门窗绘制好了,这节来绘制地板、天花板:
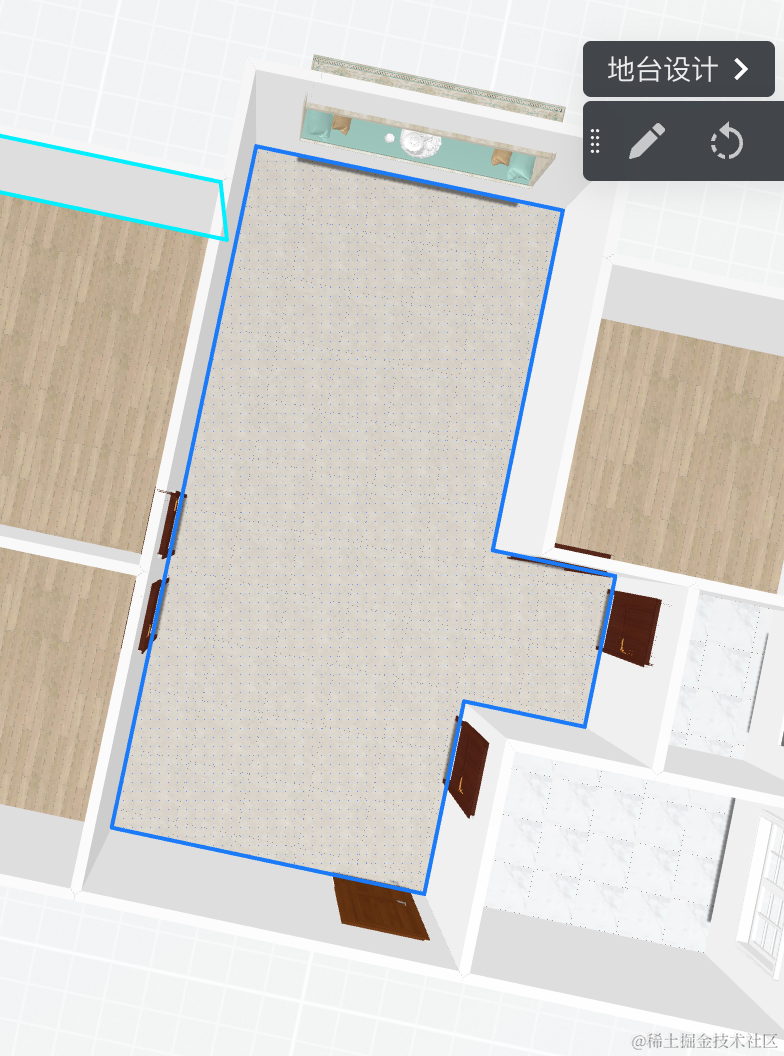
酷家乐里,除了墙、门窗、也绘制了地板、天花板:
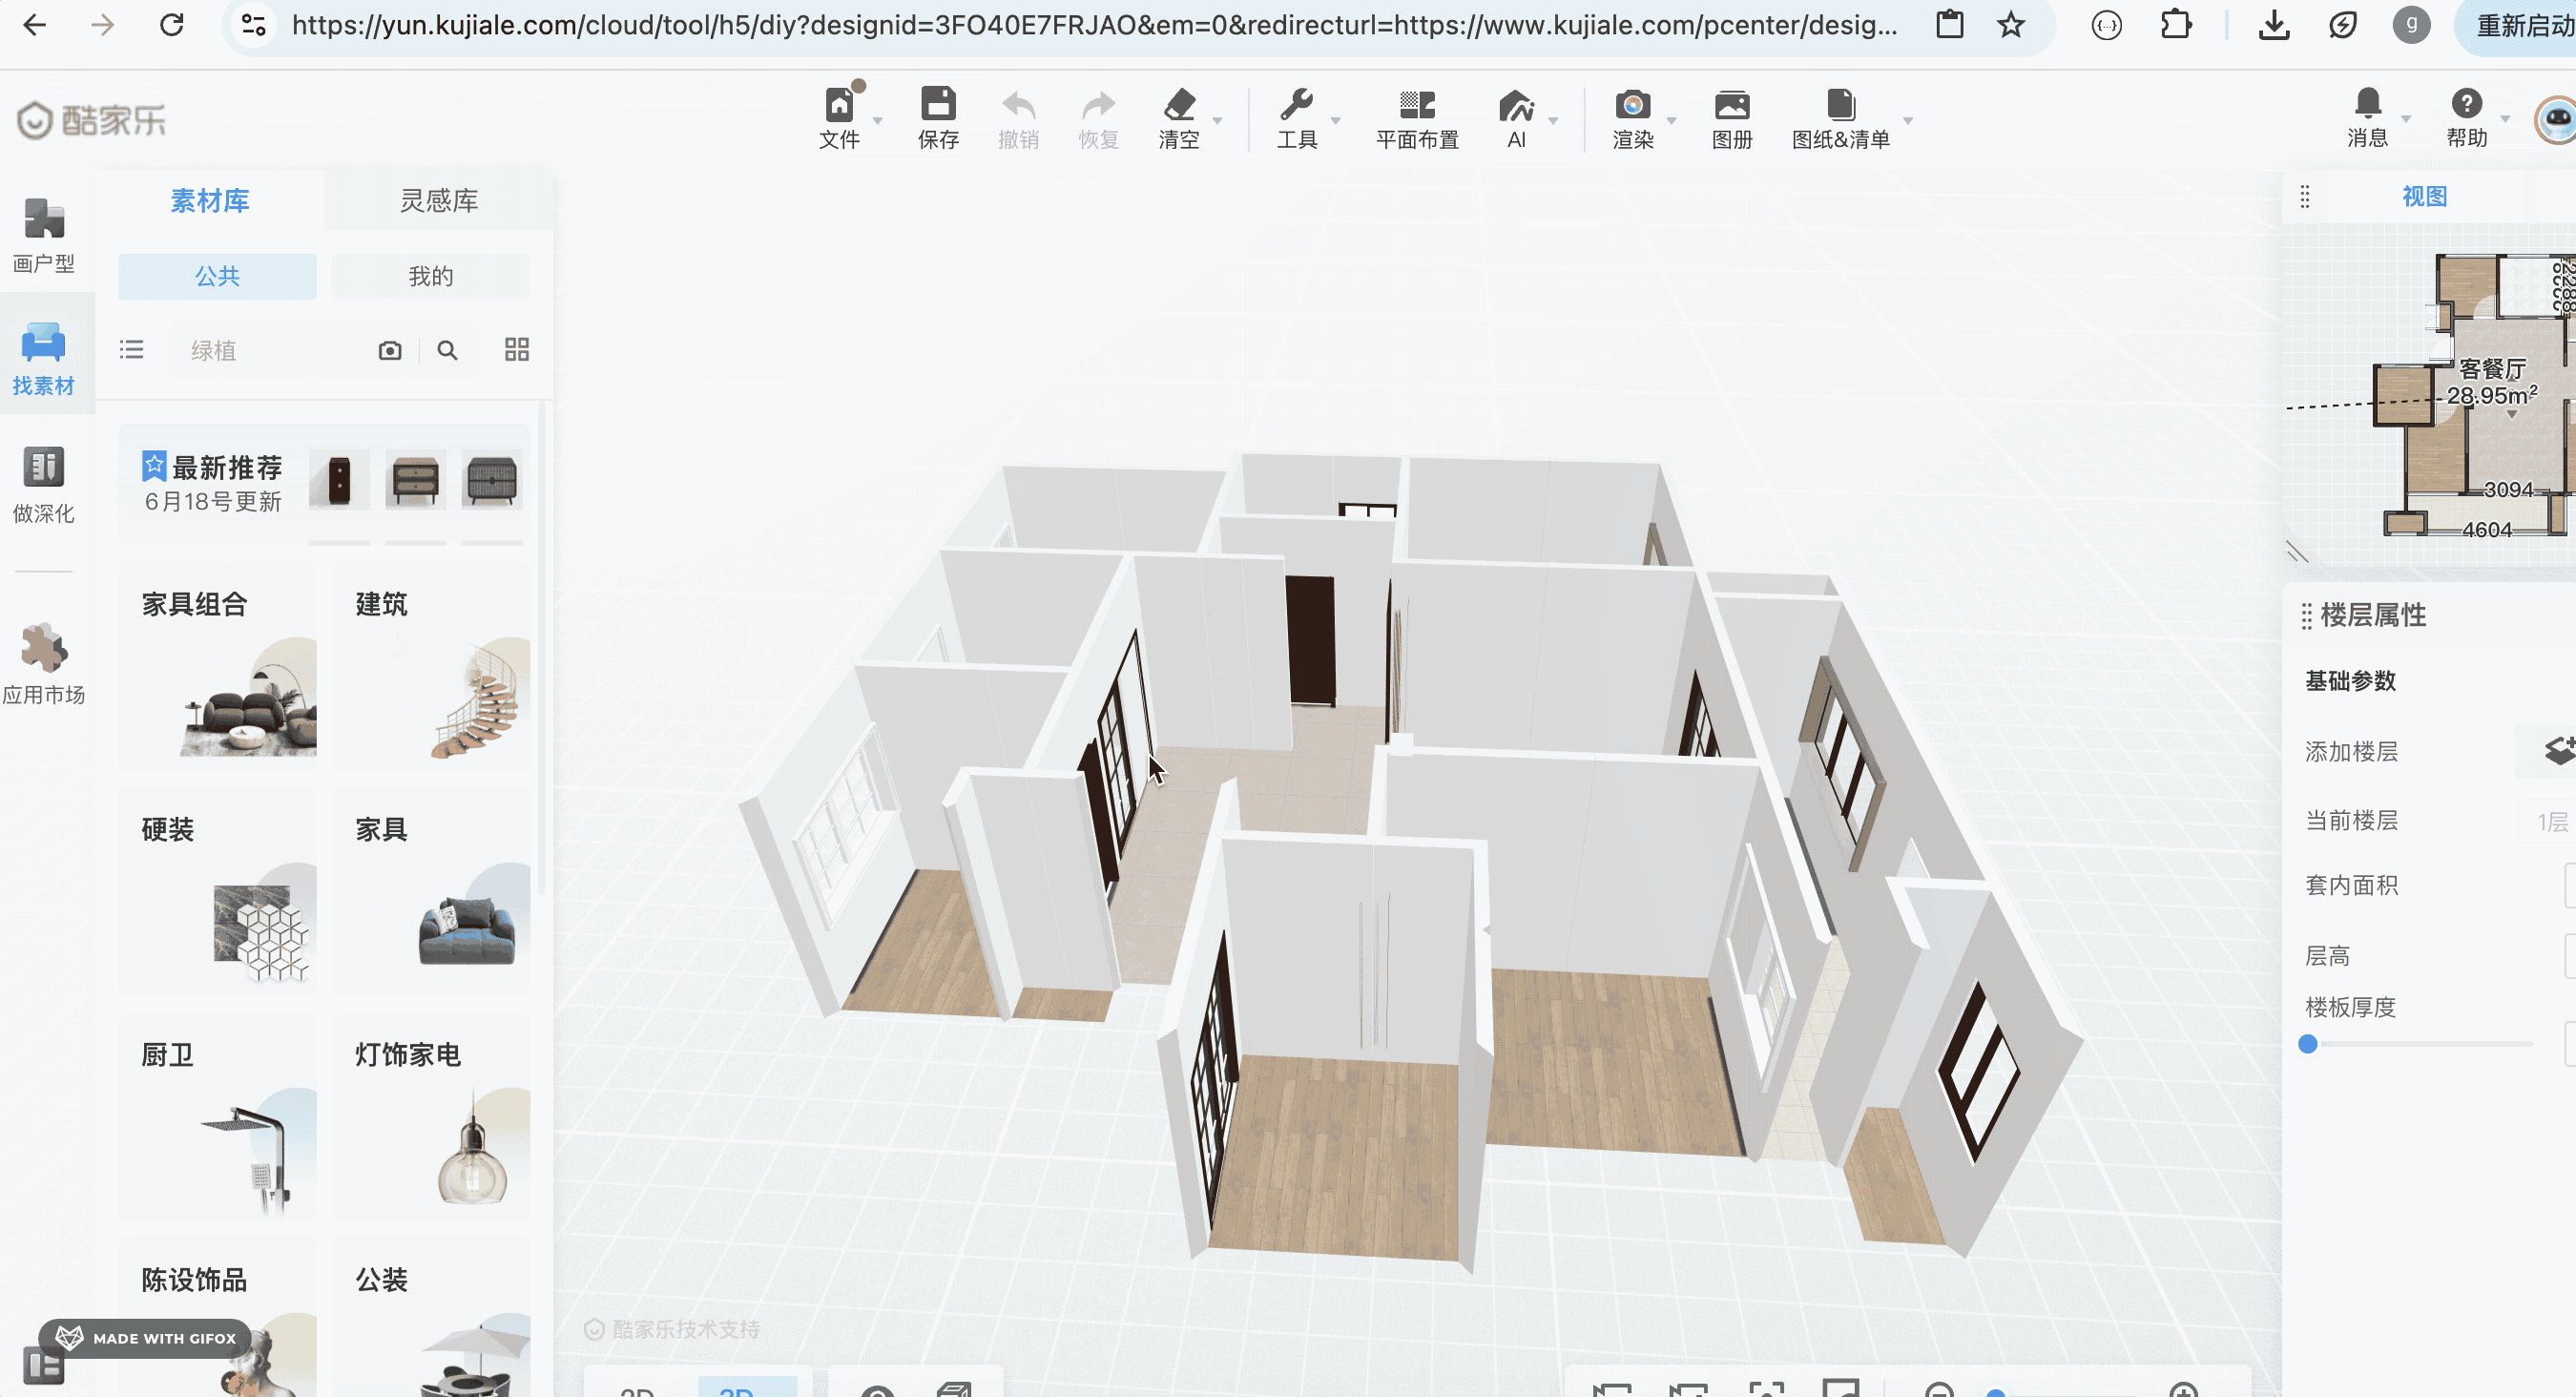
你可以用一下酷家乐个人版 https://www.kujiale.com/ 体验下,免费用。
相机从下往上看的时候可以看到天花板:
从上往下看则是看到地板:

并且客厅、卧室、洗手间的地板材料都不同:

很明显,我们也要单独存储每个房间的地板数据。
在 store 里加一个 floors 数组:
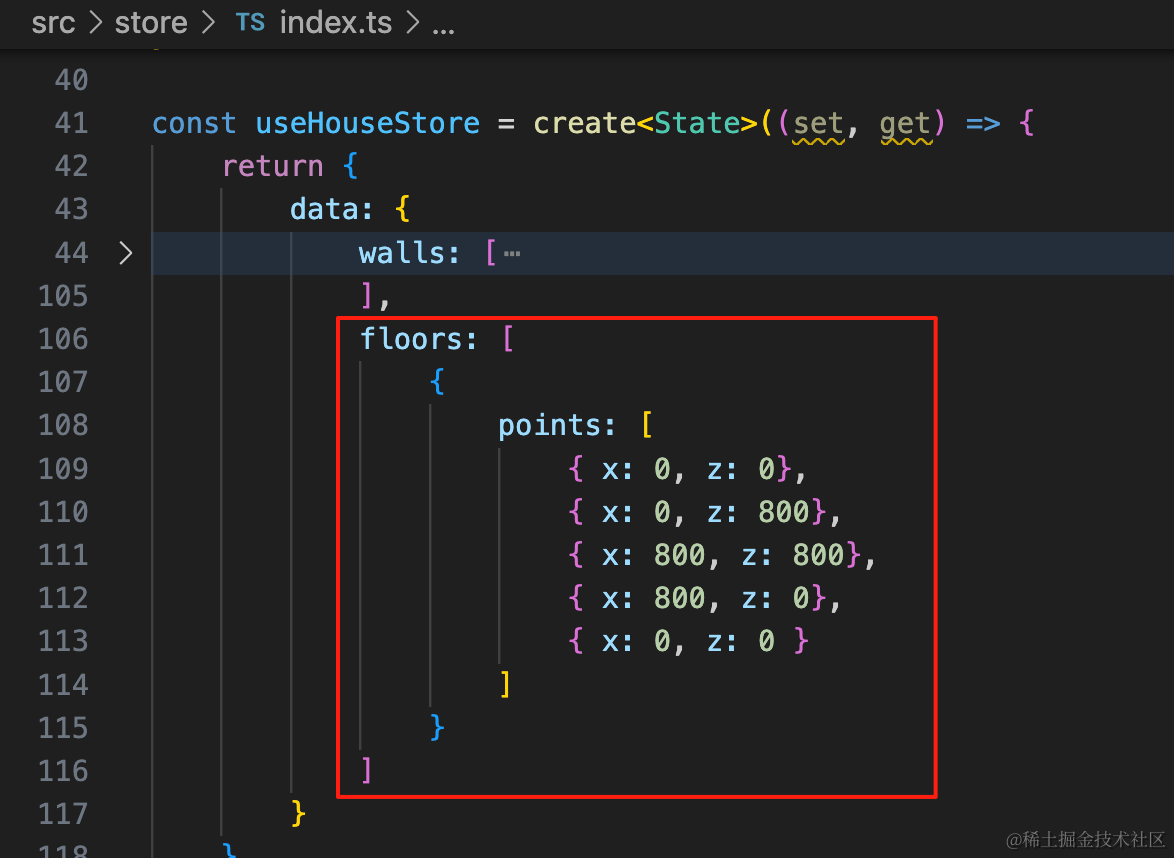
floors: [
    {
        points: [
            { x: 0, z: 0},
            { x: 0, z: 800},
            { x: 800, z: 800},
            { x: 800, z: 0},
            { x: 0, z: 0 }
        ]
    }
]
因为地板的形状是不规则的:
所以要存储一系列的点。
y 都是 0,所以存储 x、z 就好。
类型也加一下:
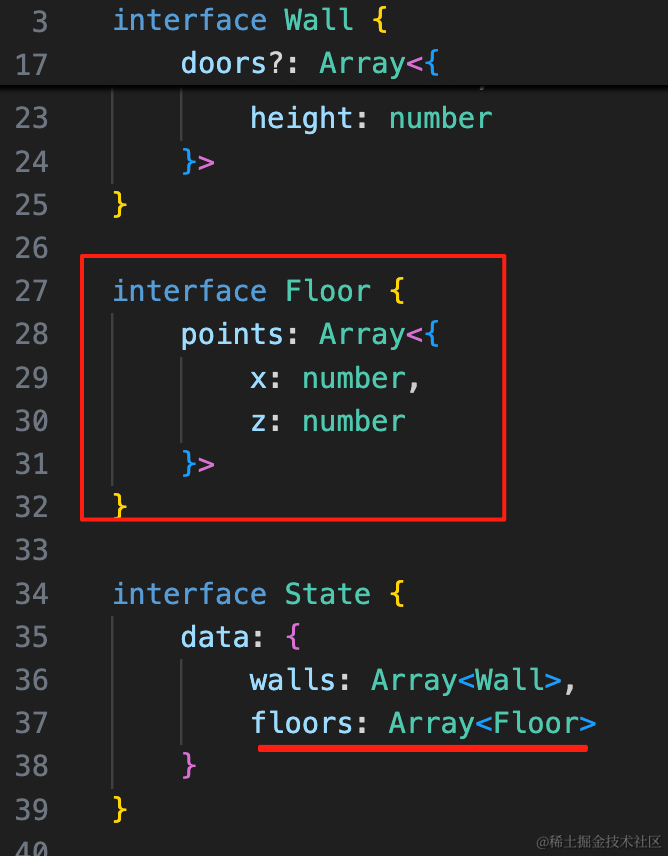
interface Floor {
    points: Array<{
        x: number,
        z: number
    }>
}

interface State {
    data: {
        walls: Array<Wall>,
        floors: Array<Floor>
    }
}
然后我们把它绘制出来:
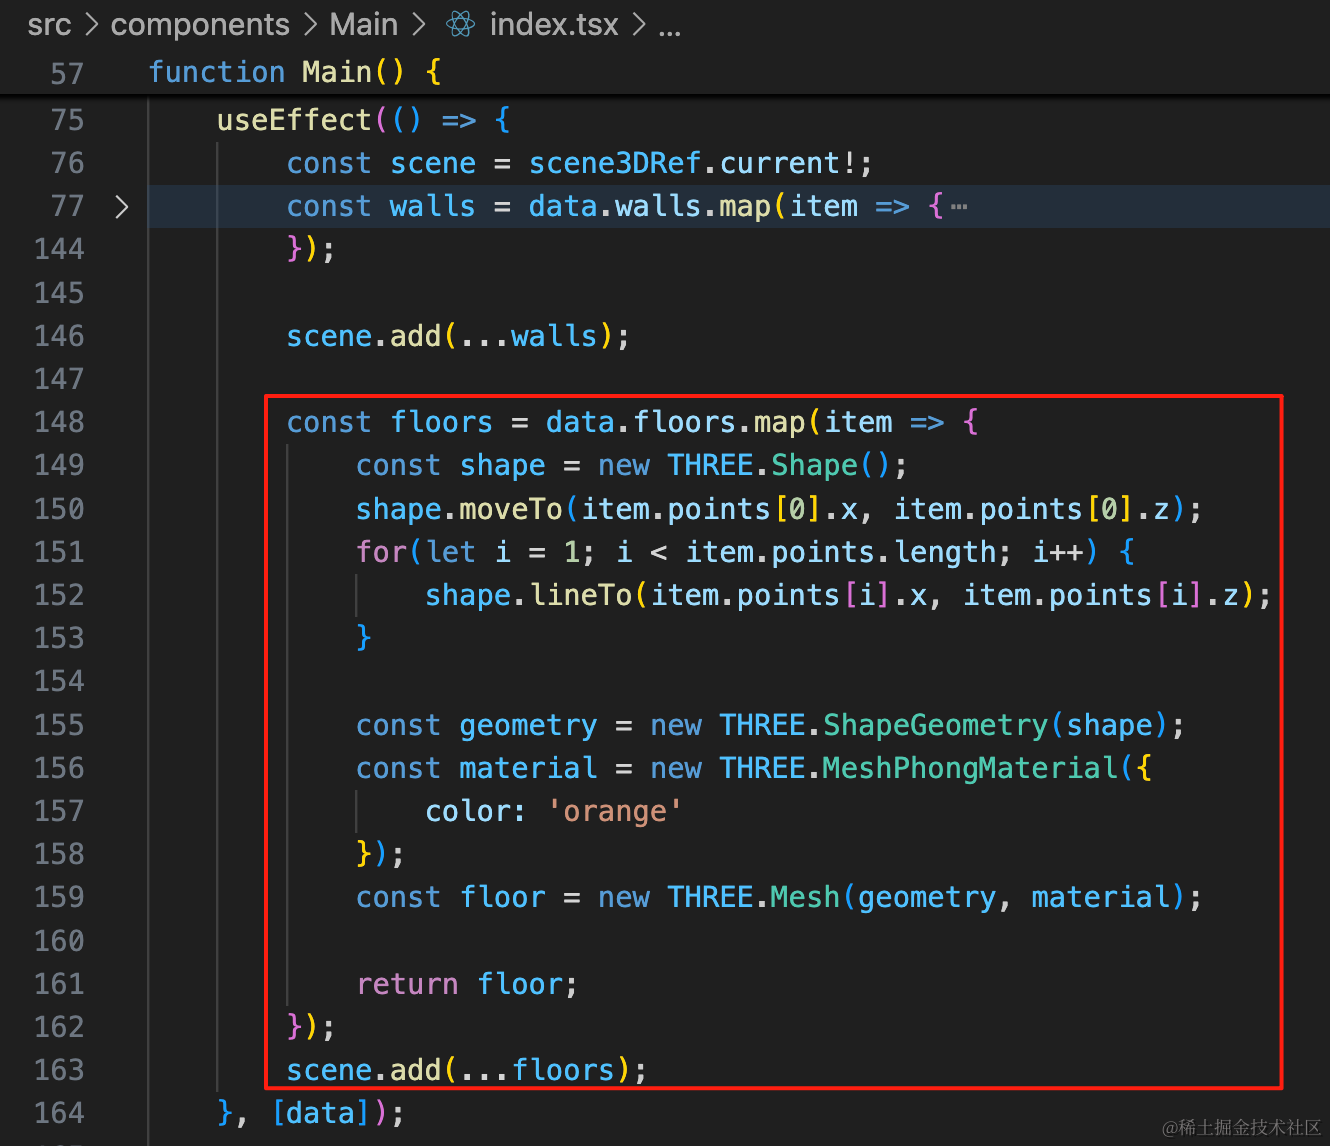
用 Shape 把所有的点依次连起来,然后用 ShapeGeometry 画出形状。
const floors = data.floors.map(item => {
    const shape = new THREE.Shape();
    shape.moveTo(item.points[0].x, item.points[0].z);
    for(let i = 1; i < item.points.length; i++) {
        shape.lineTo(item.points[i].x, item.points[i].z);
    }

    const geometry = new THREE.ShapeGeometry(shape);
    const material = new THREE.MeshPhongMaterial({
        color: 'orange'
    });
    const floor = new THREE.Mesh(geometry, material);

    return floor;
});
scene.add(...floors);
看下效果:
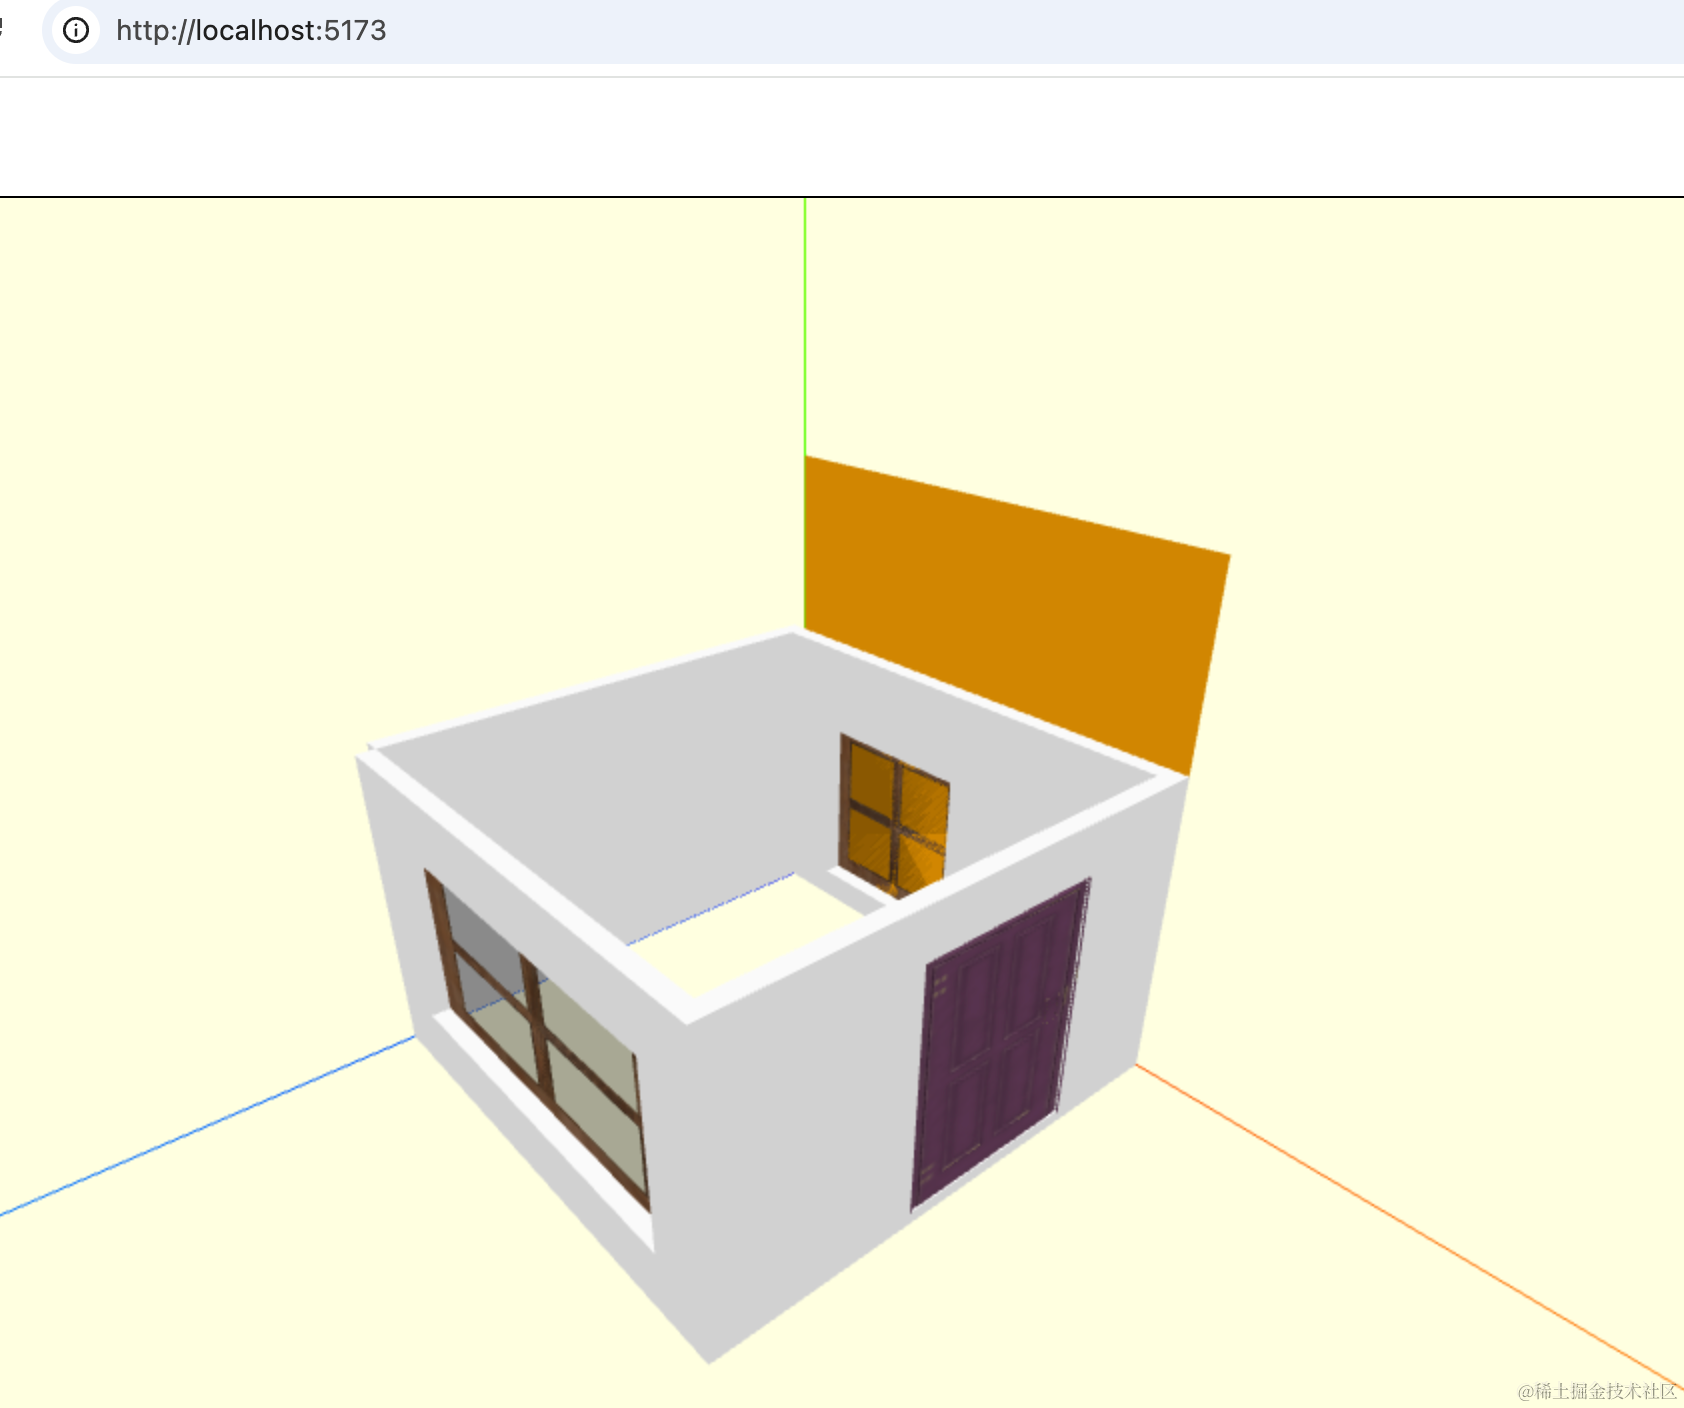
可以看到,形状画出来了,但是角度不对。
设置旋转角度和背面可见:
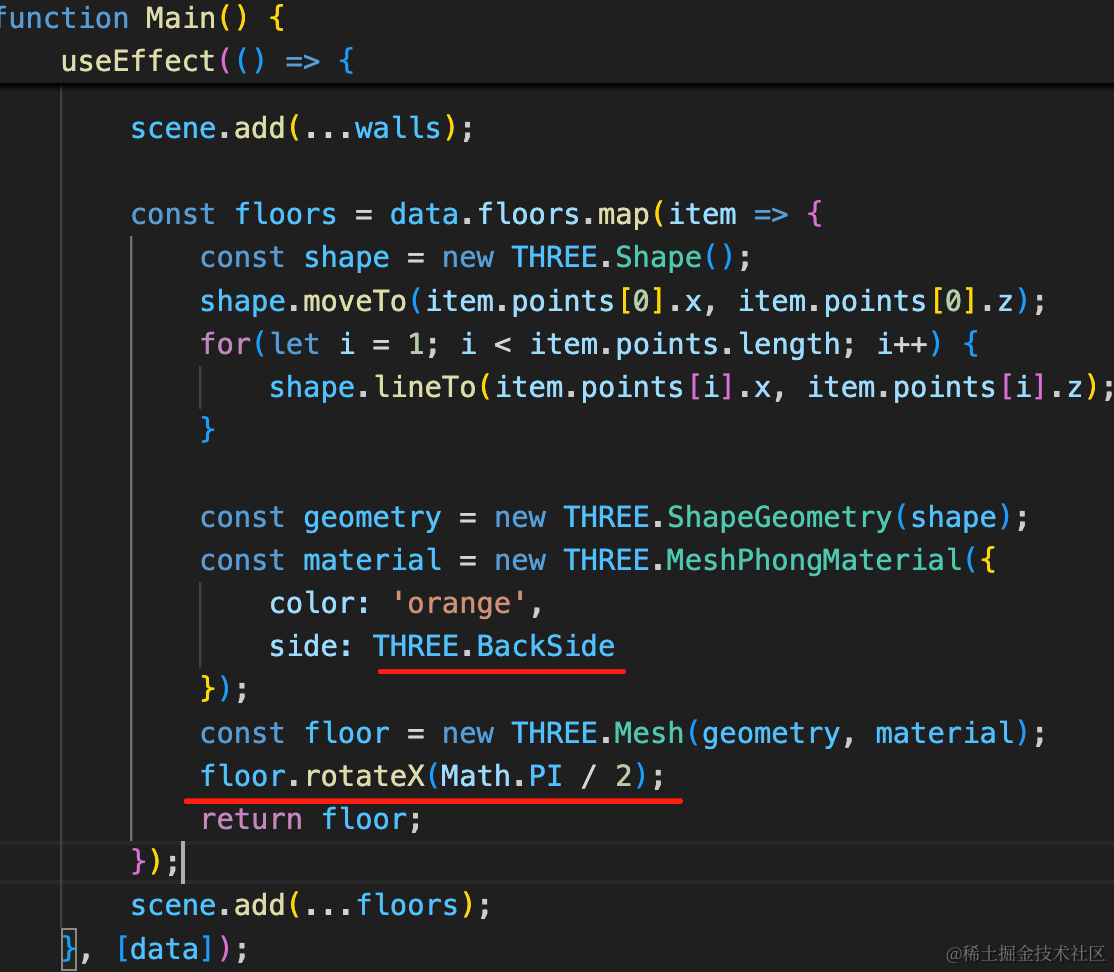
const material = new THREE.MeshPhongMaterial({
    color: 'orange',
    side: THREE.BackSide
});
const floor = new THREE.Mesh(geometry, material);
floor.rotateX(Math.PI / 2);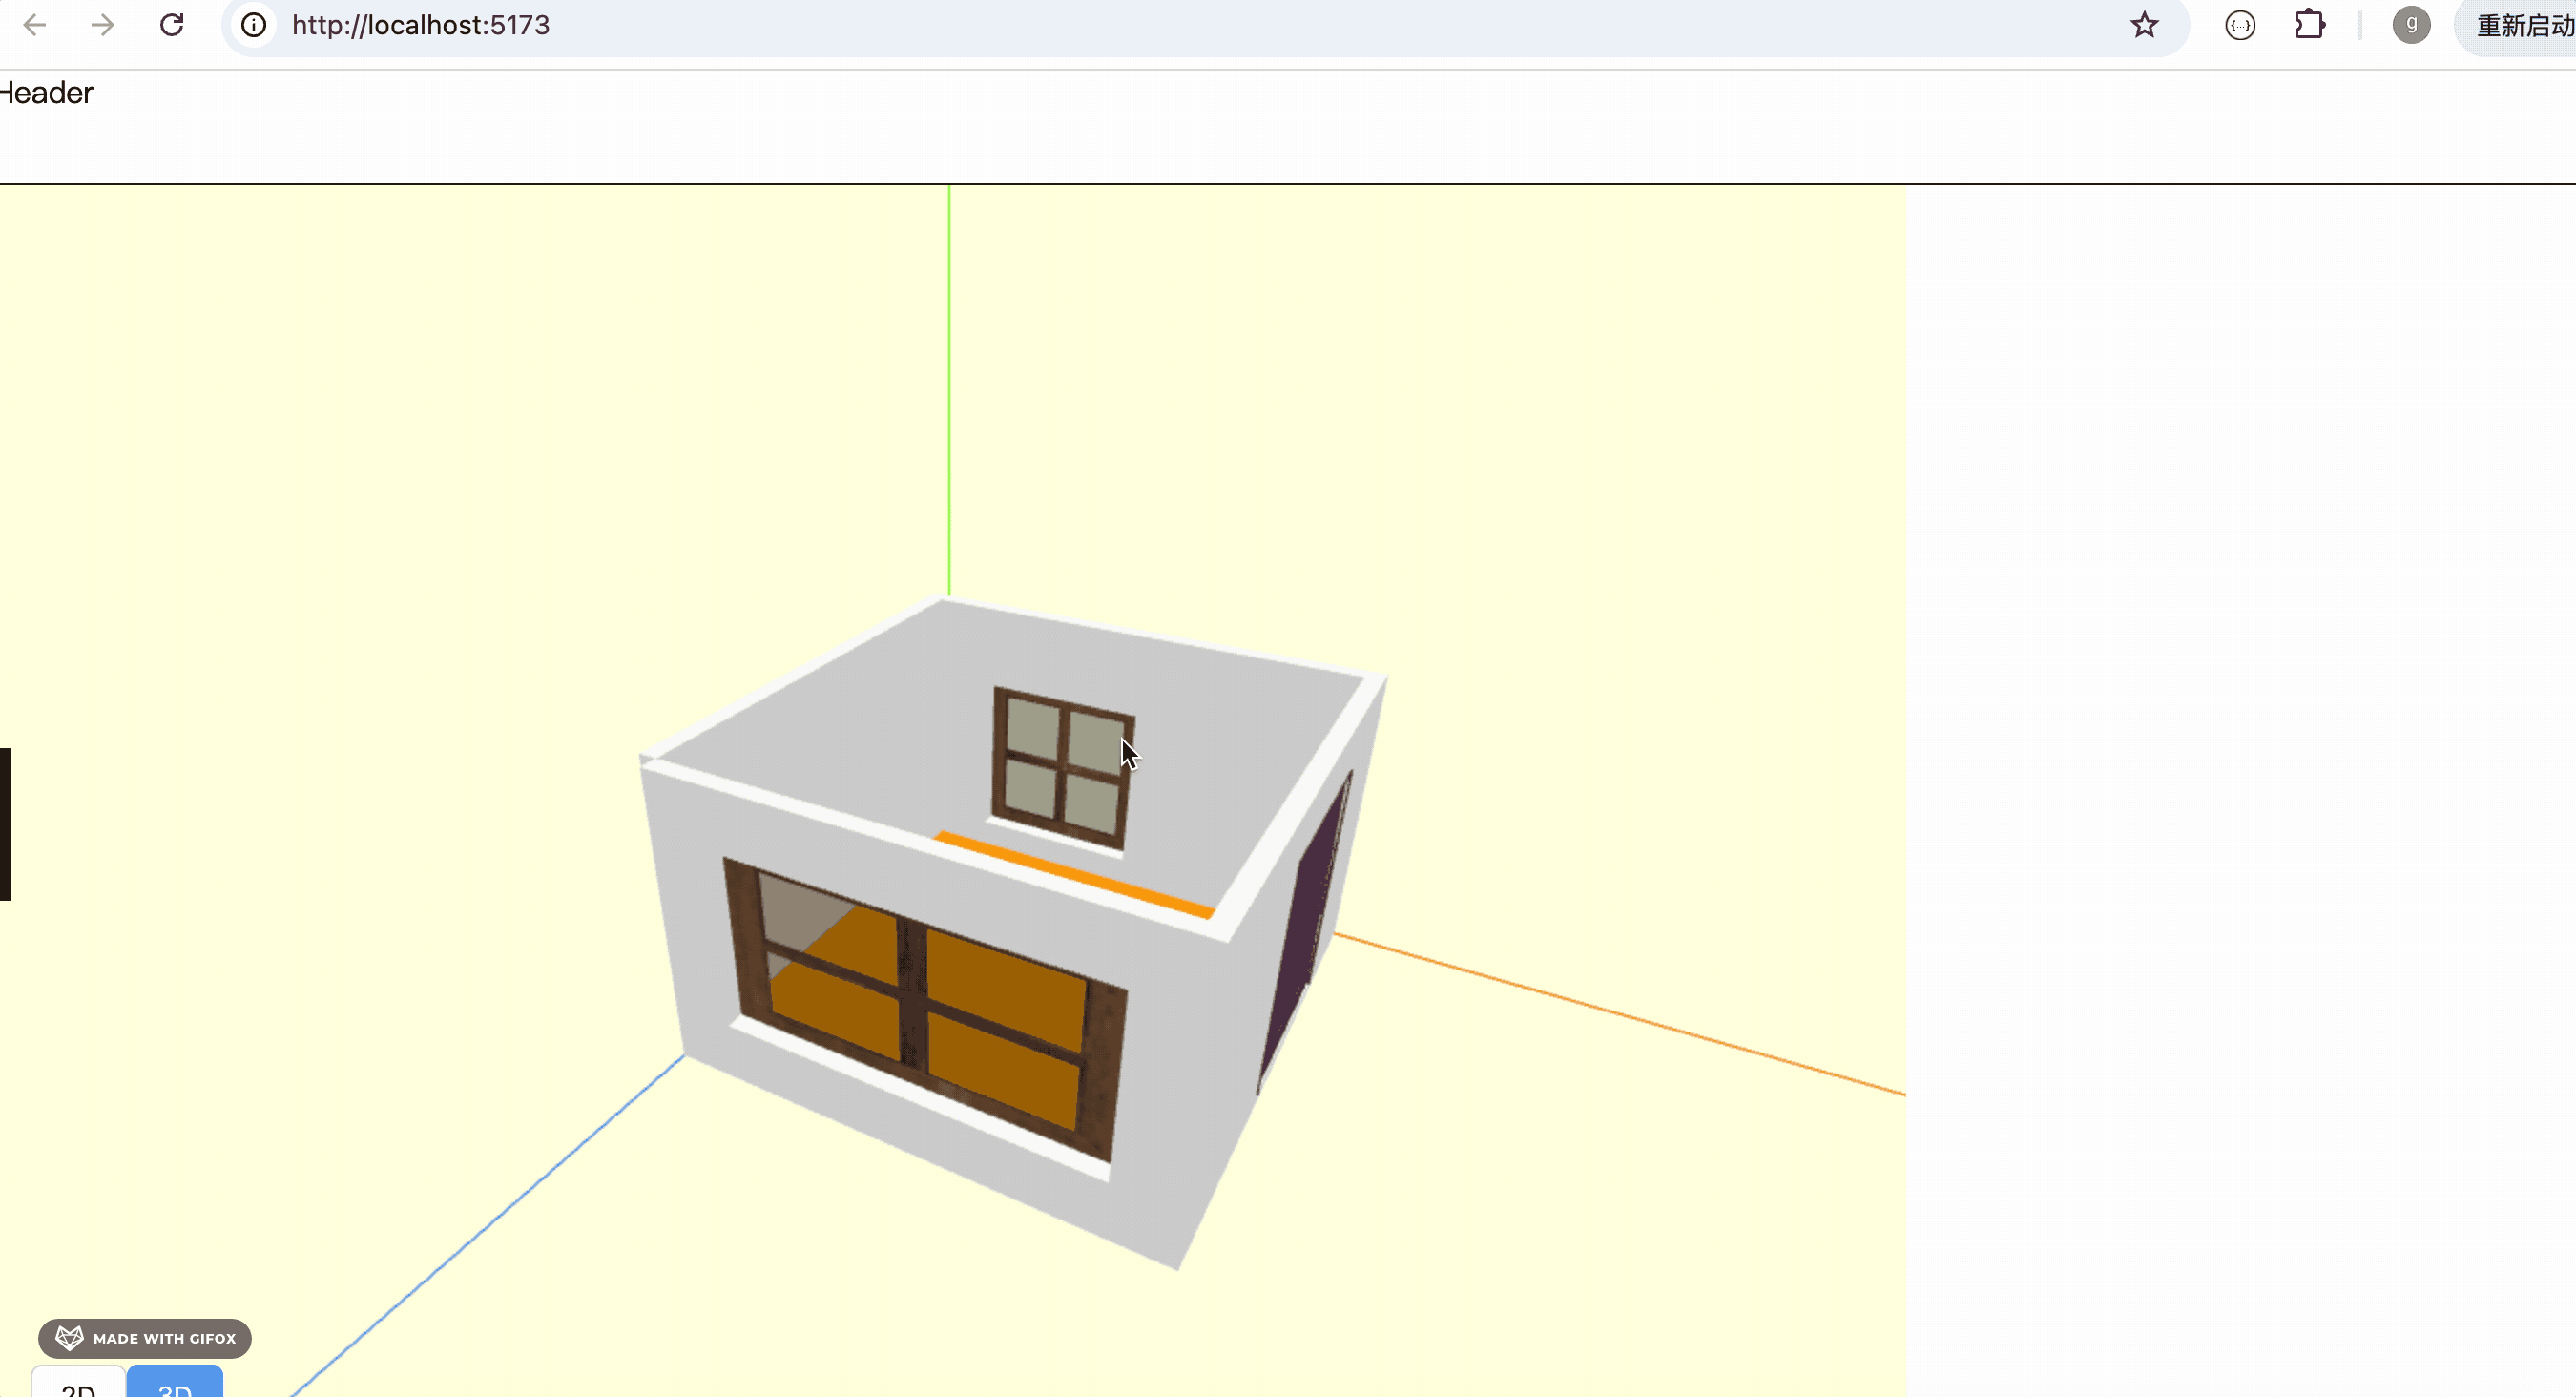
这样就好了。
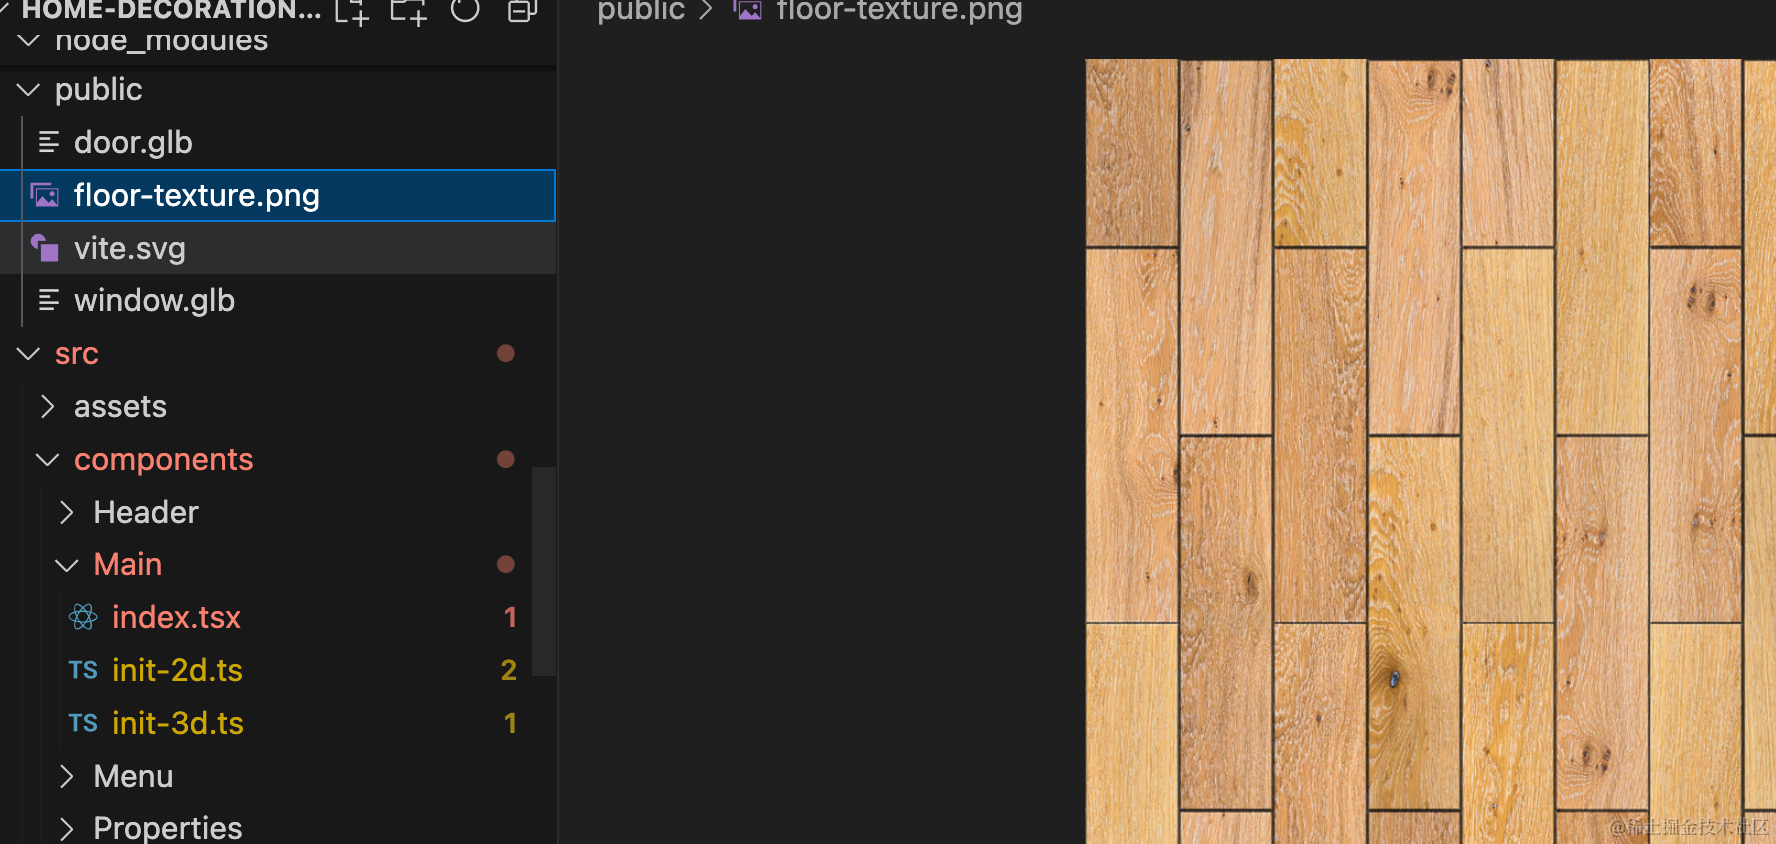
我们找个地板的纹理图片,默认用木质地板。
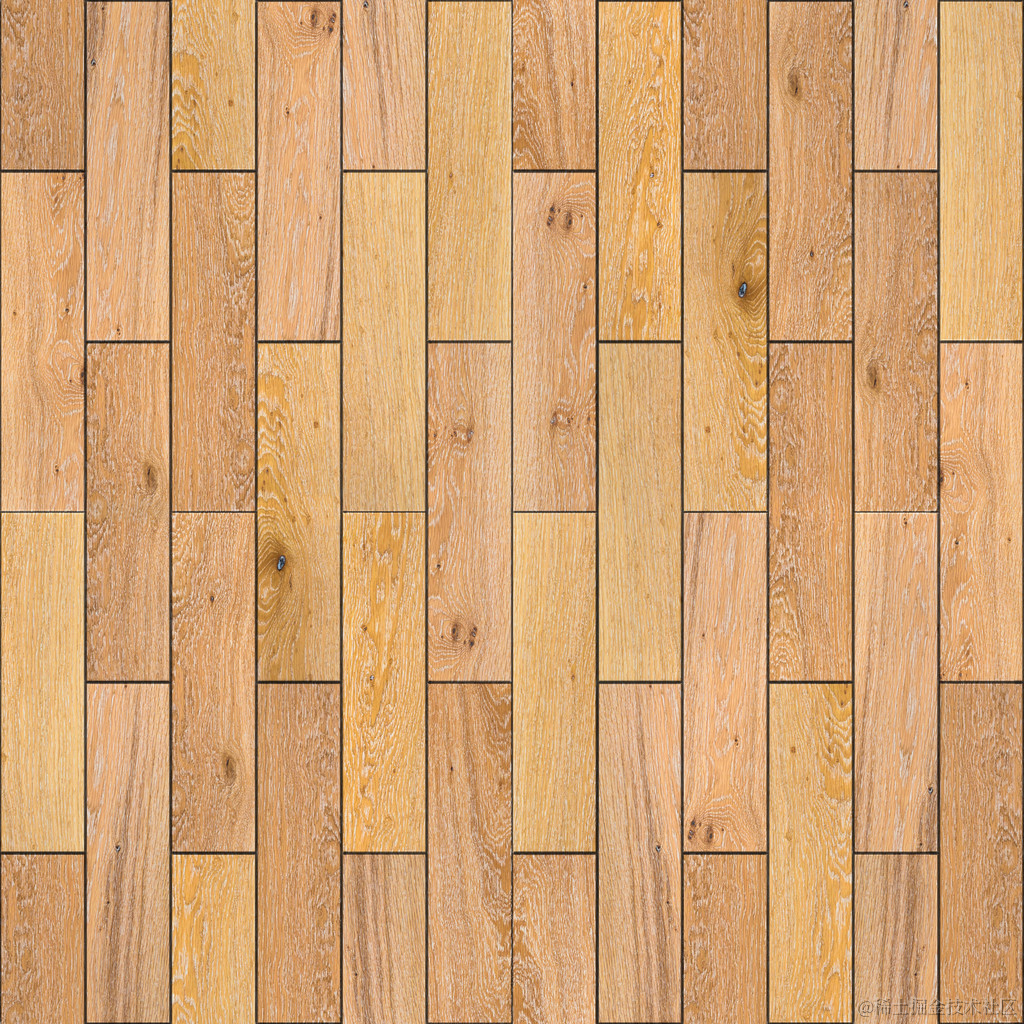
放 public 目录下:
代码里加载下:
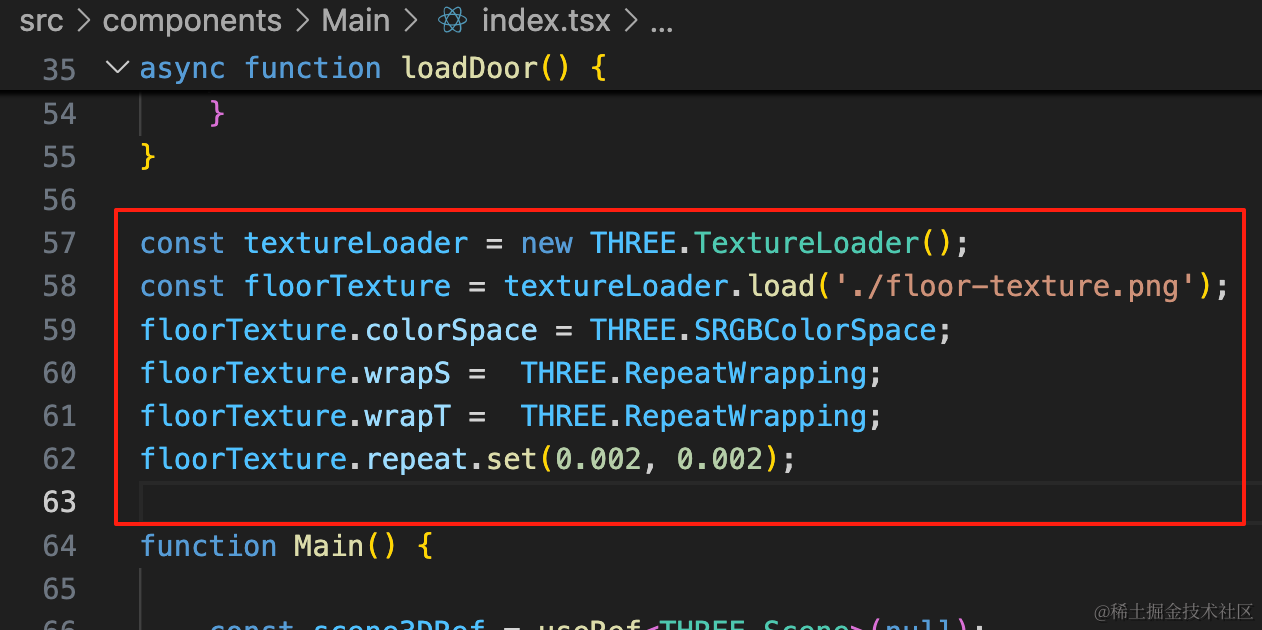
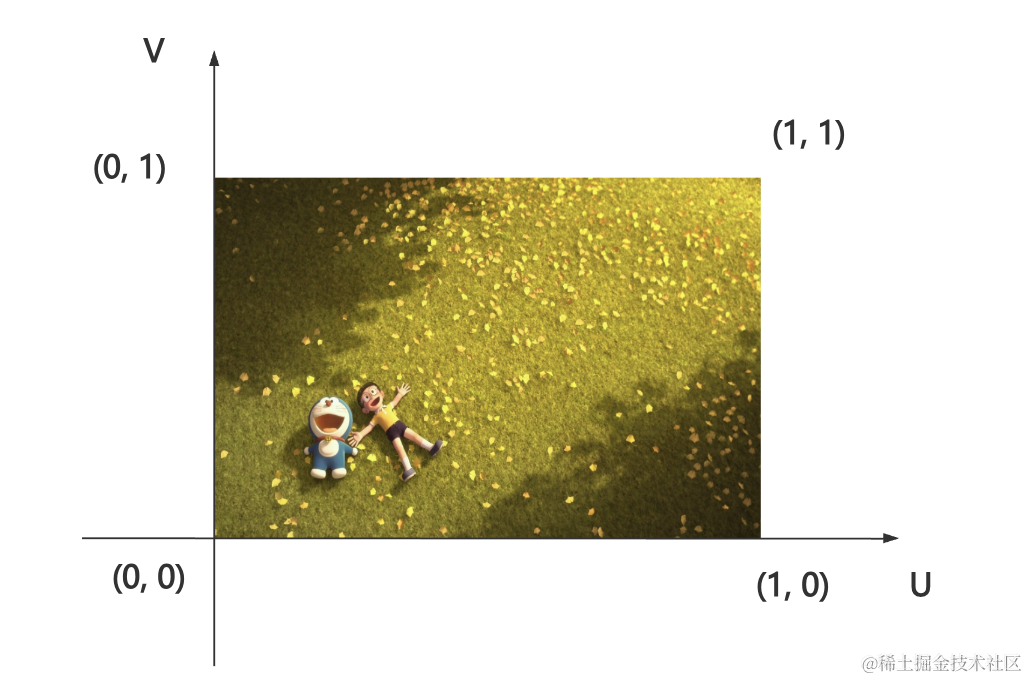
因为 ShapeGeometry、ExtrudeGeometry 这种画出来的几何体的 uv 值都特别大,所以要设置一个比较小的 repeat 才能正常展示出纹理。
const textureLoader = new THREE.TextureLoader();
const floorTexture = textureLoader.load('./floor-texture.png');
floorTexture.colorSpace = THREE.SRGBColorSpace;
floorTexture.wrapS =  THREE.RepeatWrapping;
floorTexture.wrapT =  THREE.RepeatWrapping;
floorTexture.repeat.set(0.002, 0.002);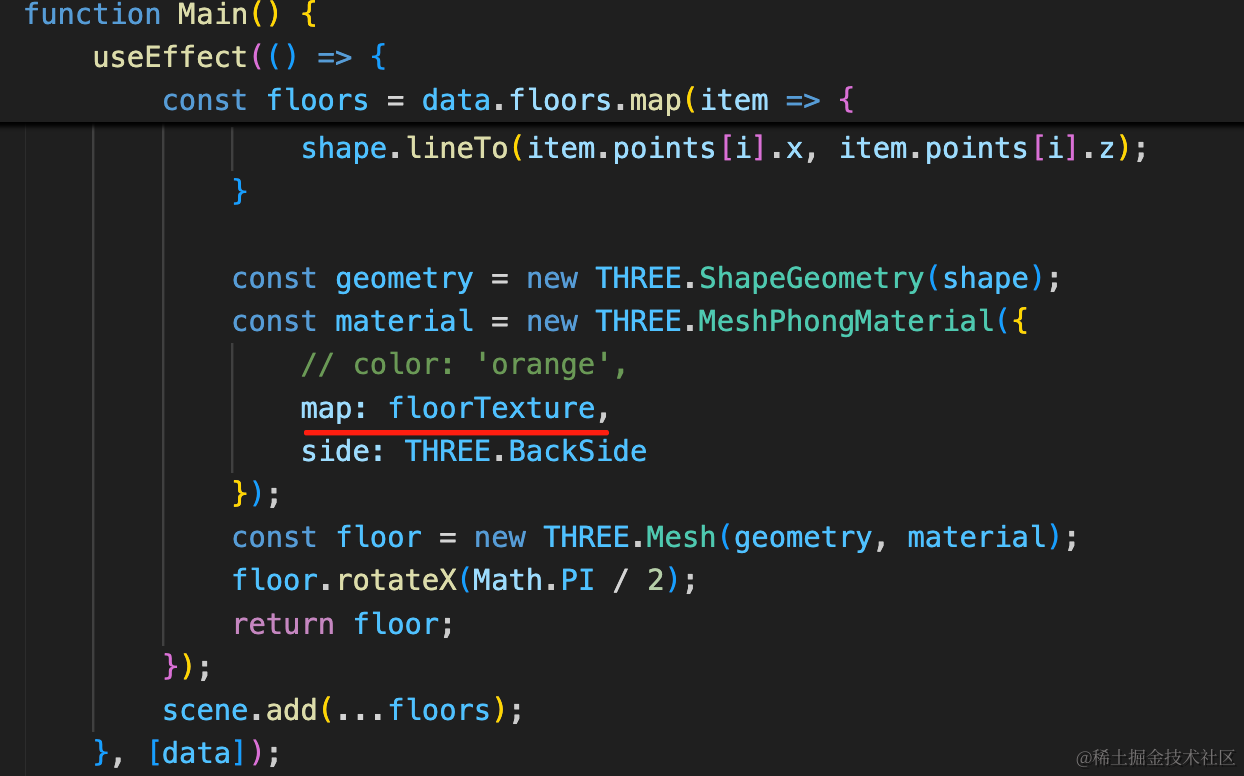
看下效果:
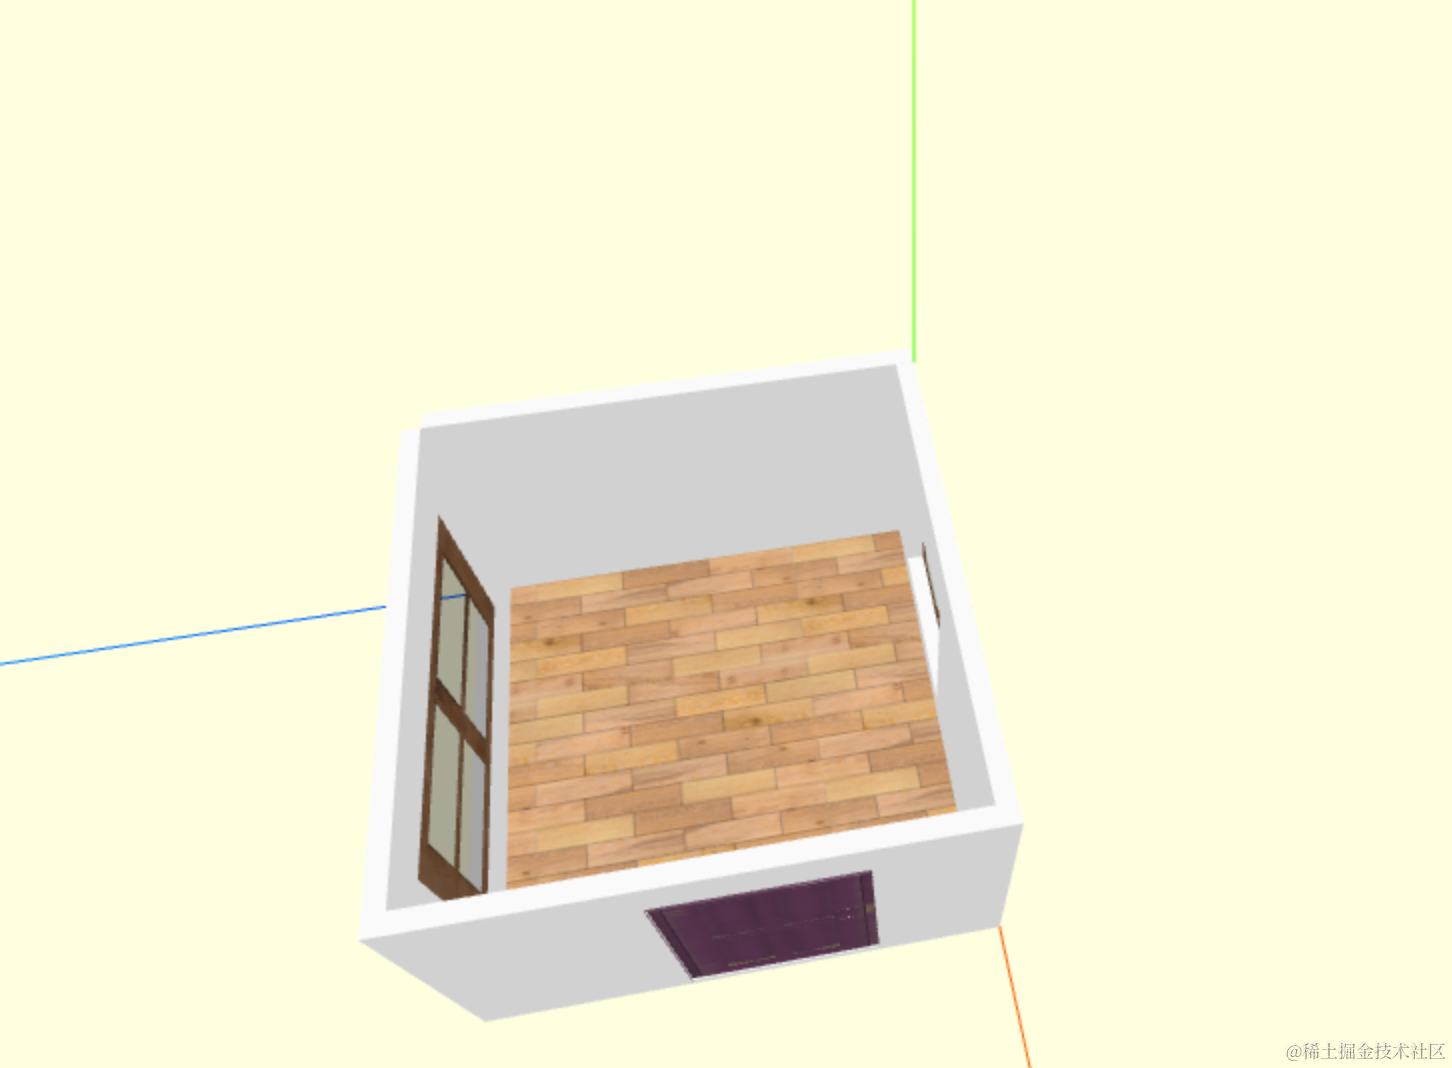
没问题。
你可以打印下 geometry 看下 uv 数组就明白了:
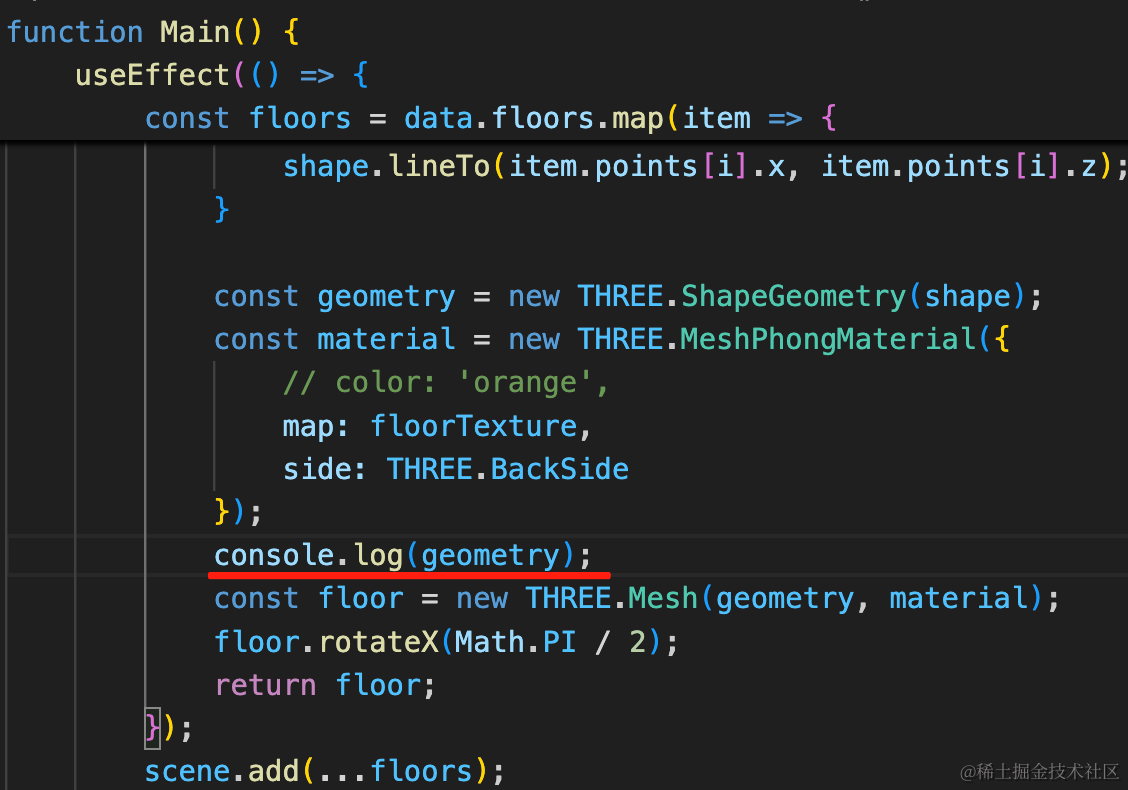
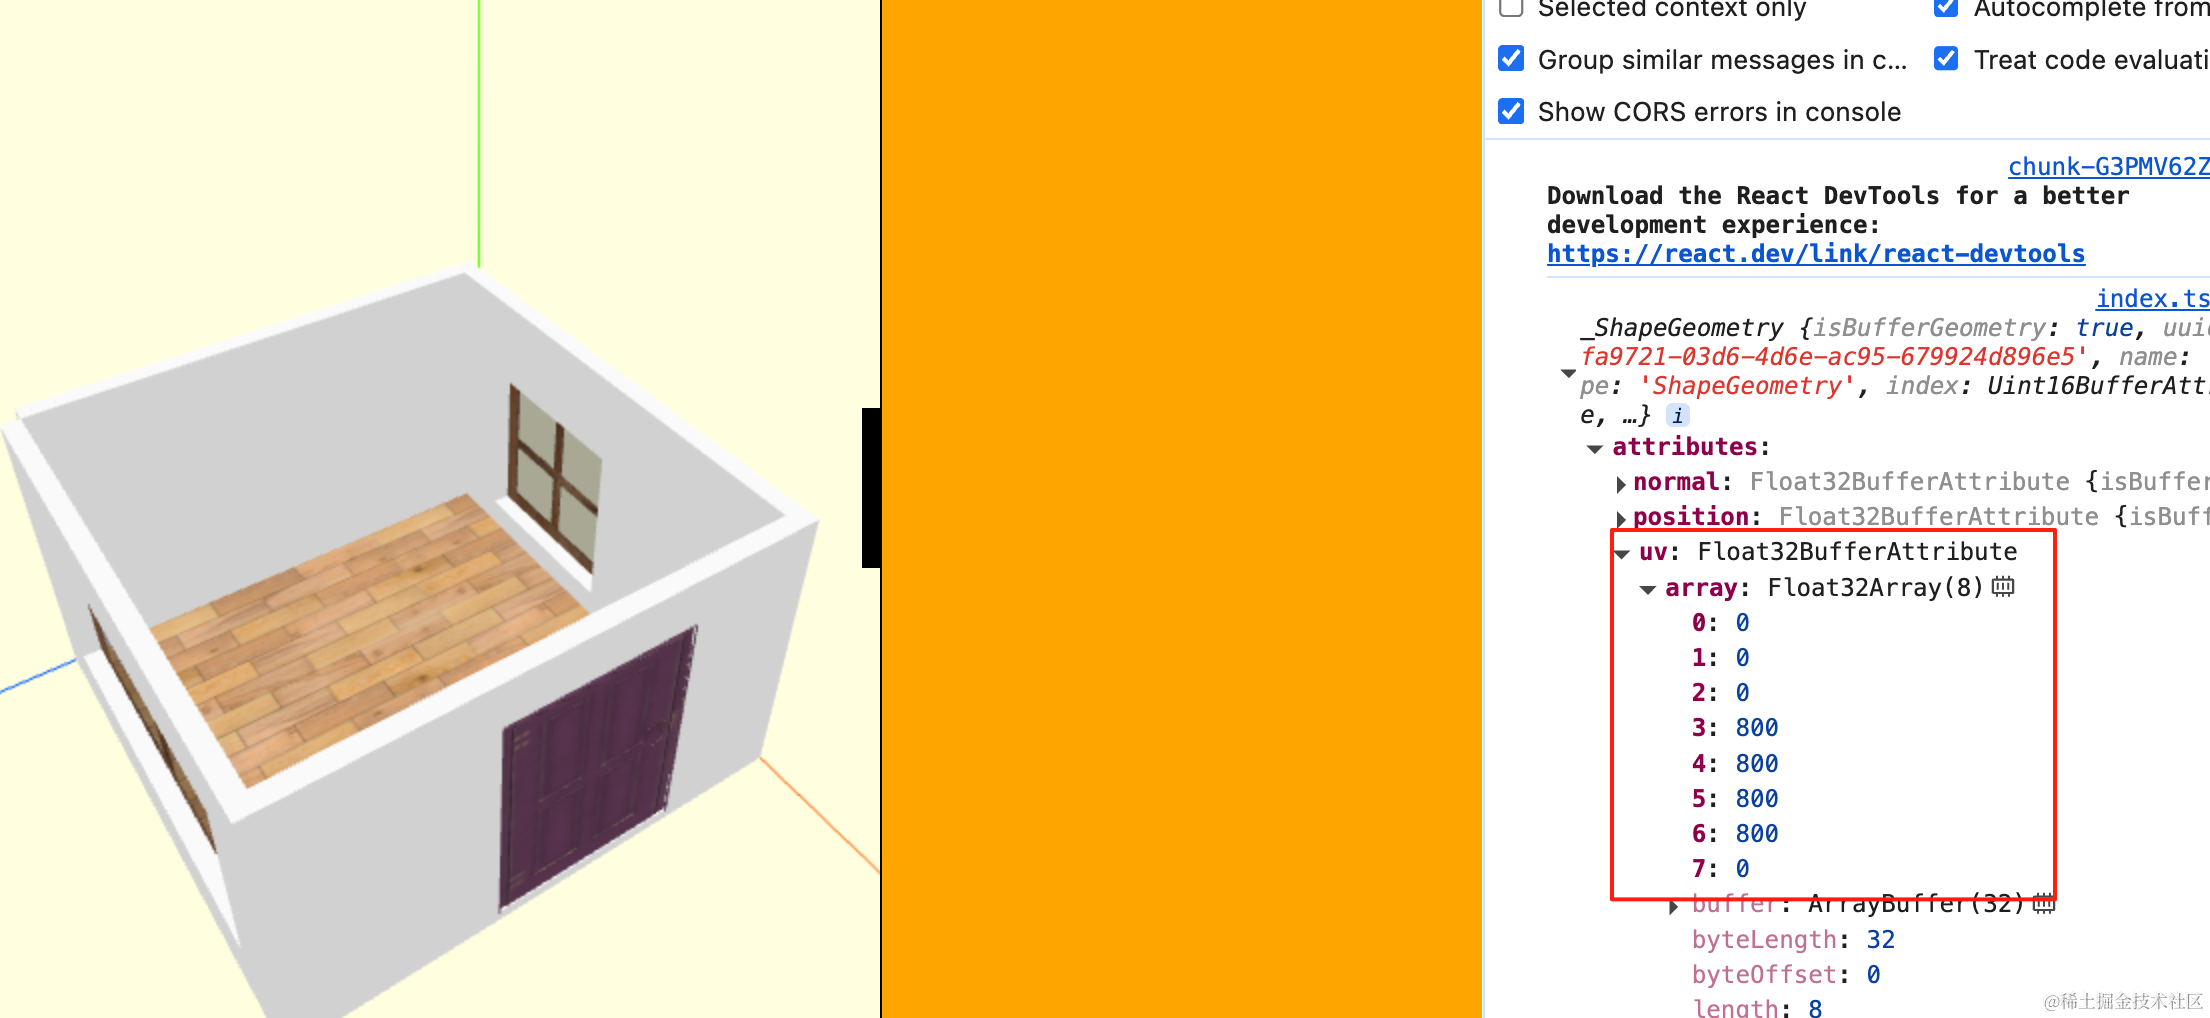
uv 数组的值都特别大,要设置一个很小的 repeat 才能刚好是 0 到 1,也就是正常映射纹理。
地板画好后,继续来画天花板:
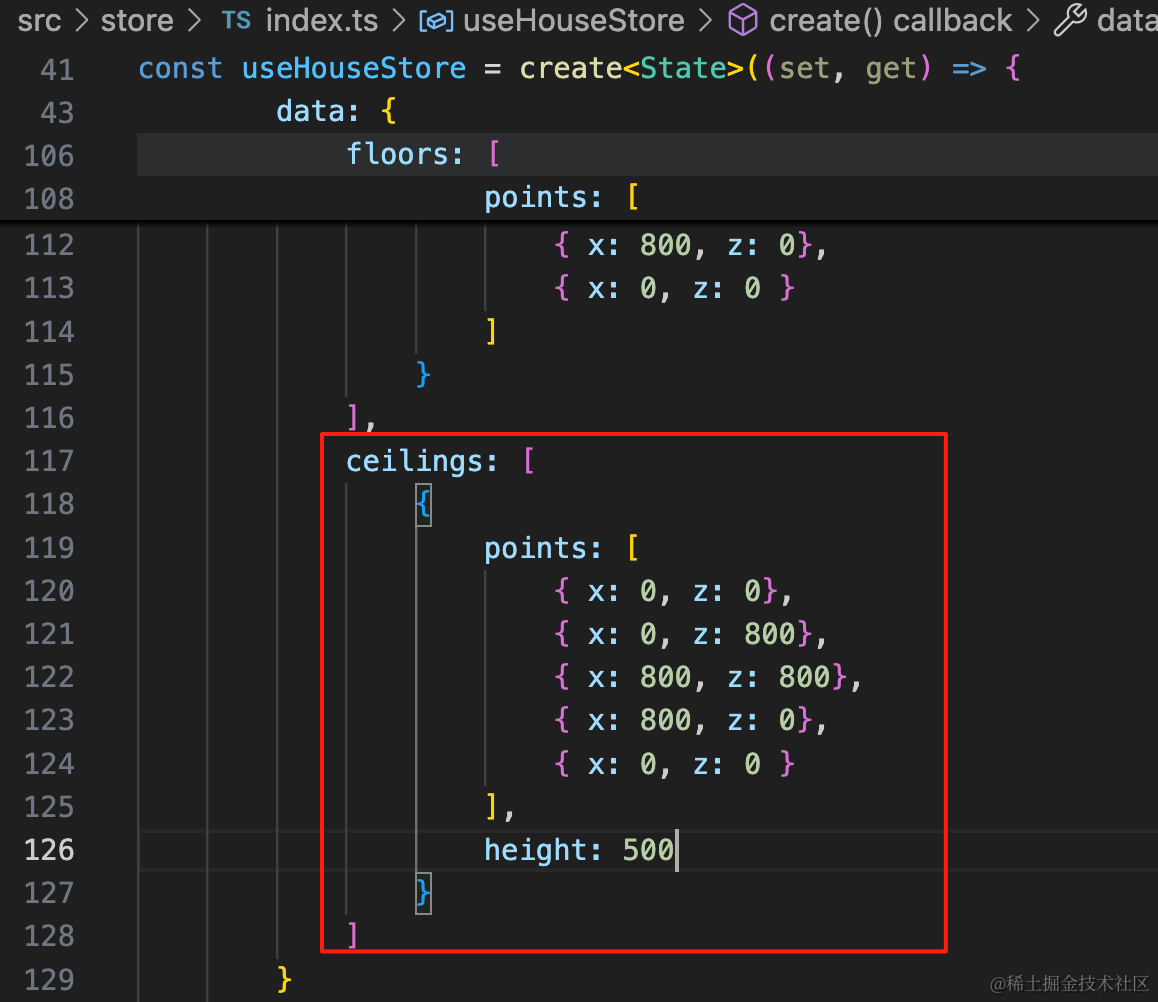
ceilings: [
    {
        points: [
            { x: 0, z: 0},
            { x: 0, z: 800},
            { x: 800, z: 800},
            { x: 800, z: 0},
            { x: 0, z: 0 }
        ],
        height: 500
    }
]
数据这里多一个 height,也就是天花板高度。
加下类型:
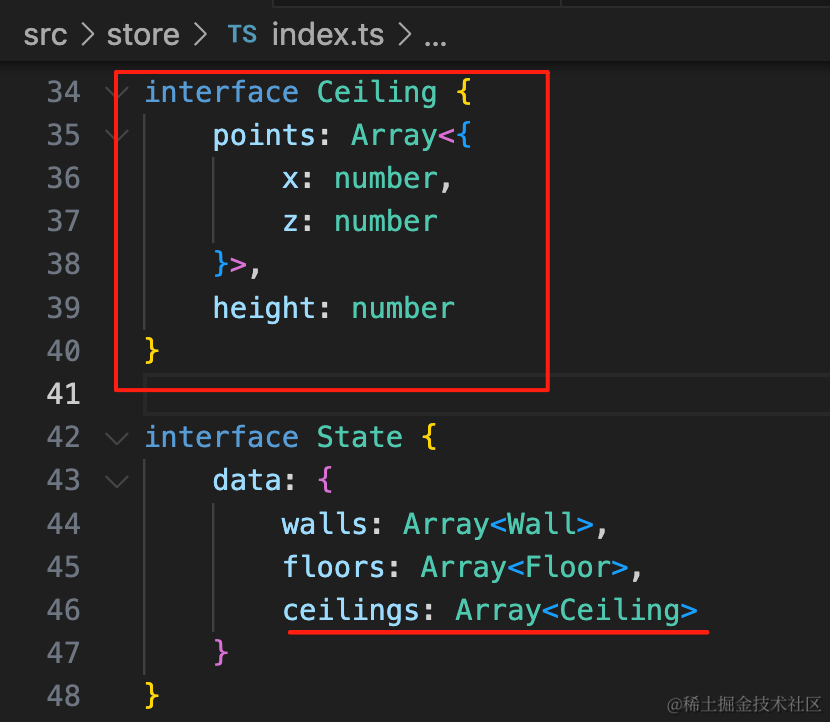
interface Ceiling {
    points: Array<{
        x: number,
        z: number
    }>,
    height: number
}

interface State {
    data: {
        walls: Array<Wall>,
        floors: Array<Floor>,
        ceilings: Array<Ceiling>
    }
}
然后画出来:
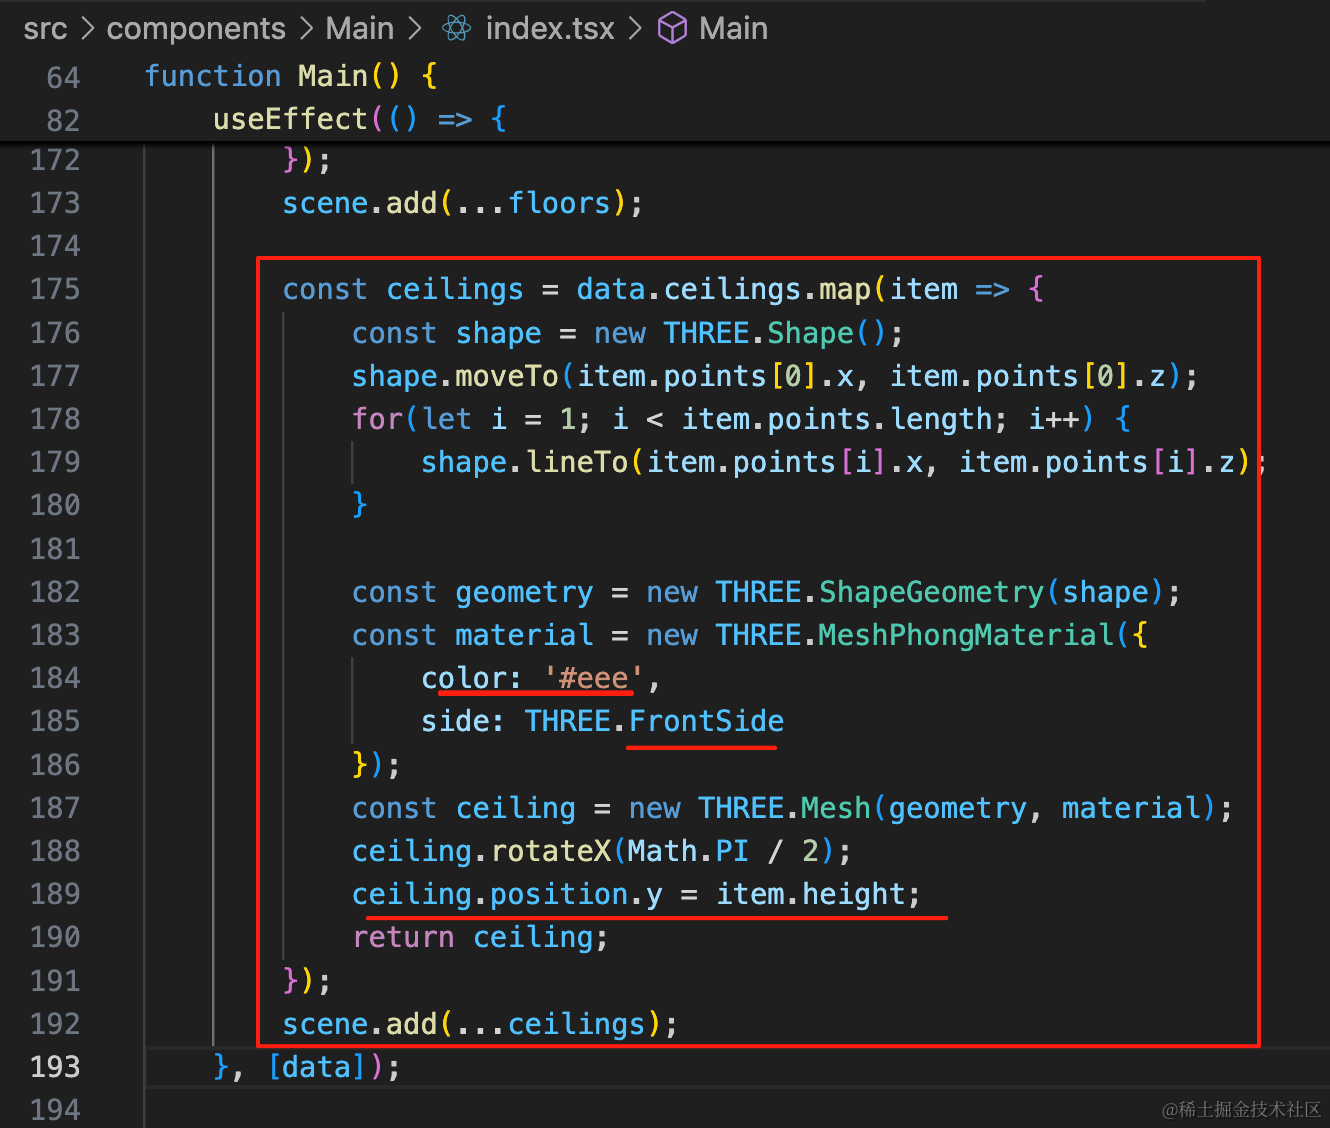
const ceilings = data.ceilings.map(item => {
    const shape = new THREE.Shape();
    shape.moveTo(item.points[0].x, item.points[0].z);
    for(let i = 1; i < item.points.length; i++) {
        shape.lineTo(item.points[i].x, item.points[i].z);
    }

    const geometry = new THREE.ShapeGeometry(shape);
    const material = new THREE.MeshPhongMaterial({
        color: '#eee',
        side: THREE.FrontSide
    });
    const ceiling = new THREE.Mesh(geometry, material);
    ceiling.rotateX(Math.PI / 2);
    ceiling.position.y = item.height;
    return ceiling;
});
scene.add(...ceilings);
颜色比墙深一点,然后设置下 position.y,其余部分一样。
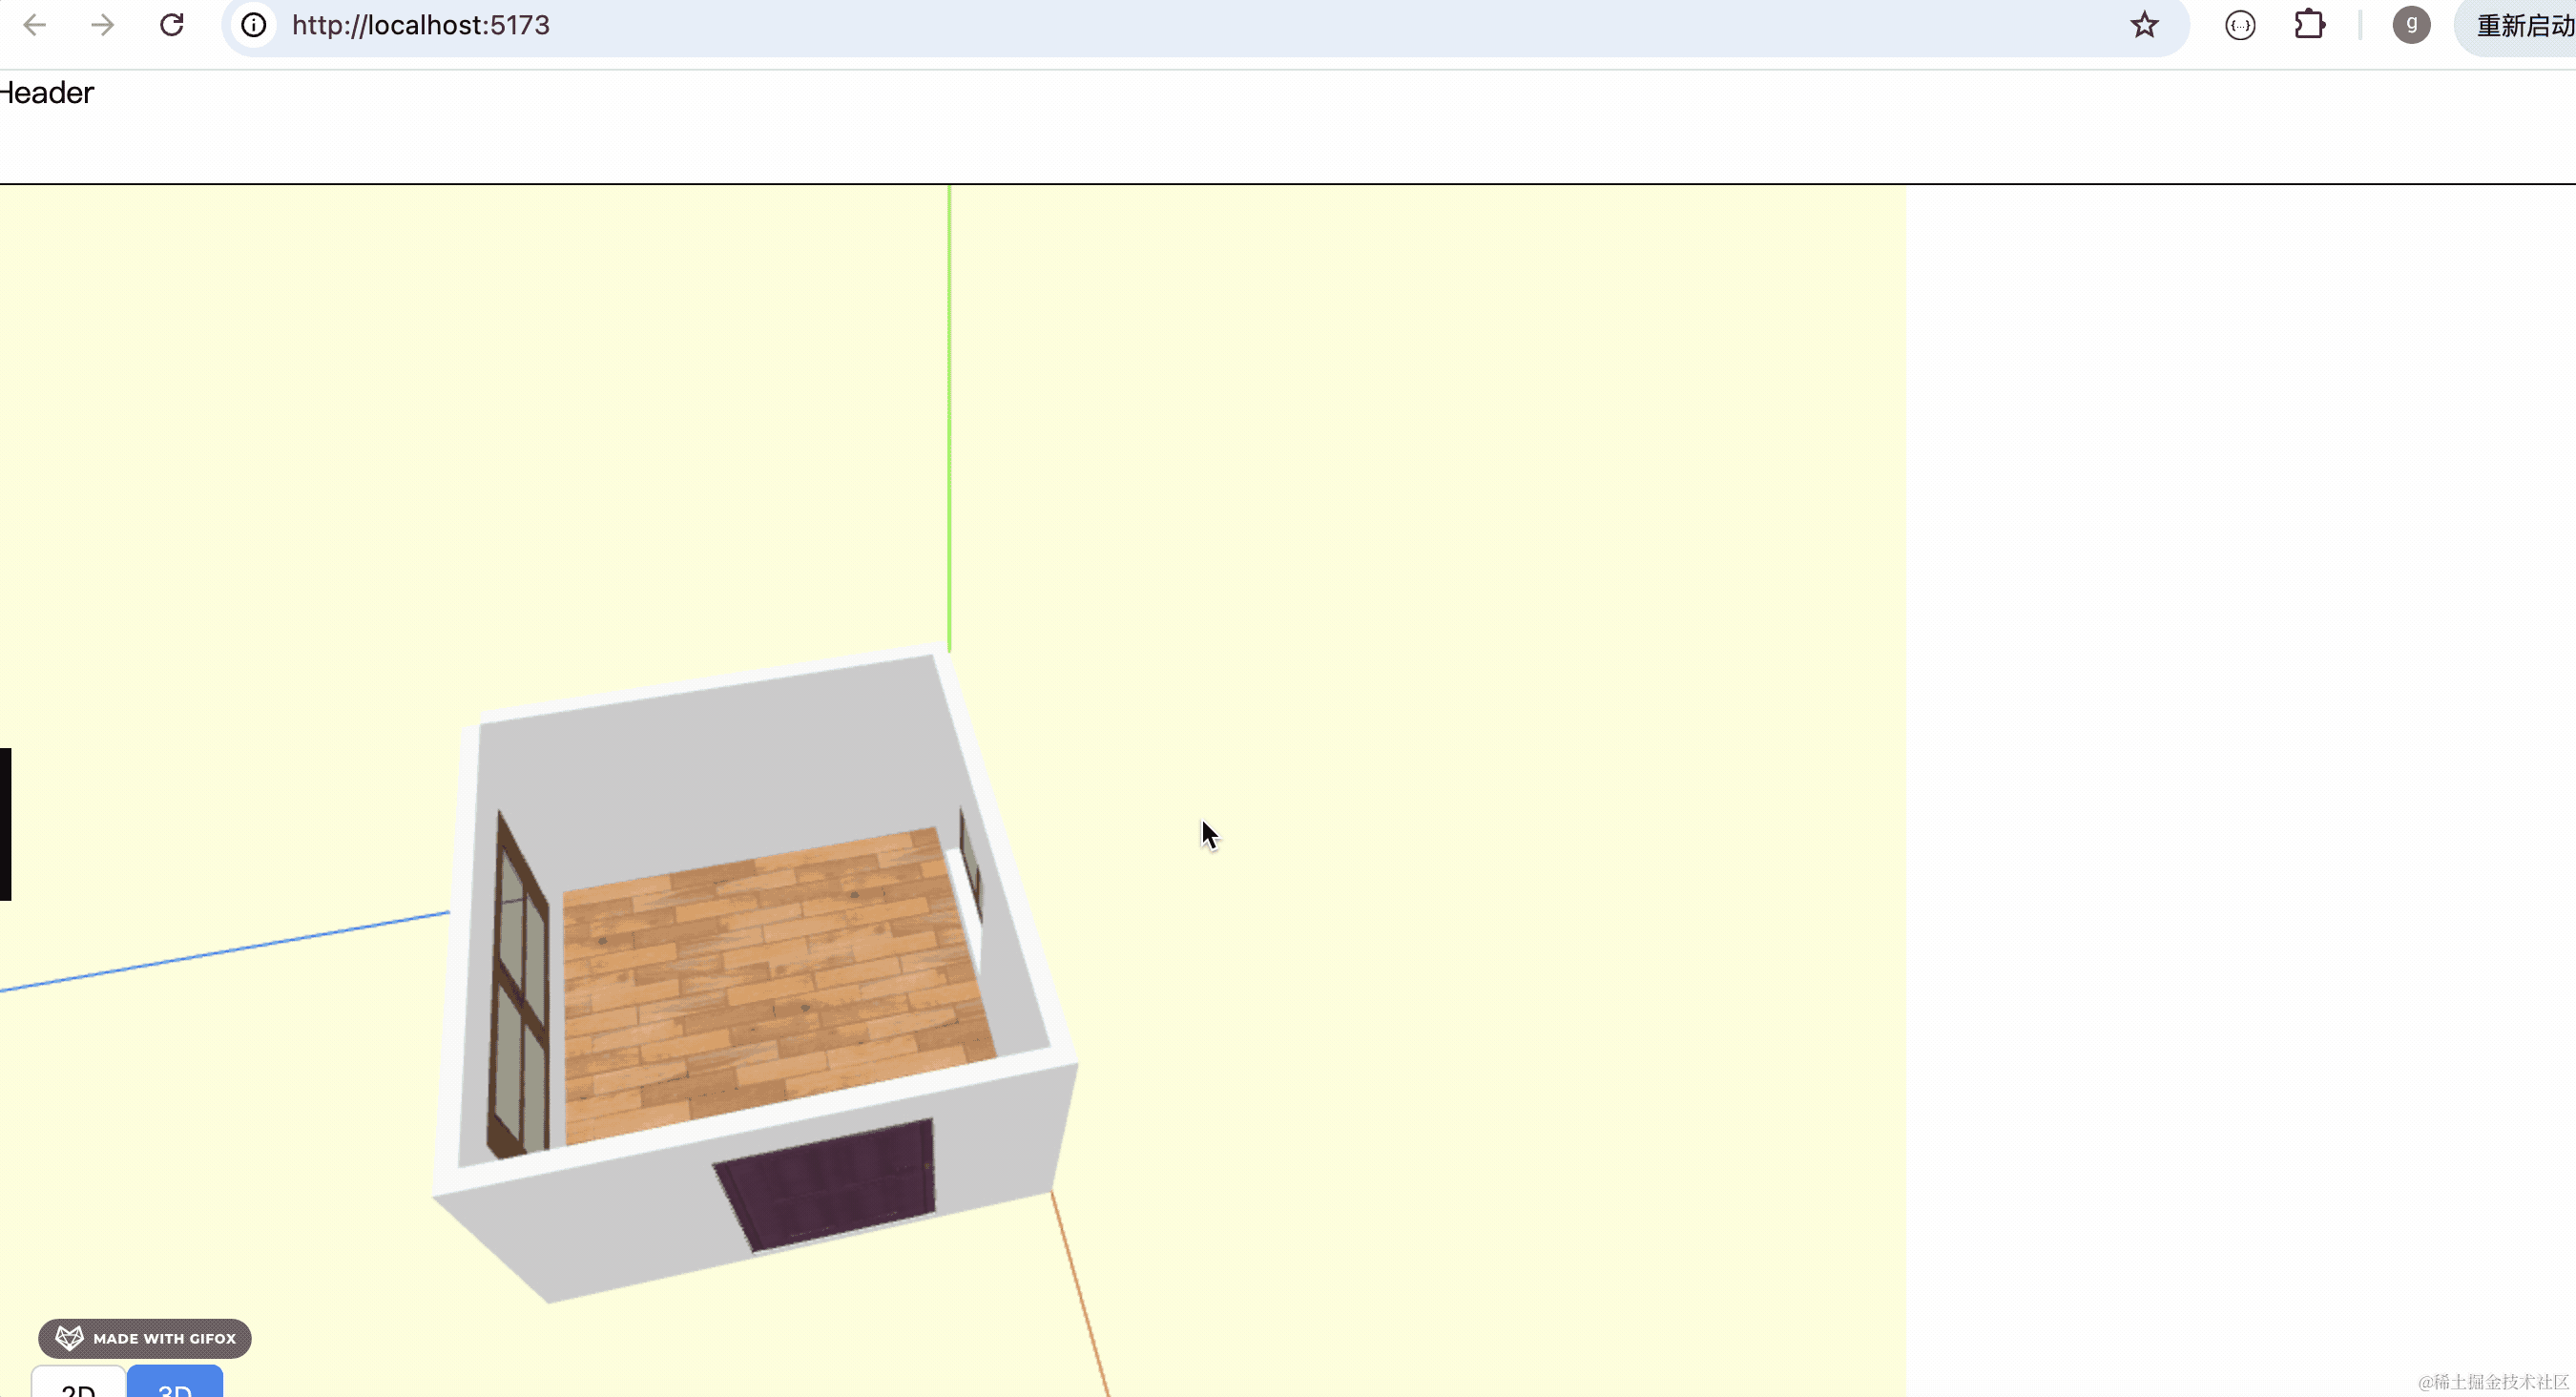
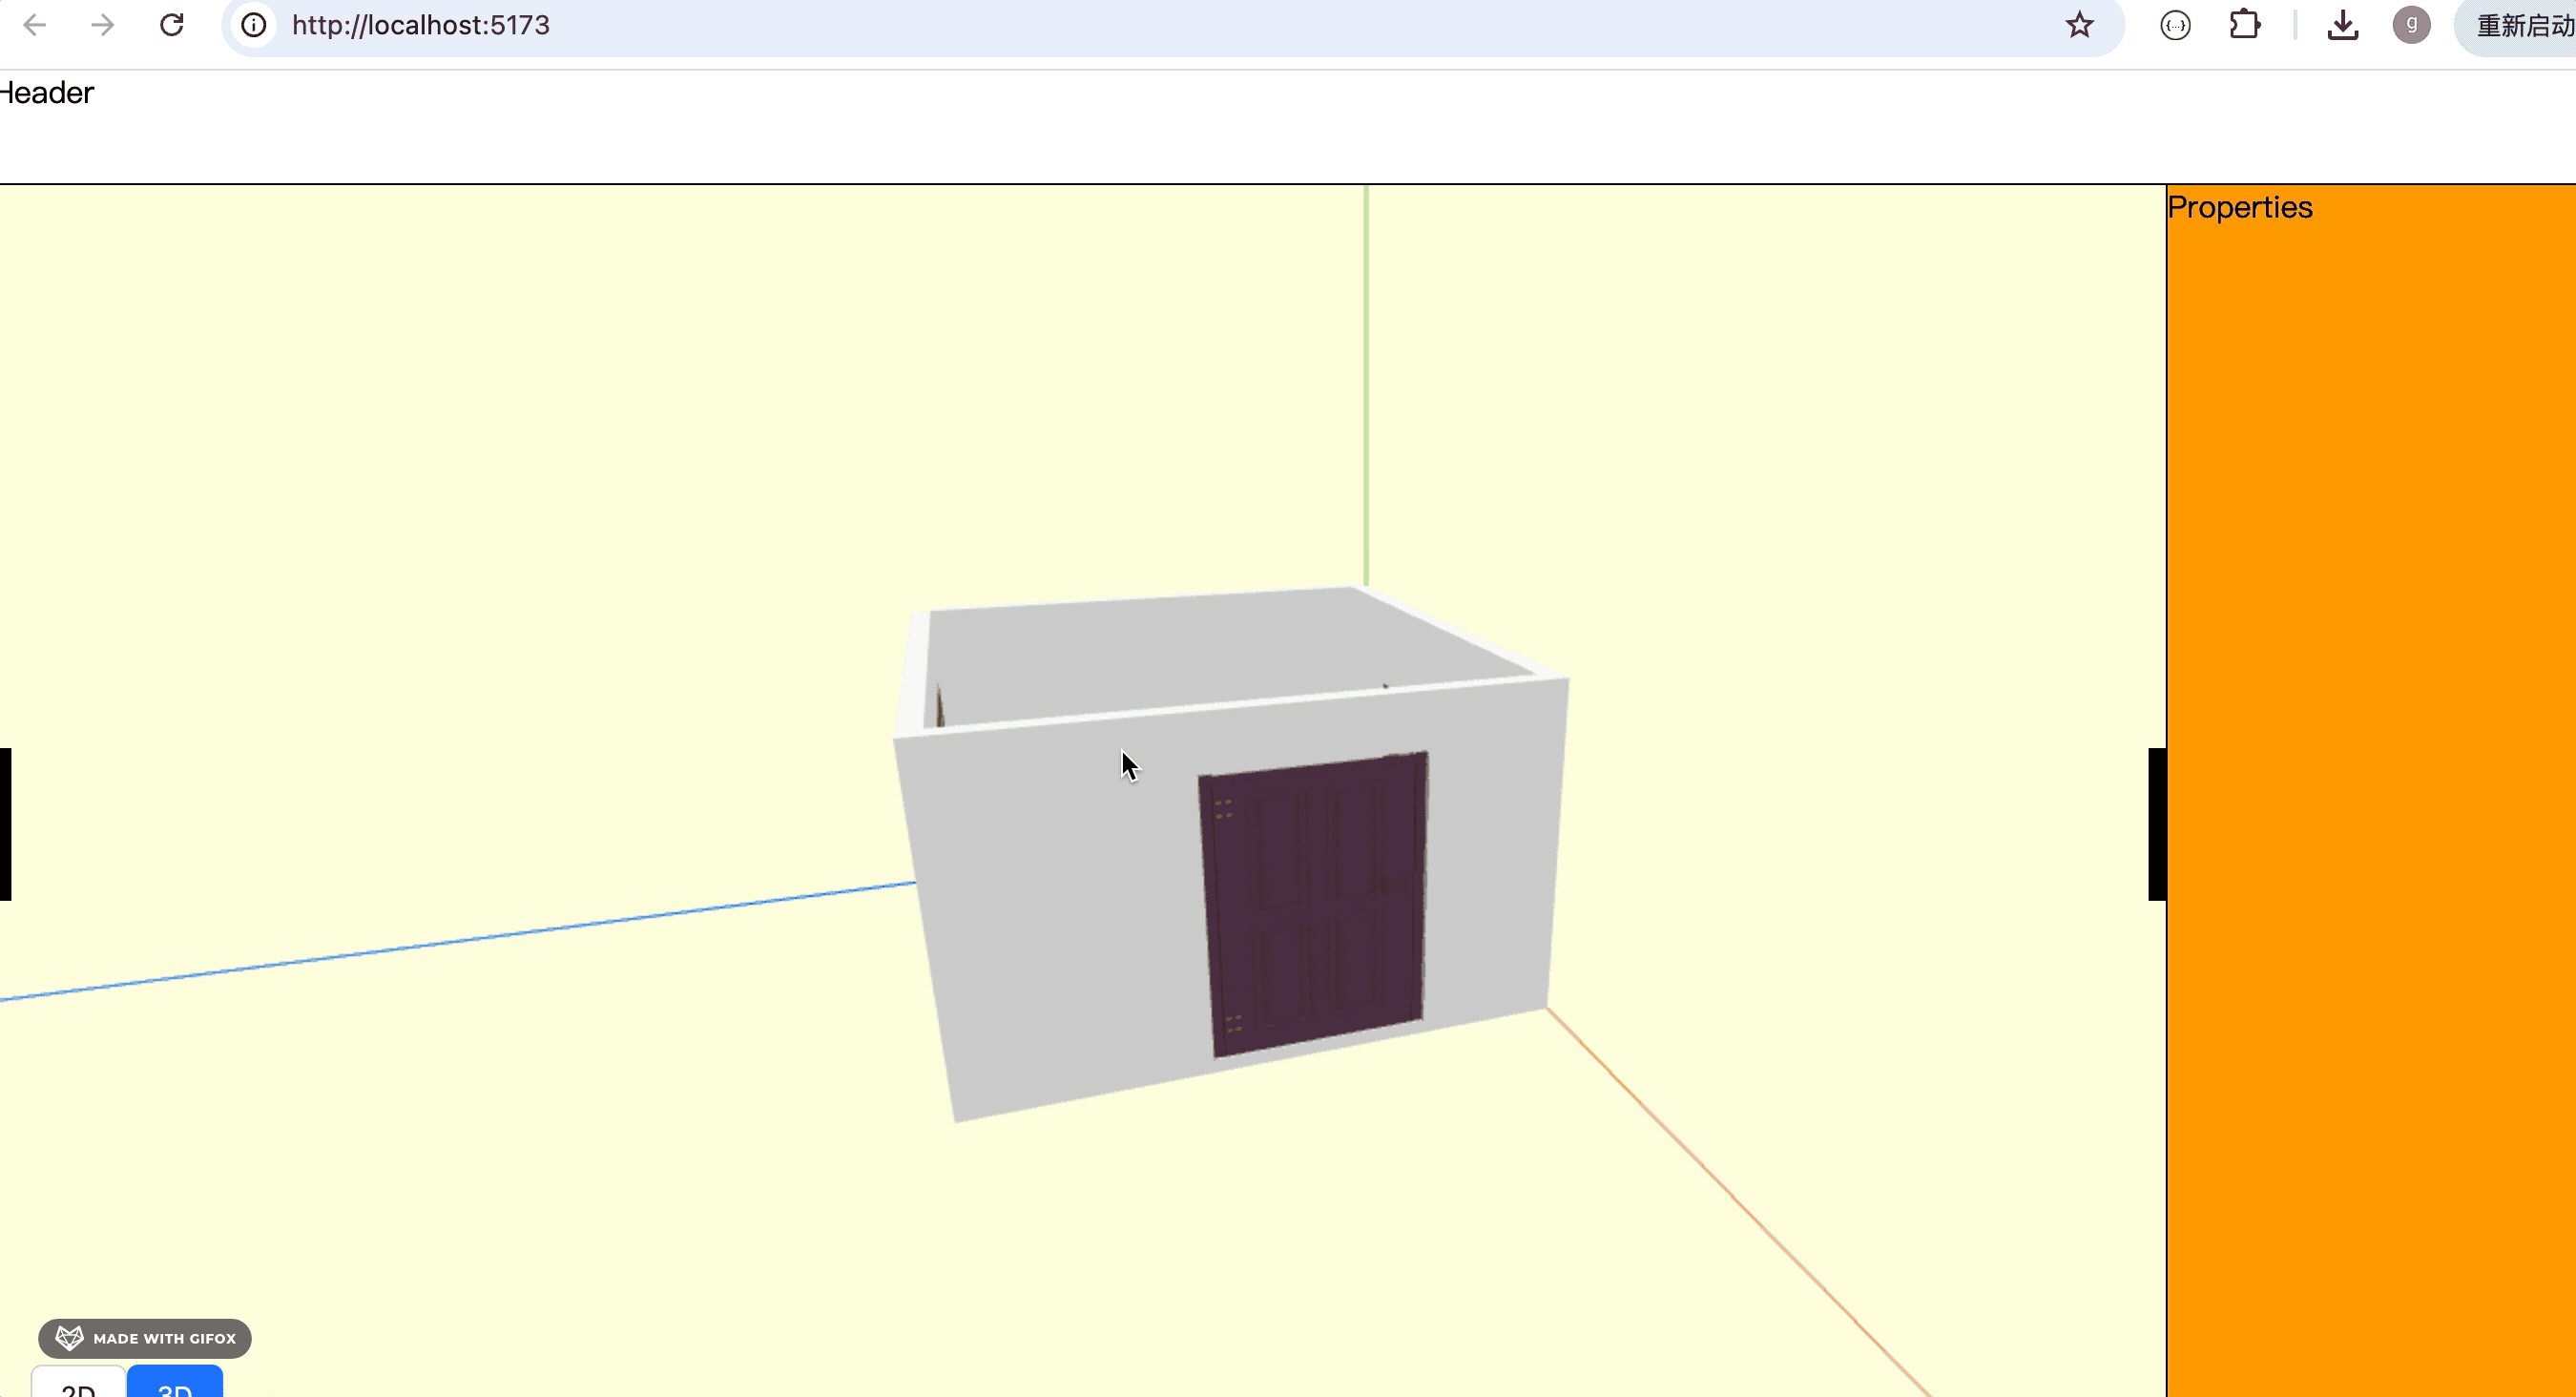
这样天花板就画好了。
因为设置了单面可见,所以从上往下看,看不到天花板,从下网上看,看不到地板。
和酷家乐这个是一样的:
案例代码上传了小册仓库
总结
这节我们绘制了地板、天花板。
存储一系列的点,用 Shape 画形状,然后用 ShapeGeometry 画出来。
设置单面可见,这样就可以实现从上往下、从下往上只能看到地板或天花板。
墙、门、窗、地板、天花板都完成了,下节就可以来写两室一厅等户型了。