我们墙、门、窗、地板、天花板都绘制完成后,这节来绘制一些具体的户型:
比如酷家乐里这个三室一厅一厨一卫的户型:
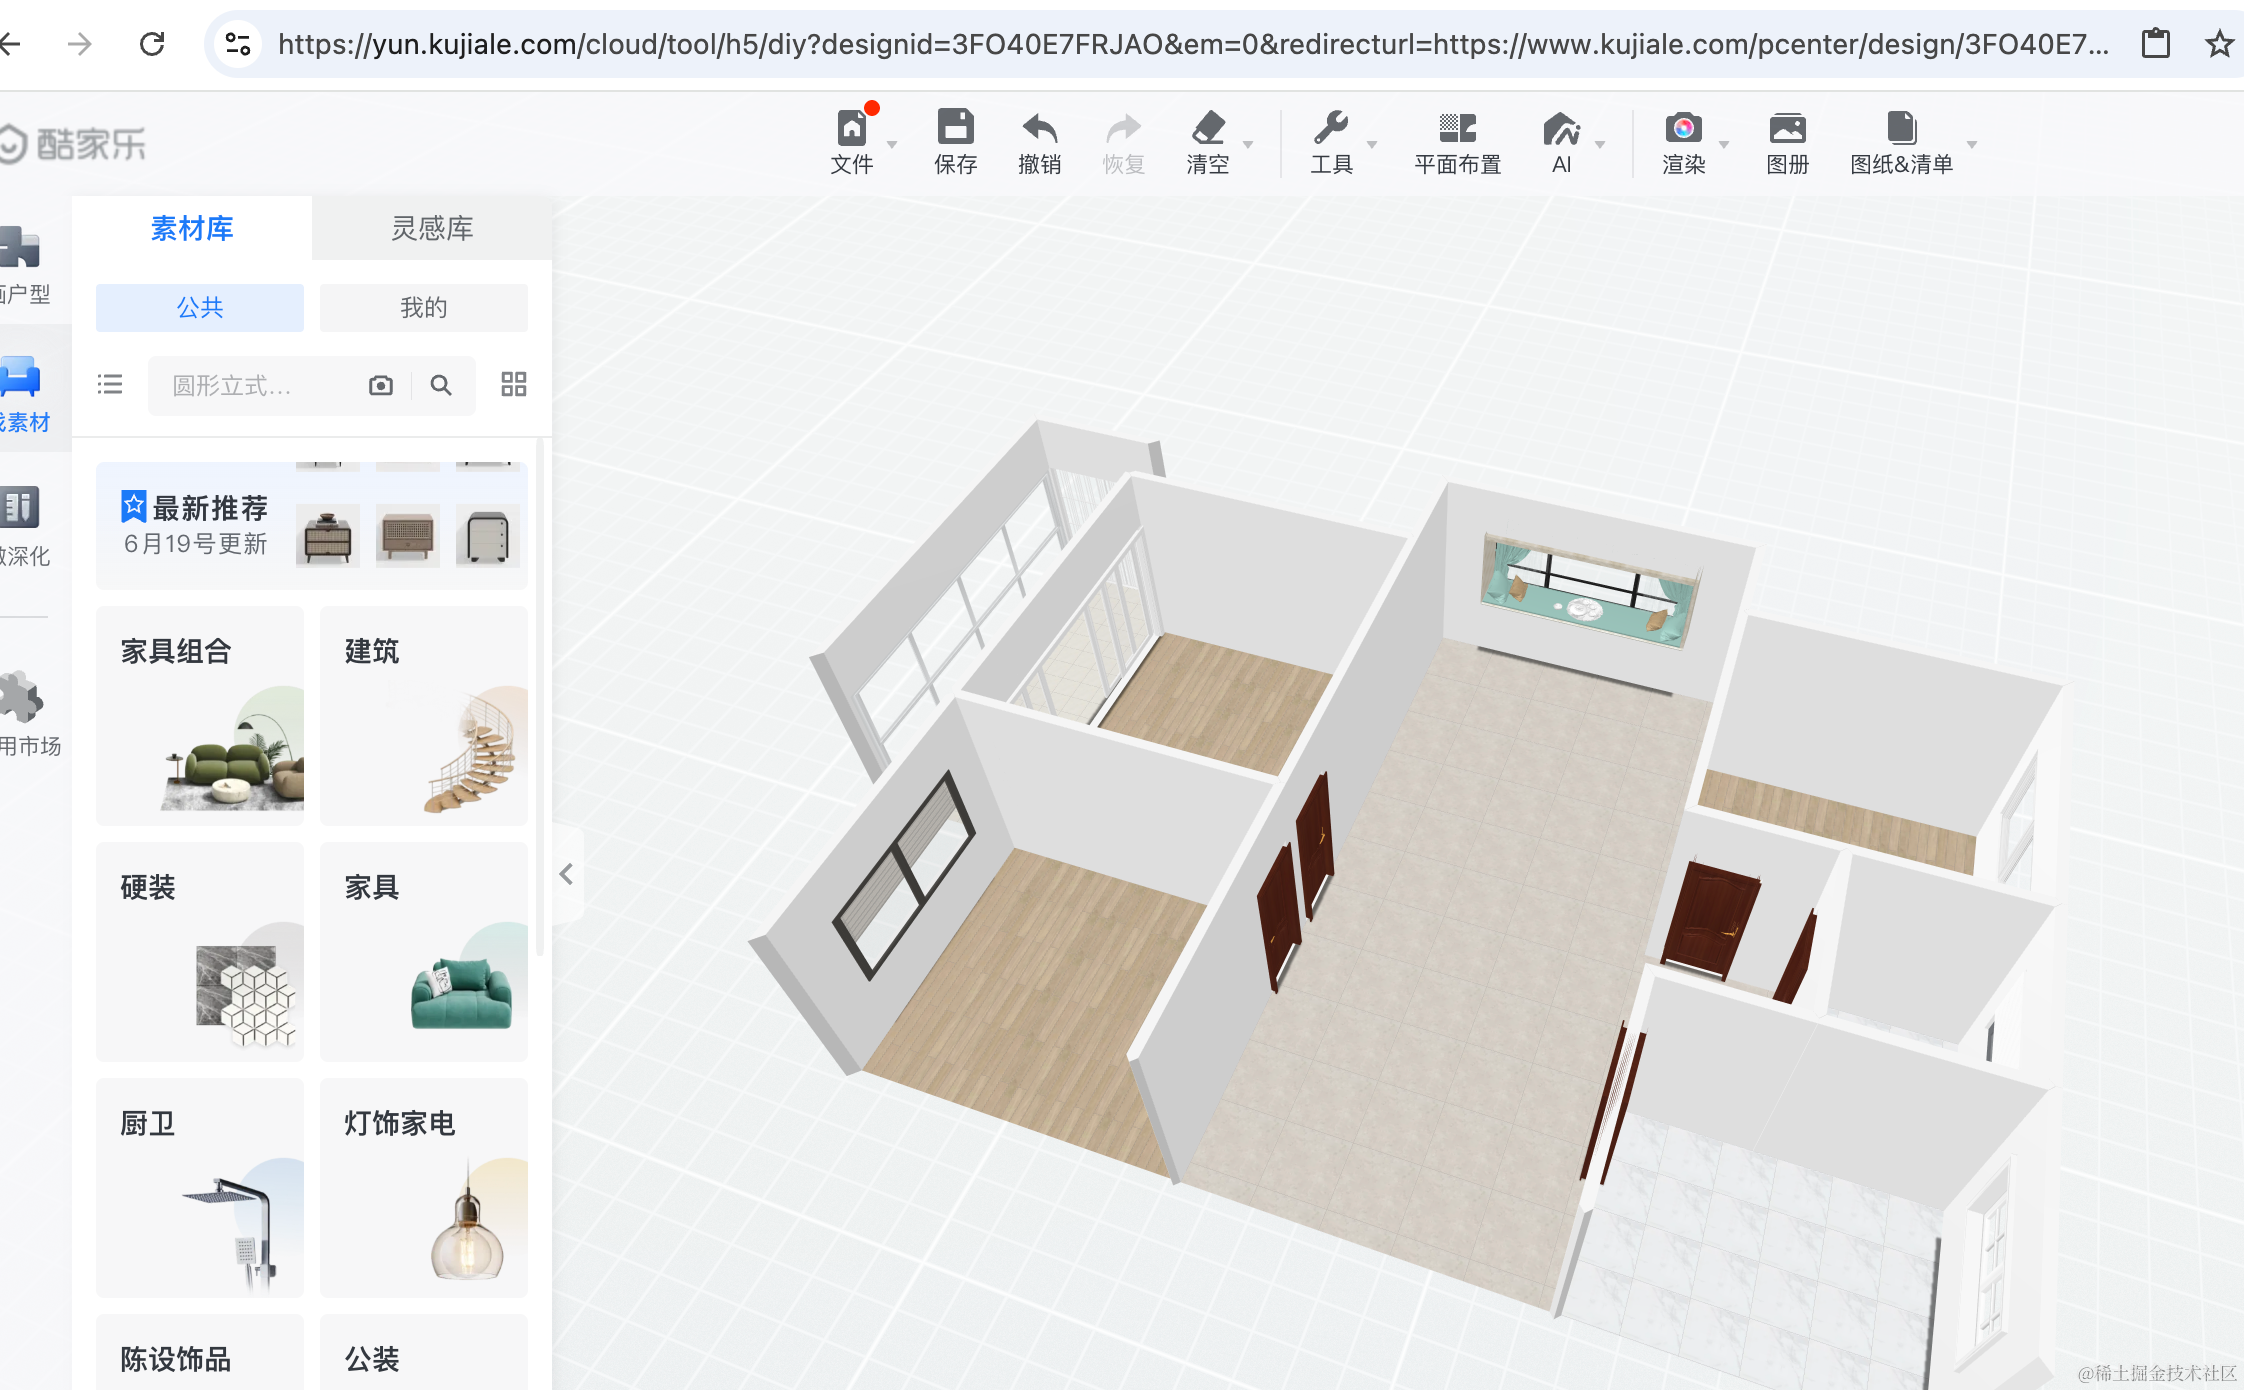
在酷家乐里,点击户型库,可以搜索各种小区的户型:

选择一个户型后,会清空当前设计,替换成新户型:

当然,我们不会内置那么多户型,写这两个户型就好了:
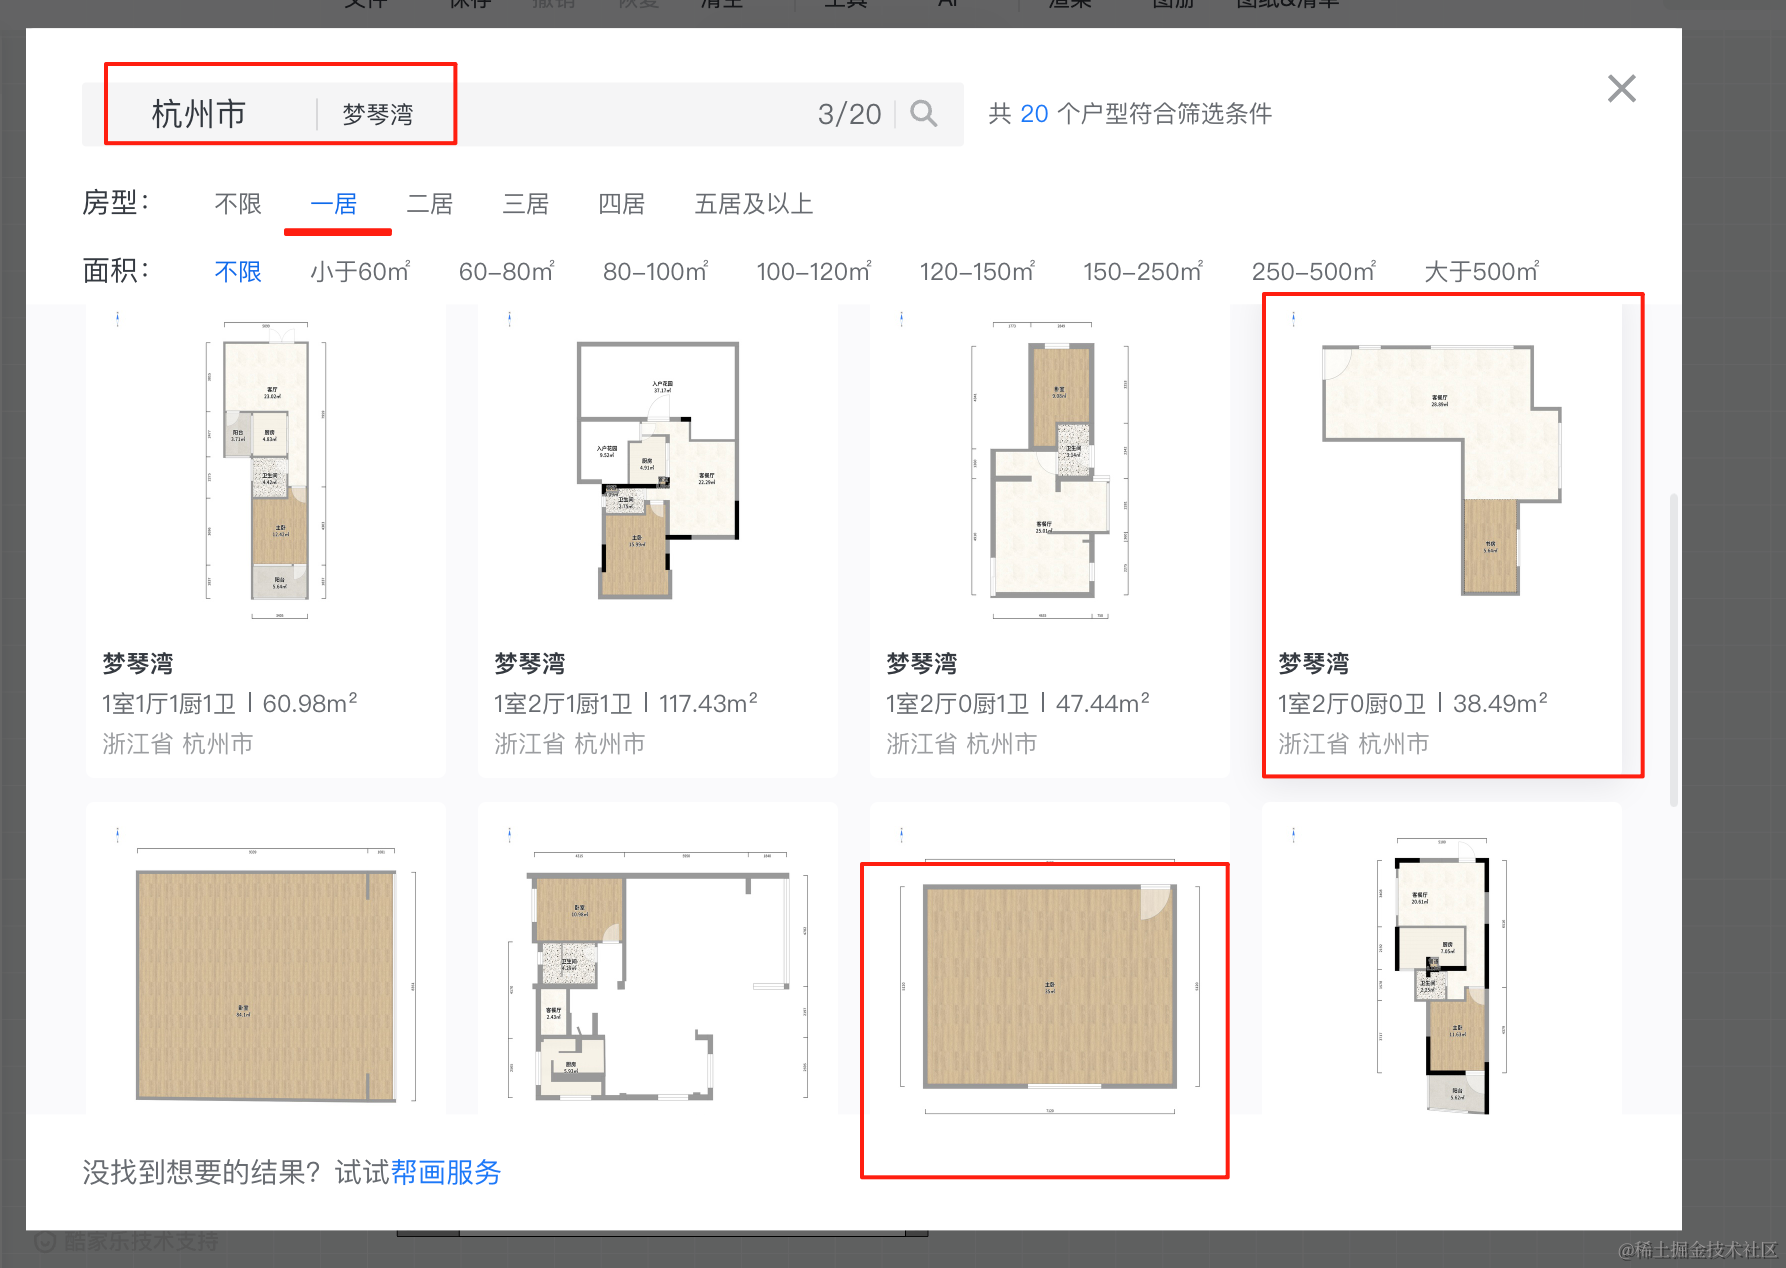
你可以从酷家乐的户型库里搜一下杭州 > 梦琴湾 > 一室 的这俩户型。
我们写这两个简单的:
首先是这个一室的户型:
然后是这个户型:
首先重构下代码:
创建 store/house1.ts
import type { State } from ".";

const data: State['data'] = {
    walls: [
        {
            position: { x: 0, y: 0, z: 0},
            width: 800,
            height: 500,
            depth: 30,
            windows: [
                {
                    leftBottomPosition: {
                        left: 100,
                        bottom: 50
                    },
                    width: 300,
                    height: 300
                }
            ]
        },
        {
            position: { x: 0, y: 0, z: 800},
            width: 800,
            height: 500,
            depth: 30,
            windows: [
                {
                    leftBottomPosition: {
                        left: 100,
                        bottom: 100
                    },
                    width: 600,
                    height: 300
                }
            ]
        },
        {
            position: { x: 0, y: 0, z: 0},
            width: 800,
            height: 500,
            depth: 30,
            rotationY: -Math.PI / 2,
            windows: [
            ]
        },
        {
            position: { x: 800, y: 0, z: 0},
            width: 800,
            height: 500,
            depth: 30,
            rotationY: -Math.PI / 2,
            windows: [
            ],
            doors: [
                {
                    leftBottomPosition: {
                        left: 200,
                        bottom: 20
                    },
                    width: 300,
                    height: 400
                }
            ]
        }
    ],
    floors: [
        {
            points: [
                { x: 0, z: 0},
                { x: 0, z: 800},
                { x: 800, z: 800},
                { x: 800, z: 0},
                { x: 0, z: 0 }
            ]
        }
    ],
    ceilings: [
        {
            points: [
                { x: 0, z: 0},
                { x: 0, z: 800},
                { x: 800, z: 800},
                { x: 800, z: 0},
                { x: 0, z: 0 }
            ],
            height: 500
        }
    ]
};

export default data;
我们把数据从 store/index.ts 转移到了这里。
这里用到的 State 类型需要导出:
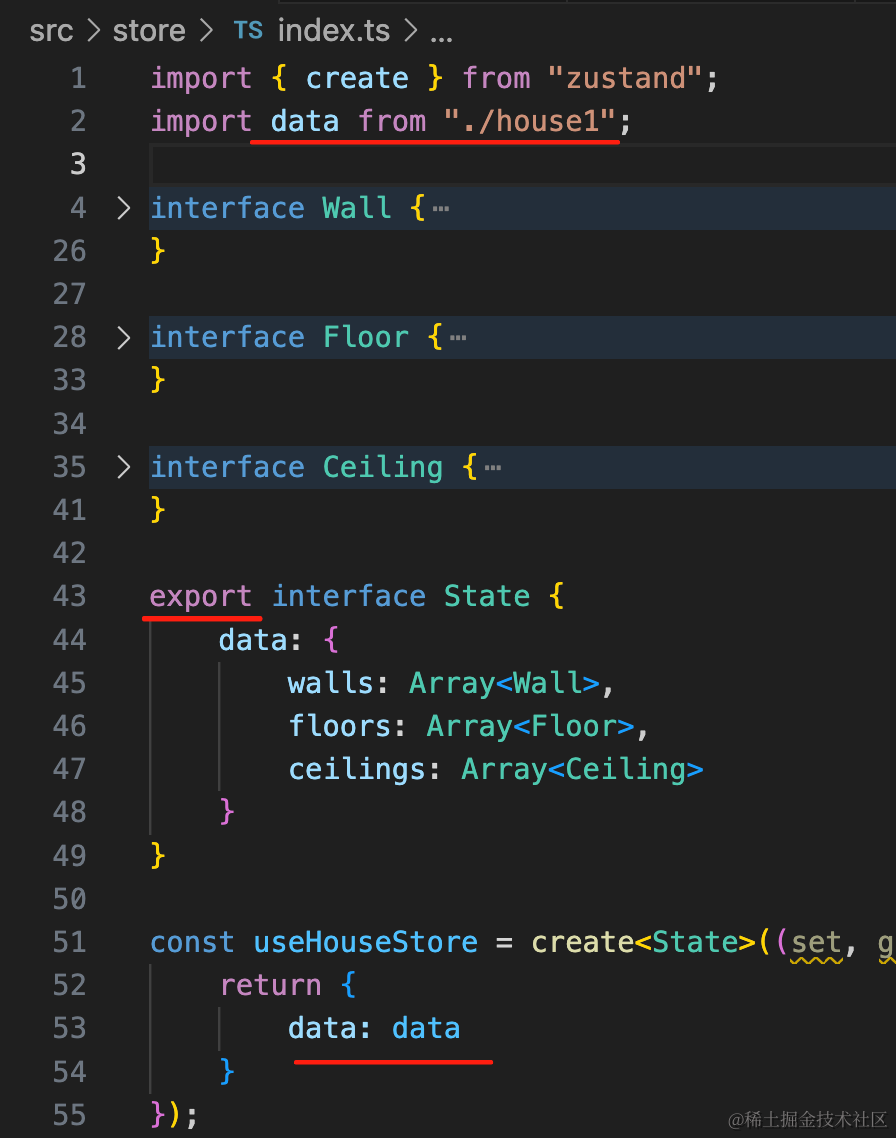
然后把 data 换成从 store/house1.ts 导入的。
看下效果:
可以看到,渲染是正常的。
不过应该是房子的中心点在坐标原点。
我们用包围盒 Box3 来计算下:
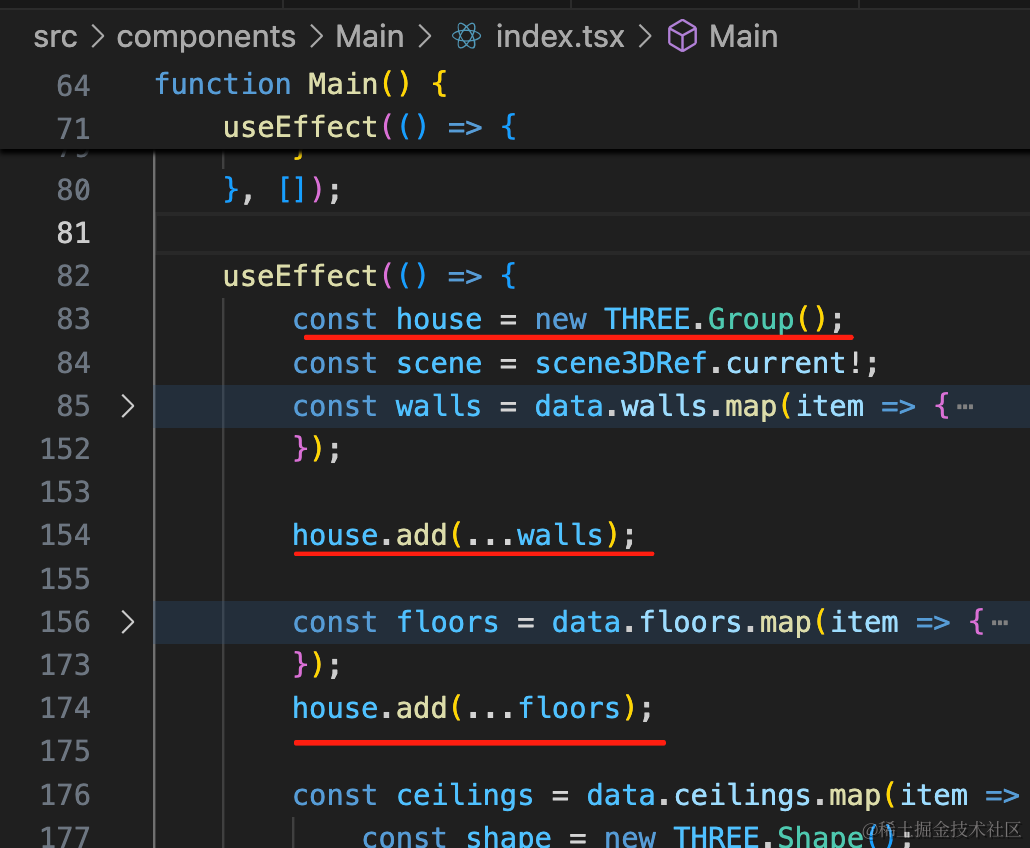
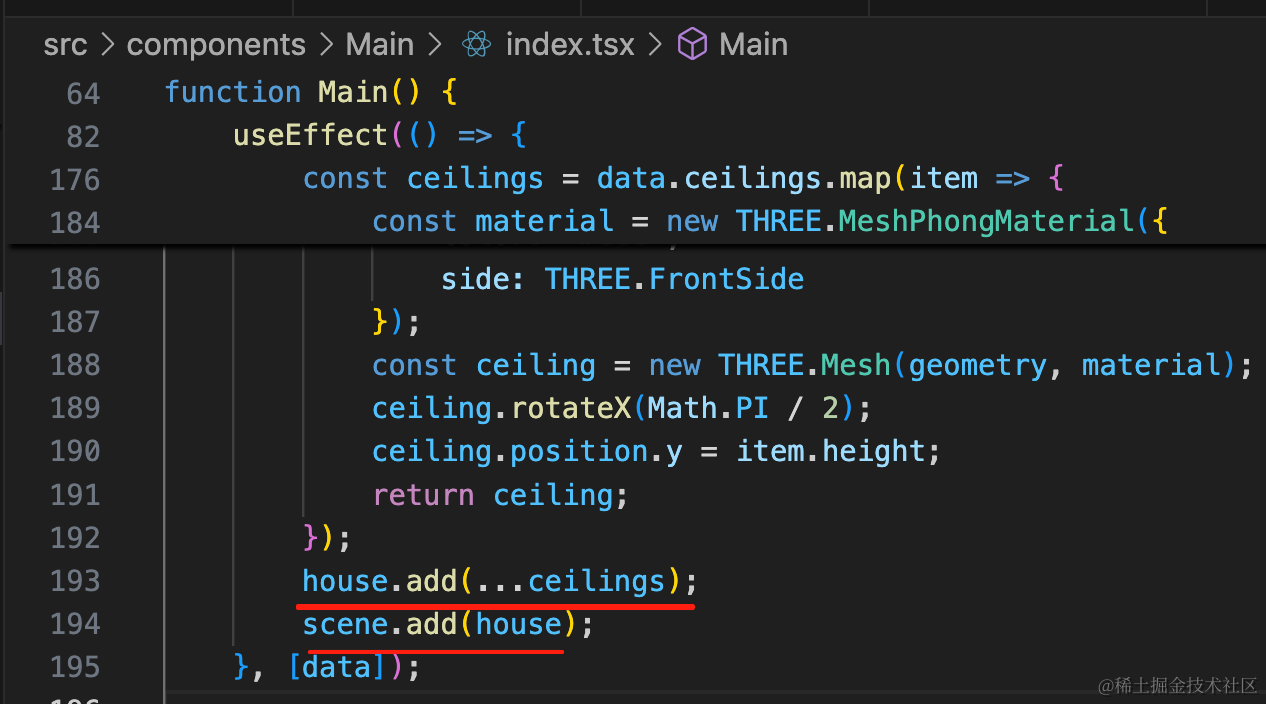
首先,我们之前是把 floor、wall、ceiling 单独添加到 scene 的。
这次我们先把它添加到一个 group 再添加到 scene。
然后来计算这个 group 的包围盒大小:
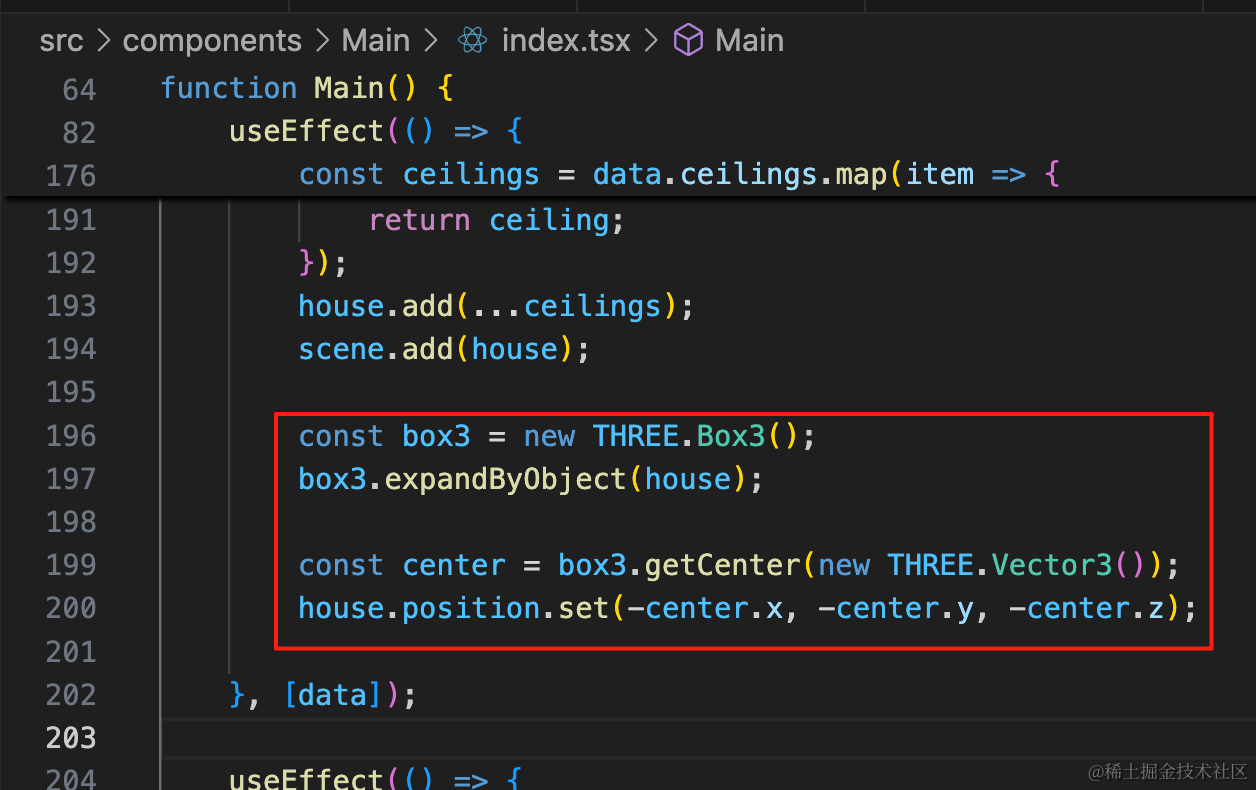
const box3 = new THREE.Box3();
box3.expandByObject(house);

const center = box3.getCenter(new THREE.Vector3());
house.position.set(-center.x, -center.y, -center.z);
用 Box3 包围这个 group,拿到 center,做一下反向位移。
这样,房子的中心就移到坐标原点了:
然后我们来观察下这个户型:
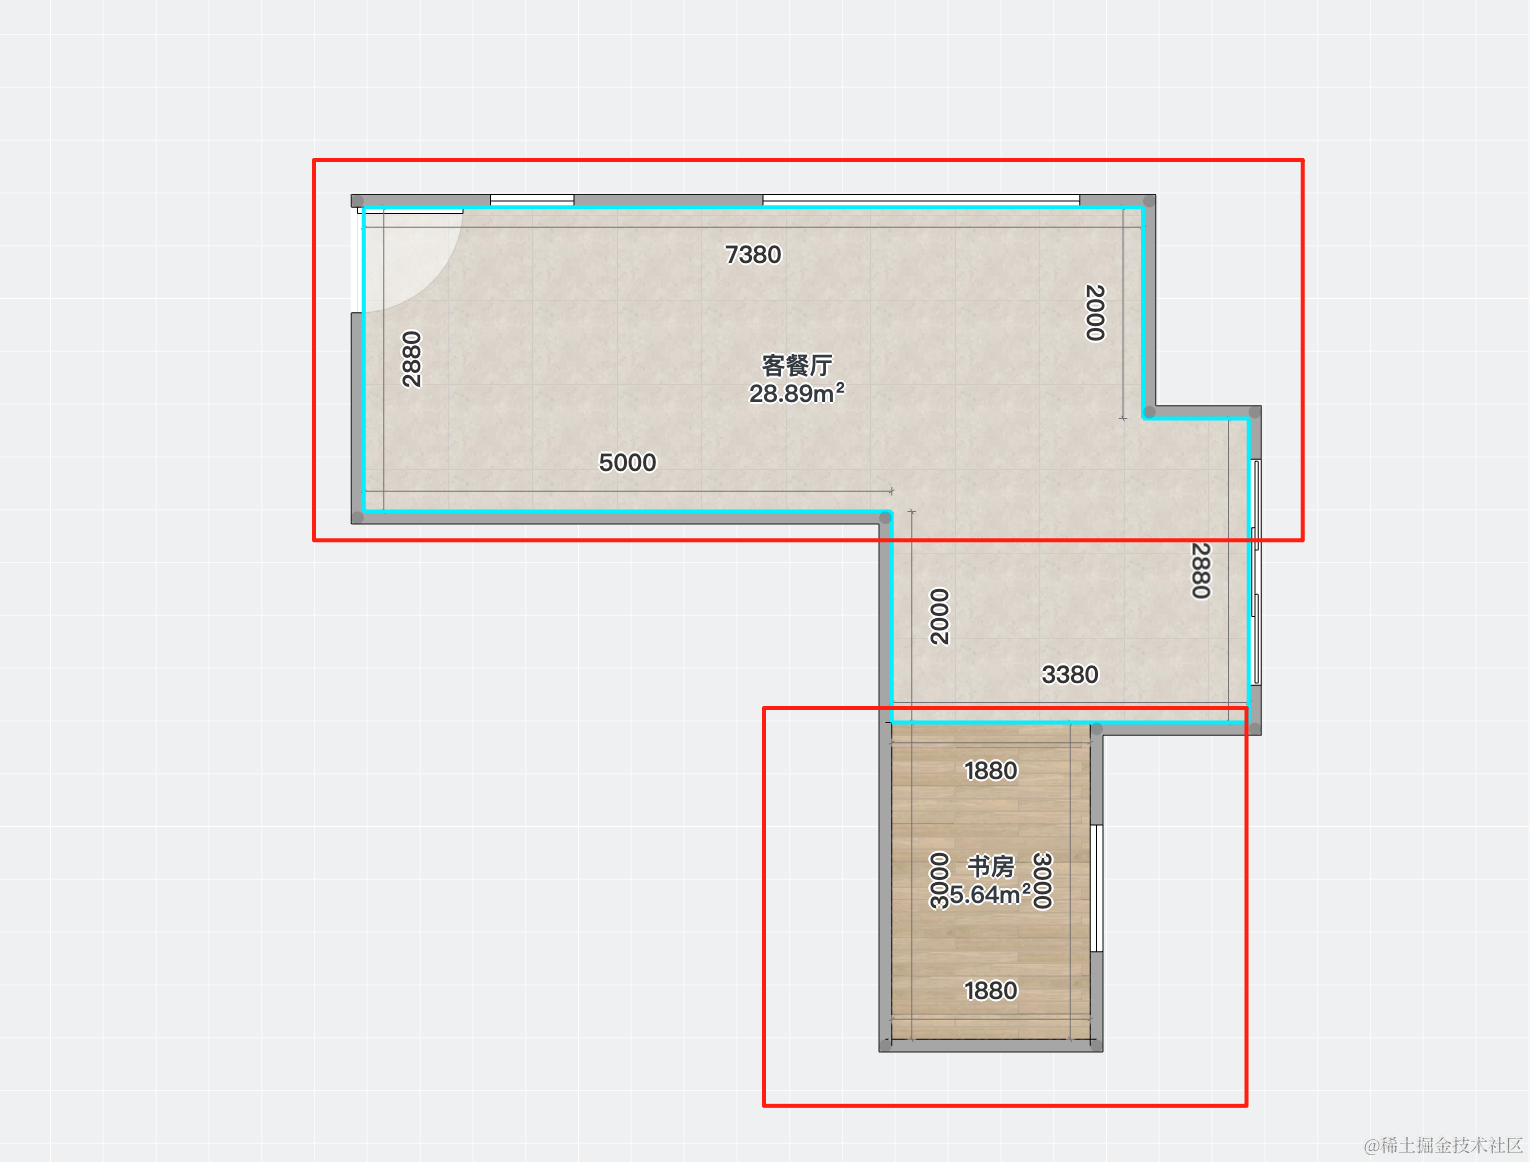
客餐厅是 28.89 平方米。
尺寸的单位是毫米,7380 毫米就是 7.38 米。
如果按照这个单位的话,那一般的数值都是好几千的数量级。
我们现在都是按照几百的数量级来绘制的。
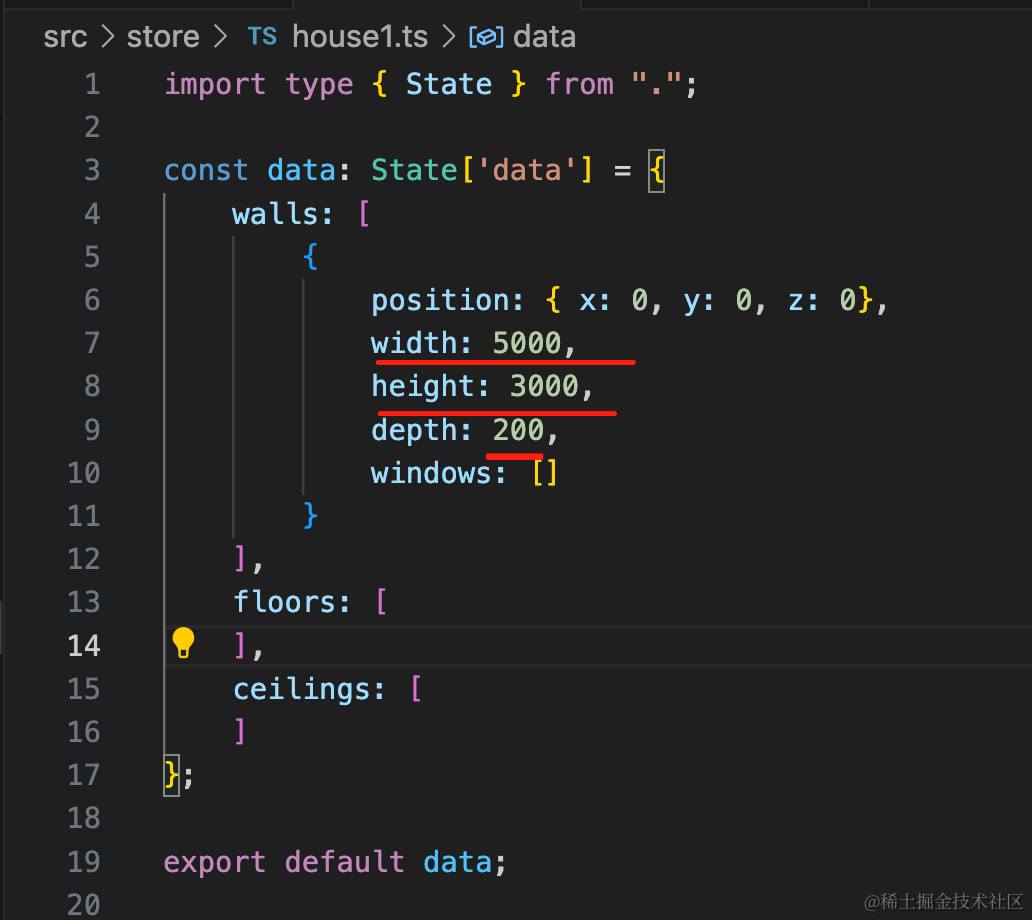
先把数值改一下:
比如高度是 3000 毫米也就是 3 米。
两面的墙宽度 5 米:
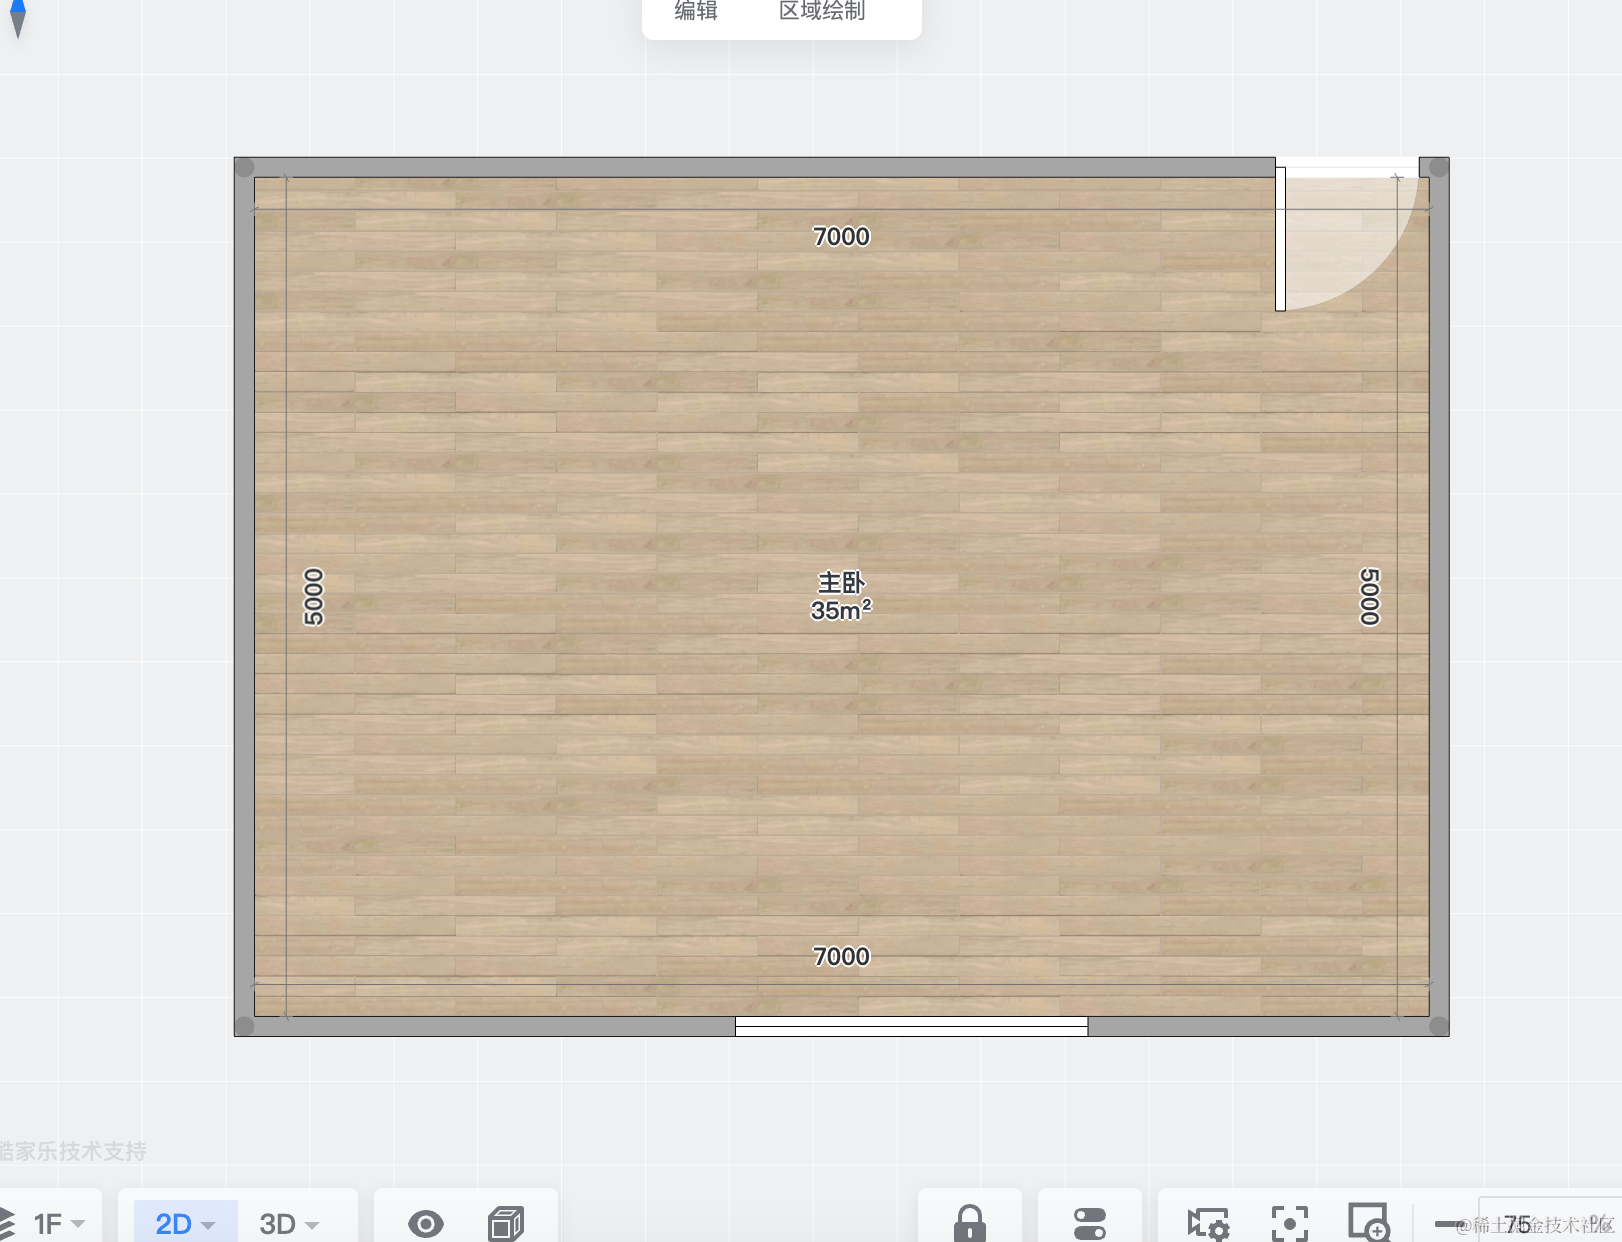
高 3 米宽 5 米,厚度 0.2 米:
import type { State } from ".";

const data: State['data'] = {
    walls: [
        {
            position: { x: 0, y: 0, z: 0},
            width: 5000,
            height: 3000,
            depth: 200,
            windows: []
        }
    ],
    floors: [
    ],
    ceilings: [
    ]
};

export default data;
绘制出来是这样的:
数量级大了,那相机的位置也应该调一下:
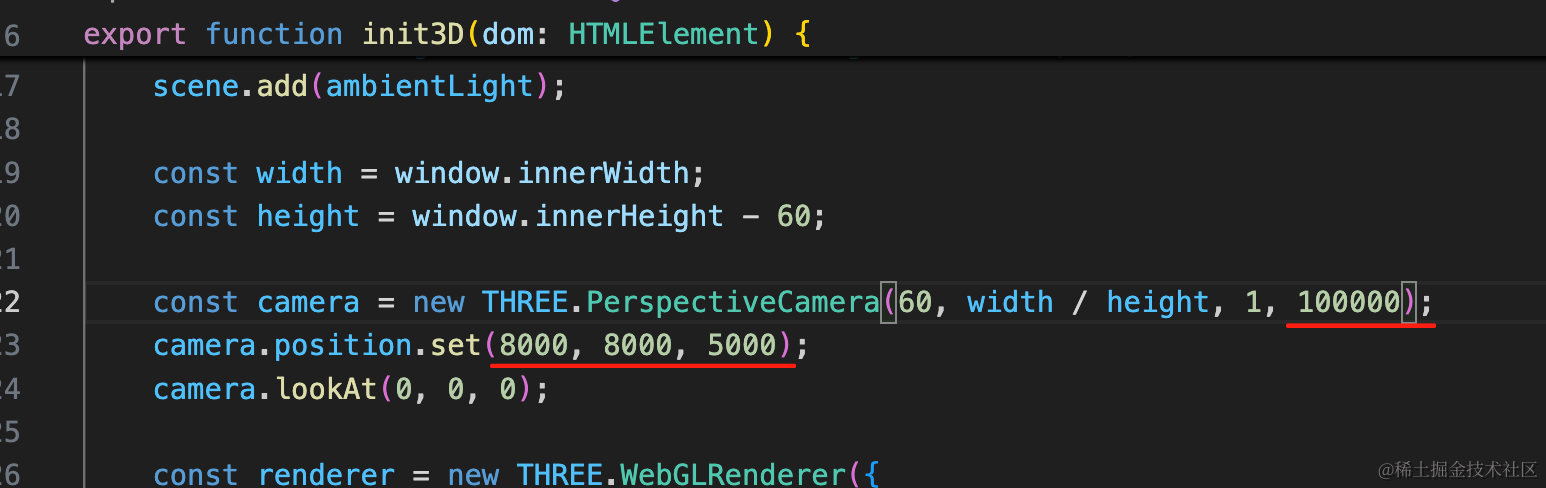
const camera = new THREE.PerspectiveCamera(60, width / height, 1, 100000);
camera.position.set(8000, 8000, 5000);
差不多是大一个数量级。
这样视野就好多了。
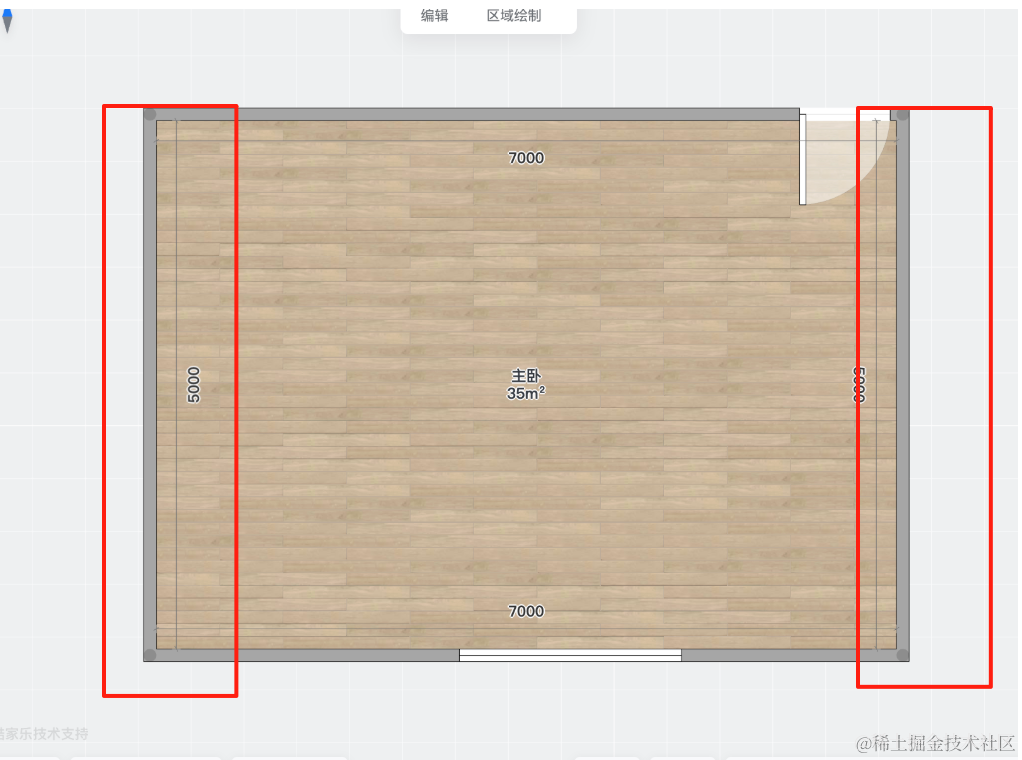
继续画另一面墙:
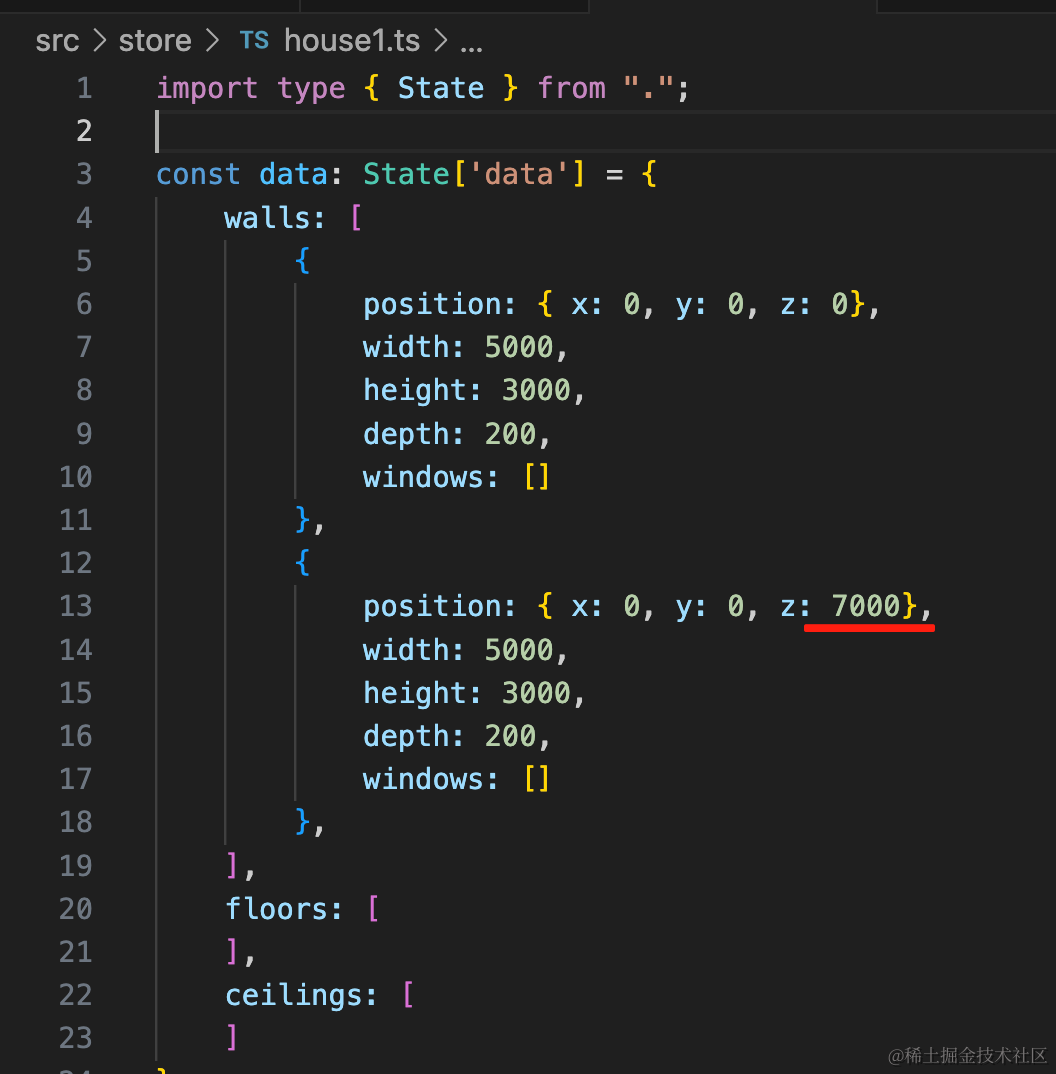
{
    position: { x: 0, y: 0, z: 7000},
    width: 5000,
    height: 3000,
    depth: 200,
    windows: []
},
间隔 7 米。
然后画另外两面:
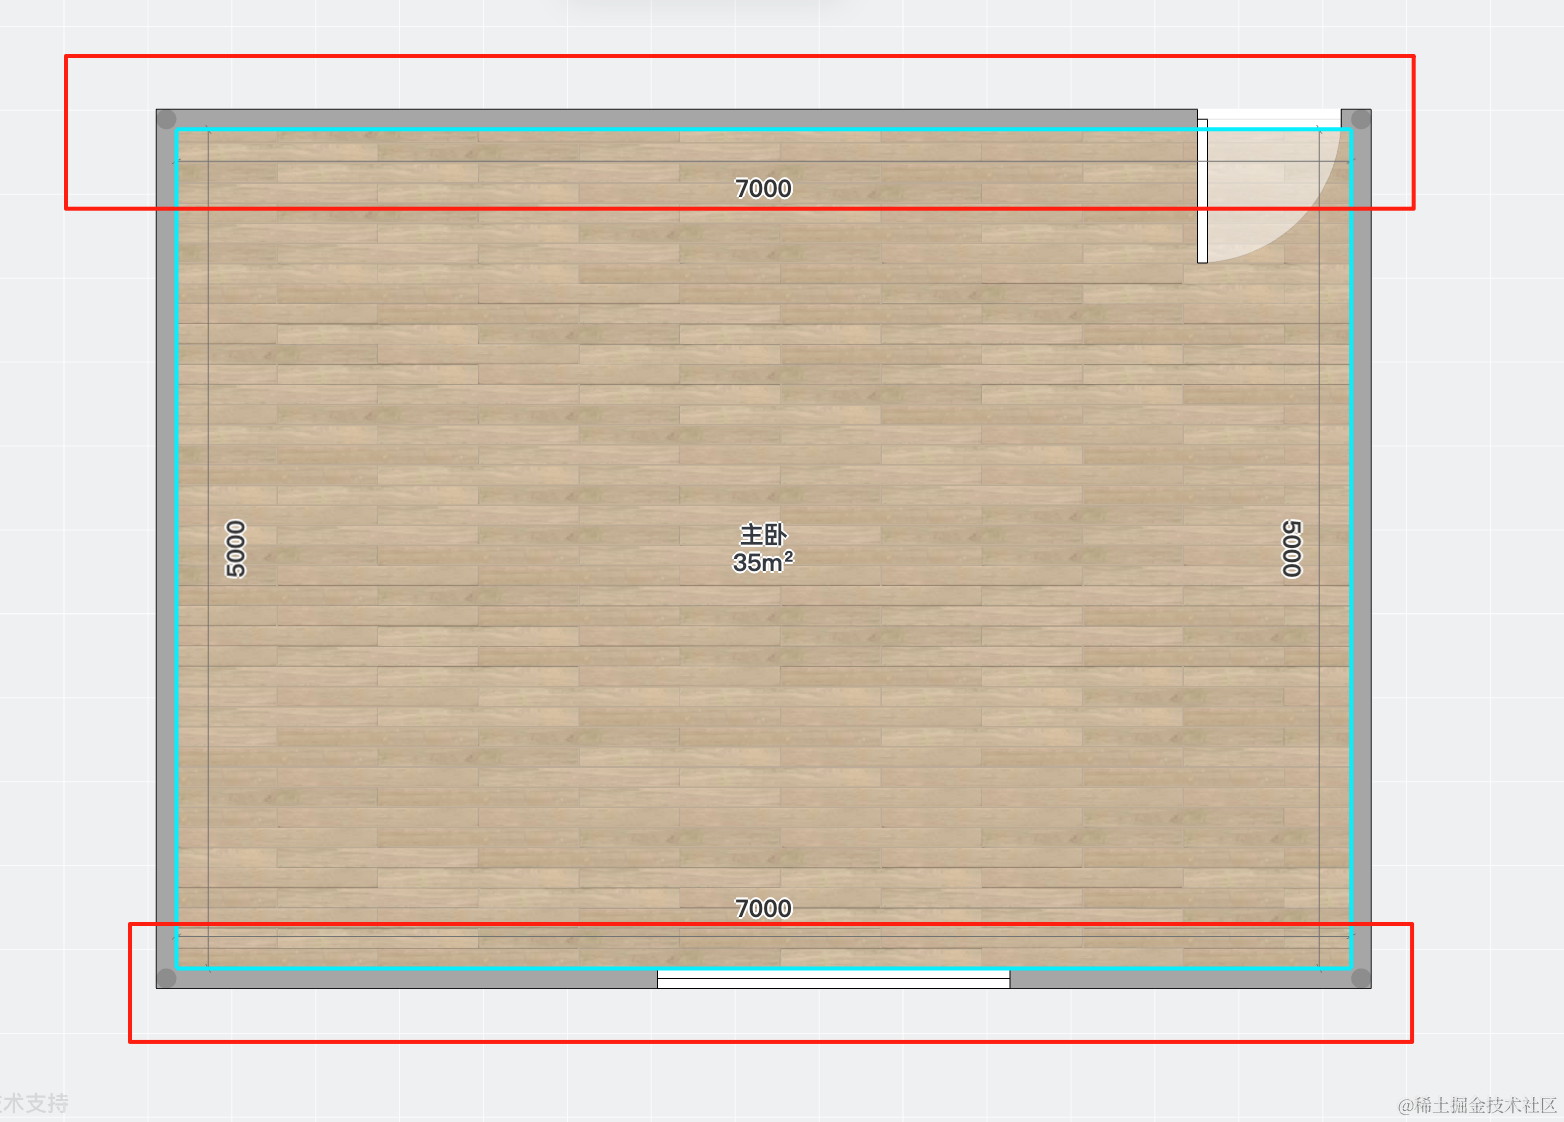
门窗先不画。
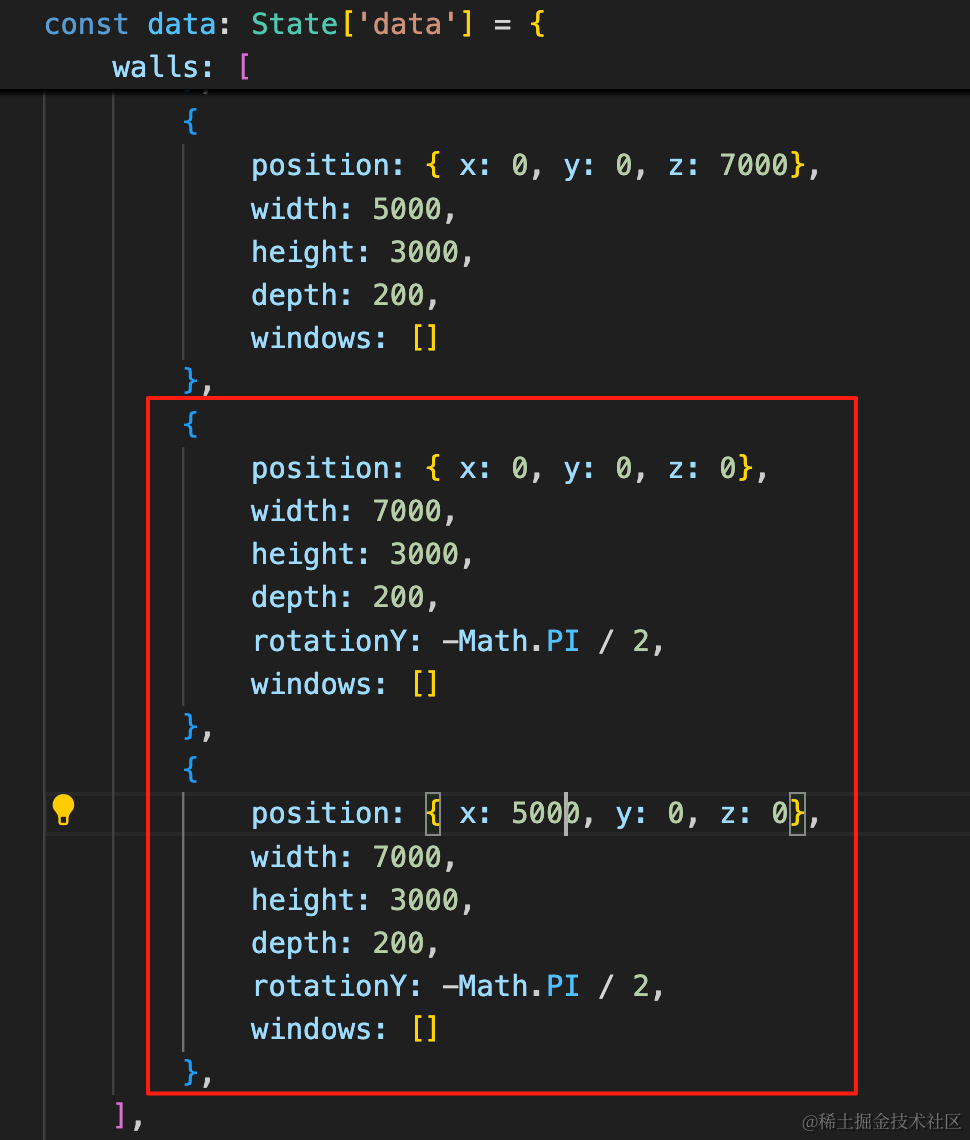
{
    position: { x: 0, y: 0, z: 0},
    width: 7000,
    height: 3000,
    depth: 200,
    rotationY: -Math.PI / 2,
    windows: []
},
{
    position: { x: 5000, y: 0, z: 0},
    width: 7000,
    height: 3000,
    depth: 200,
    rotationY: -Math.PI / 2,
    windows: []
},
这样,四面墙就画完了。
然后加上窗户:
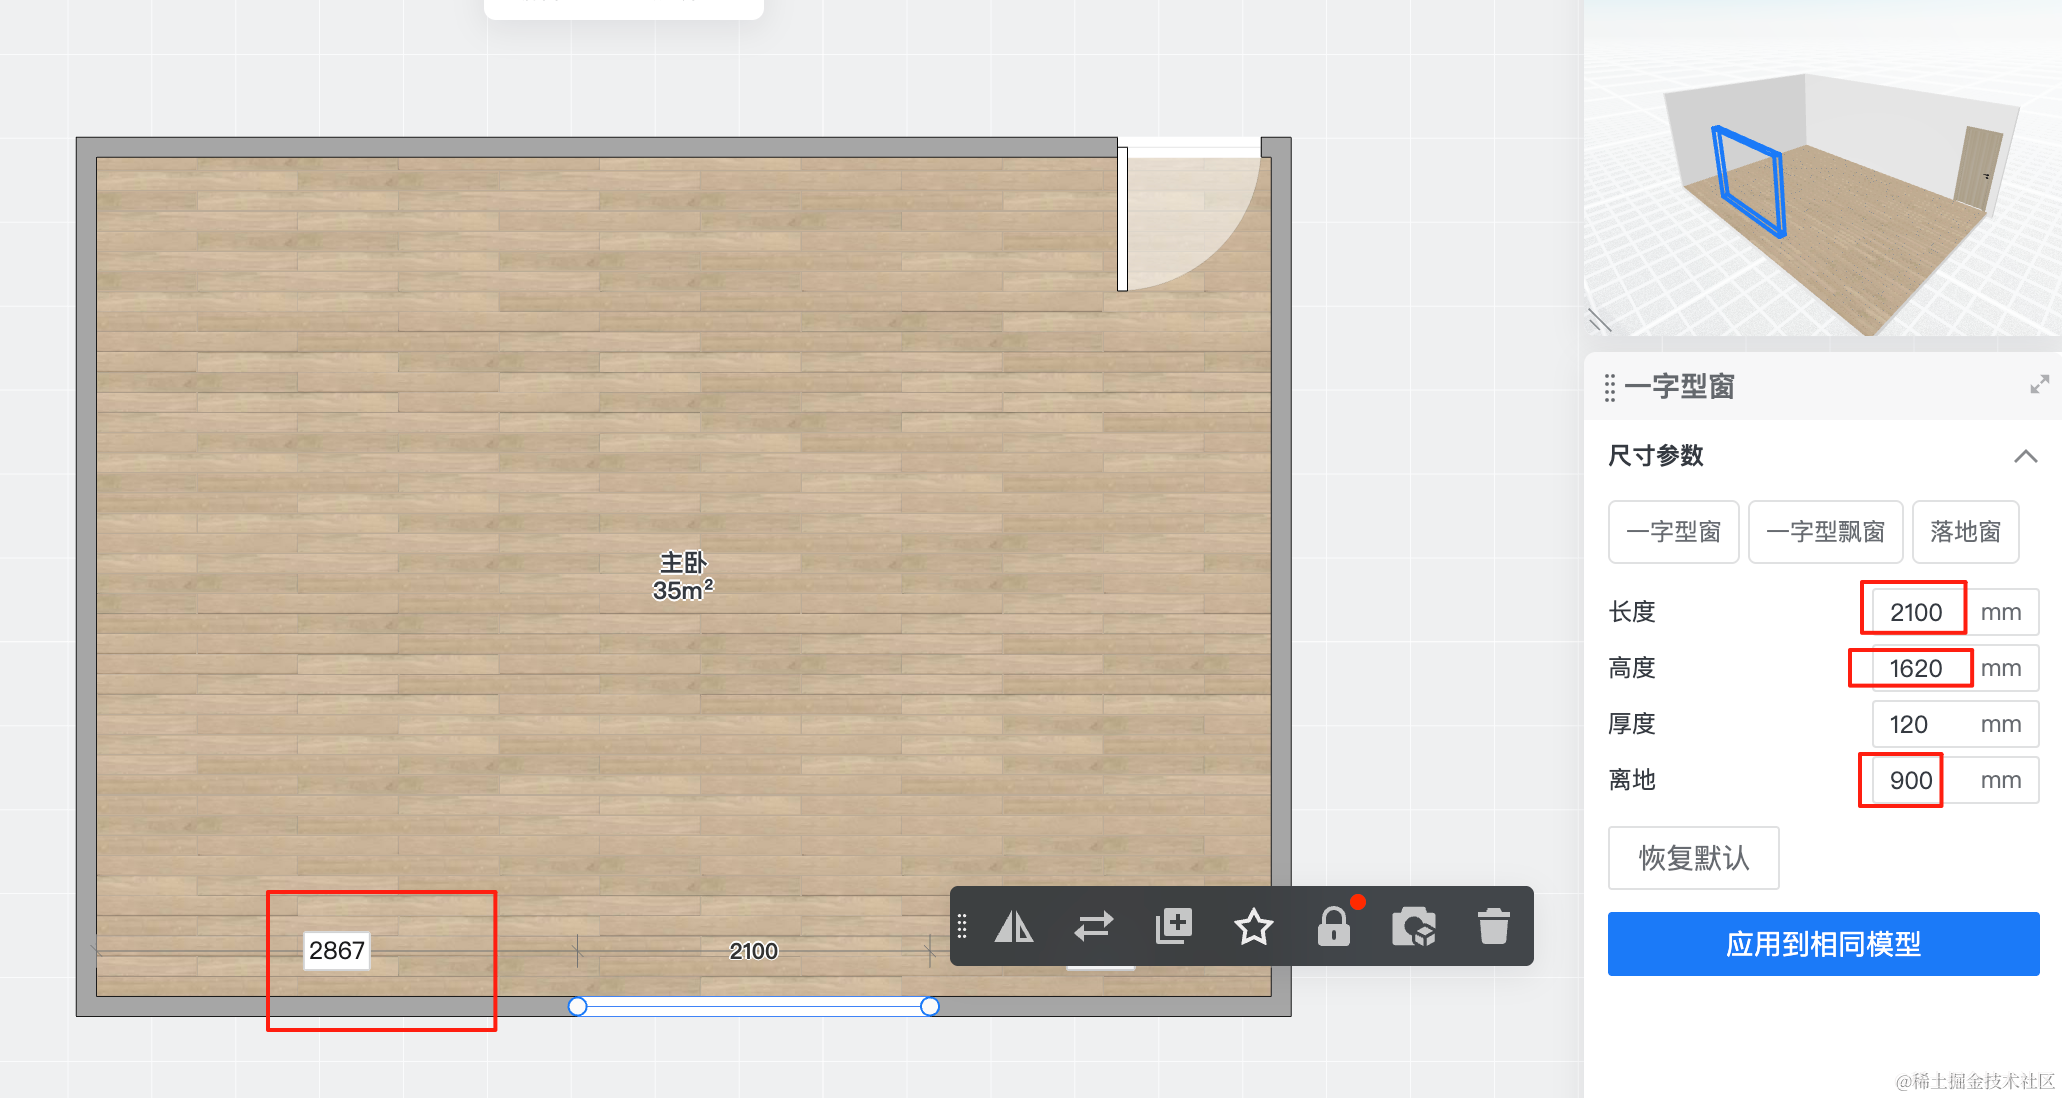
宽度、高度、离地、距离左侧距离,都有具体的数据。
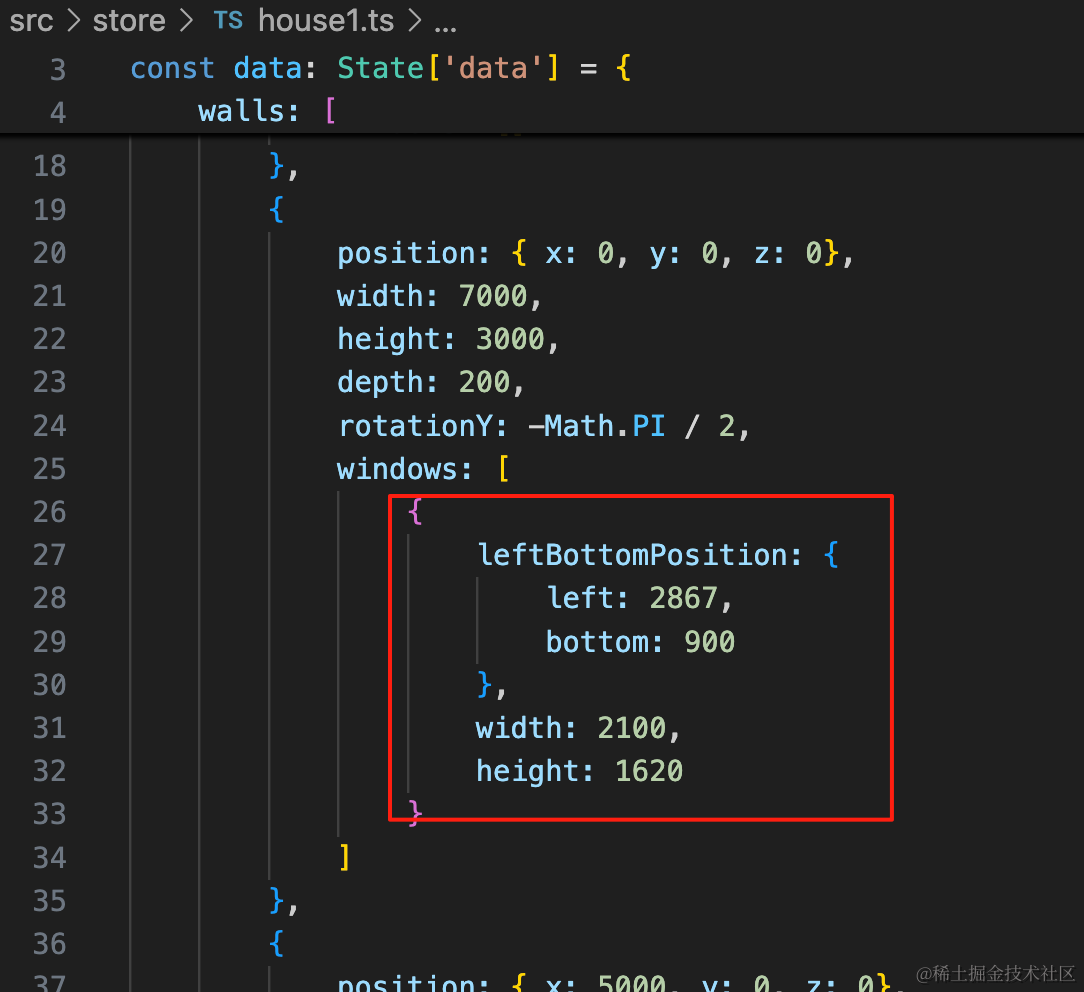
{
    leftBottomPosition: {
        left: 2867,
        bottom: 900
    },
    width: 2100,
    height: 1620
}
把数据填上,就可以画出窗户来:
另一边的门也是一样:
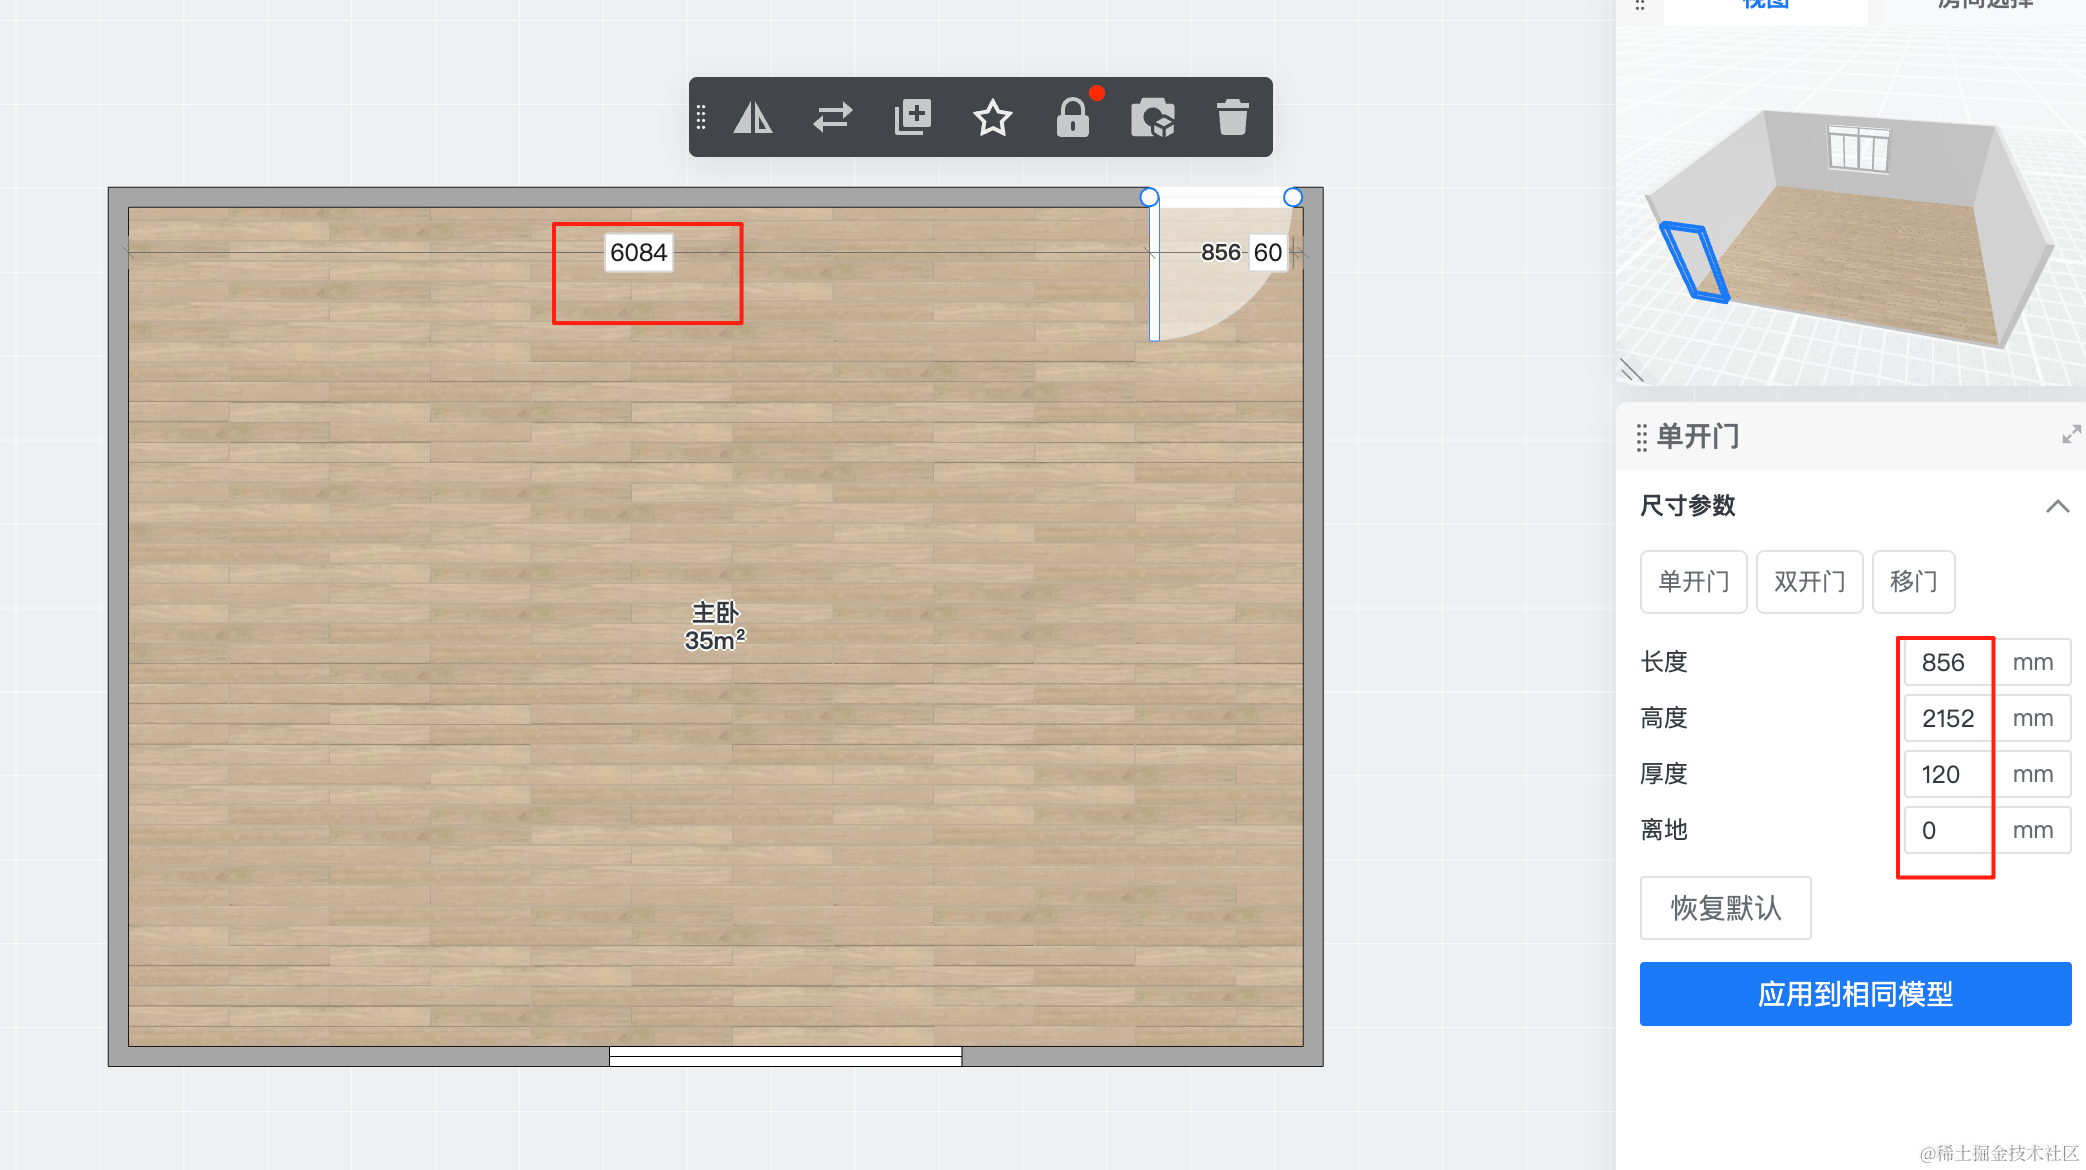
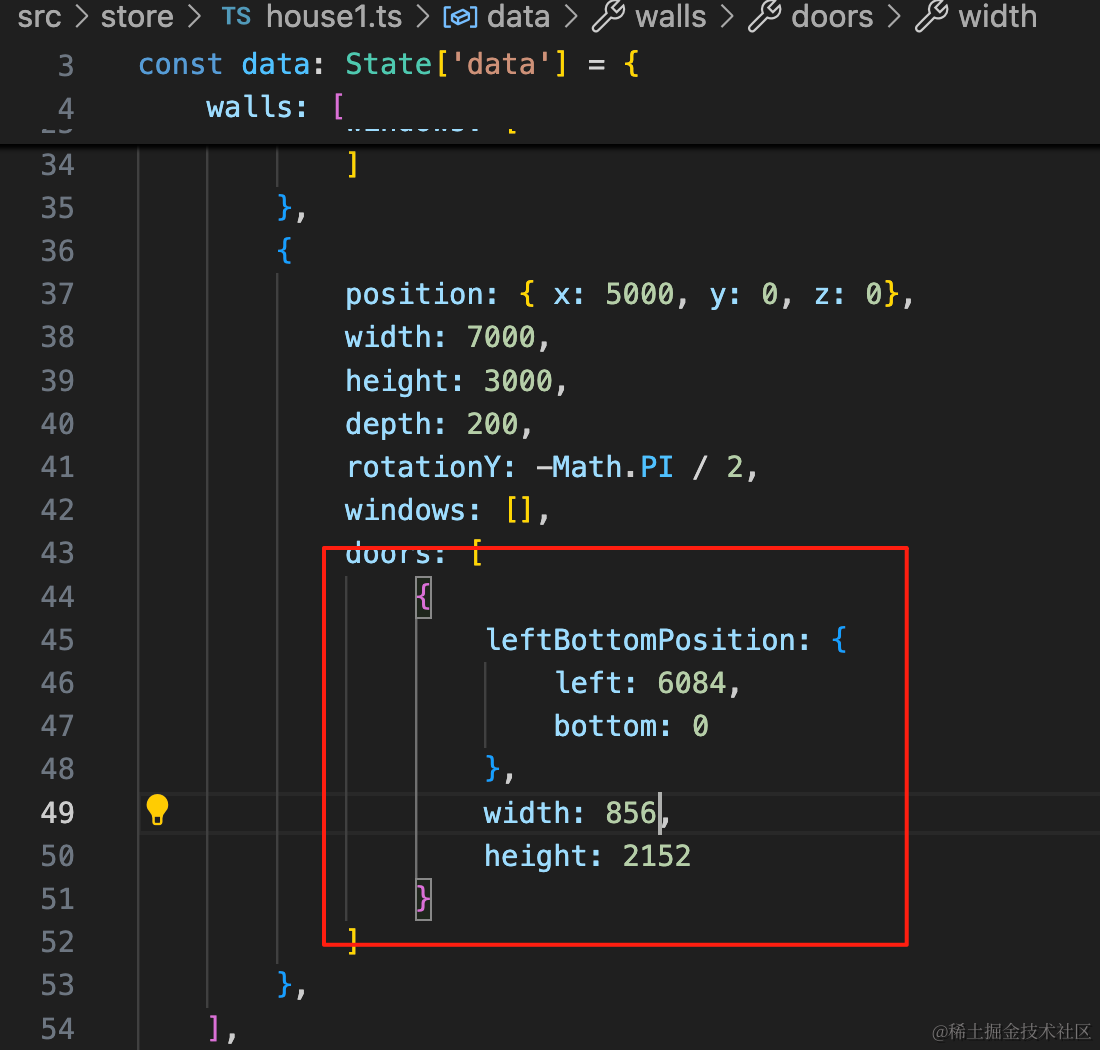
{
    leftBottomPosition: {
        left: 6084,
        bottom: 0
    },
    width: 856,
    height: 2152
}
数据都是从户型数据里来的,你可以对比下。
这样,门就画好了。
有个小问题:
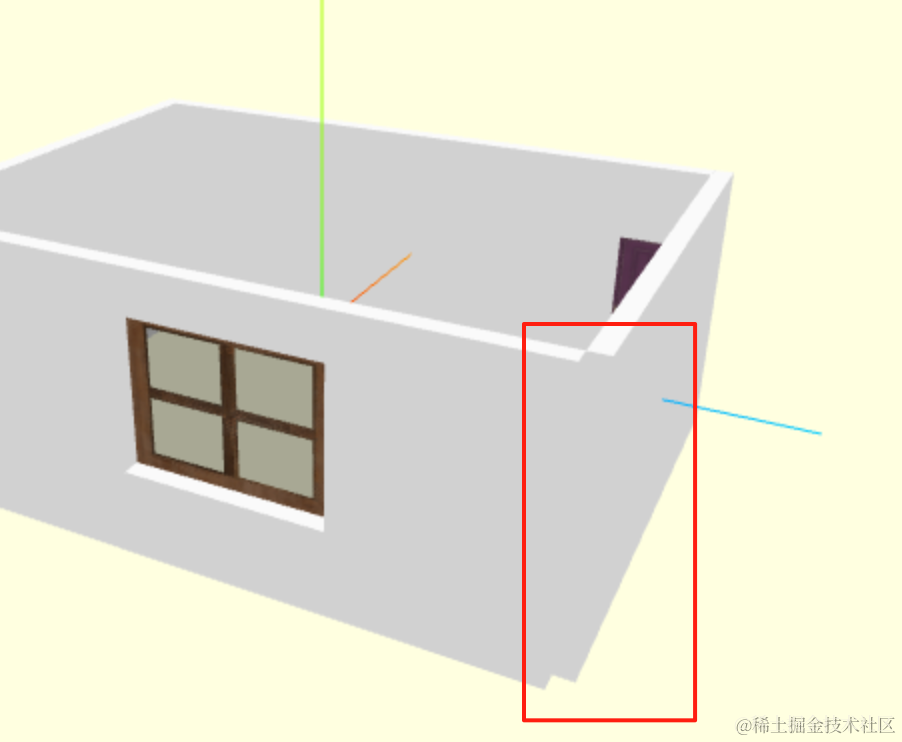
墙这里因为内部是 7 米,但还有个墙的厚度没加上,所以这两面墙宽度要多加 0.2 米:
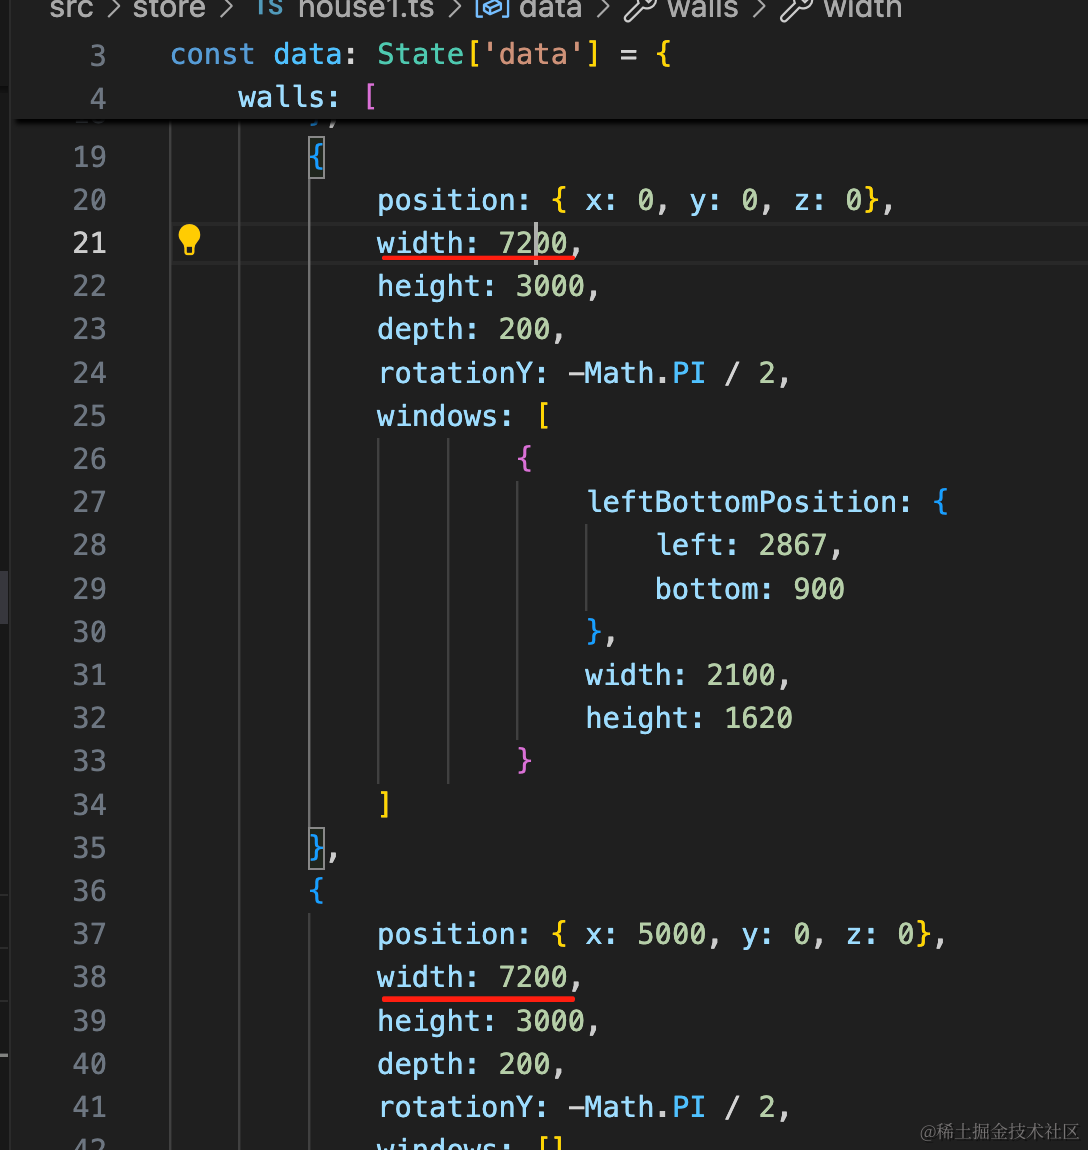
这样就好了:
加上地板、天花板:
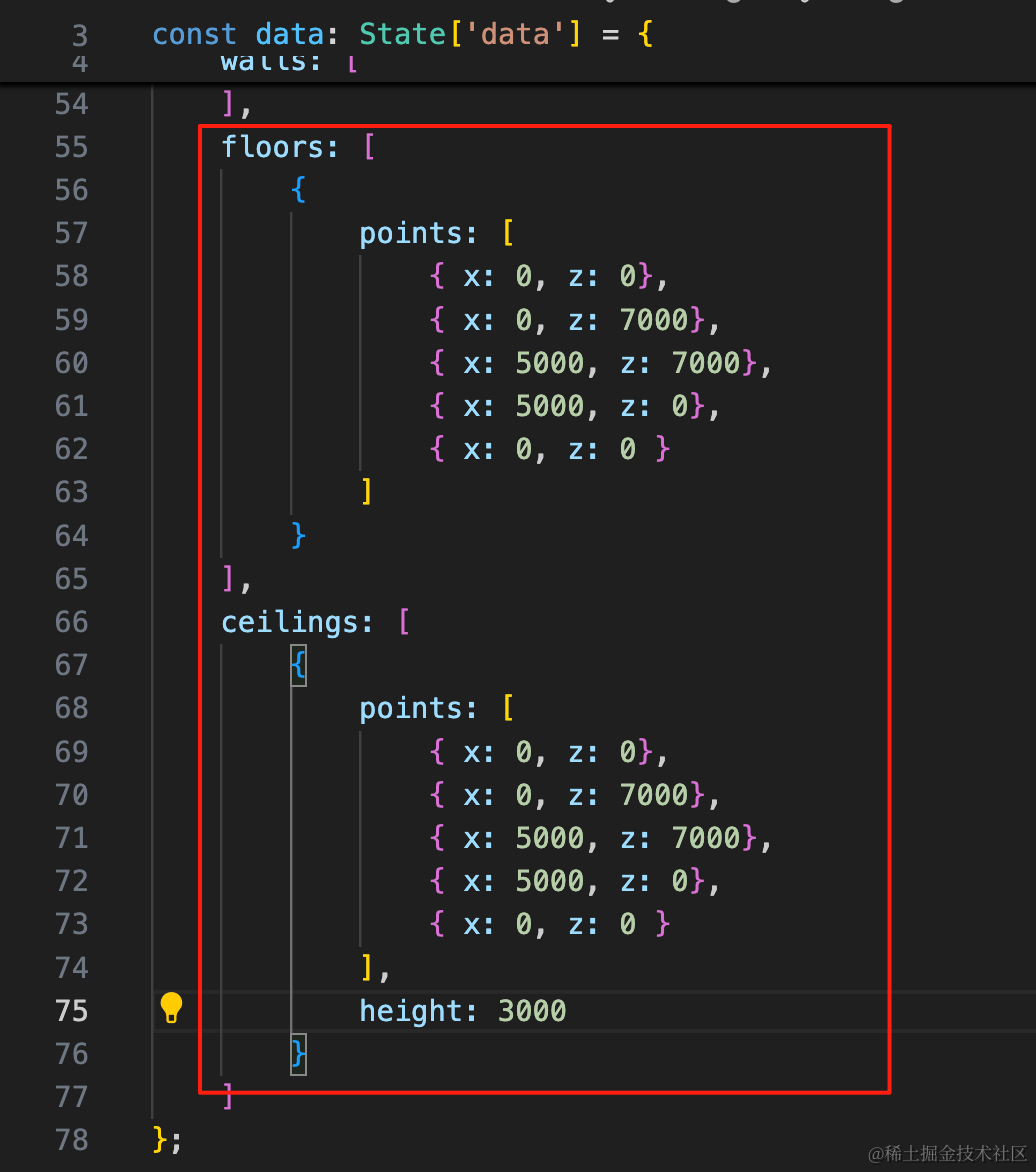
floors: [
    {
        points: [
            { x: 0, z: 0},
            { x: 0, z: 7000},
            { x: 5000, z: 7000},
            { x: 5000, z: 0},
            { x: 0, z: 0 }
        ]
    }
],
ceilings: [
    {
        points: [
            { x: 0, z: 0},
            { x: 0, z: 7000},
            { x: 5000, z: 7000},
            { x: 5000, z: 0},
            { x: 0, z: 0 }
        ],
        height: 3000
    }
]
和酷家乐的对比下:
一样的。
案例代码上传了小册仓库
总结
这节我们绘制了第一个户型。
从酷家乐里招了两个户型图,它的单位是毫米,我们根据数据绘制出了 4 面墙、一个窗、一个门,还有天花板和地板。
户型绘制出来效果和酷家乐的是一样的。
并且,我们还用 Box3 包围盒计算出了户型的中心位置,把它移到了坐标原点。
下节我们继续绘制几个户型。