上节跑通了注册流程,这节来做登录。

进入后端项目
首先加一下 user/dto/login-user.dto.ts
import { IsString, MaxLength, MinLength } from 'class-validator';

export class LoginUserDto {
  @IsString()
  @MinLength(3)
  @MaxLength(50)
  username: string;

  @IsString()
  @MinLength(1)
  @MaxLength(100)
  password: string;
}
dto 是接收参数的,传入这俩字段。
在 UserController 加一个接口:
import { Body, Controller, Post } from '@nestjs/common';
import { UserService } from './user.service';
import { LoginUserDto } from './dto/login-user.dto';
import { RegisterUserDto } from './dto/register-user.dto';

@Controller('user')
export class UserController {
  constructor(private readonly userService: UserService) {}

  @Post('register')
  register(@Body() registerUserDto: RegisterUserDto) {
    return this.userService.register(registerUserDto);
  }

  @Post('login')
  login(@Body() loginUserDto: LoginUserDto) {
    return this.userService.login(loginUserDto);
  }
}
然后安装 jwt 的包,用来做 jwt 的生成:
pnpm install @nestjs/jwt在 UserService 里加一下:
import {
ConflictException,
Injectable,
UnauthorizedException,
} from '@nestjs/common';
import { JwtService } from '@nestjs/jwt';
import { InjectRepository } from '@nestjs/typeorm';
import { Repository } from 'typeorm';
import * as bcrypt from 'bcrypt';
import { LoginUserDto } from './dto/login-user.dto';
import { RegisterUserDto } from './dto/register-user.dto';
import { User } from './entities/user.entity';
@Injectable()
export class UserService {
constructor(
@InjectRepository(User)
private readonly userRepository: Repository<User>,
private readonly jwtService: JwtService,
) {}
async register(dto: RegisterUserDto) {
const existing = await this.userRepository.findOne({
where: { username: dto.username },
});
if (existing) {
throw new ConflictException('用户名已被占用');
}
const passwordHash = await bcrypt.hash(dto.password, 10);
const user = this.userRepository.create({
username: dto.username,
password: passwordHash,
});
await this.userRepository.save(user);
return {
id: user.id,
username: user.username,
createdAt: user.createdAt,
};
}
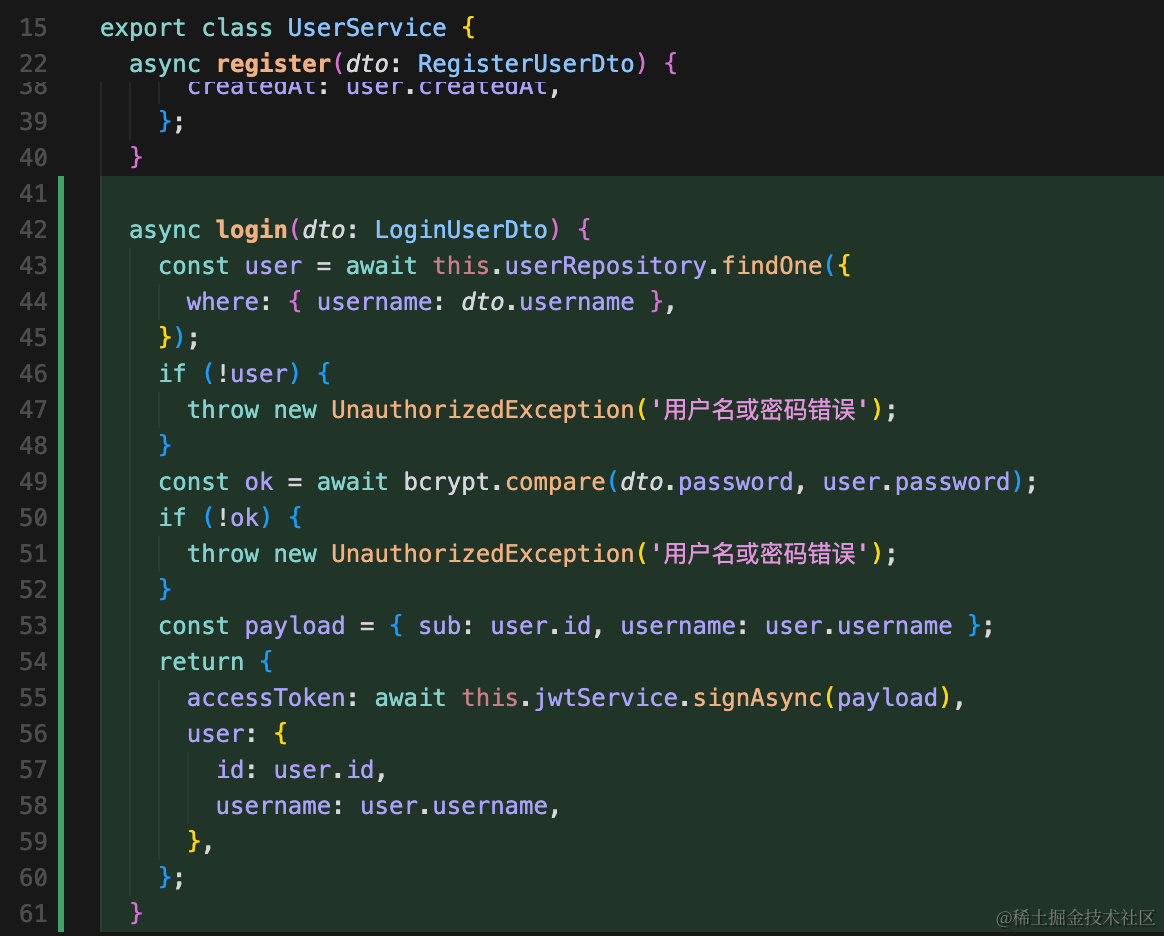
async login(dto: LoginUserDto) {
const user = await this.userRepository.findOne({
where: { username: dto.username },
});
if (!user) {
throw new UnauthorizedException('用户名或密码错误');
}
const ok = await bcrypt.compare(dto.password, user.password);
if (!ok) {
throw new UnauthorizedException('用户名或密码错误');
}
const payload = { sub: user.id, username: user.username };
return {
accessToken: await this.jwtService.signAsync(payload),
user: {
id: user.id,
username: user.username,
},
};
}
}还要在 UserModule 引入 JwtModule
import { Module } from '@nestjs/common';
import { JwtModule } from '@nestjs/jwt';
import { TypeOrmModule } from '@nestjs/typeorm';
import { UserService } from './user.service';
import { UserController } from './user.controller';
import { User } from './entities/user.entity';

@Module({
  imports: [
    TypeOrmModule.forFeature([User]),
    JwtModule.register({
      secret: process.env.JWT_SECRET ?? 'open-world-dev-secret',
      signOptions: { expiresIn: '7d' },
    }),
  ],
  controllers: [UserController],
  providers: [UserService],
})
export class UserModule {}
跑起来测试下:
npm run start:dev用这个 curl
curl -s -X POST http://localhost:3000/user/login \
-H "Content-Type: application/json" \
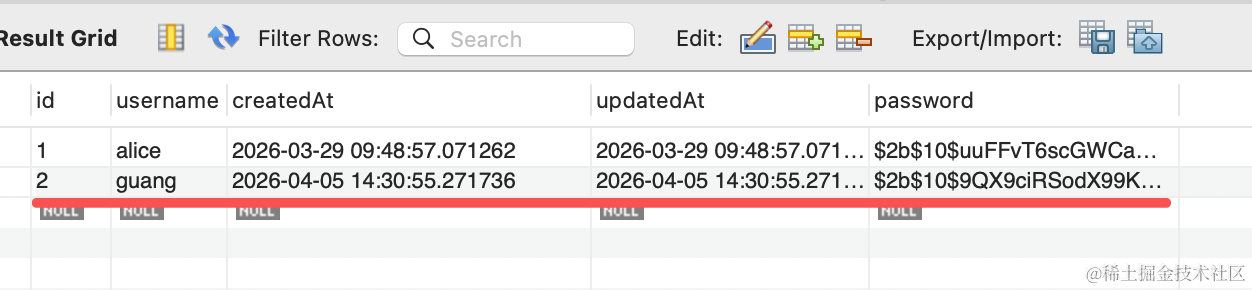
-d '{"username":"guang","password":"11111111"}'这里替换成你在界面注册的用户信息


没啥问题,返回了 jwt 就代表登录成功了。
总结
这节我们实现了登录接口。
username 和 password 校验成功后,返回 jwt
之后前端携带 jwt 就可以访问需要登录的信息了。