上节实现了颜色切换:
这节我们加上滚动控制颜色切换。
我们在 App.jsx 加一下 html 部分:
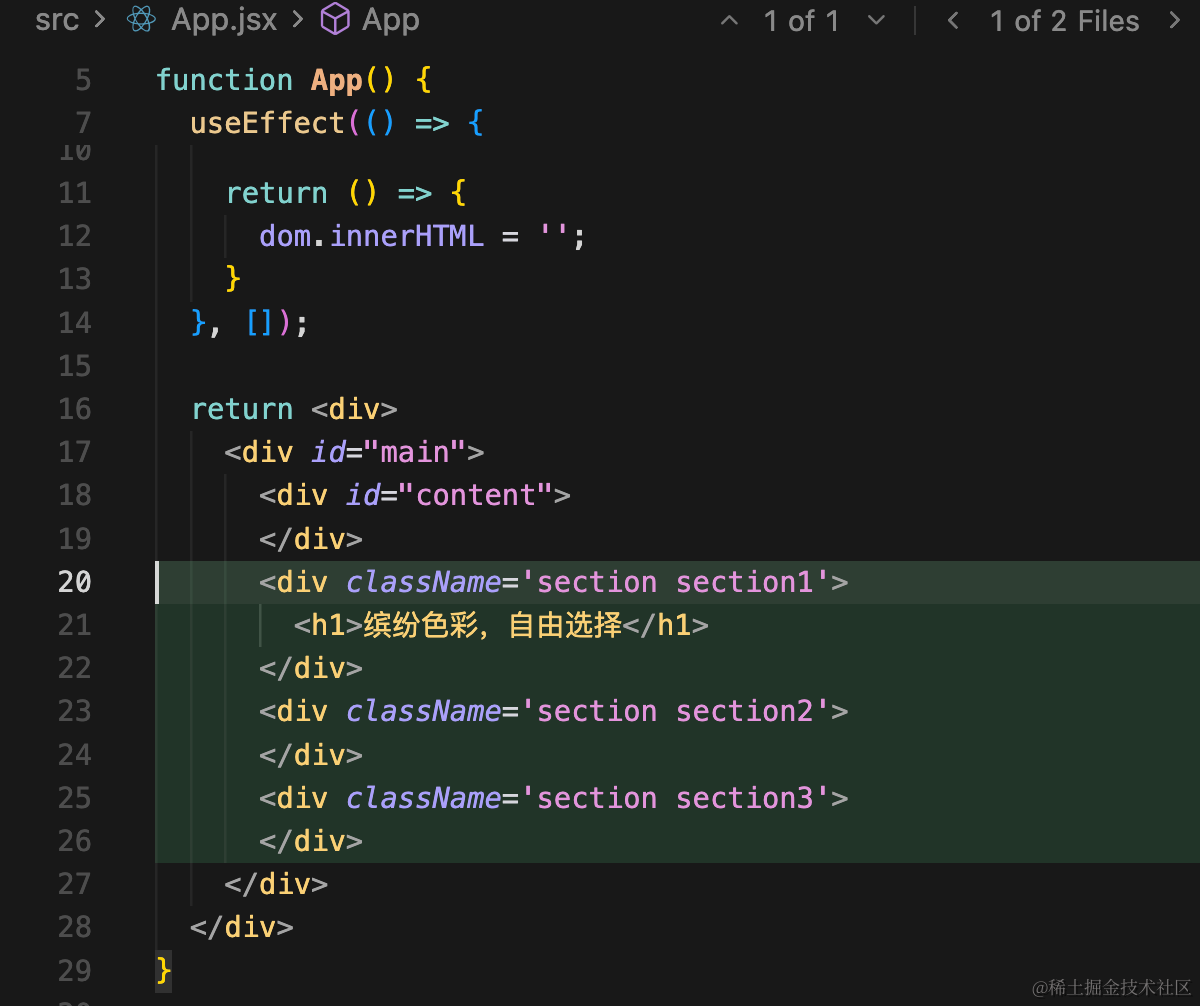
<div className='section section1'>
    <h1>缤纷色彩,自由选择</h1>
</div>
<div className='section section2'>
</div>
<div className='section section3'>
</div>
加一下样式,改下 App.css:
* {
  margin: 0;
}

#content {
  position: fixed;
  top: 0;
  left: 0;
}

.section {
  height: 100vh;
  text-align: center;
  transition: background-color 0.5s ease;
}

.section h1 {
  font-size: 50px;
  margin-bottom: 0px;
  font-weight: 300;
}
设置下 3D 场景的背景透明:
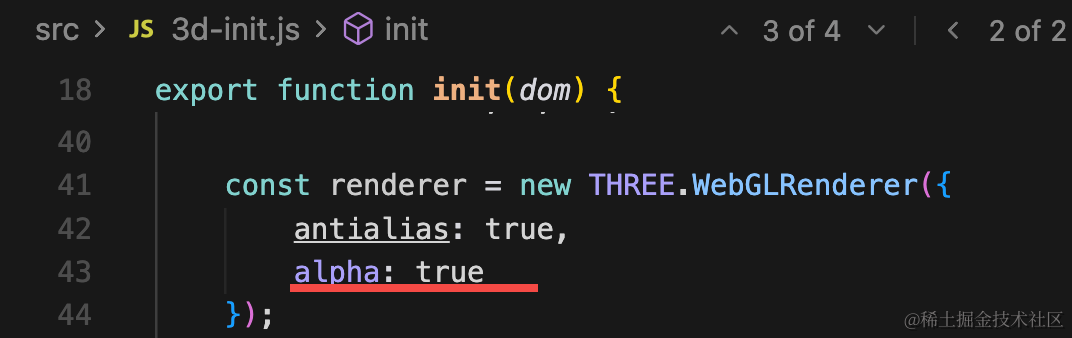

这样也就不需要设置透明度了。
看下效果:
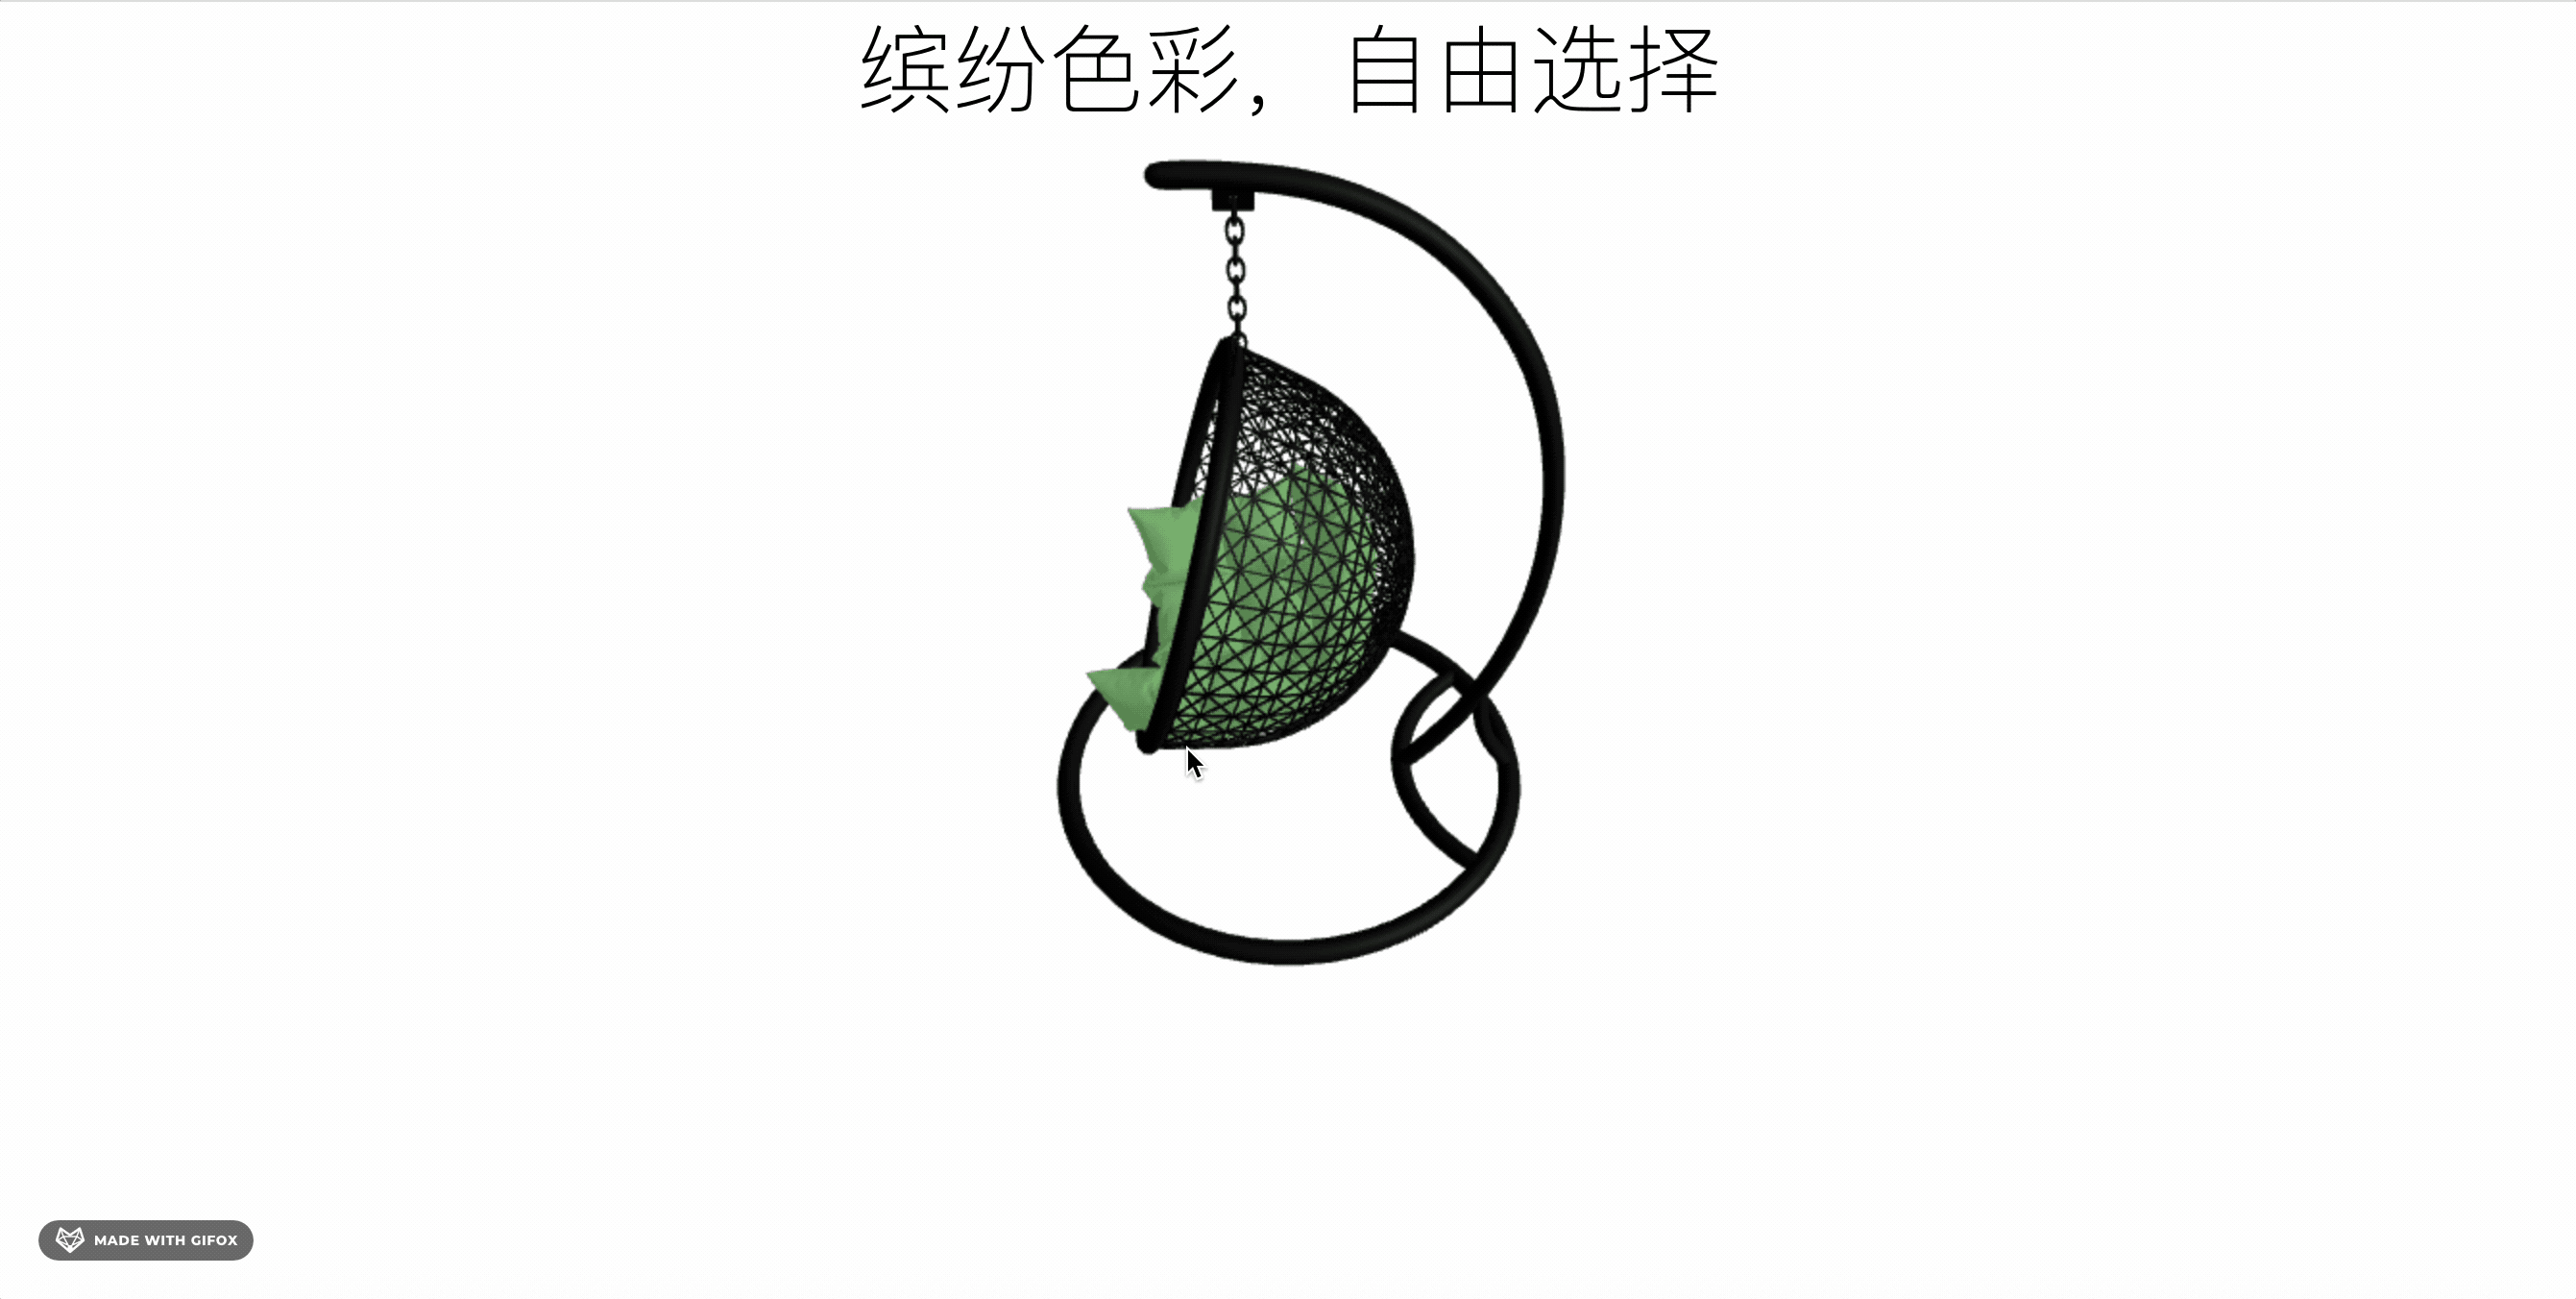
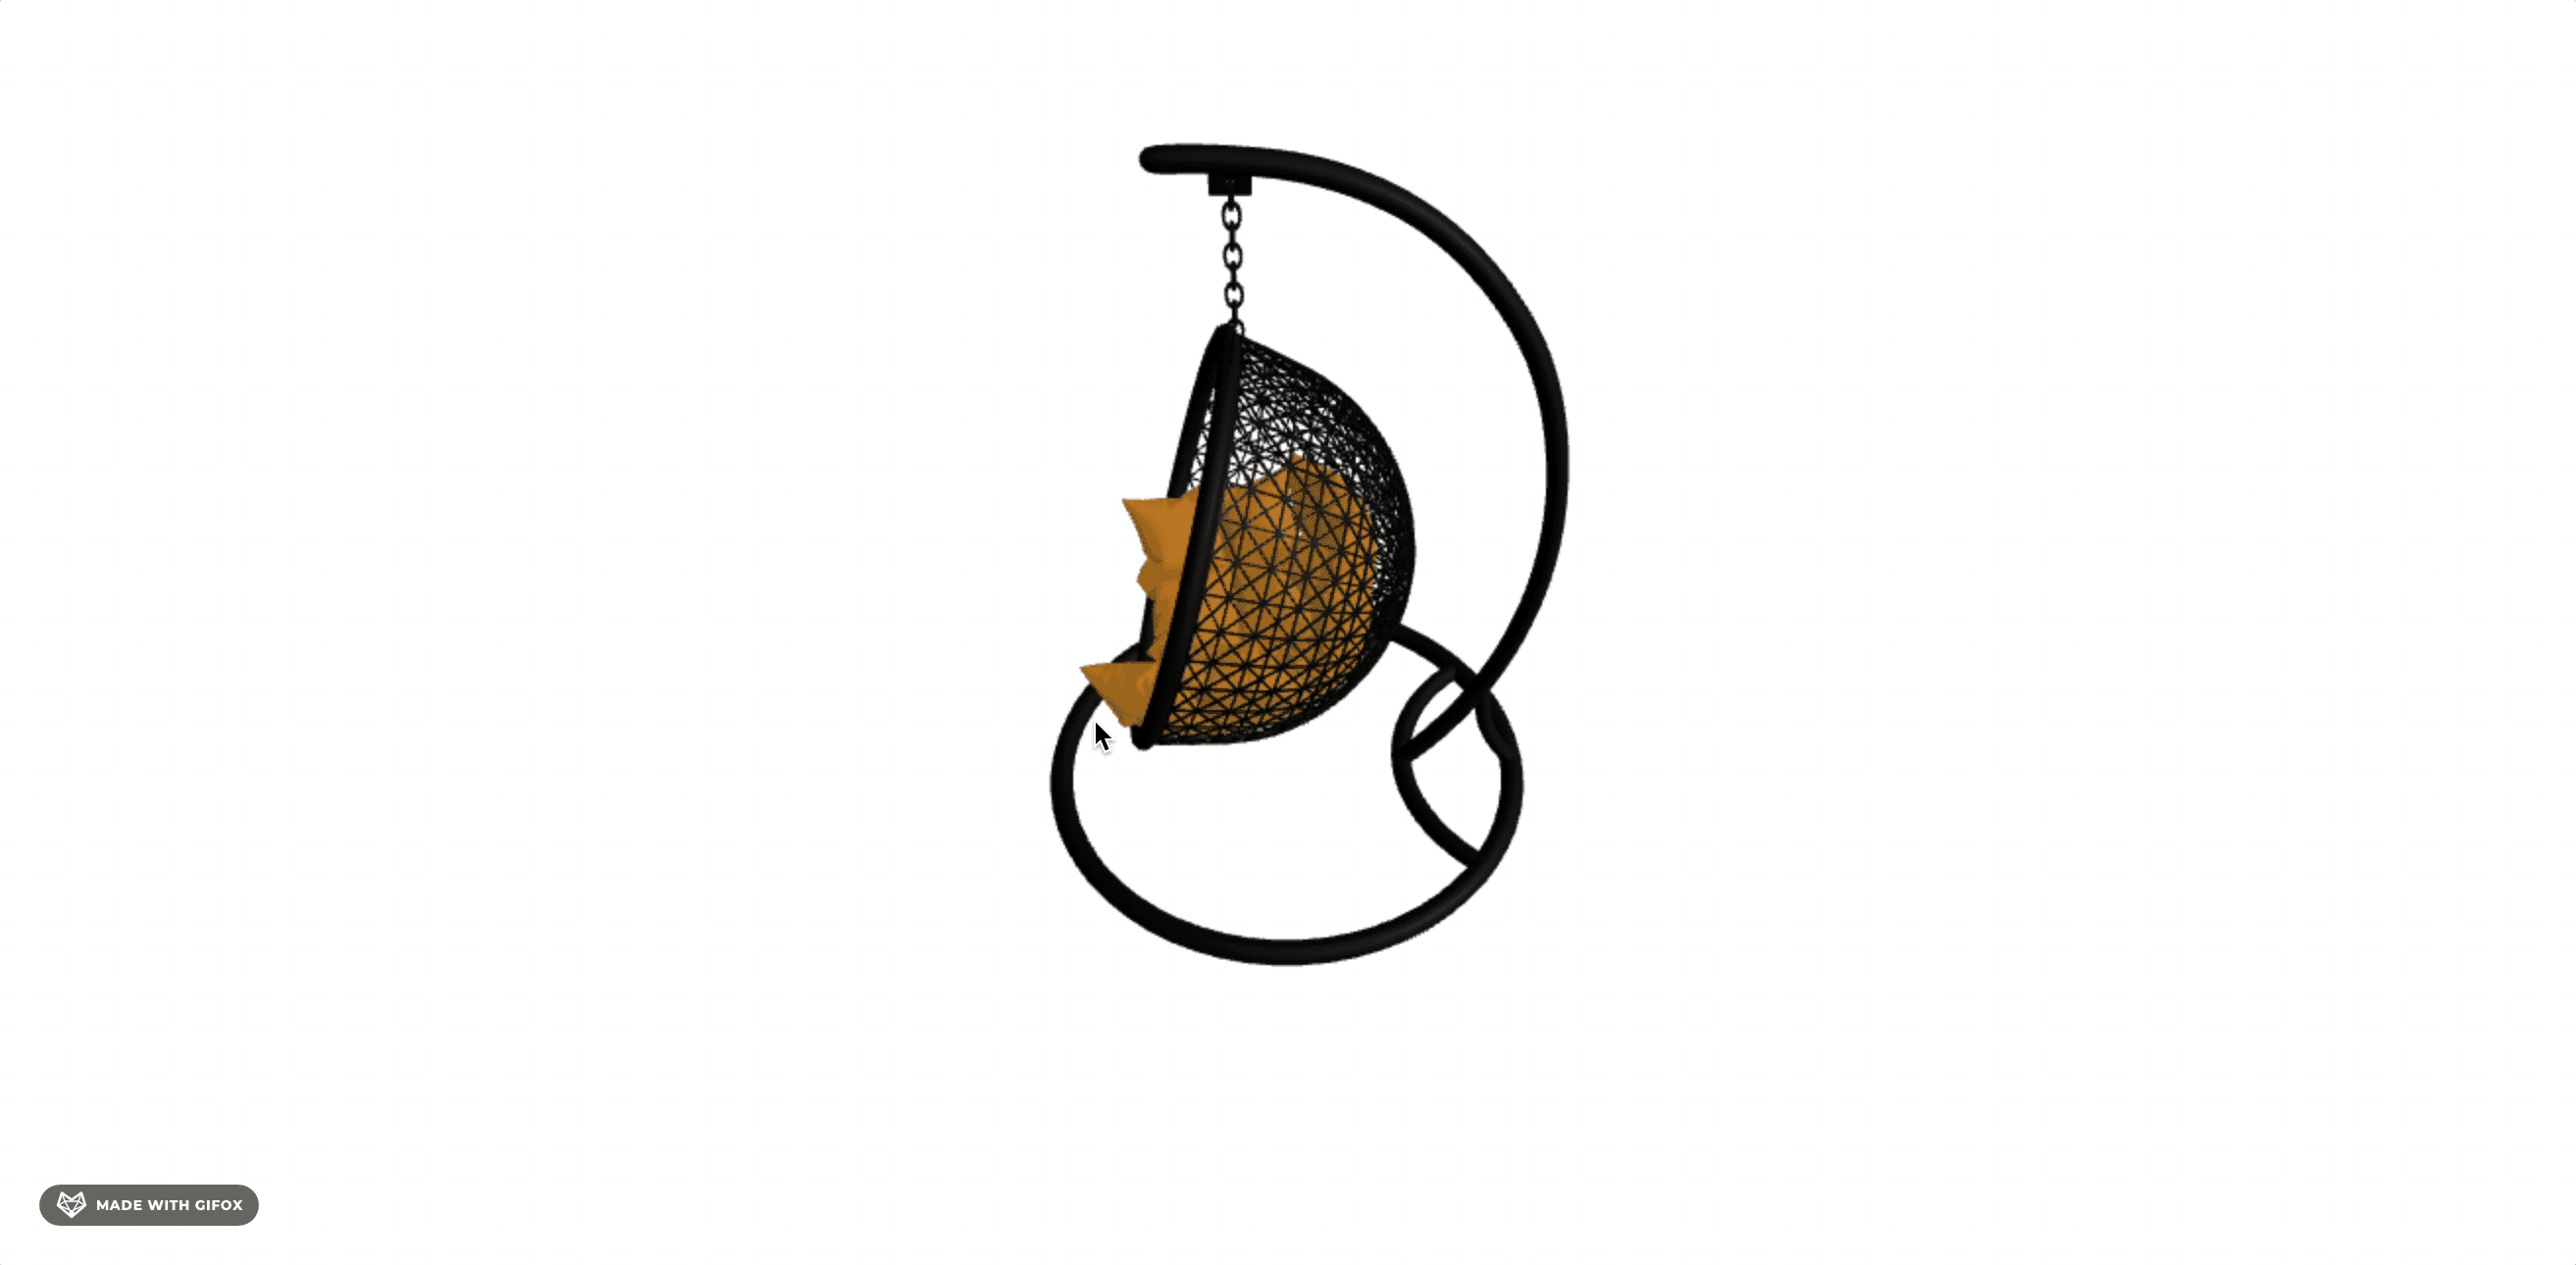
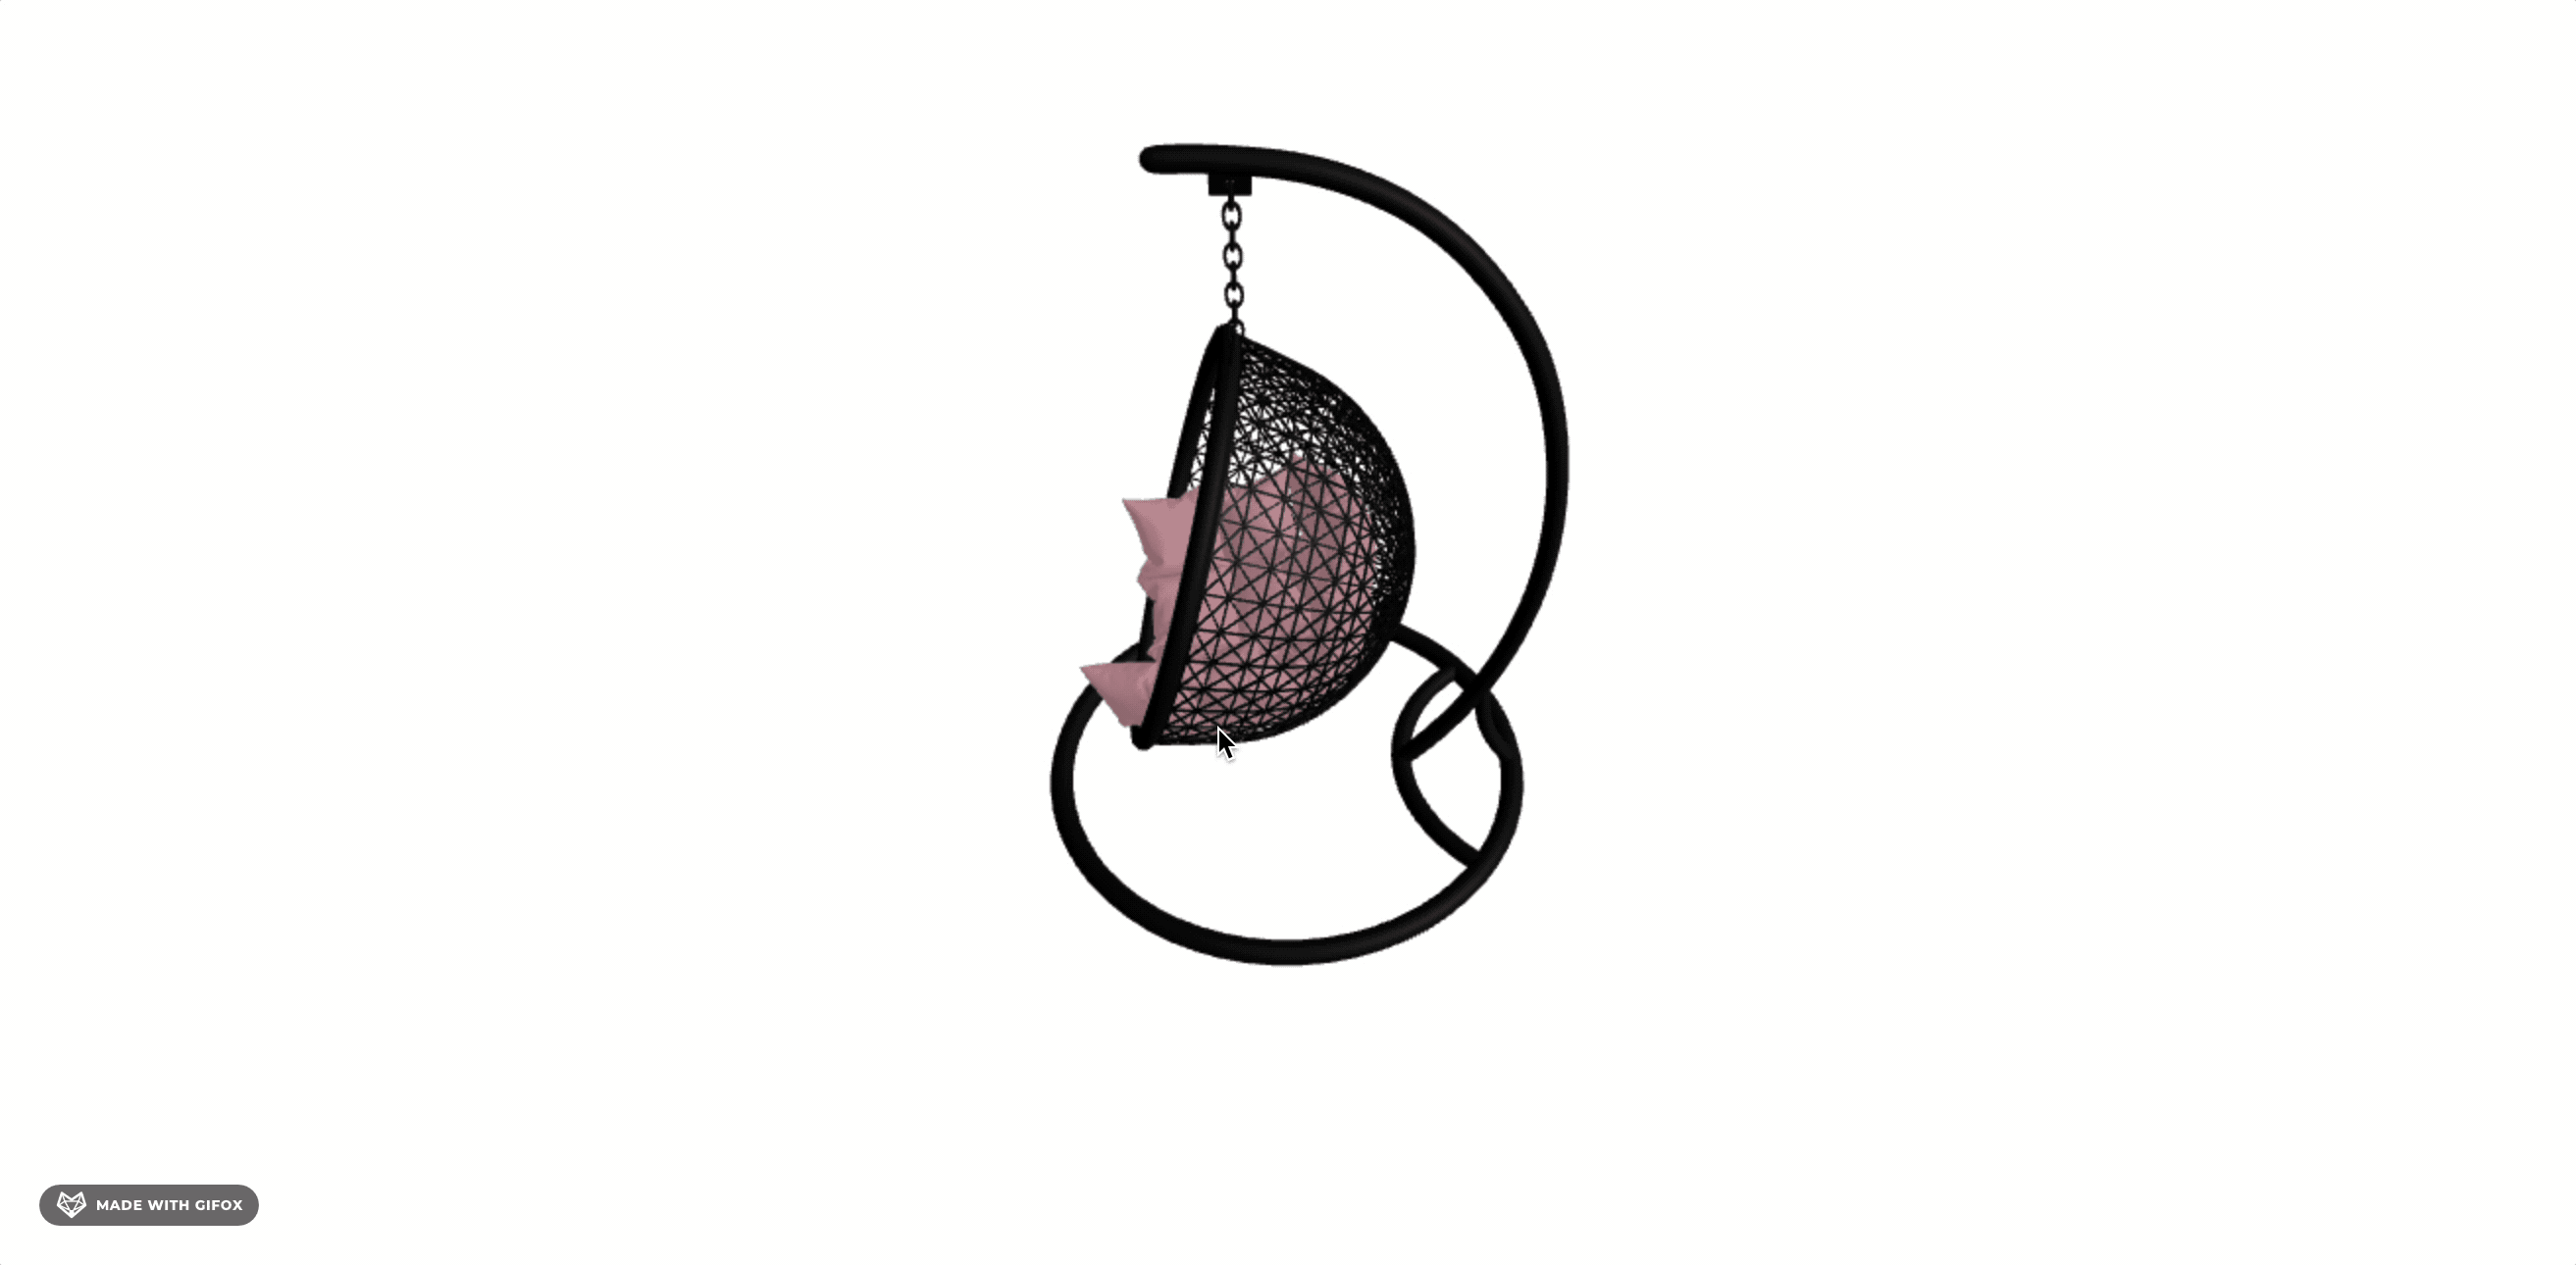
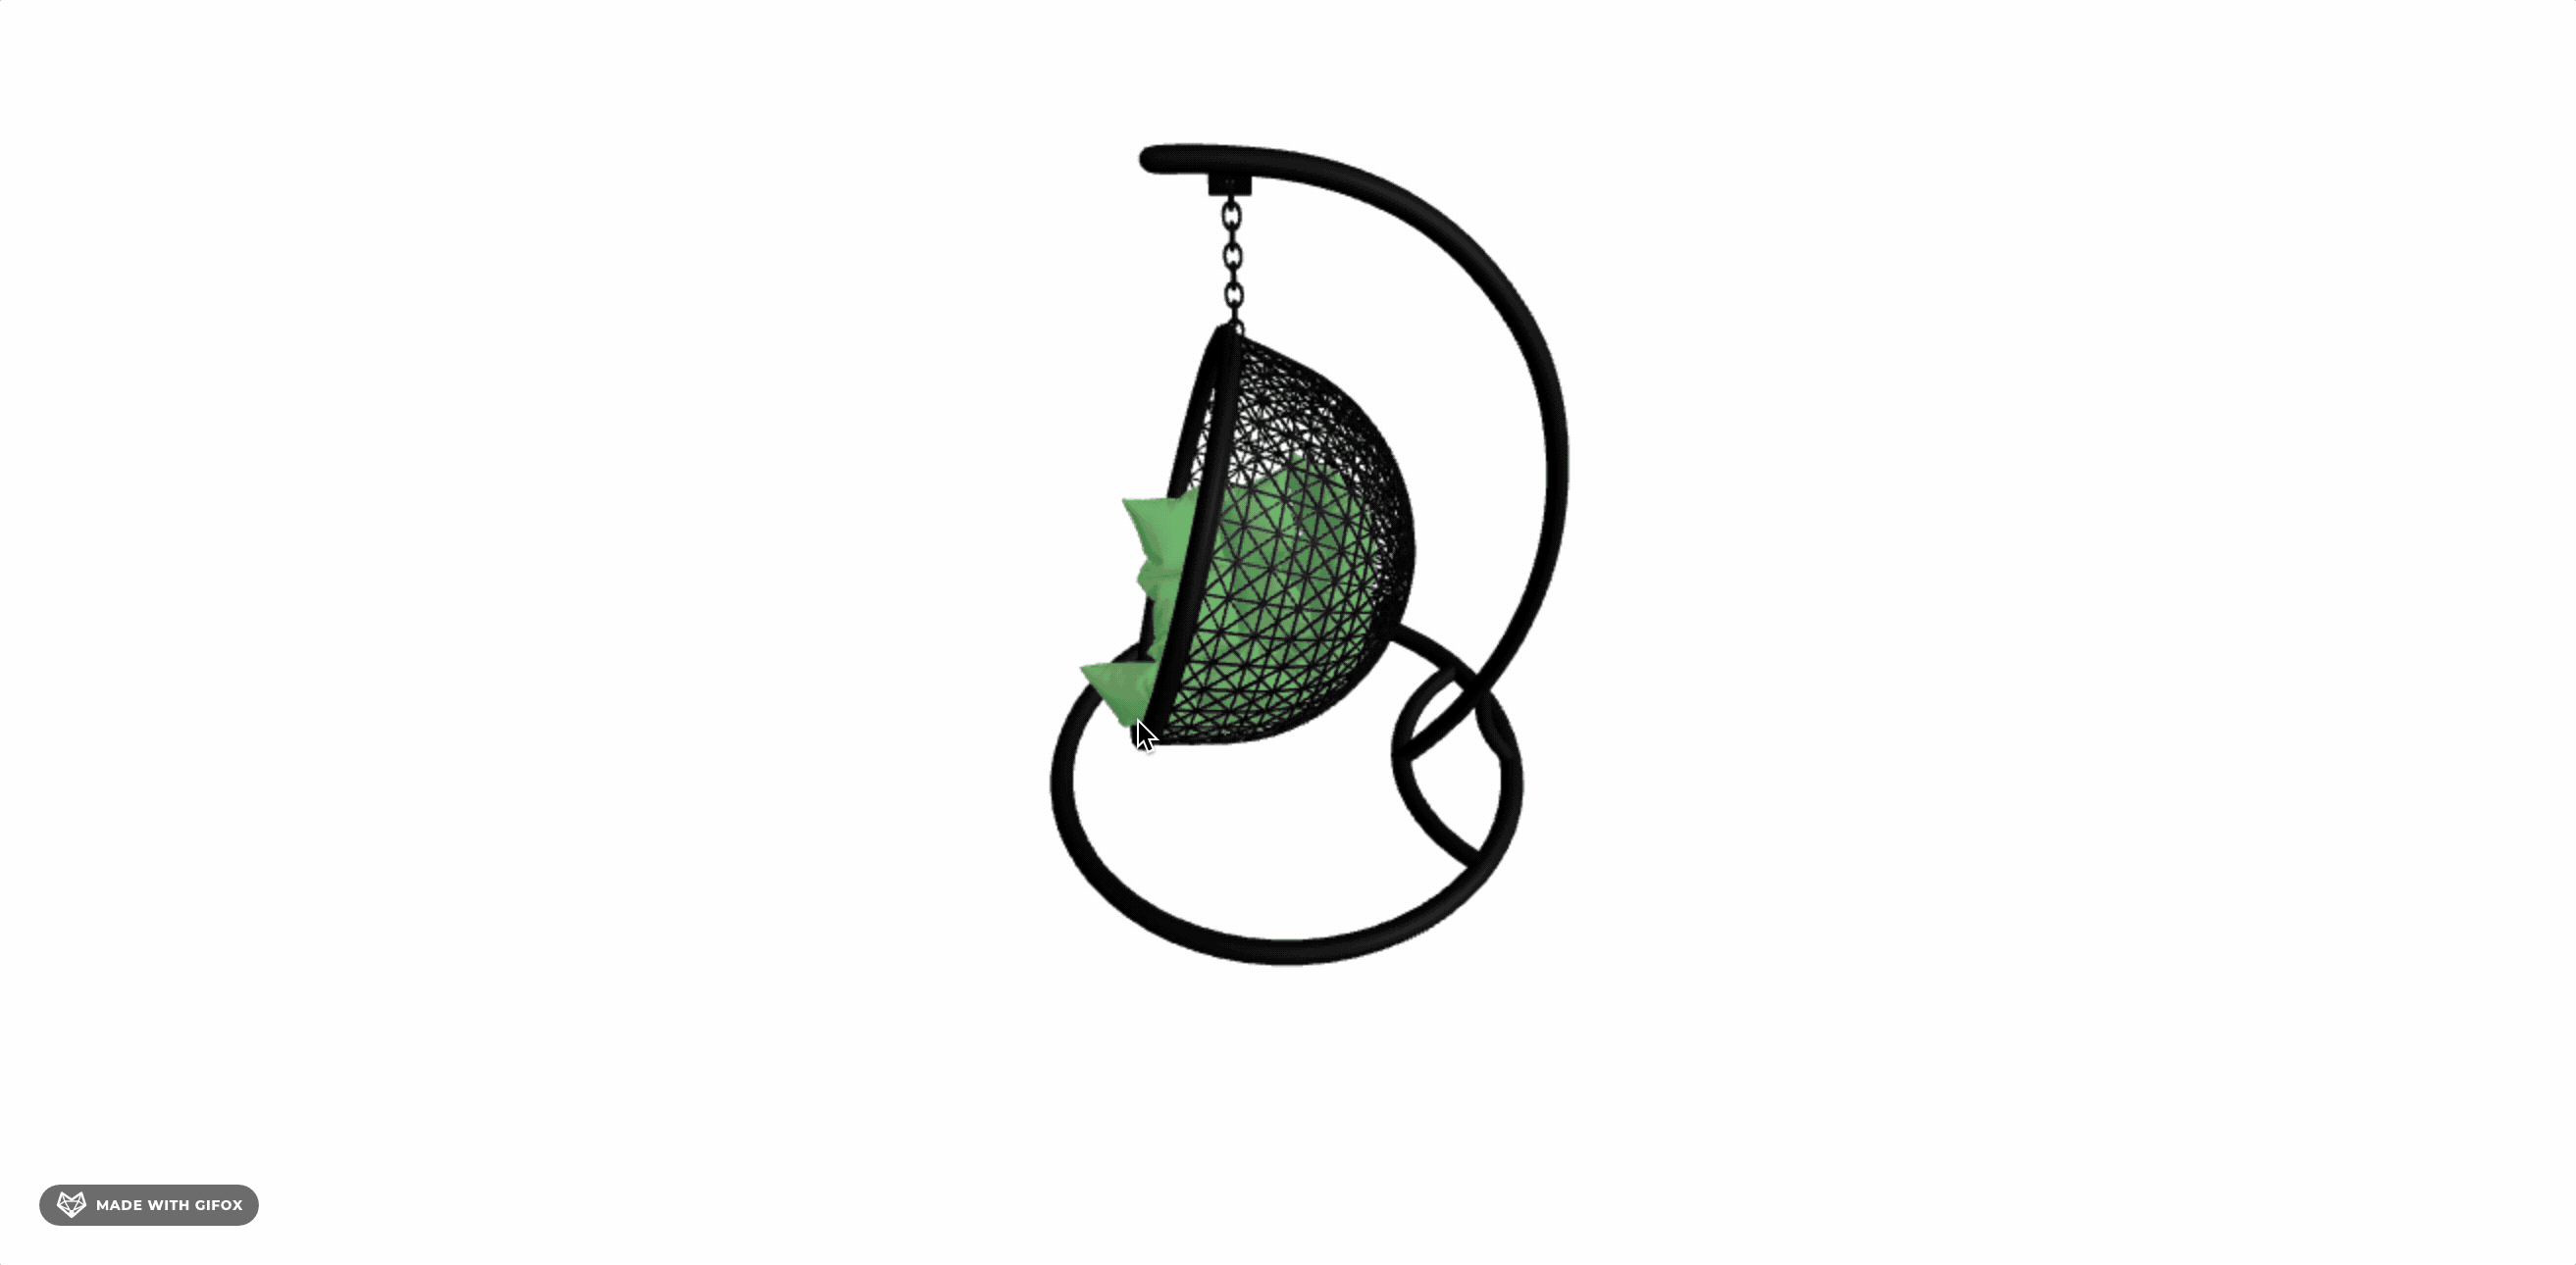
然后我们再做一下滚动的时候切换坐垫颜色。
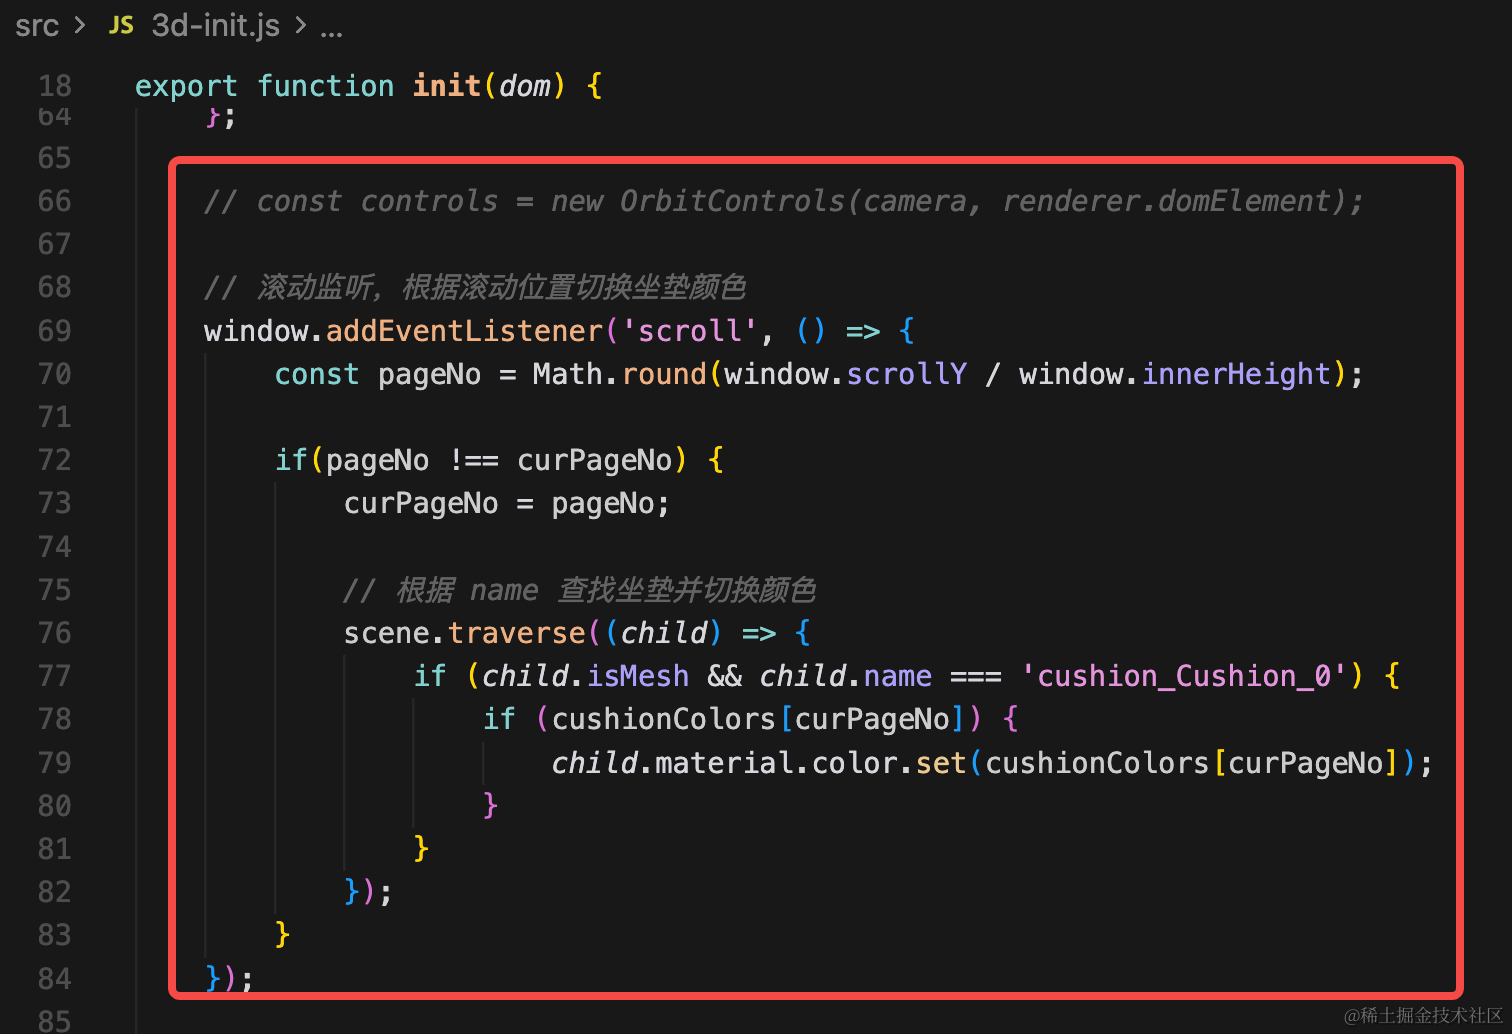
去掉 OrbitControls,滚动的时候修改坐垫颜色。
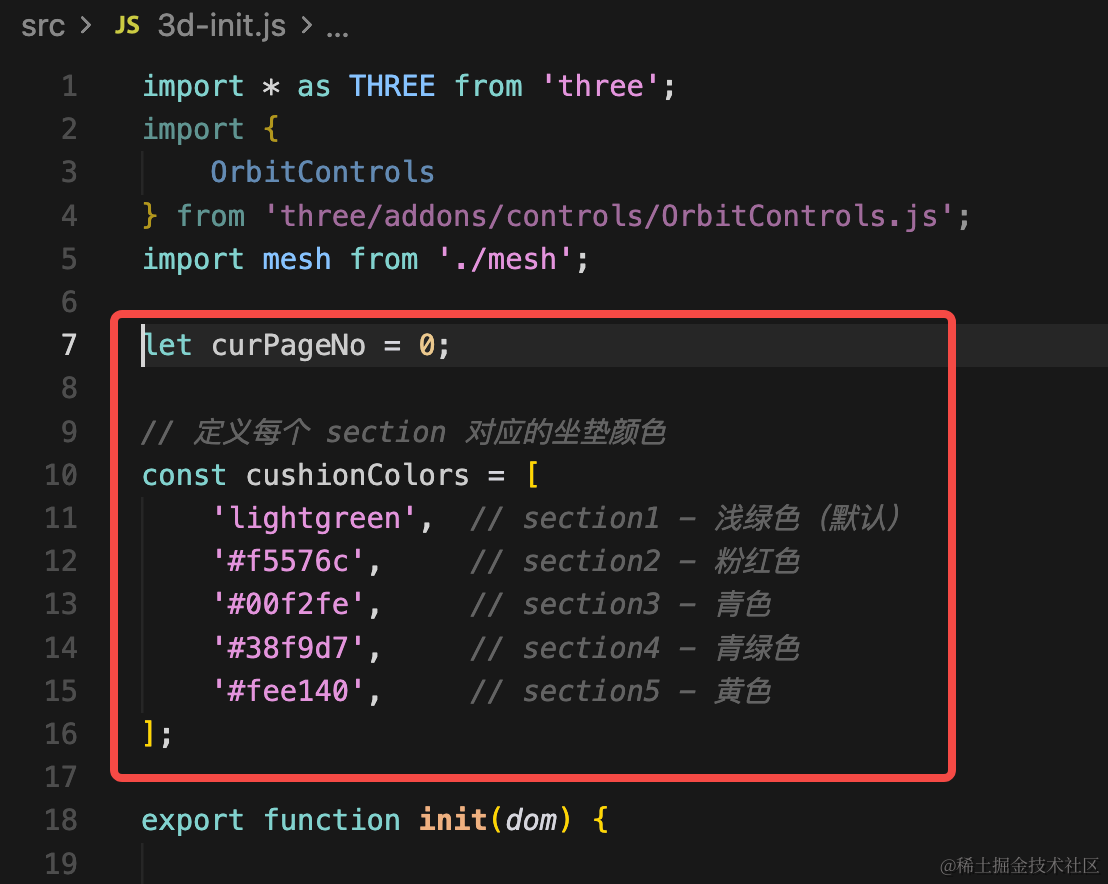
let curPageNo = 0;

// 定义每个 section 对应的坐垫颜色
const cushionColors = [
    'lightgreen',  // section1 - 浅绿色(默认)
    '#f5576c',     // section2 - 粉红色
    '#00f2fe',     // section3 - 青色
    '#38f9d7',     // section4 - 青绿色
    '#fee140',     // section5 - 黄色
];
// const controls = new OrbitControls(camera, renderer.domElement);
// 滚动监听,根据滚动位置切换坐垫颜色
window.addEventListener('scroll', () => {
const pageNo = Math.round(window.scrollY / window.innerHeight);
if(pageNo !== curPageNo) {
curPageNo = pageNo;
// 根据 name 查找坐垫并切换颜色
scene.traverse((child) => {
if (child.isMesh && child.name === 'cushion_Cushion_0') {
if (cushionColors[curPageNo]) {
child.material.color.set(cushionColors[curPageNo]);
}
}
});
}
});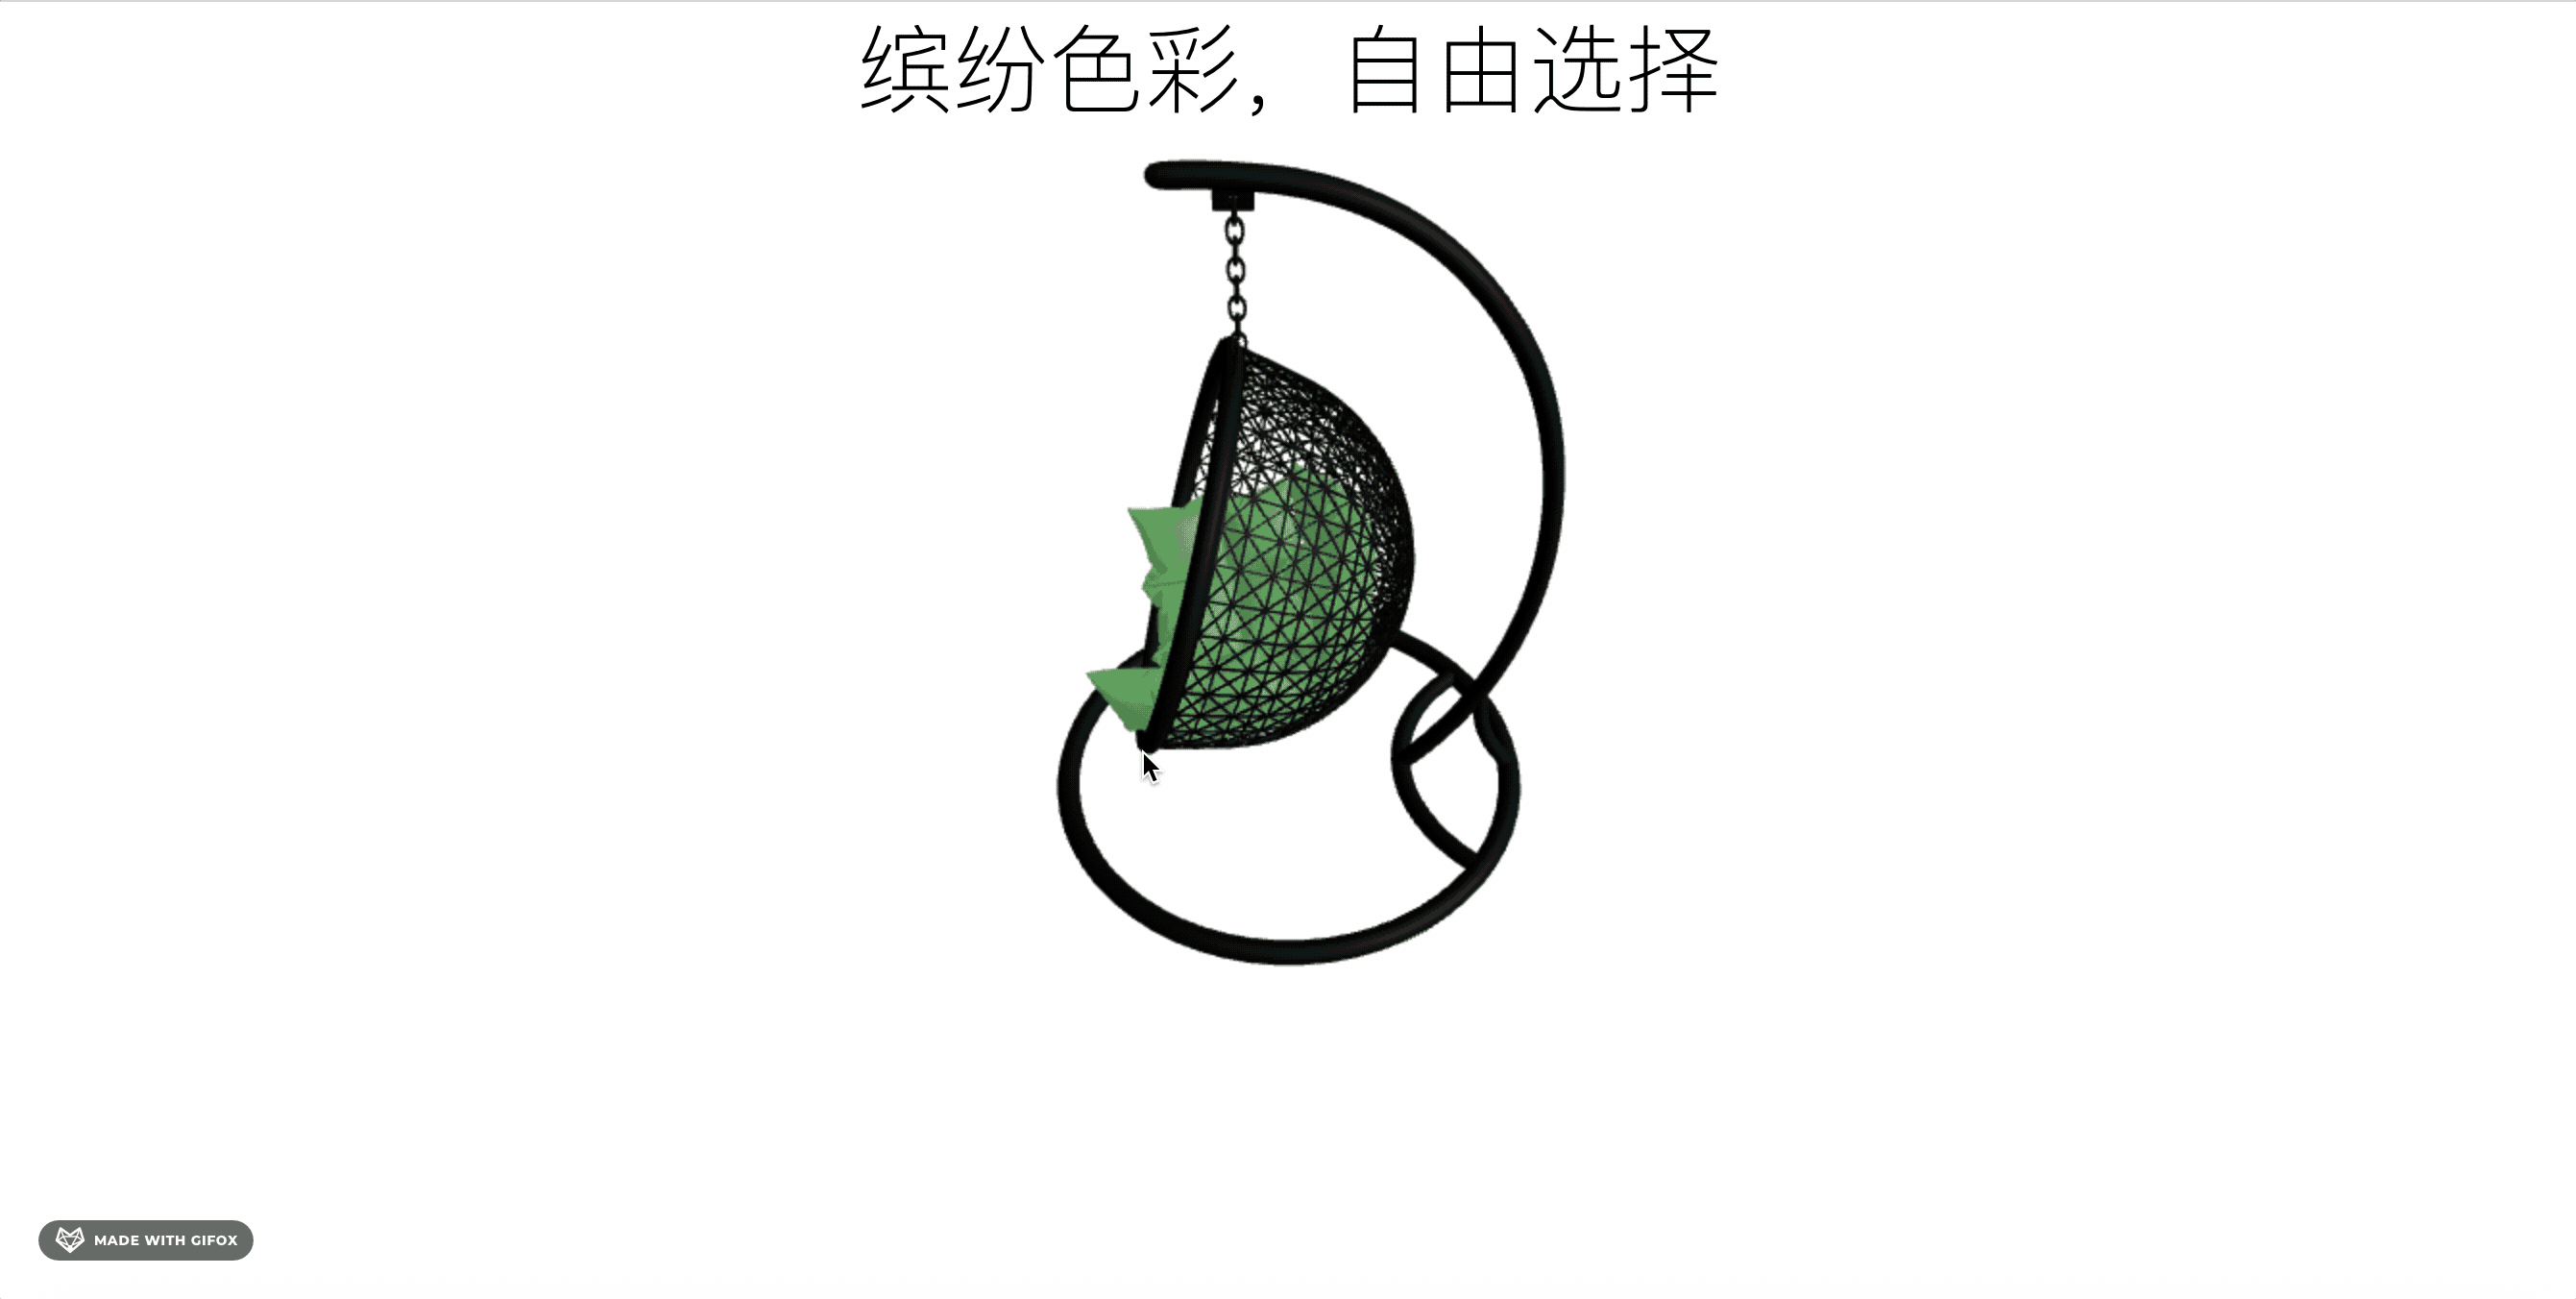
这样,颜色切换就完成了。
看下网上这个:
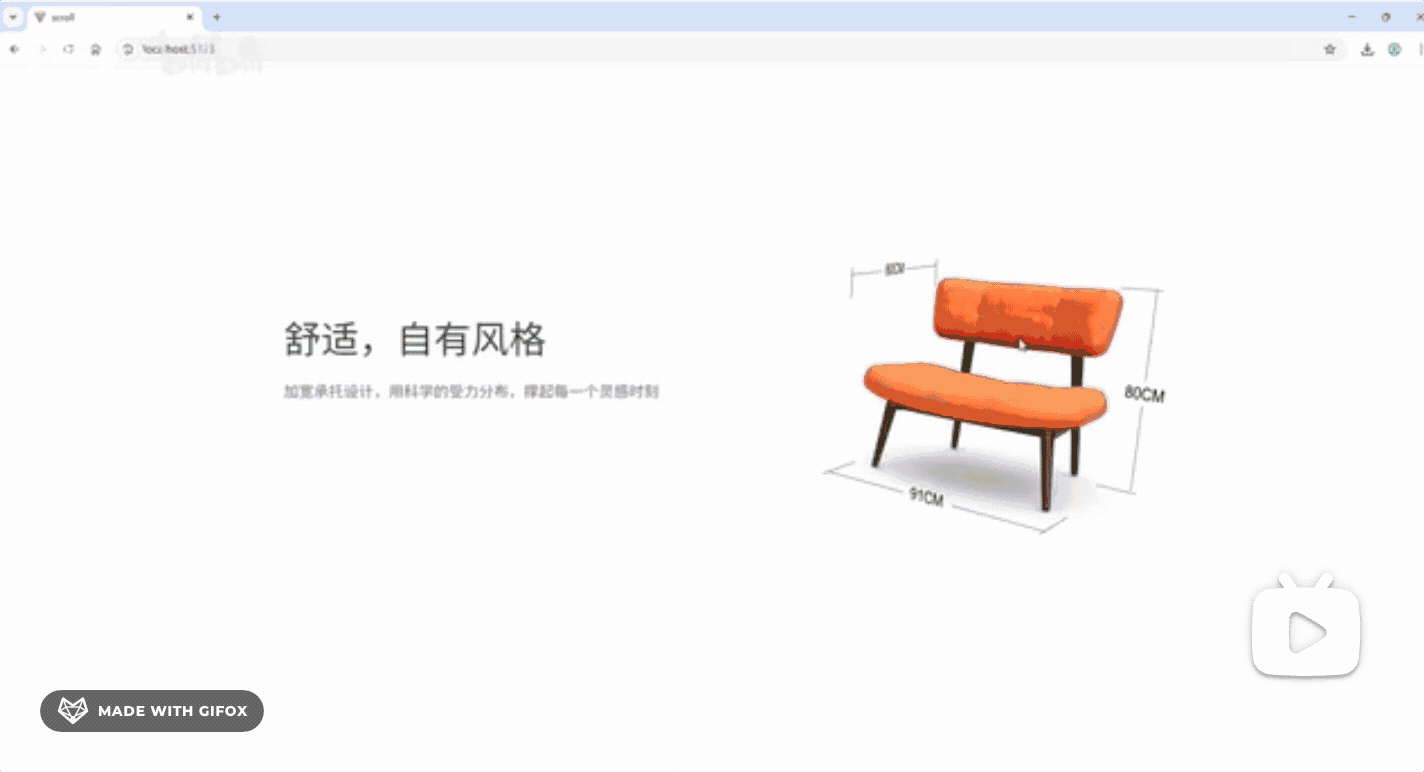
切换颜色这部分是一样的。
案例代码上传了小册仓库
总结
这节我们把滚动控制颜色切换的功能完成了。
下节继续来做更多的产品展示的交互。