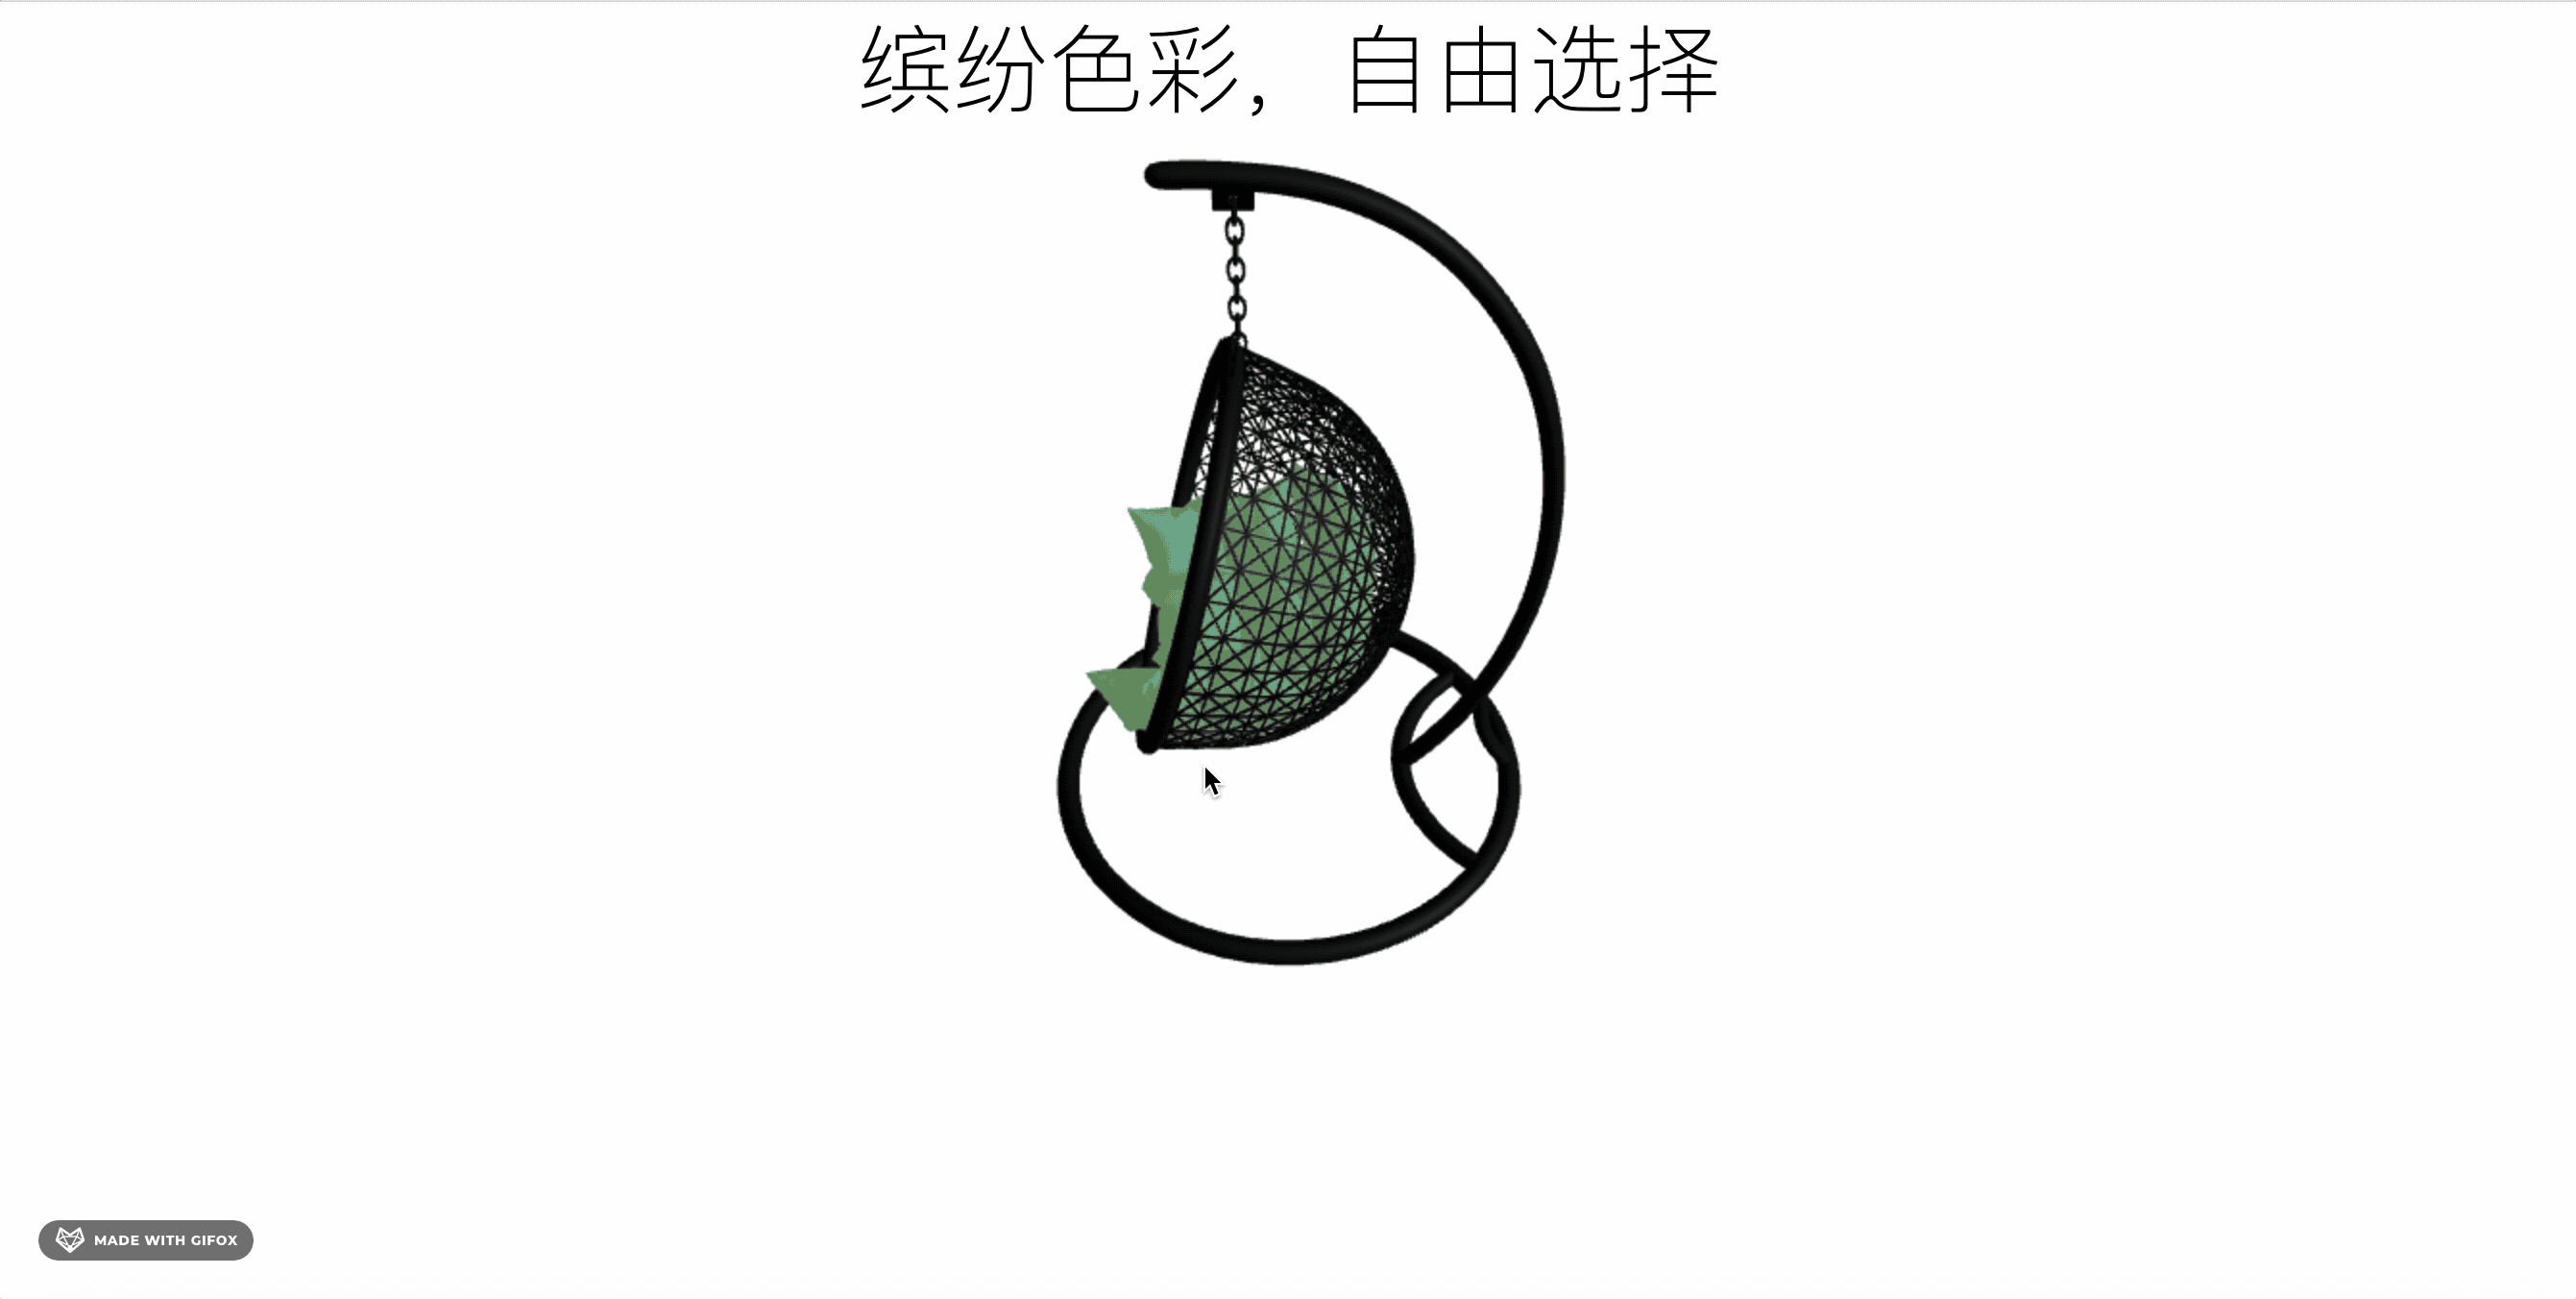
上节把颜色切换完成了:
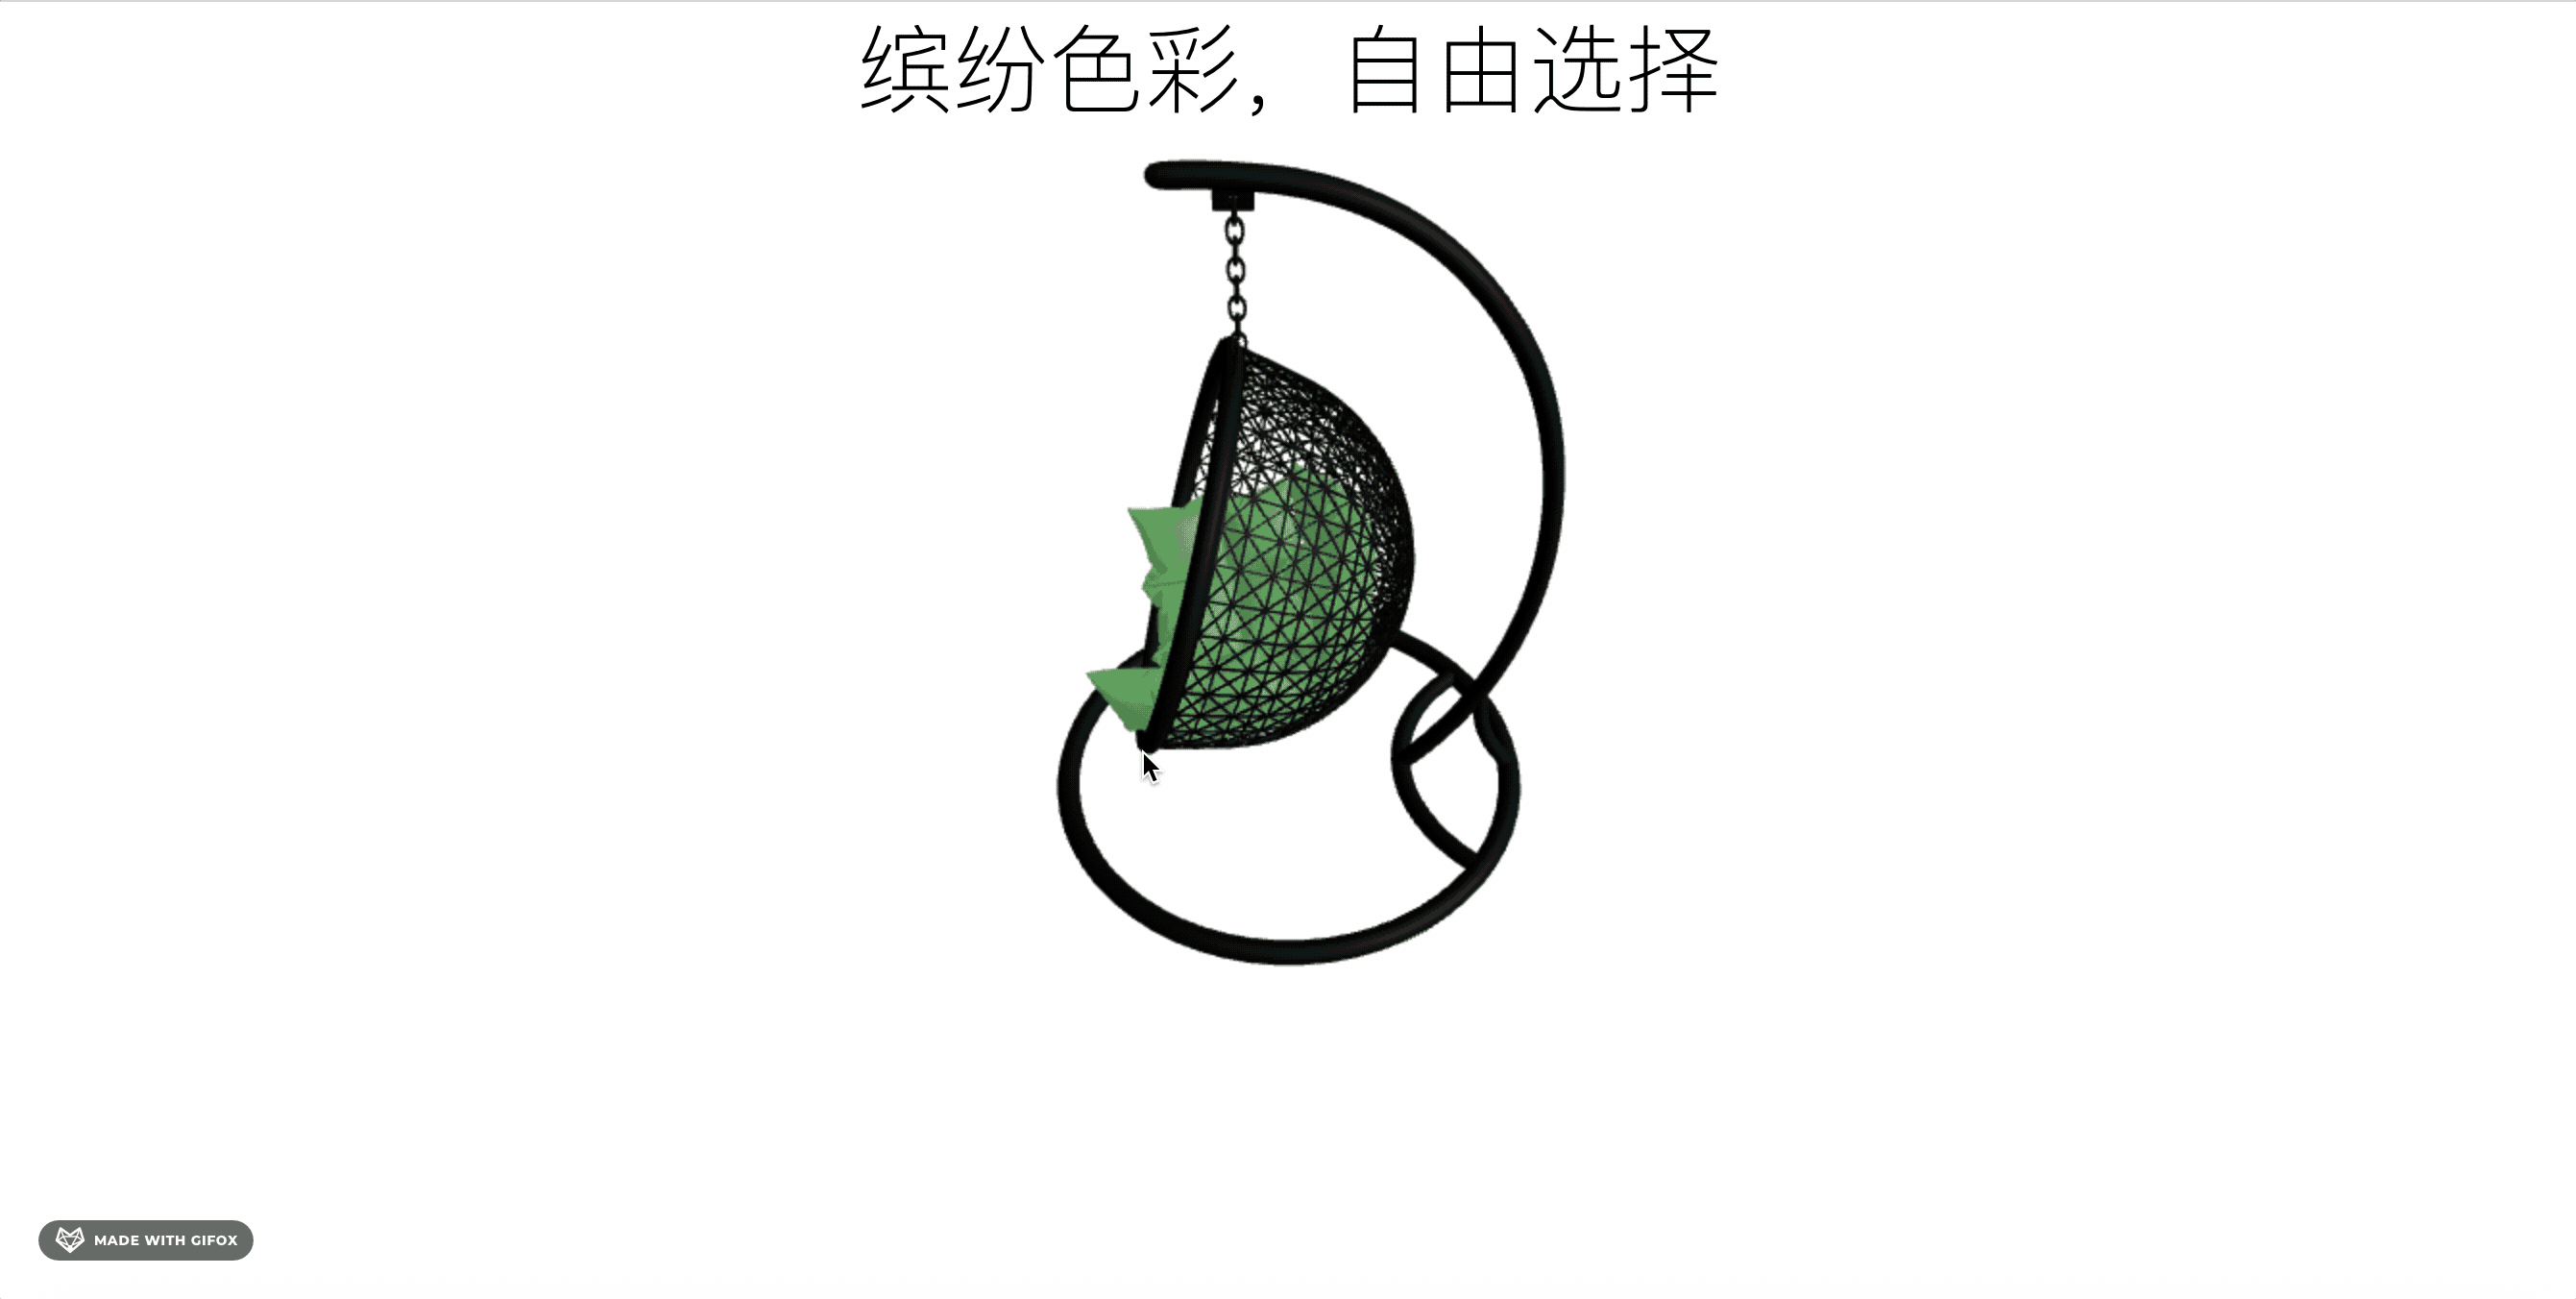
这节我们来做这个效果:
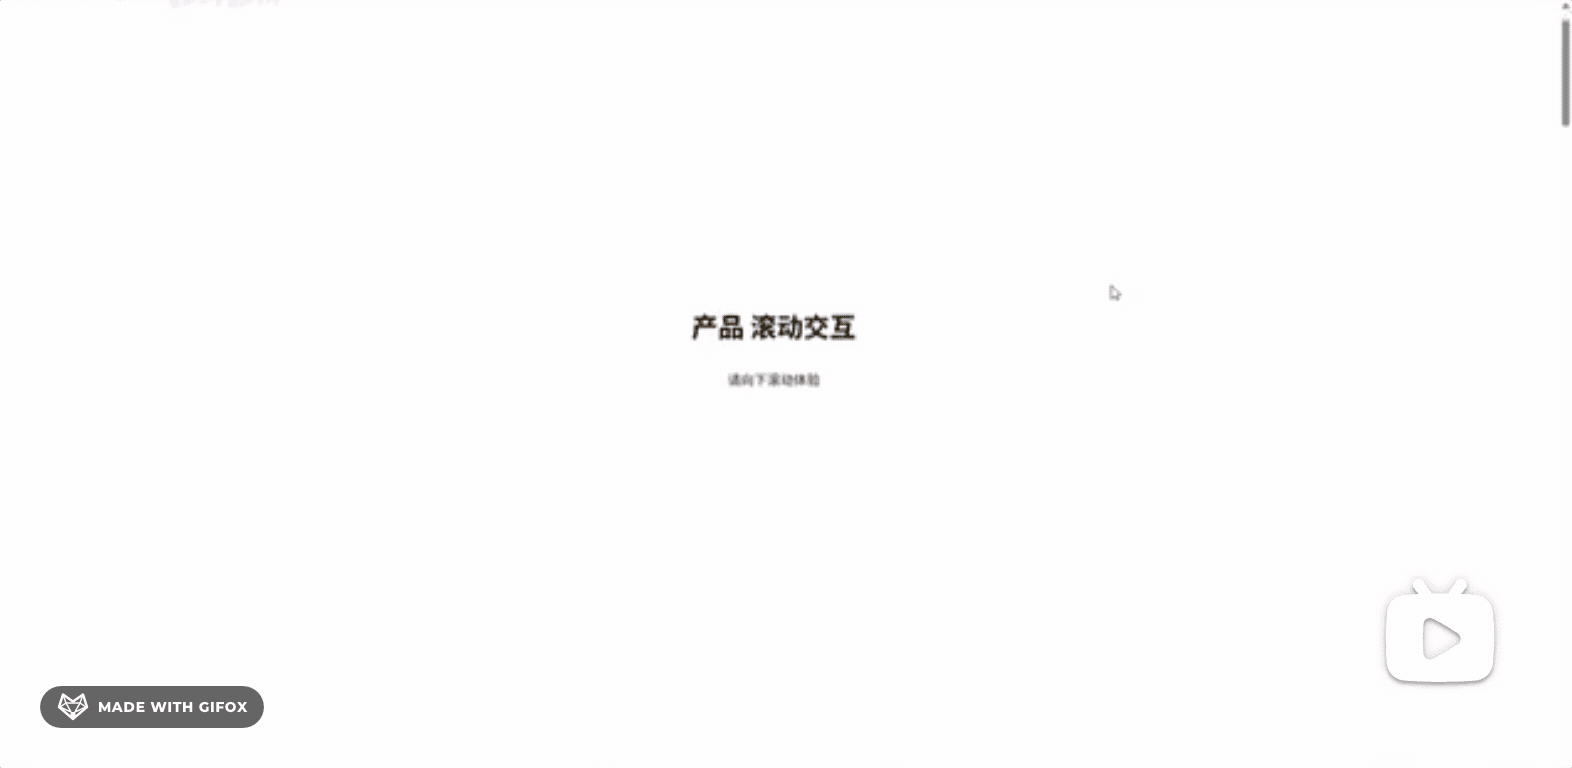
滚动控制转圈和位置移动。
首先加一下对应的 html:
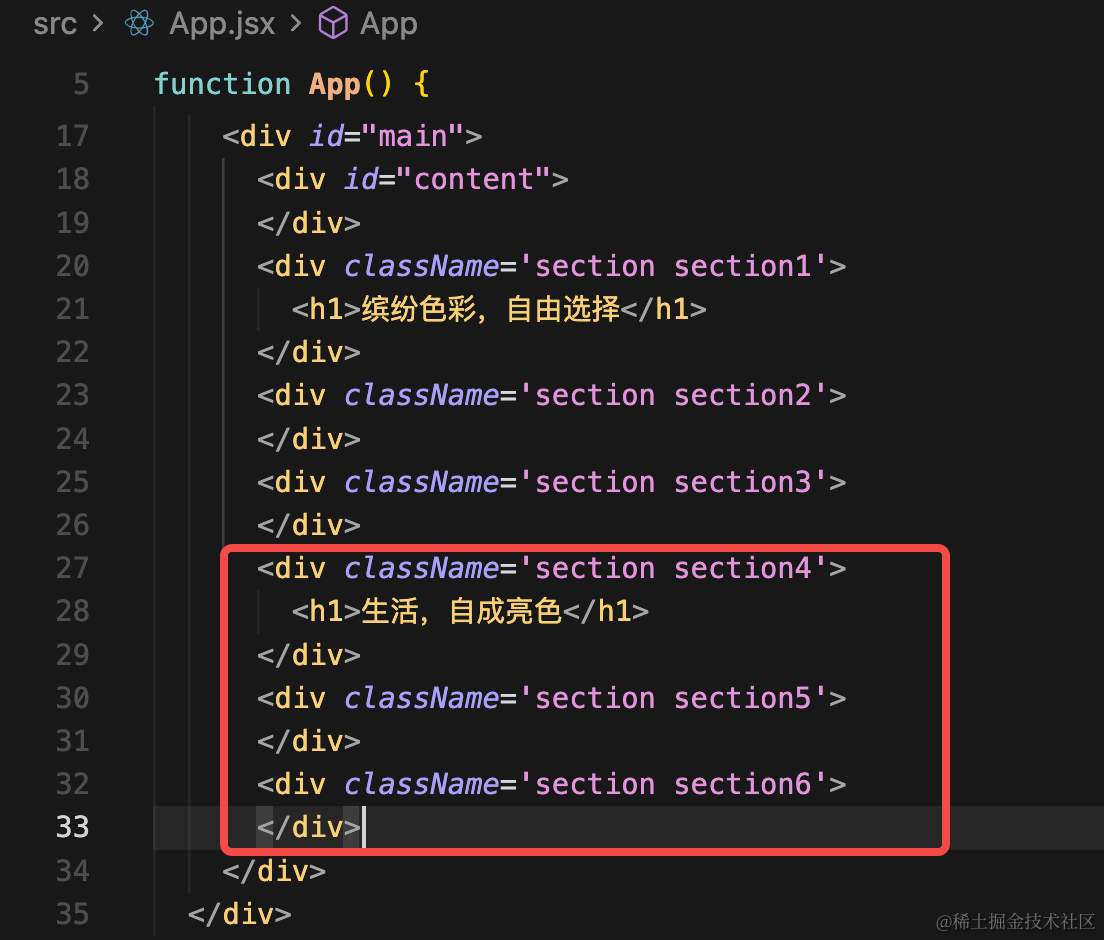
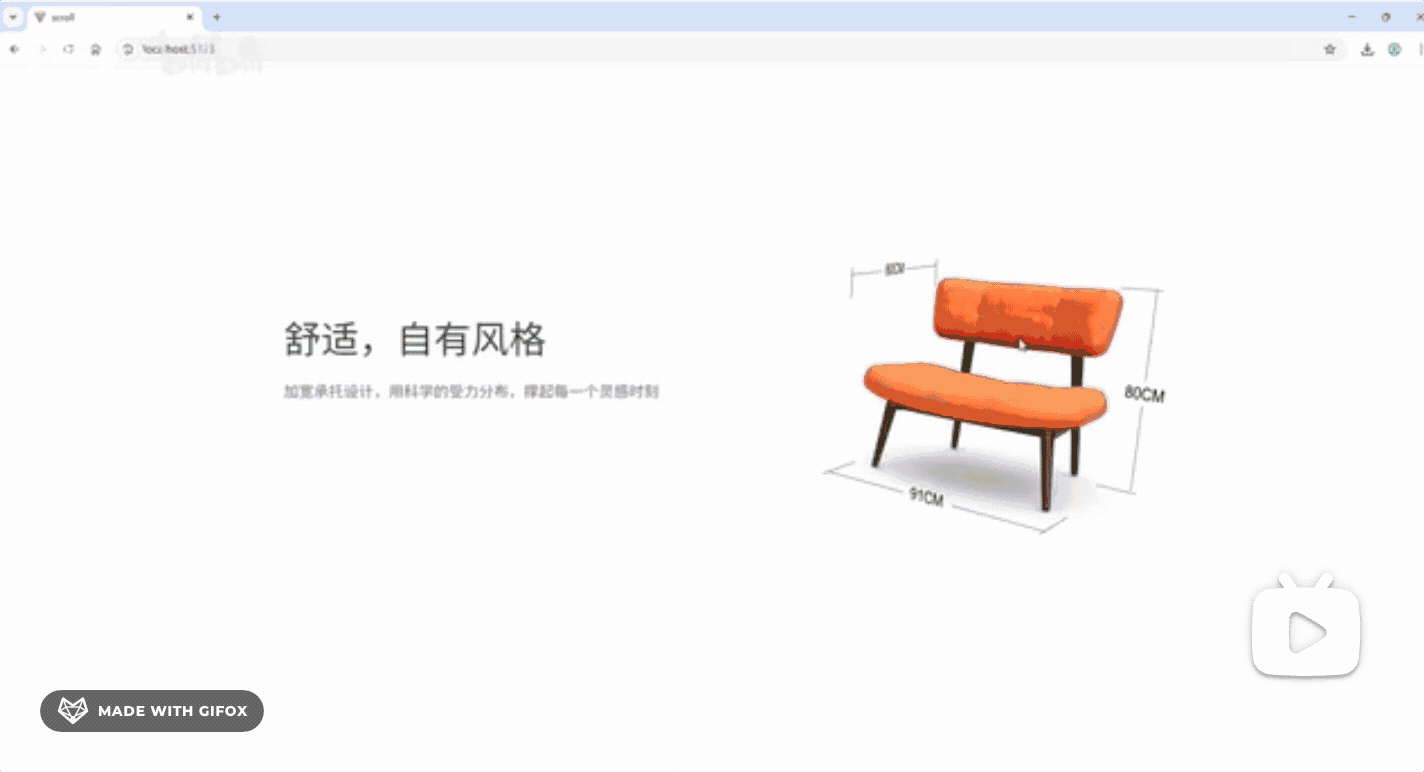
<div className='section section4'>
    <h1>生活,自成亮色</h1>
</div>
<div className='section section5'>
</div>
<div className='section section6'>
</div>
首先,改变颜色只有 4 屏之前:

4屏之后根据滚动距离计算进度:
根据进度来设置位置和旋转:
// 滚动监听,根据滚动位置切换坐垫颜色和模型位置/旋转
window.addEventListener('scroll', () => {
const scrollY = window.scrollY;
const pageNo = Math.round(scrollY / window.innerHeight);
// 切换坐垫颜色(只在4屏之前,即pageNo < 3)
if(pageNo !== curPageNo) {
curPageNo = pageNo;
// 只在4屏之前改变颜色
if (curPageNo < 3) {
scene.traverse((child) => {
if (child.isMesh && child.name === 'cushion_Cushion_0') {
if (cushionColors[curPageNo]) {
child.material.color.set(cushionColors[curPageNo]);
}
}
});
}
}
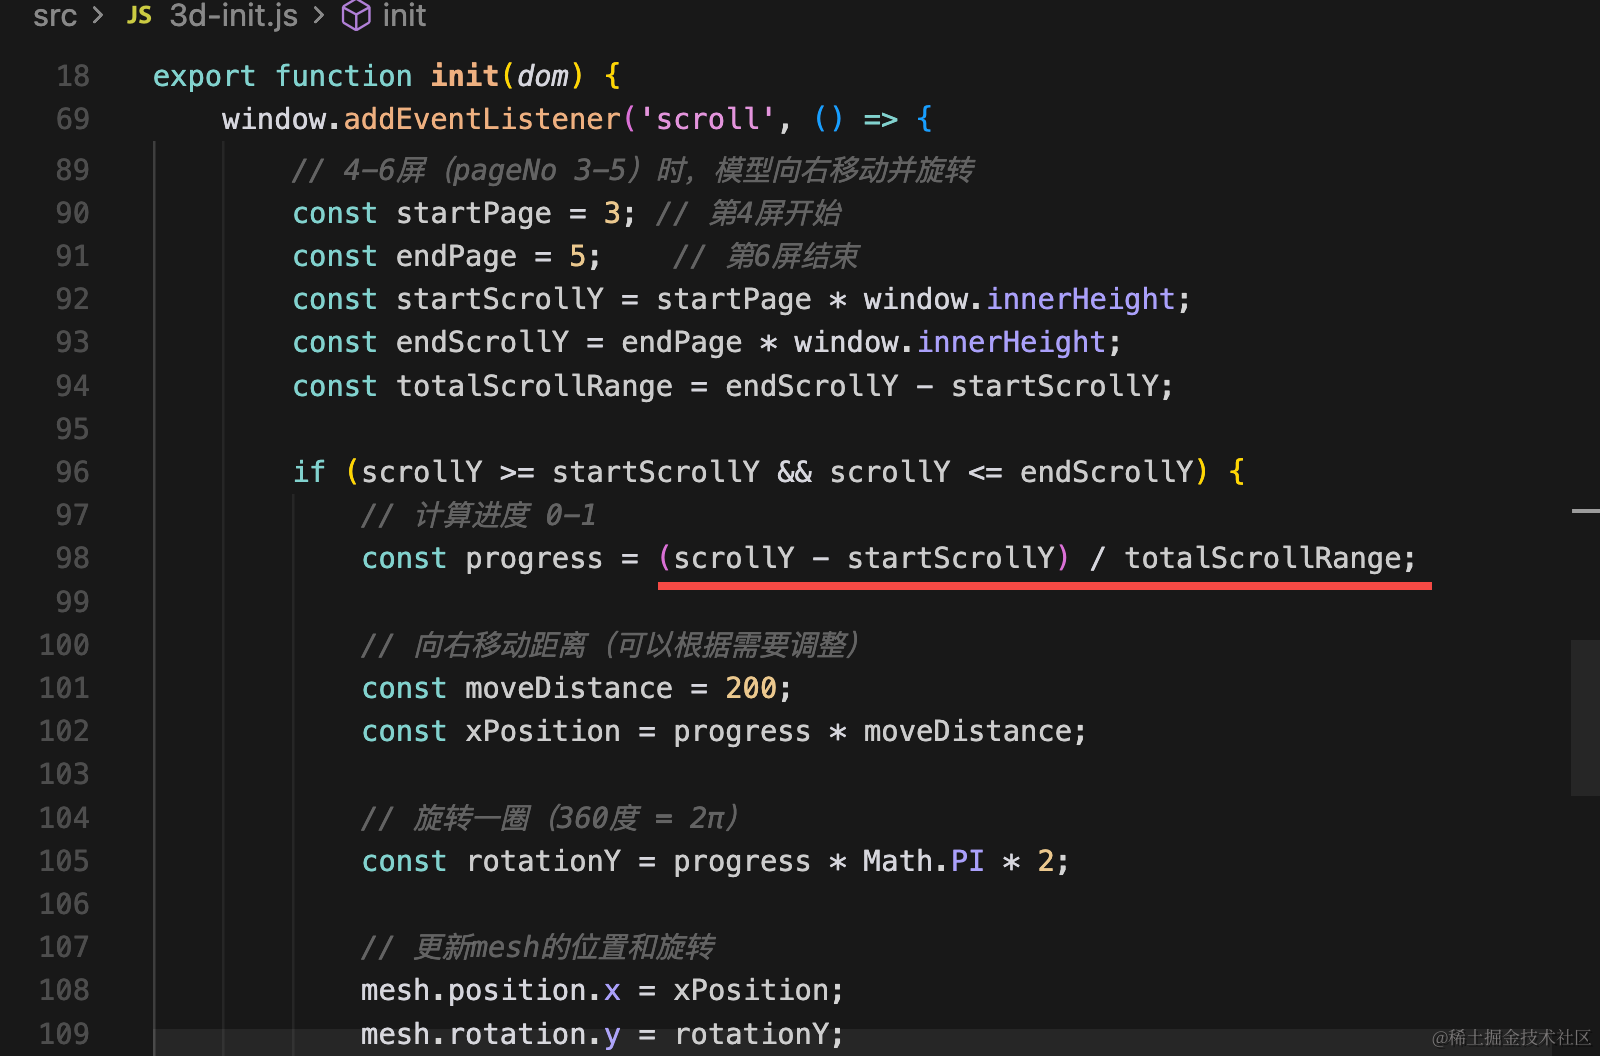
// 4-6屏(pageNo 3-5)时,模型向右移动并旋转
const startPage = 3; // 第4屏开始
const endPage = 5; // 第6屏结束
const startScrollY = startPage * window.innerHeight;
const endScrollY = endPage * window.innerHeight;
const totalScrollRange = endScrollY - startScrollY;
if (scrollY >= startScrollY && scrollY <= endScrollY) {
// 计算进度 0-1
const progress = (scrollY - startScrollY) / totalScrollRange;
// 向右移动距离(可以根据需要调整)
const moveDistance = 500;
const xPosition = progress * moveDistance;
// 旋转一圈(360度 = 2π)
const rotationY = progress * Math.PI * 2;
// 更新mesh的位置和旋转
mesh.position.x = xPosition;
mesh.rotation.y = rotationY;
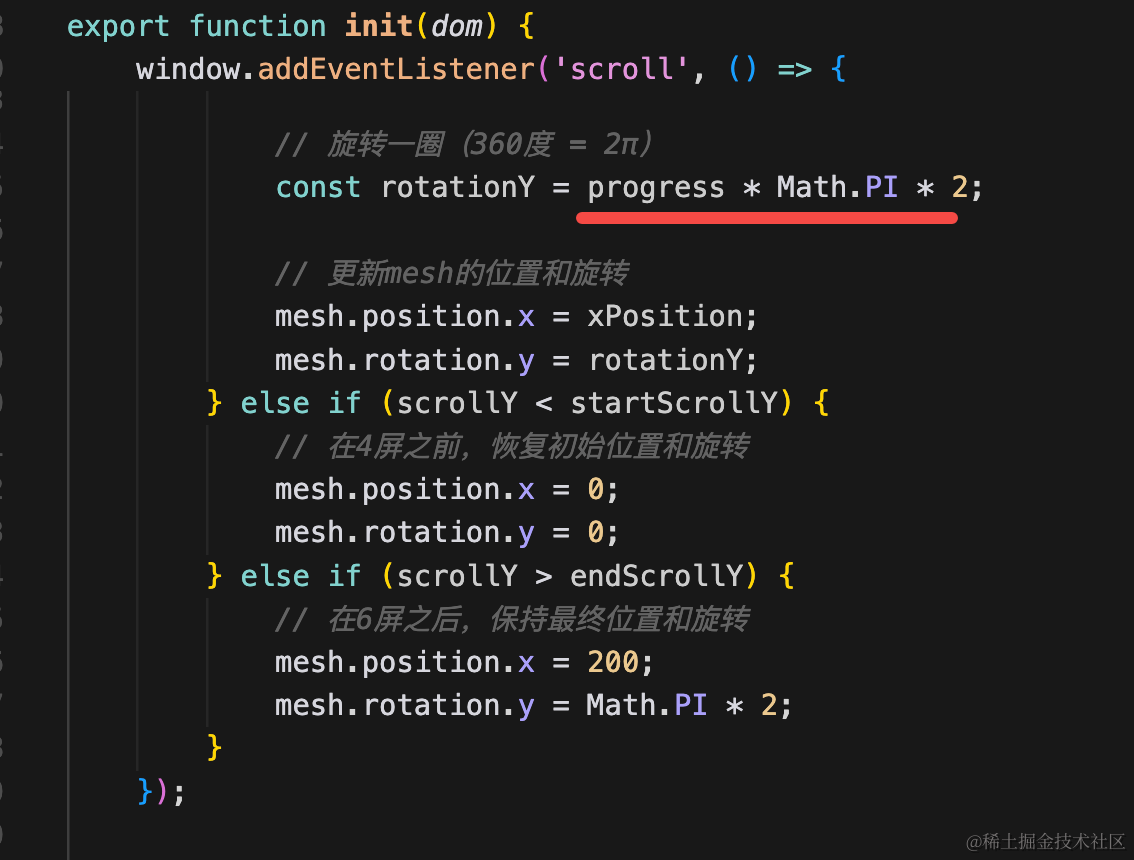
} else if (scrollY < startScrollY) {
// 在4屏之前,恢复初始位置和旋转
mesh.position.x = 0;
mesh.rotation.y = 0;
} else if (scrollY > endScrollY) {
// 在6屏之后,保持最终位置和旋转
mesh.position.x = 500;
mesh.rotation.y = Math.PI * 2;
}
});
试一下:
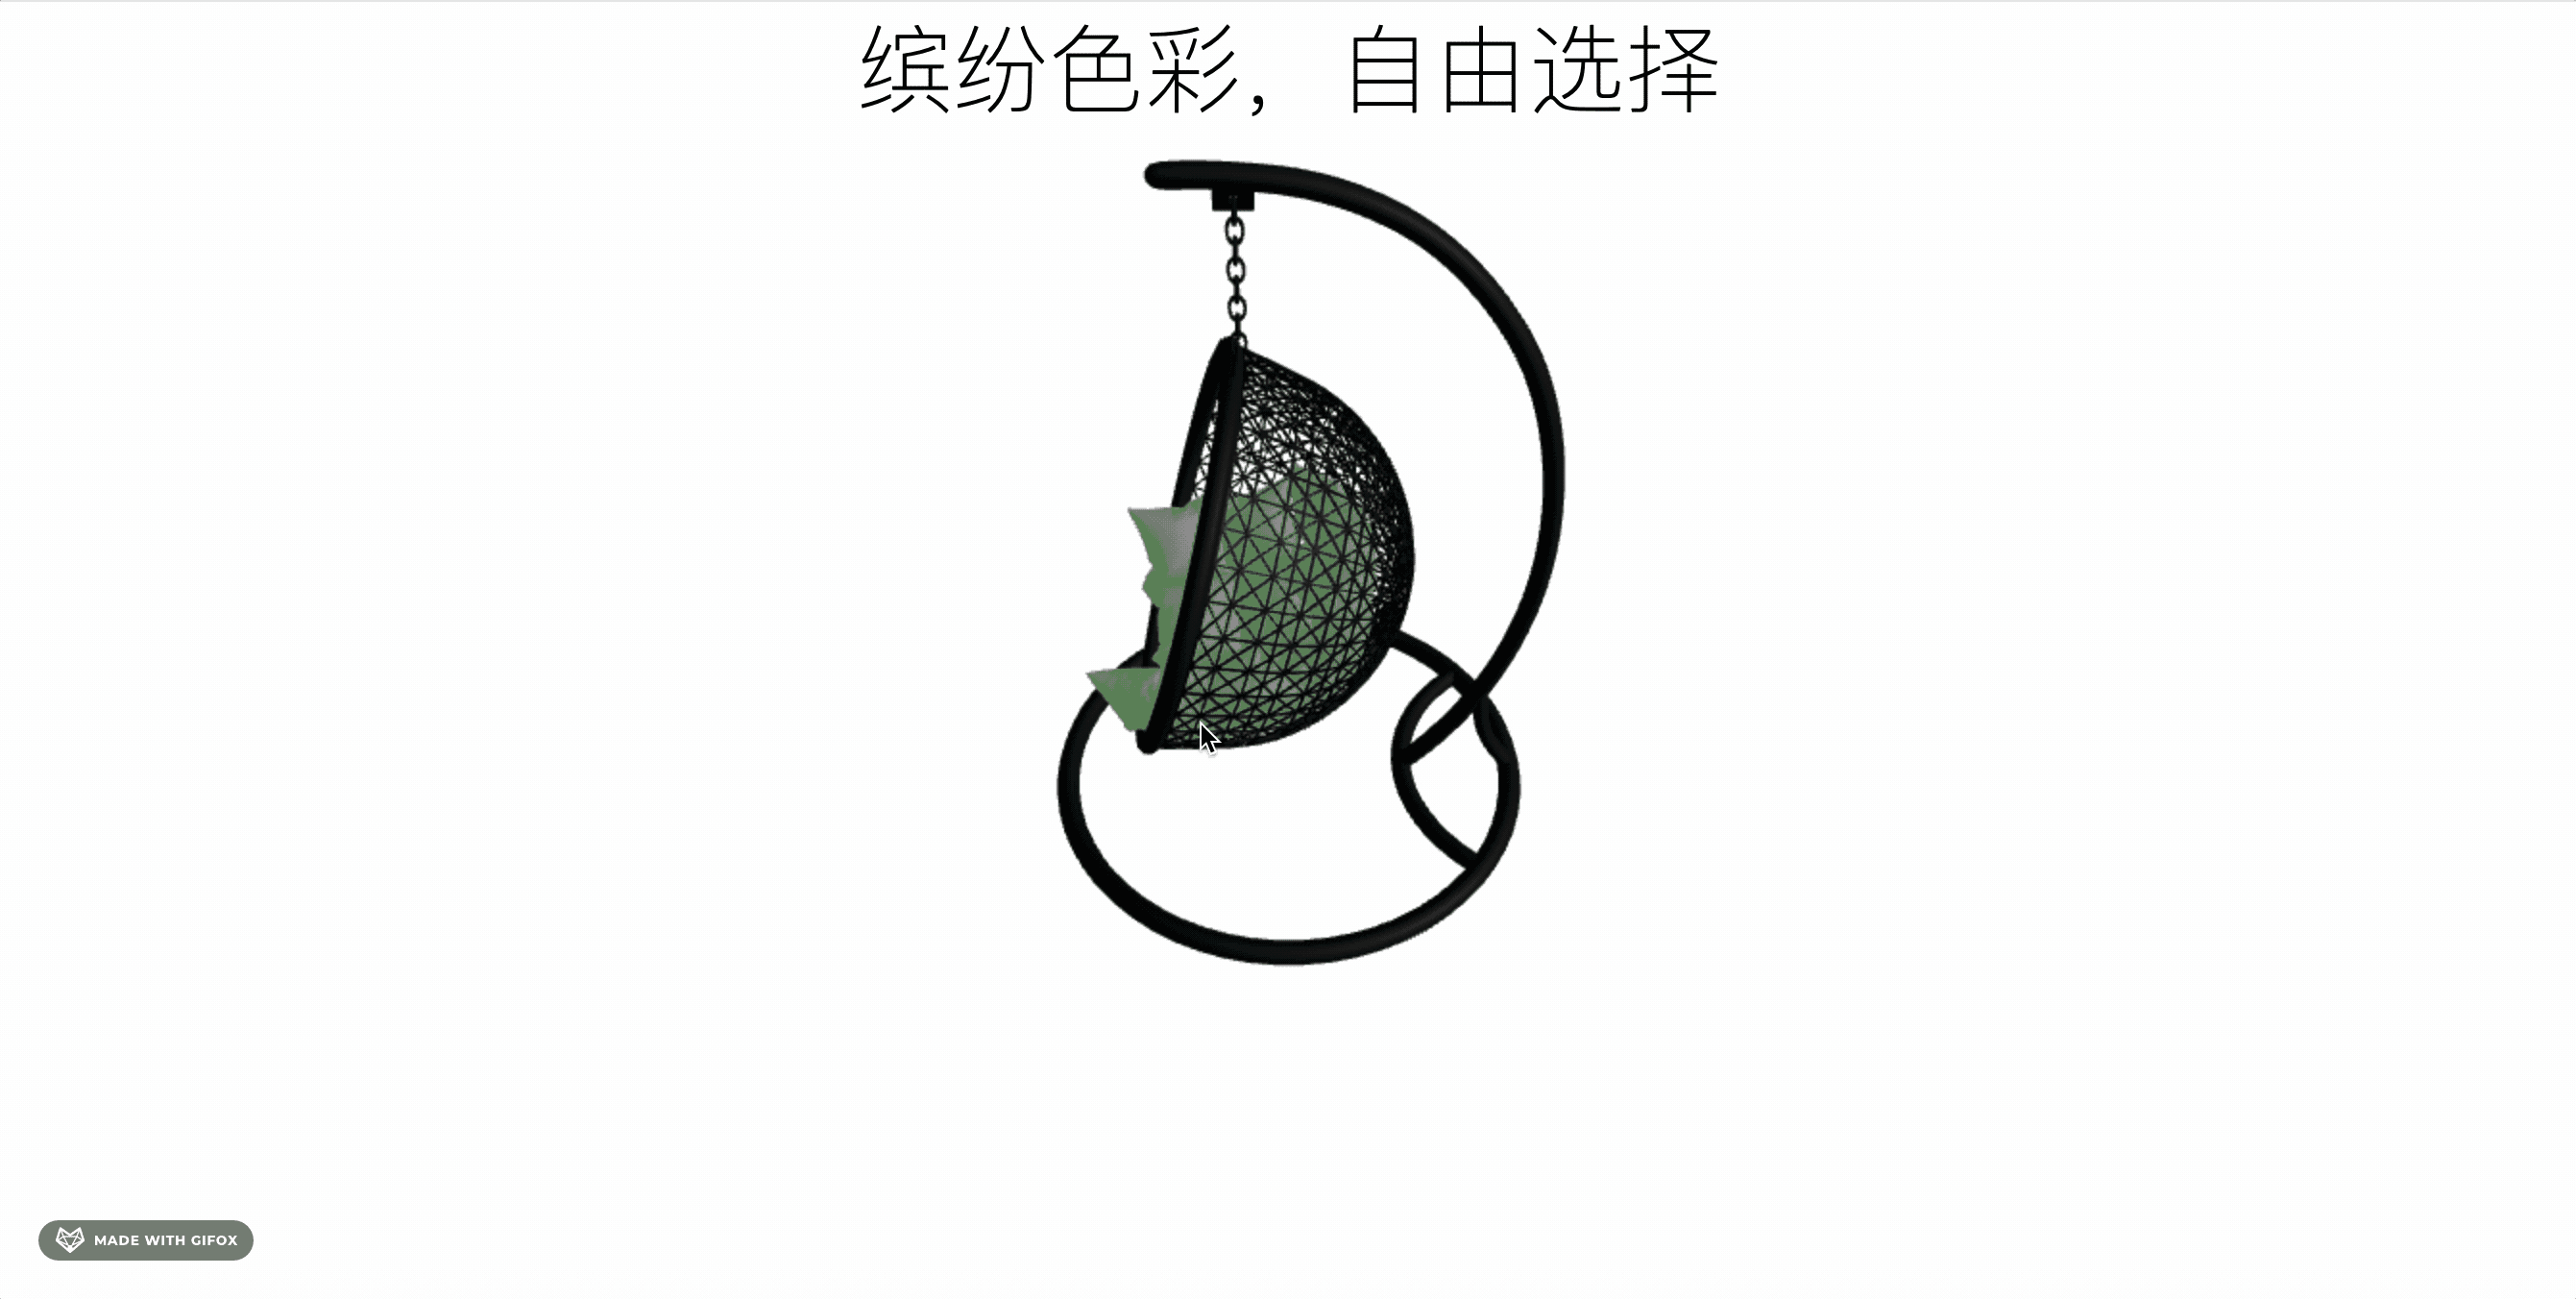
这样,滚动控制产品旋转和位置改变就完成了
参考下网上那个效果:
只要在 4、6 屏加一下对应的 html 就可以了。
比如滚动到左边的时候在右边加文案
滚动到右边的时候在在左边加文案
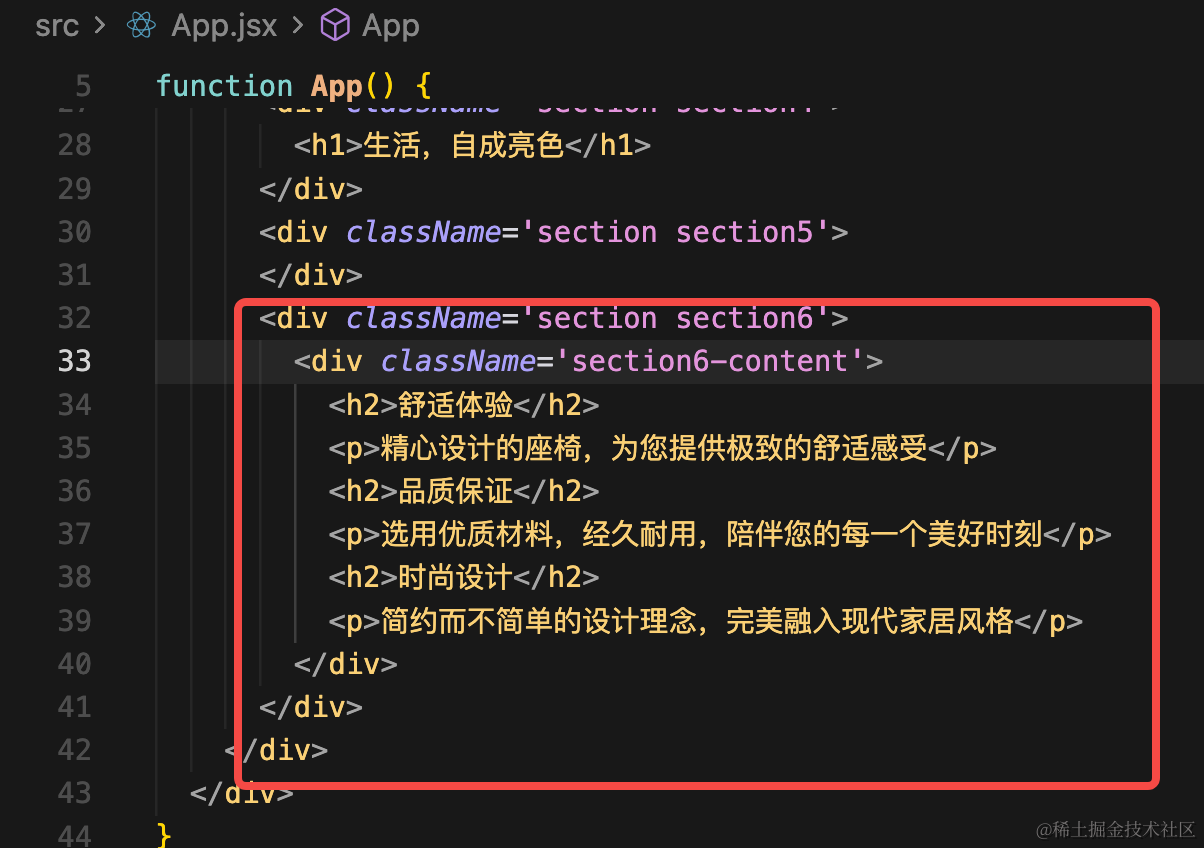
<div className='section section6'>
<div className='section6-content'>
  <h2>舒适体验</h2>
  <p>精心设计的座椅,为您提供极致的舒适感受</p>
  <h2>品质保证</h2>
  <p>选用优质材料,经久耐用,陪伴您的每一个美好时刻</p>
  <h2>时尚设计</h2>
  <p>简约而不简单的设计理念,完美融入现代家居风格</p>
</div>
</div>
对应样式:
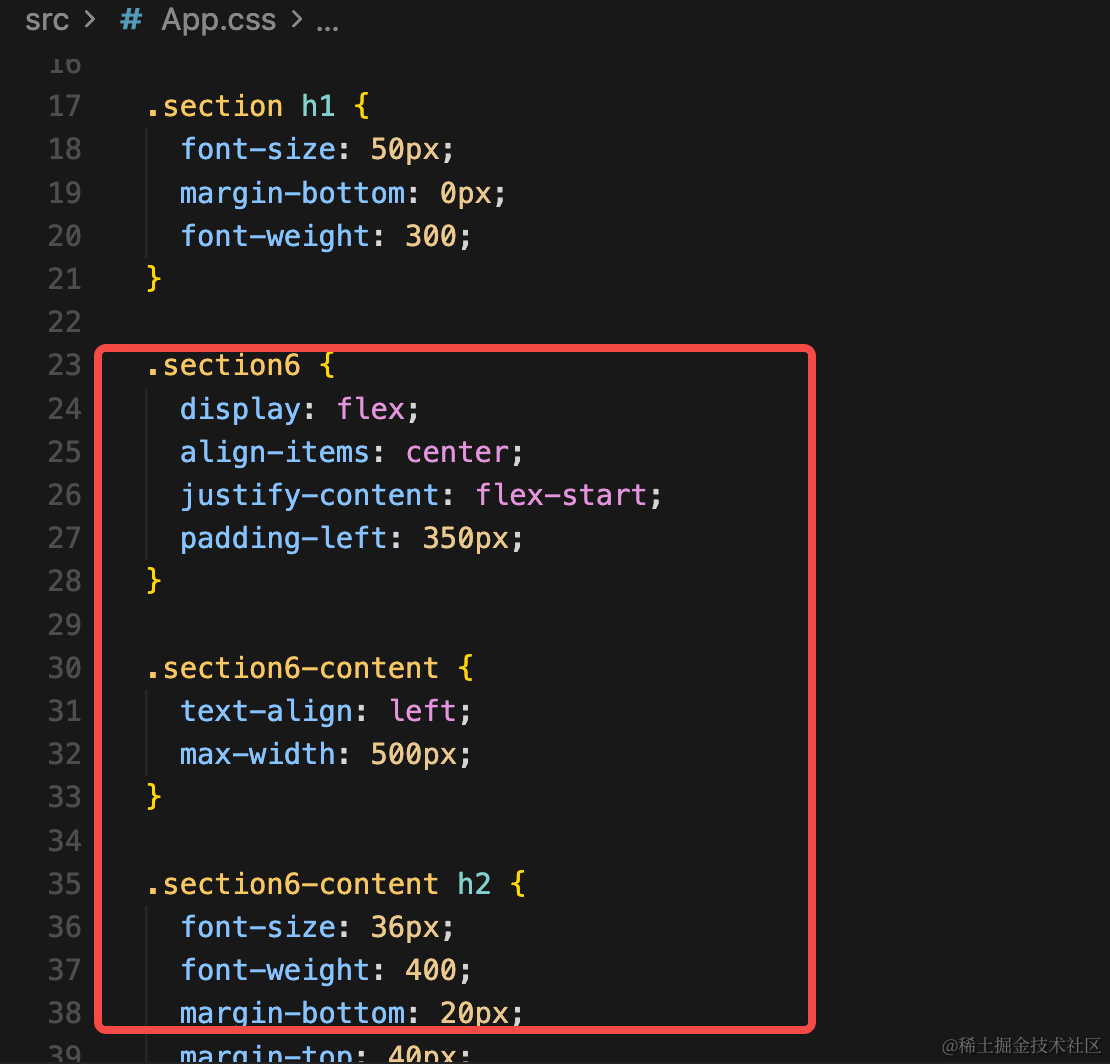
.section6 {
  display: flex;
  align-items: center;
  justify-content: flex-start;
  padding-left: 350px;
}

.section6-content {
  text-align: left;
  max-width: 500px;
}

.section6-content h2 {
  font-size: 36px;
  font-weight: 400;
  margin-bottom: 20px;
  margin-top: 40px;
  color: #000000;
}

.section6-content h2:first-child {
  margin-top: 0;
}

.section6-content p {
  font-size: 18px;
  line-height: 1.8;
  color: #000000;
  margin-bottom: 30px;
}
这样,产品展示的交互效果就完成了。
你当然可以做一个左移、做一个右移,类似这样:
案例代码上传了小册仓库
总结
这节我们实现了产品展示网站的滚动控制产品移动的效果。
可以产品旋转到左边,在右边加介绍,或者移动到右边在左边加介绍。
很多产品展示的官网就是这种交互效果。