前面我们绘制过林海雪原的场景:
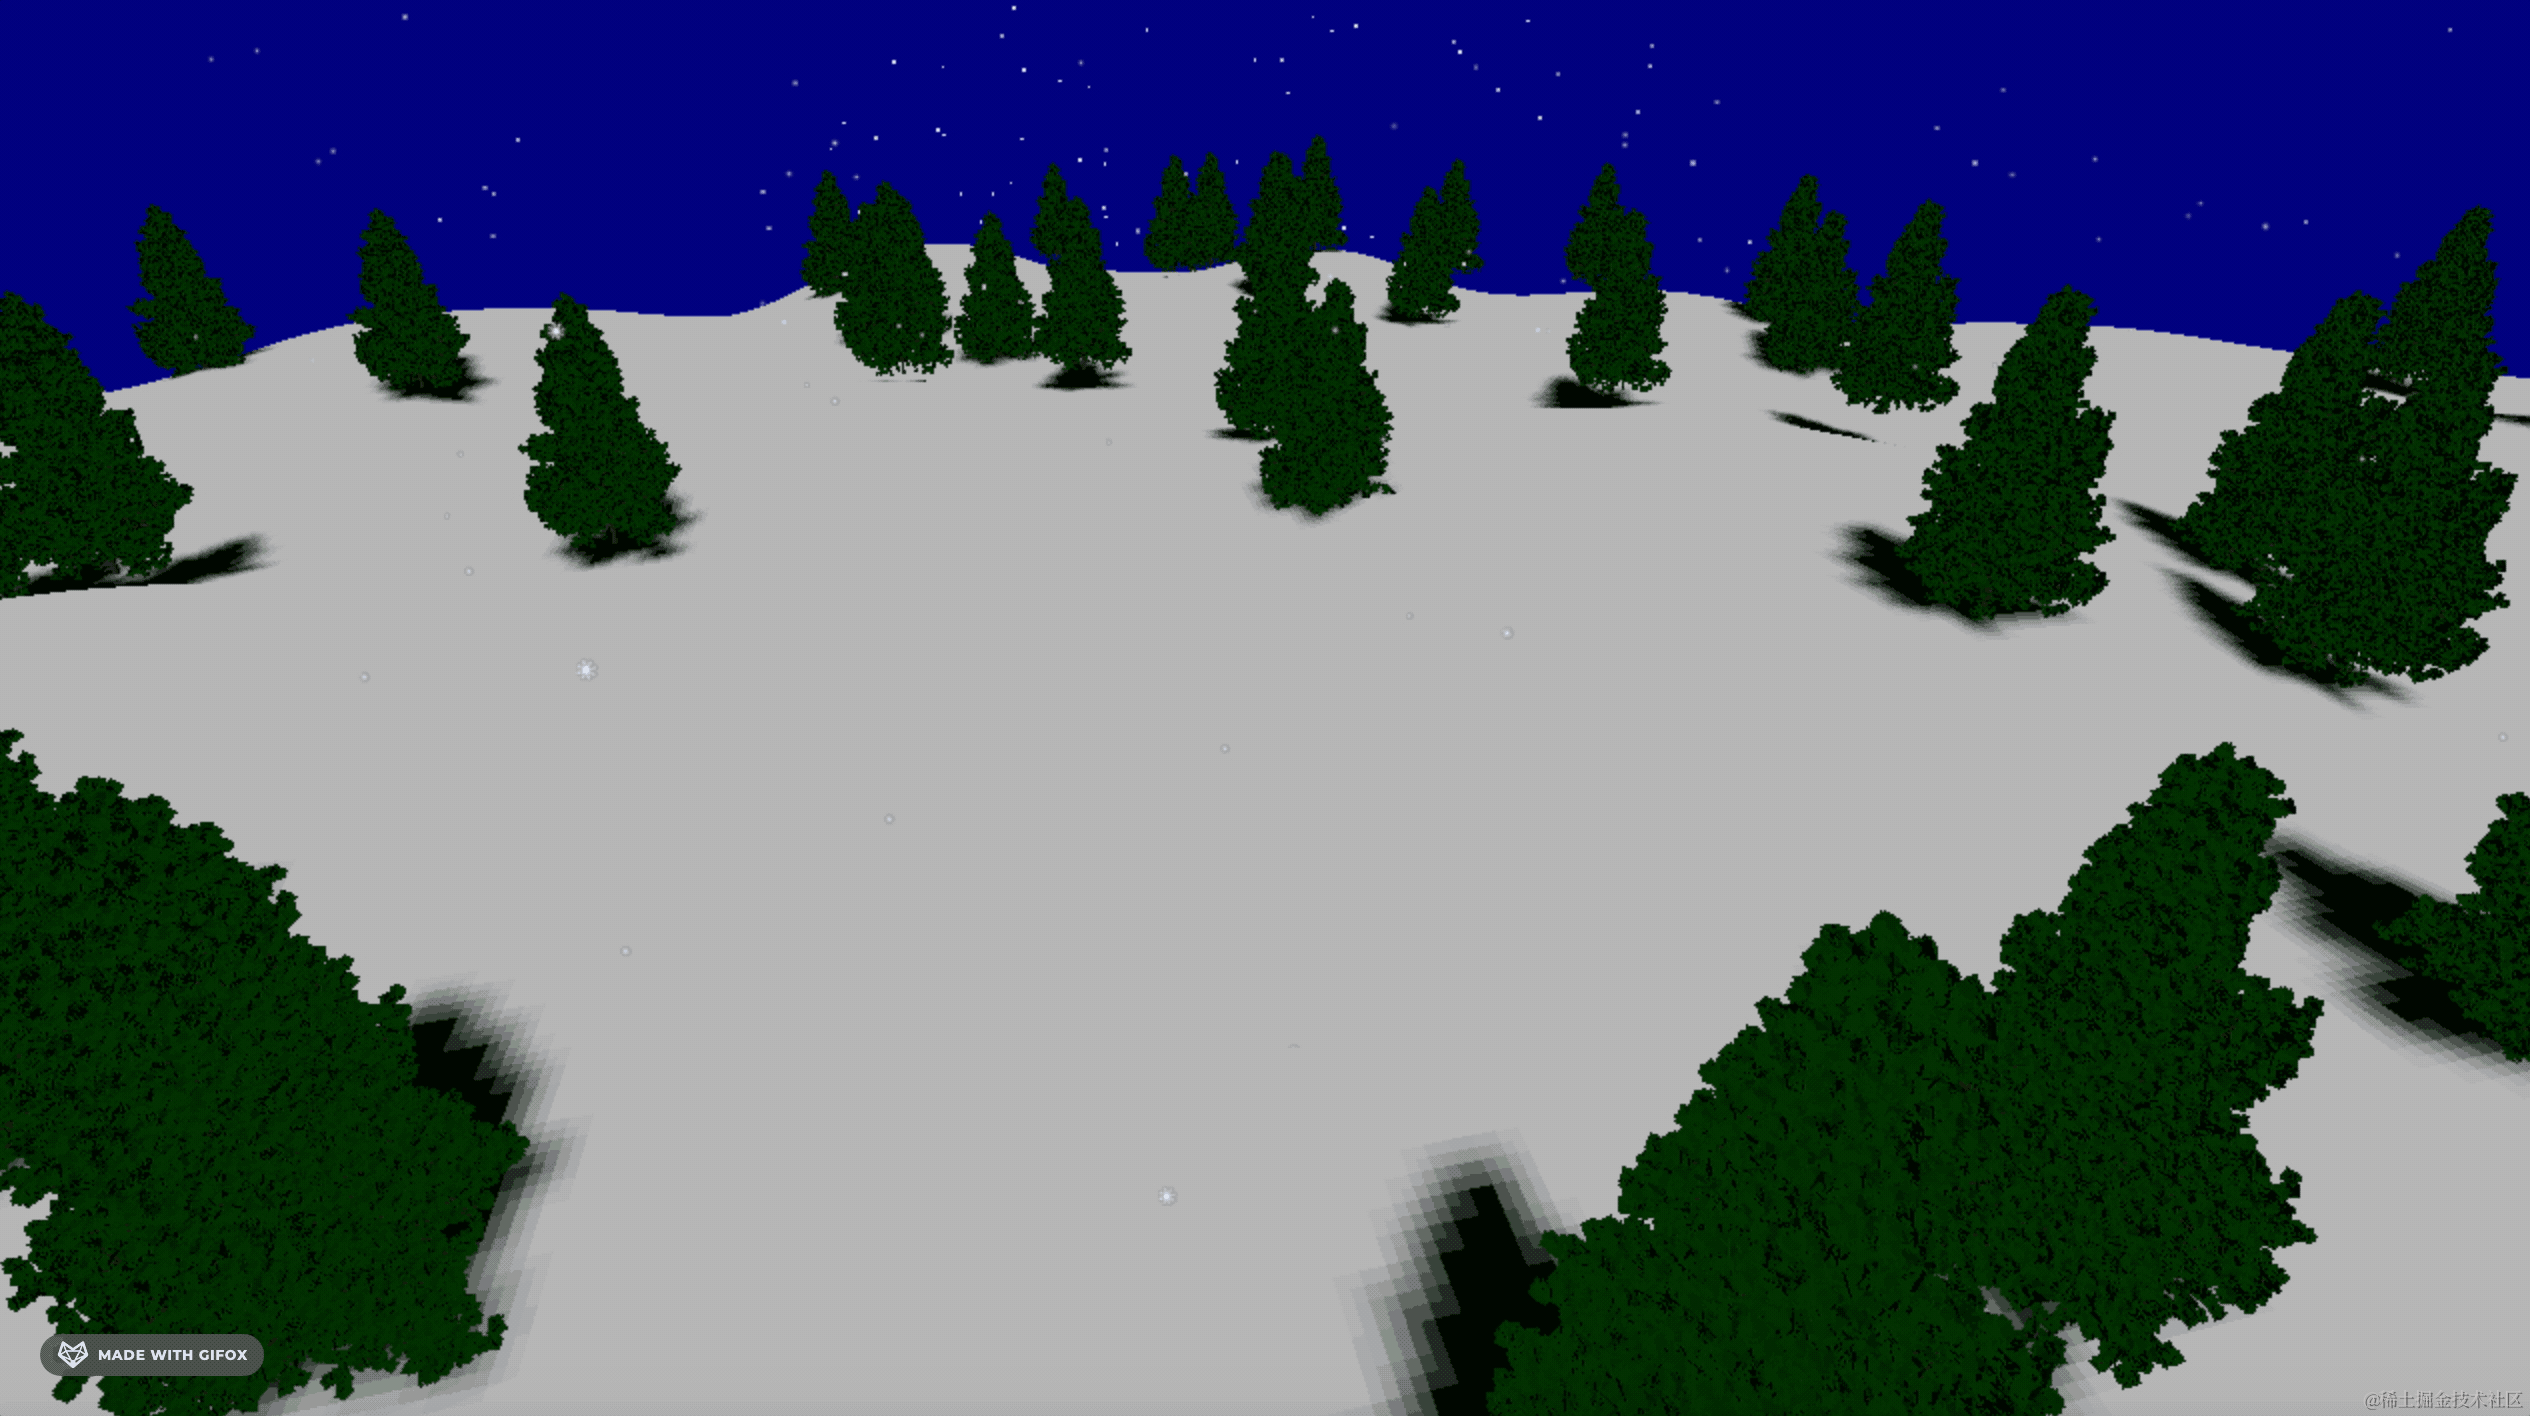
在山坡上随机位置种树。
计算出随机的 x、y 坐标,然后拿到那个位置的顶点坐标。
学了表面采样器后,我们完全可以用表面采样器来做。
试一下:
npx create-vite hillside-flowers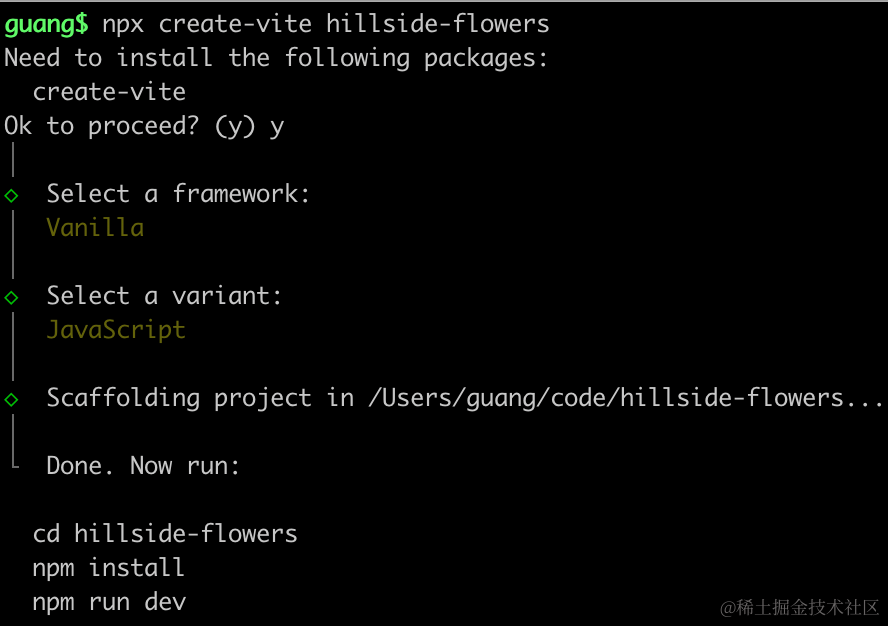
进入项目,安装依赖:
pnpm install
pnpm install --save three
pnpm install --save-dev @types/three
先写下基础代码:
改下 src/main.js
import './style.css';
import * as THREE from 'three';
import {
    OrbitControls
} from 'three/addons/controls/OrbitControls.js';
import mesh from './mesh.js';

const scene = new THREE.Scene();

scene.add(mesh);

const light = new THREE.DirectionalLight(0xffffff);
light.position.set(500, 300, 600);
scene.add(light);

const light2 = new THREE.AmbientLight();
scene.add(light2);

const axesHelper = new THREE.AxesHelper(1000);
scene.add(axesHelper);

const width = window.innerWidth;
const height = window.innerHeight;

const camera = new THREE.PerspectiveCamera(60, width / height, 1, 10000);
camera.position.set(0, 500, 500);
camera.lookAt(0, 0, 0);

const renderer = new THREE.WebGLRenderer({
  antialias: true
});
renderer.setSize(width, height)

function render() {
    renderer.render(scene, camera);
    requestAnimationFrame(render);
}

render();

document.body.append(renderer.domElement);

const controls = new OrbitControls(camera, renderer.domElement);
创建 Scene、Light、Camera、Renderer
改下 style.css
body {
    margin: 0;
}
然后创建 mesh.js
import * as THREE from 'three';
import { SimplexNoise } from 'three/examples/jsm/Addons.js';
const simplex = new SimplexNoise();
const geometry = new THREE.PlaneGeometry(3000, 3000, 100, 100);
const positions = geometry.attributes.position;
for (let i = 0 ; i < positions.count; i ++) {
const x = positions.getX(i);
const y = positions.getY(i);
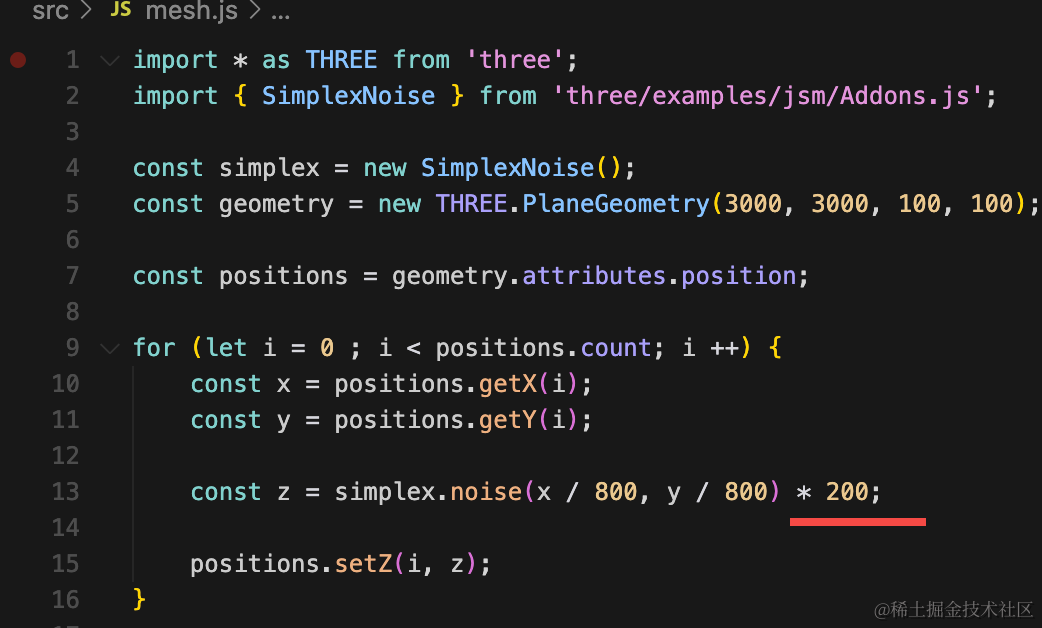
const z = simplex.noise(x / 800, y / 800) * 50;
positions.setZ(i, z);
}
const material = new THREE.MeshLambertMaterial({
color: new THREE.Color('white'),
wireframe: true
});
const mountainside = new THREE.Mesh(geometry, material);
mountainside.rotateX(- Math.PI / 2);
export default mountainside;创建一个平面几何体,用噪音算法修改顶点的 z 坐标,生成一个山坡。
跑一下:
npm run dev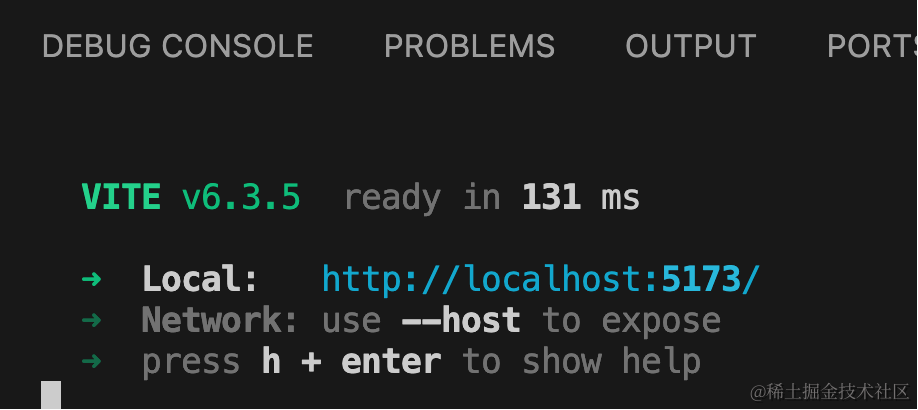
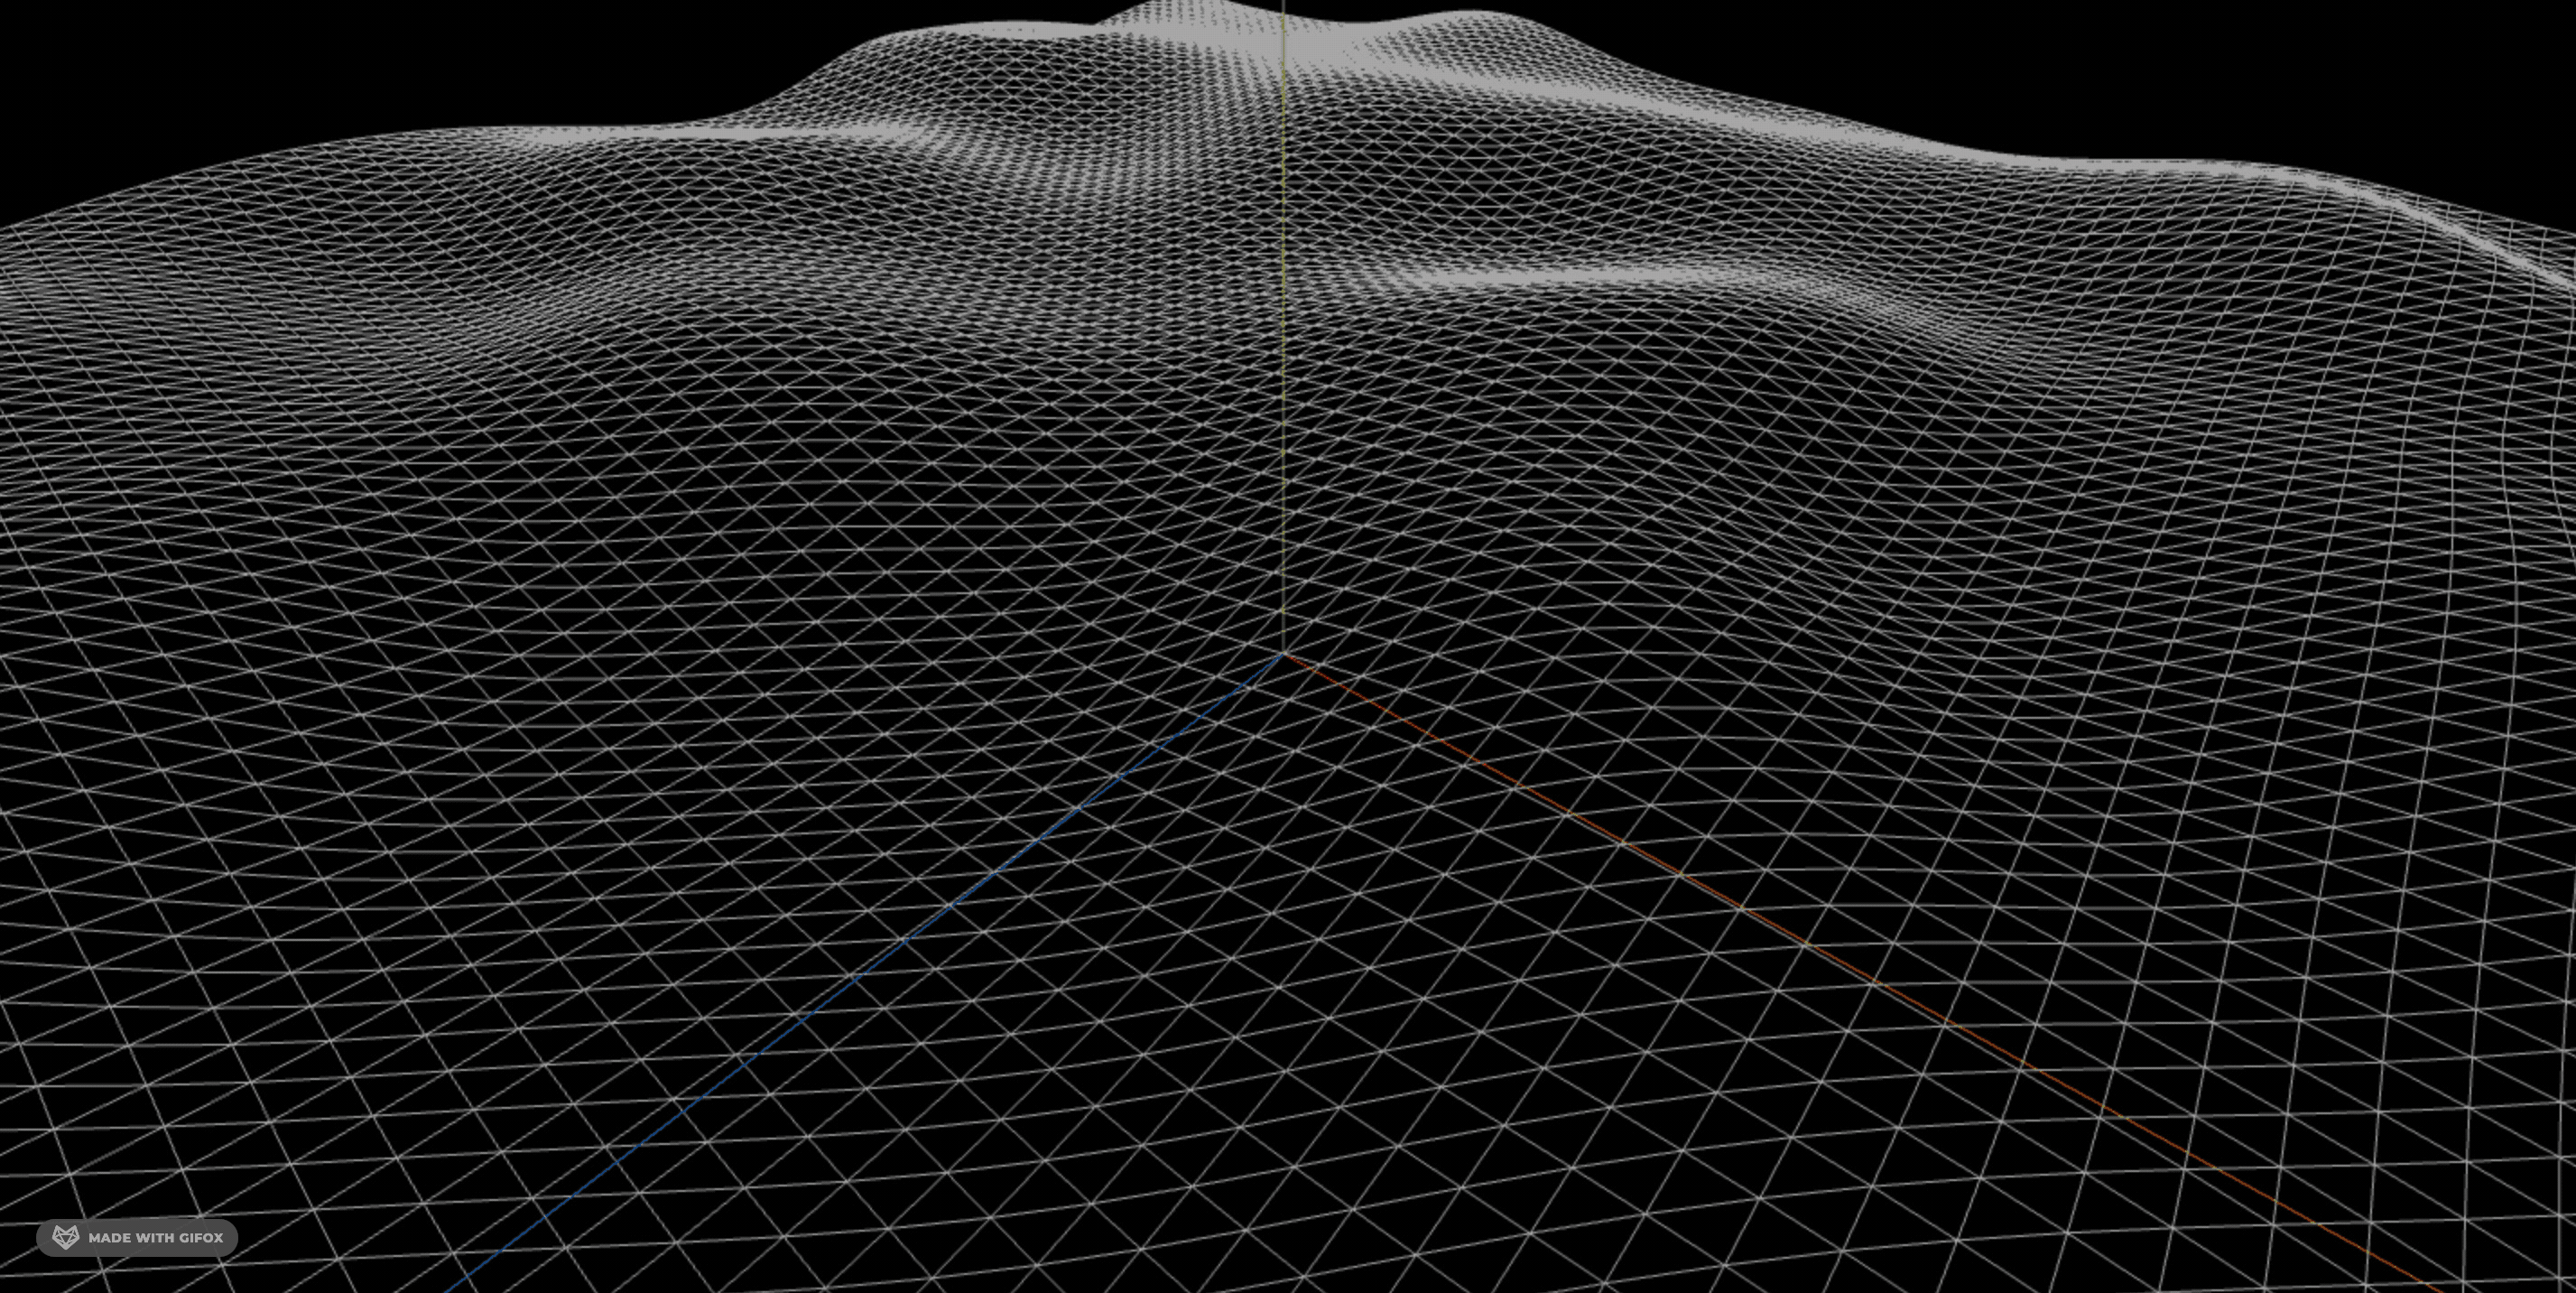
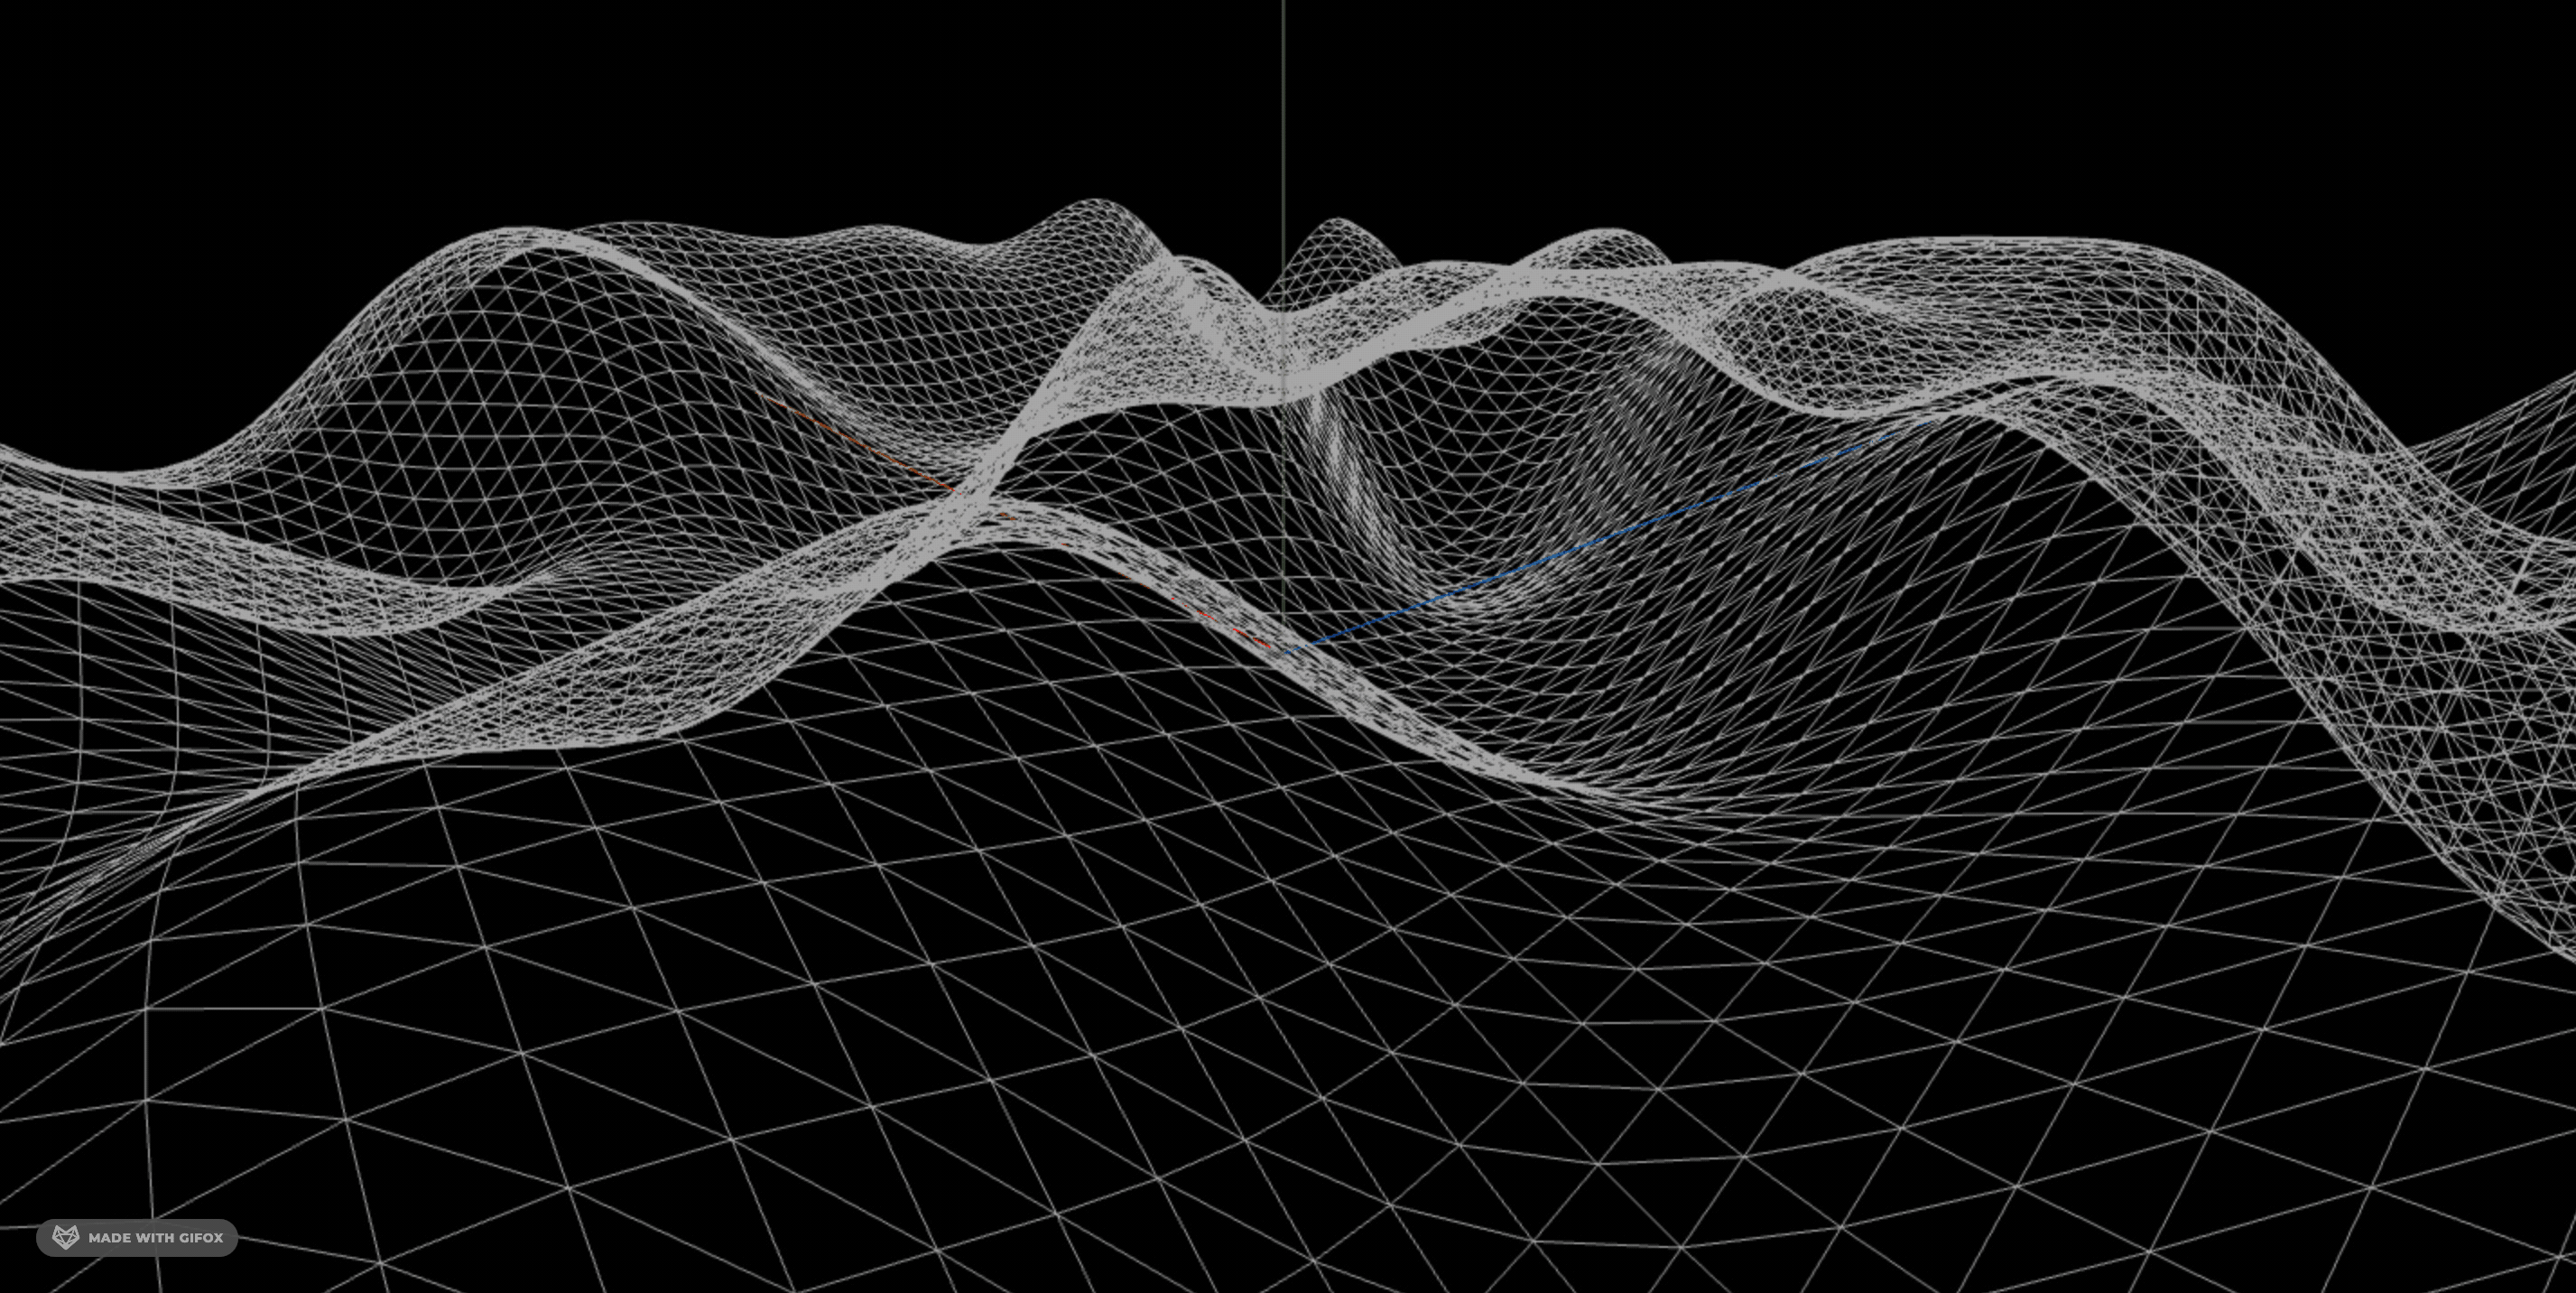
让坡度更陡峭一点:
通过多重噪音添加更多细节:
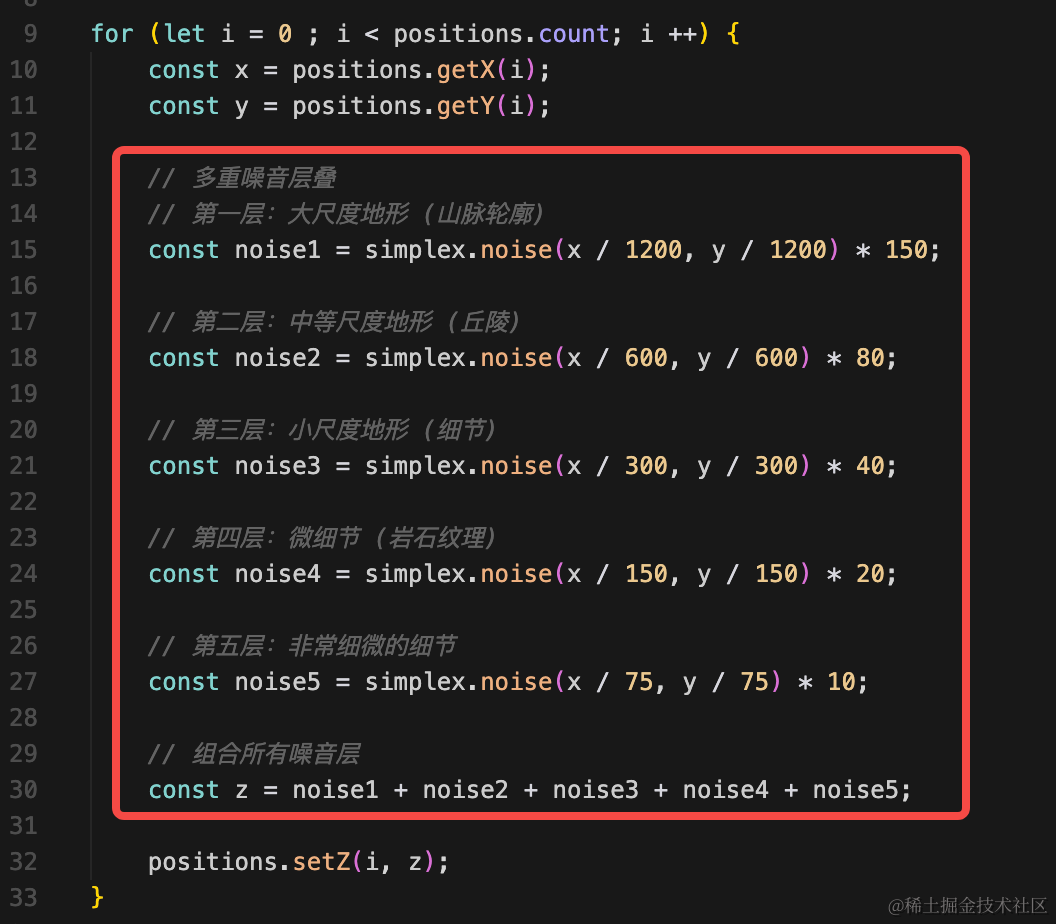
// 多重噪音层叠
// 第一层:大尺度地形 (山脉轮廓)
const noise1 = simplex.noise(x / 1200, y / 1200) * 150;
// 第二层:中等尺度地形 (丘陵)
const noise2 = simplex.noise(x / 600, y / 600) * 80;
// 第三层:小尺度地形 (细节)
const noise3 = simplex.noise(x / 300, y / 300) * 40;
// 第四层:微细节 (岩石纹理)
const noise4 = simplex.noise(x / 150, y / 150) * 20;
// 第五层:非常细微的细节
const noise5 = simplex.noise(x / 75, y / 75) * 10;
// 组合所有噪音层
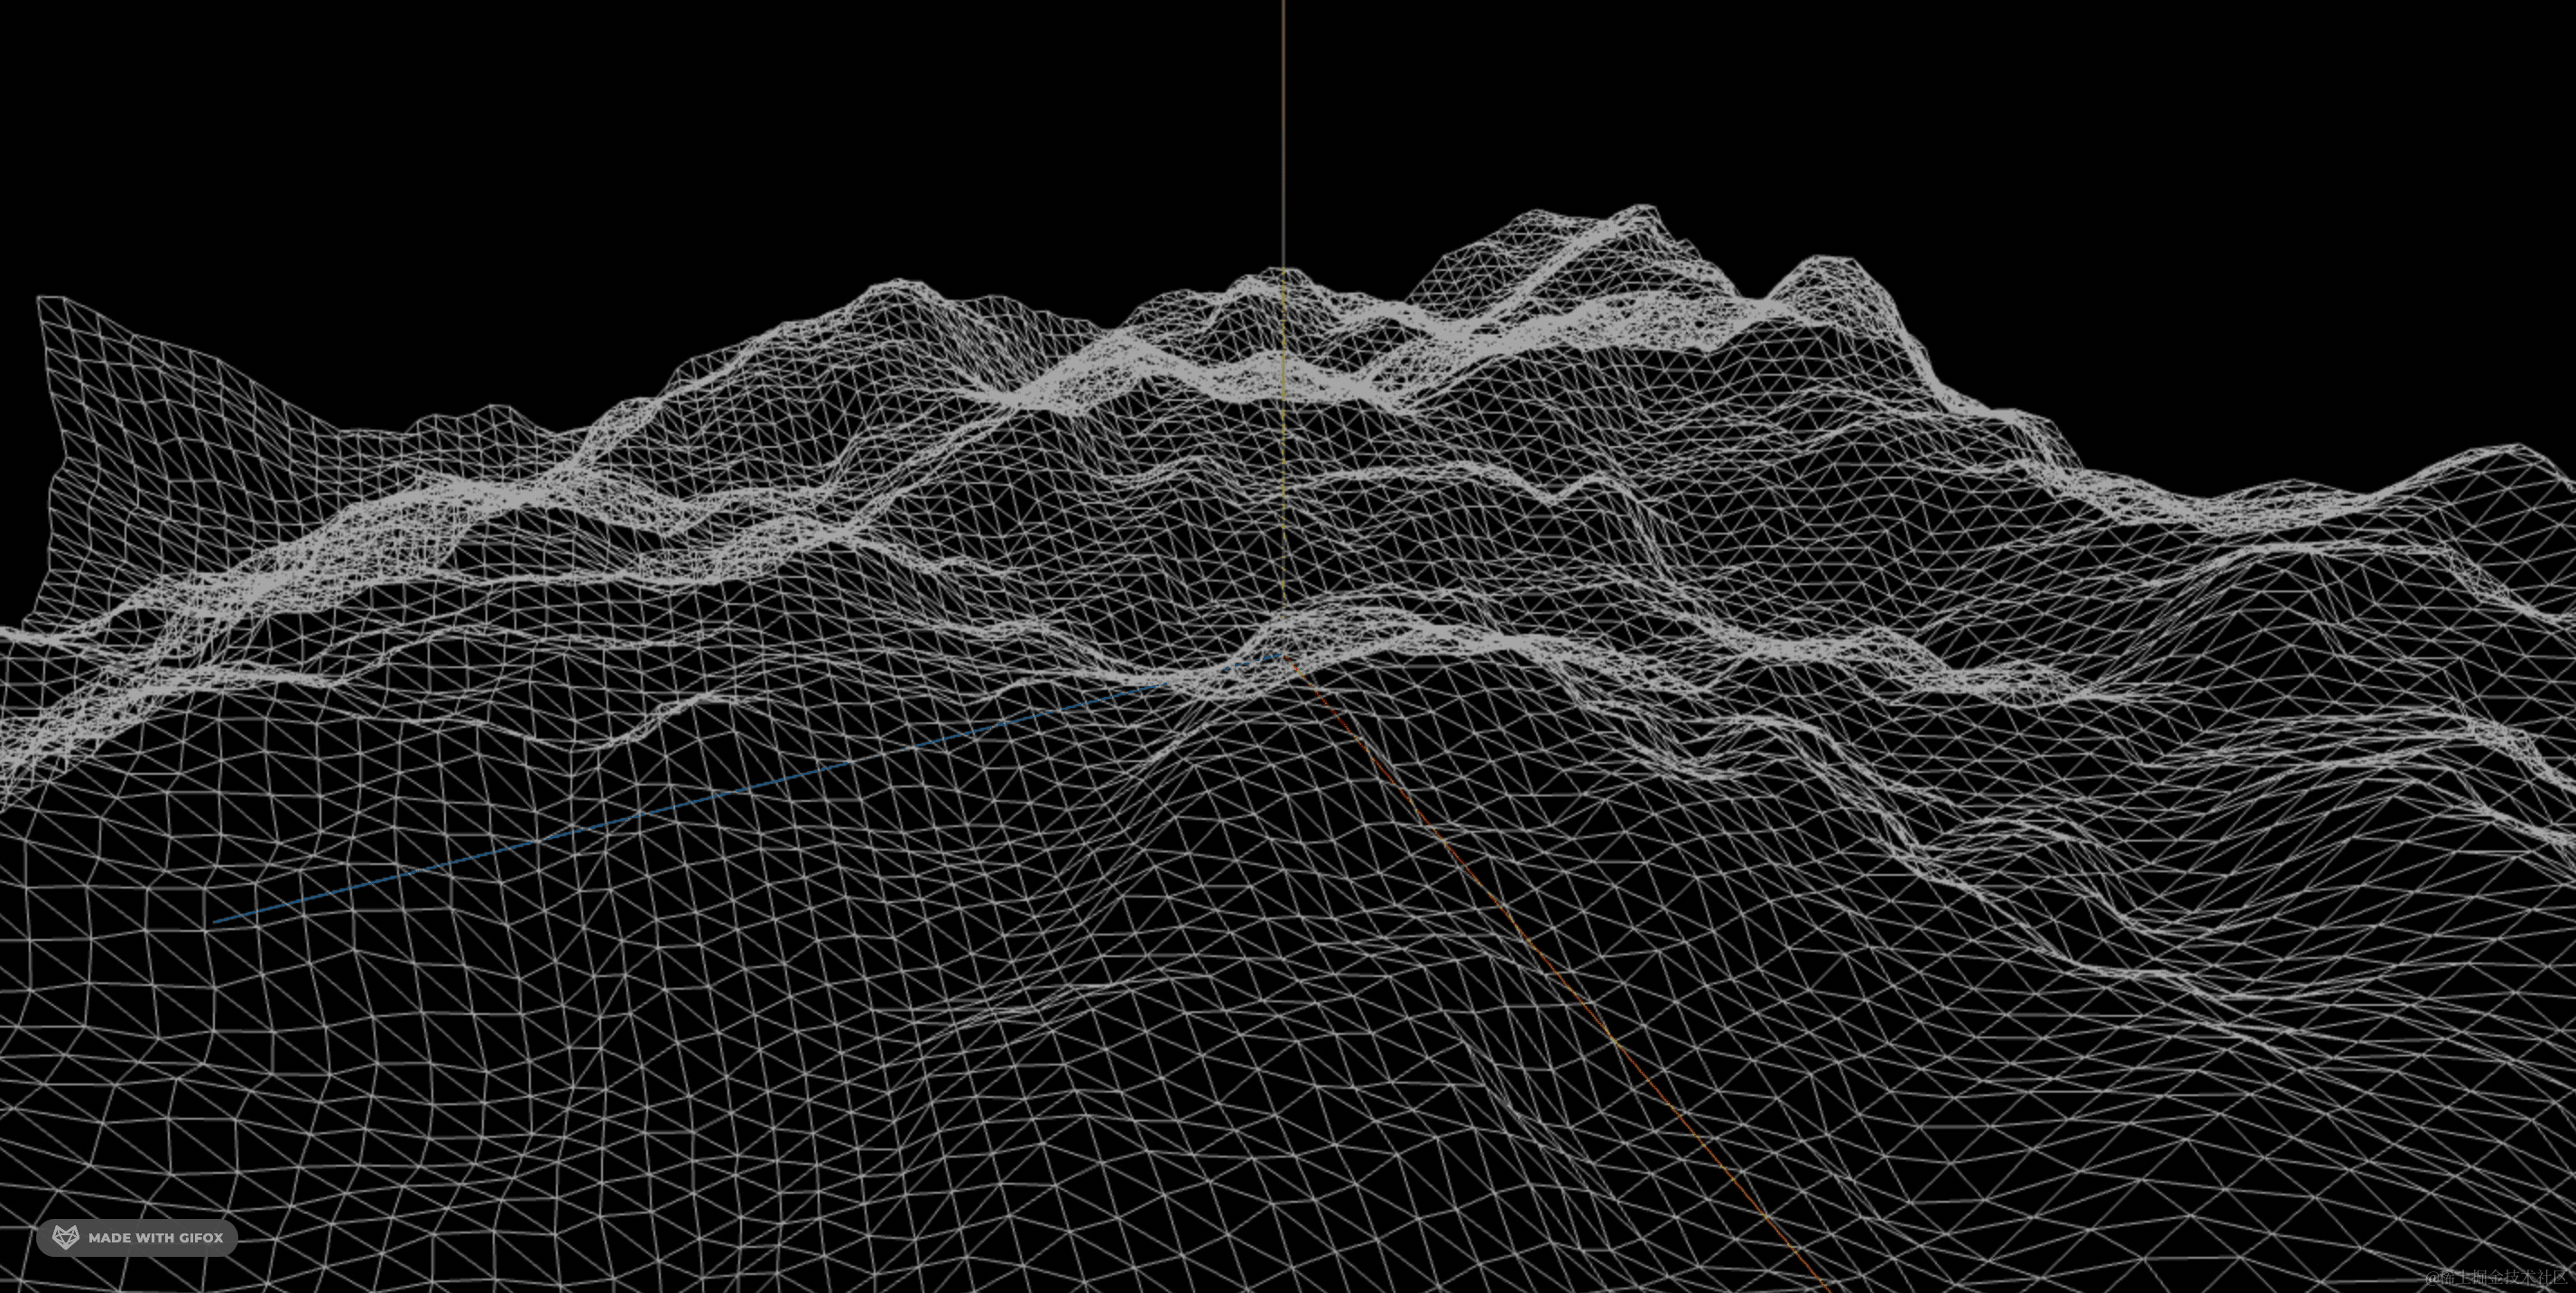
const z = noise1 + noise2 + noise3 + noise4 + noise5;用 5 层噪音可以做到非常细致的地形。
然后加一下颜色:

我们对顶点的 z 排下序,算出整体的高度差。
然后准备 5 个颜色来渐变。
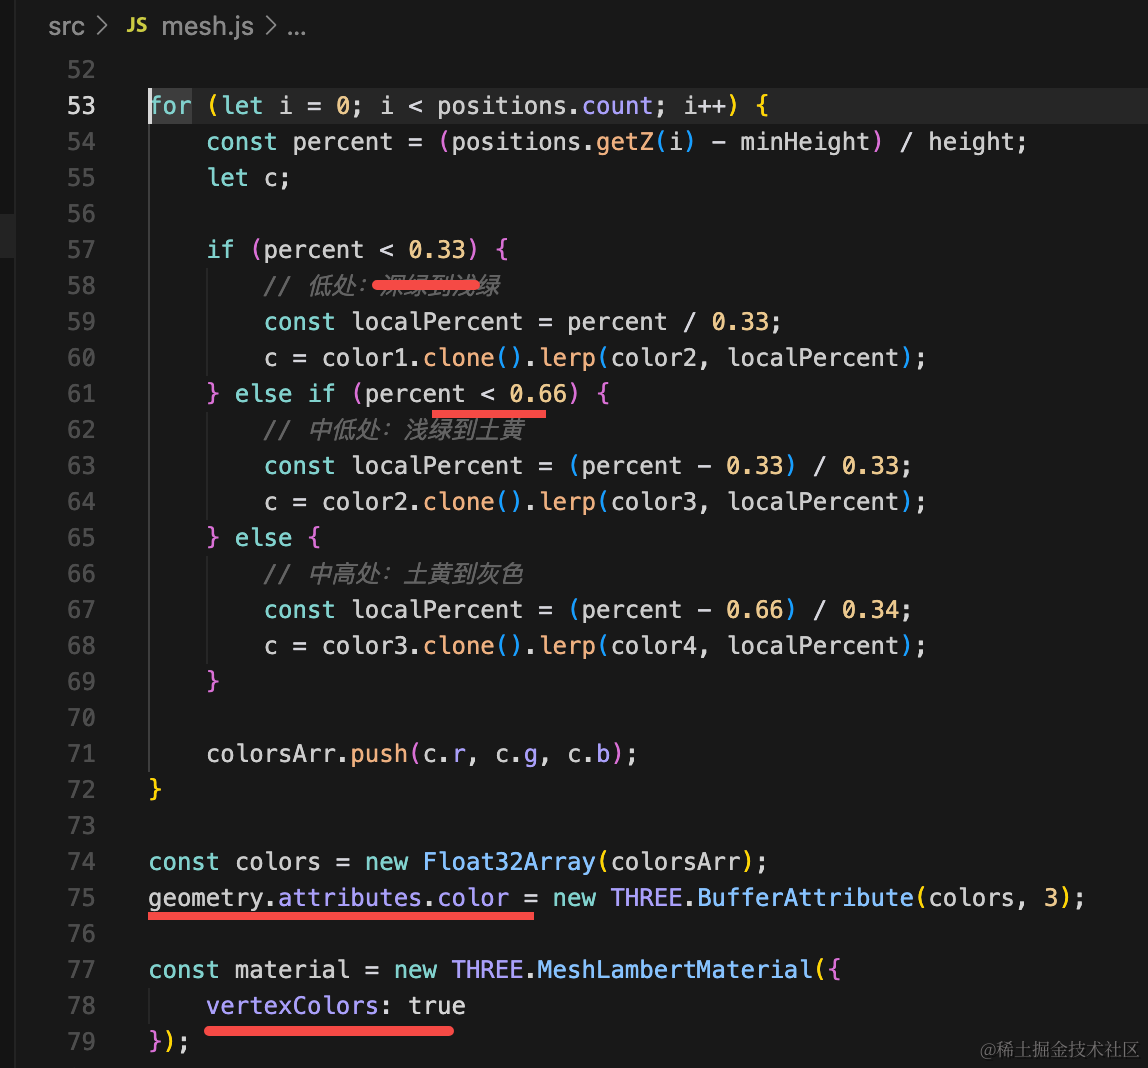
根据 z 的百分比分别设置不同的颜色渐变。
设置到 geometry.attributes.color
// 计算高度范围用于颜色映射
const heightArr = [];
for (let i = 0; i < positions.count; i++) {
    heightArr.push(positions.getZ(i));
}
heightArr.sort();

const minHeight = heightArr[0];
const maxHeight = heightArr[heightArr.length - 1];
const height = maxHeight - minHeight;

// 设置颜色渐变 - 土黄色系山地
const colorsArr = [];
const color1 = new THREE.Color('#d2b48c');  // 低处 - 浅土黄 (较浅的土黄色)
const color2 = new THREE.Color('#cd853f');  // 中低处 - 土黄色 (经典土黄色)
const color3 = new THREE.Color('#b8860b');  // 中高处 - 暗金色 (深土黄色)
const color4 = new THREE.Color('#8b7355');  // 高处 - 深棕色 (最深土黄色)

for (let i = 0; i < positions.count; i++) {
    const percent = (positions.getZ(i) - minHeight) / height;
    let c;

    if (percent < 0.33) {
        // 低处:深绿到浅绿
        const localPercent = percent / 0.33;
        c = color1.clone().lerp(color2, localPercent);
    } else if (percent < 0.66) {
        // 中低处:浅绿到土黄
        const localPercent = (percent - 0.33) / 0.33;
        c = color2.clone().lerp(color3, localPercent);
    } else {
        // 中高处:土黄到灰色
        const localPercent = (percent - 0.66) / 0.34;
        c = color3.clone().lerp(color4, localPercent);
    }

    colorsArr.push(c.r, c.g, c.b);
}

const colors = new Float32Array(colorsArr);
geometry.attributes.color = new THREE.BufferAttribute(colors, 3);

const material = new THREE.MeshLambertMaterial({
    vertexColors: true
});
看下效果:
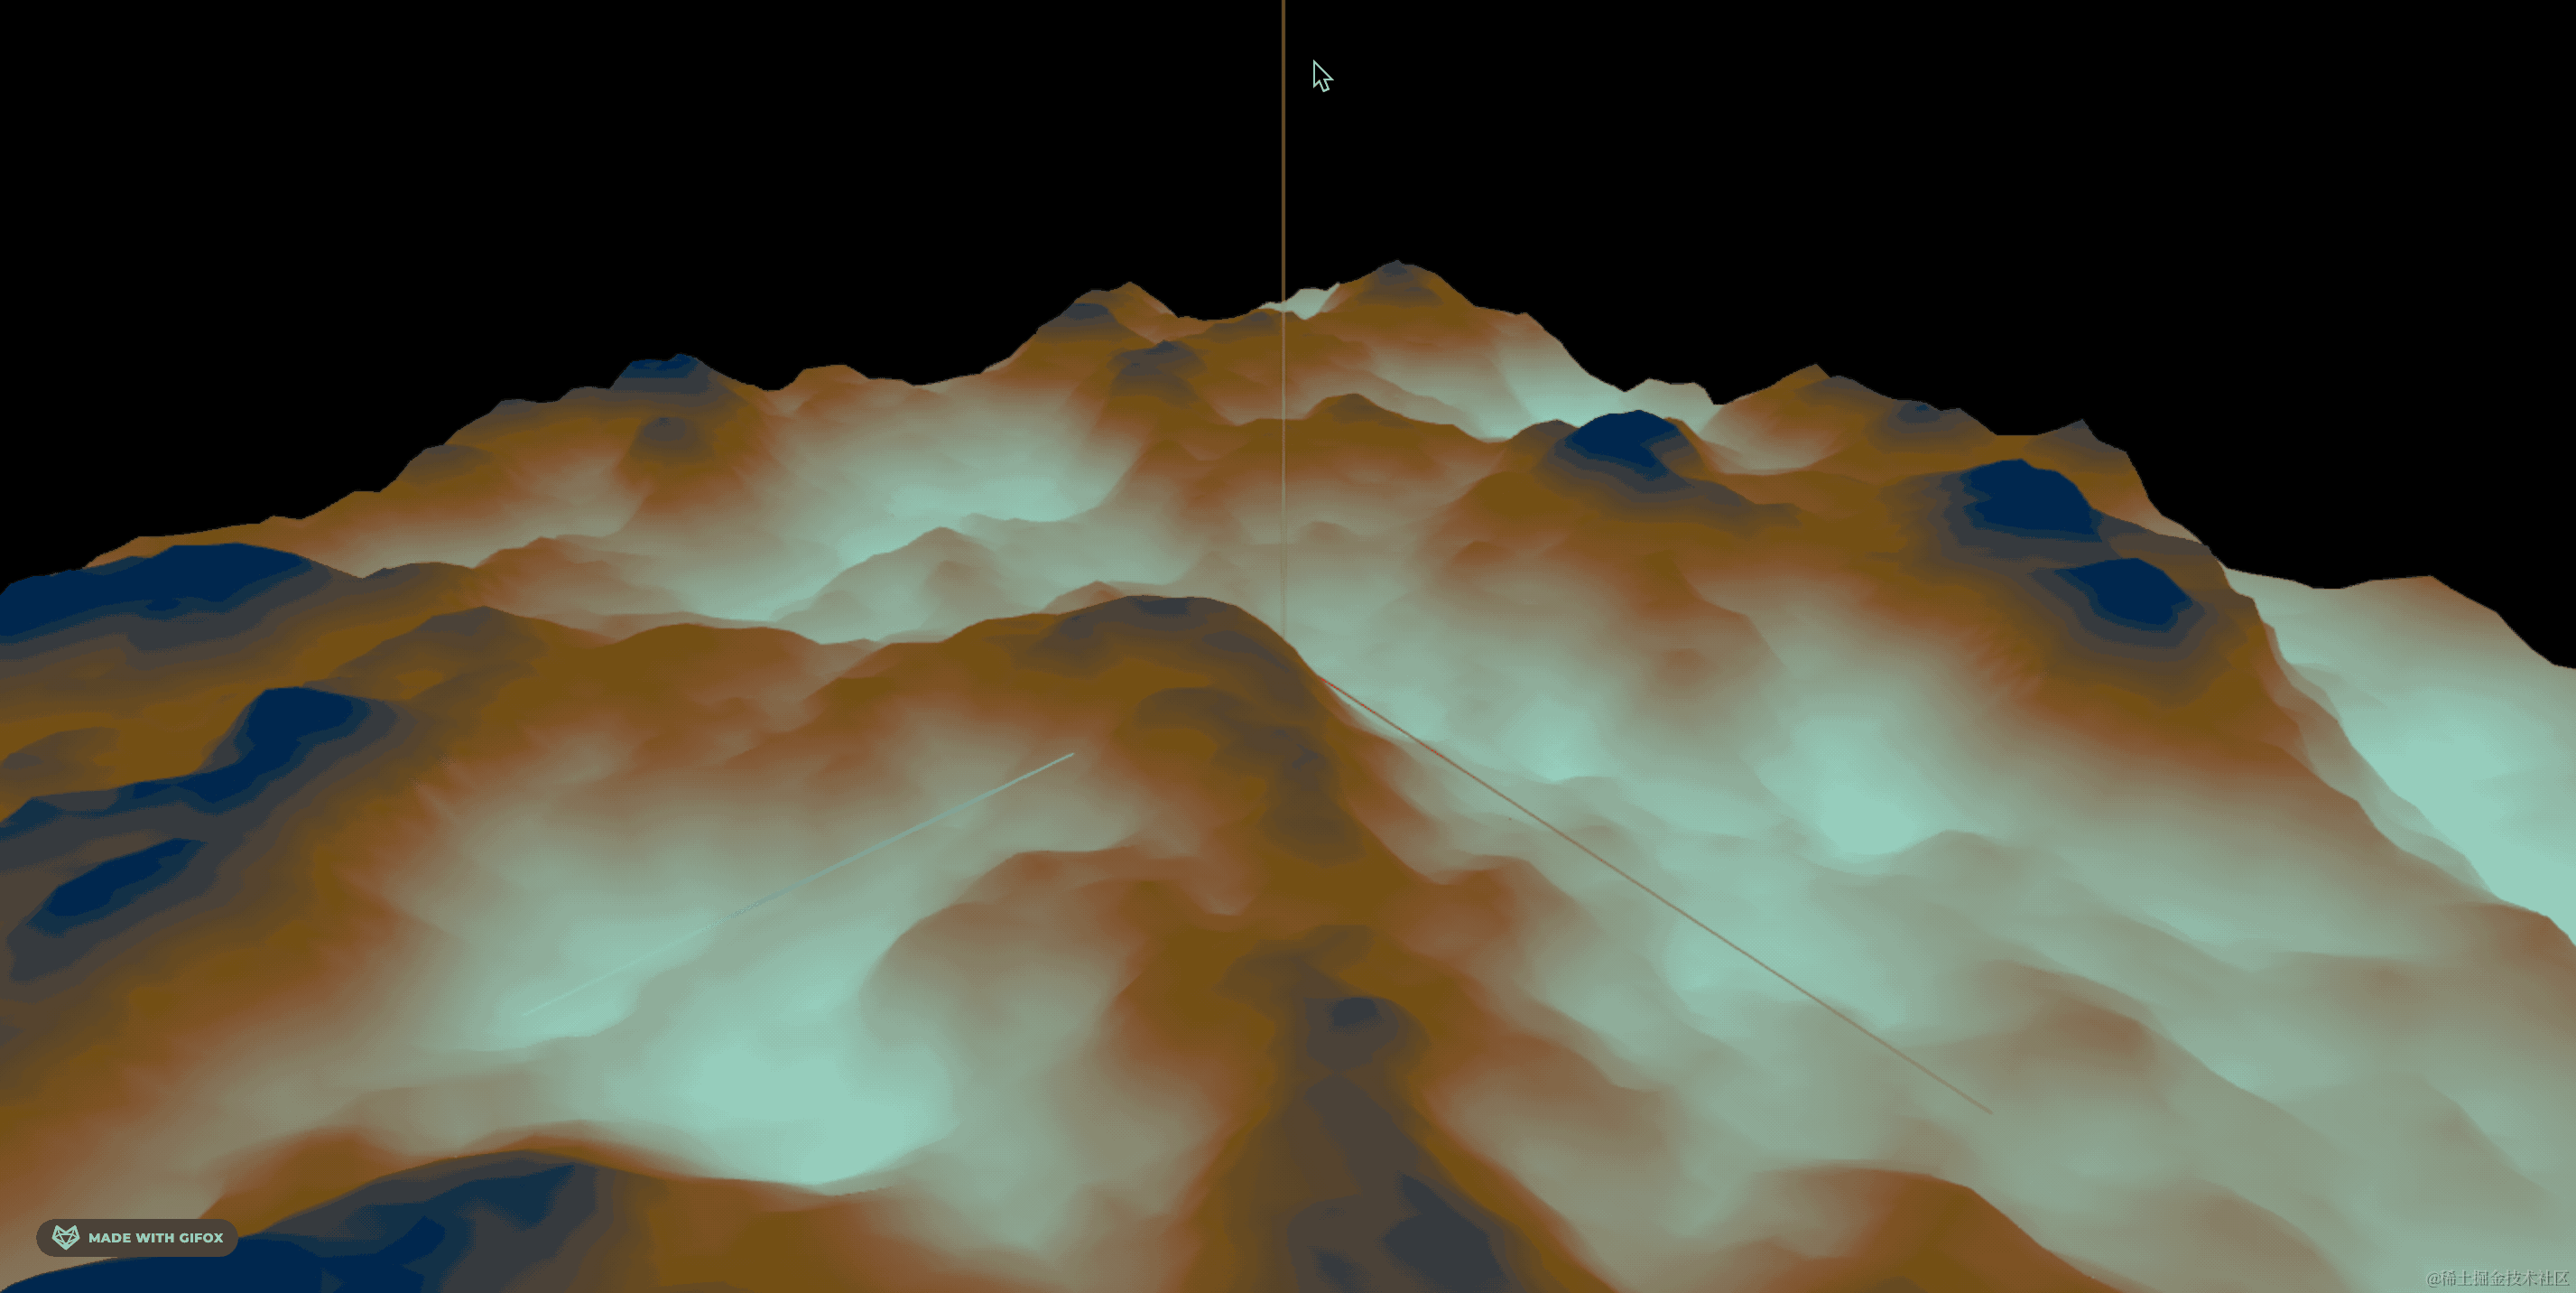
这样看起来就有山坡的感觉了。
案例代码上传了小册仓库
总结
这节我们把山画了一下,相比之前,现在做的更细致了。
用了 5 层噪音来实现更真实的山坡效果。
用了 5 种颜色渐变来添加颜色。
这样的山坡会更加的真实。
下节加上植被。