上节把山坡画了出来:
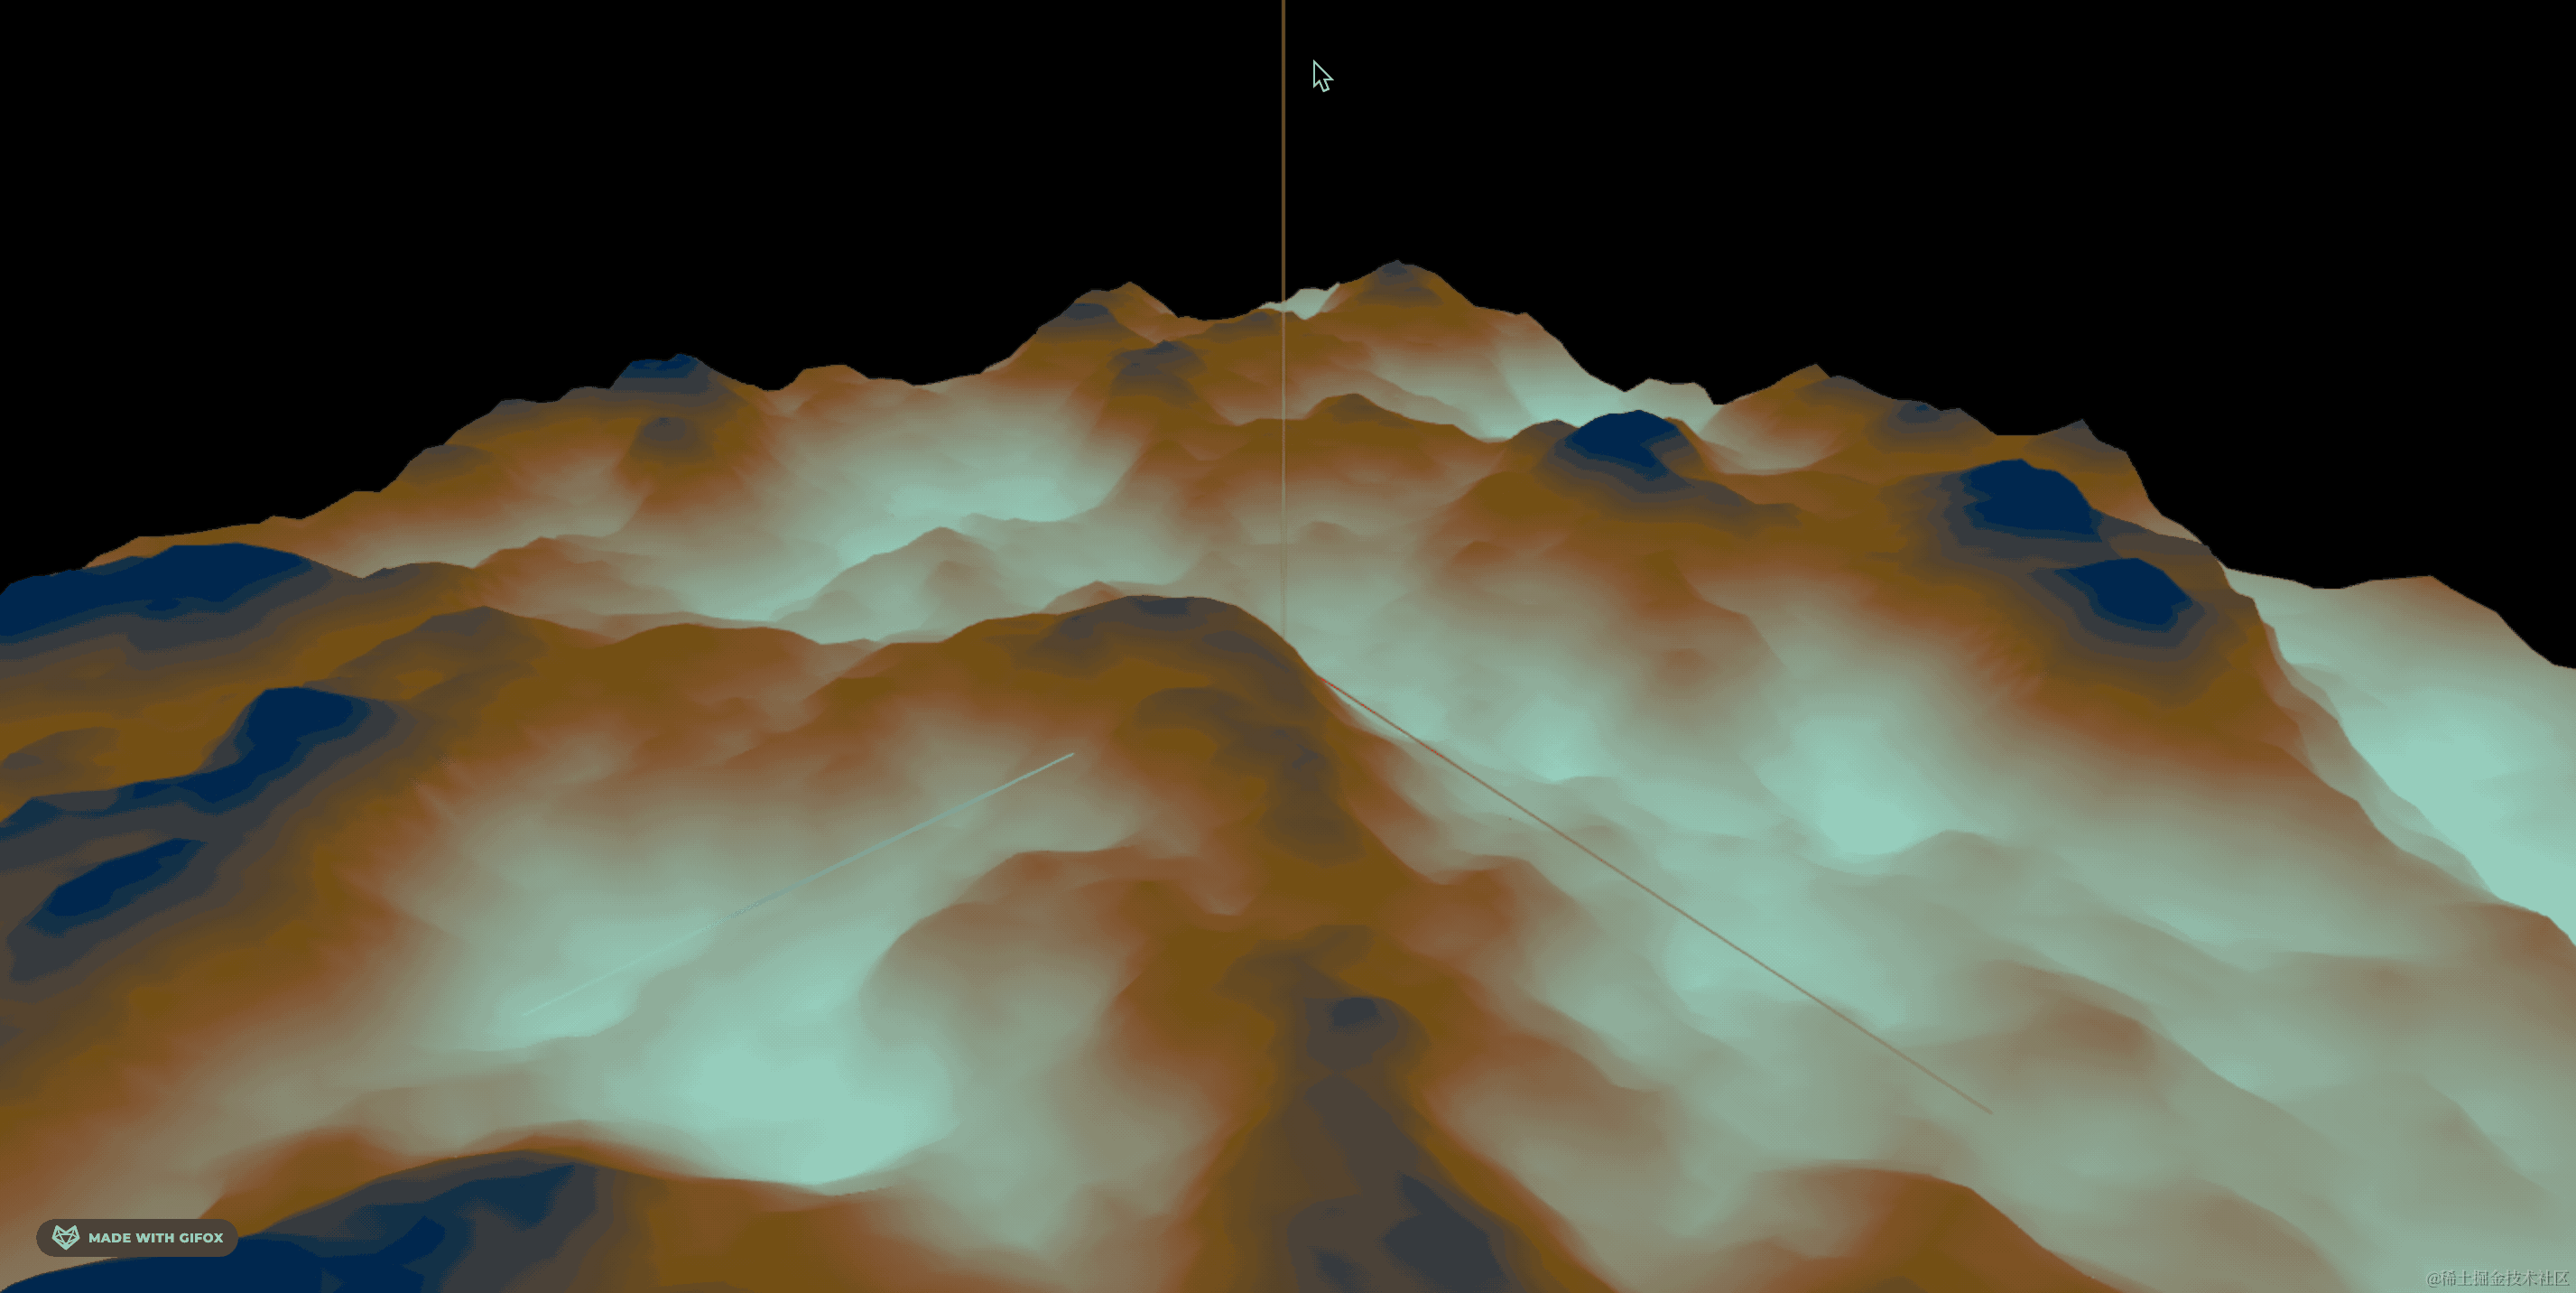
这节加上植被。
我们用表面采样器在山坡上随机取一些点:
const sampler = new MeshSurfaceSampler(mountainside).build();

const flowerPositions = [];
const position = new THREE.Vector3();

// 在地形表面采样3000个点作为鲜花位置
for (let i = 0; i < 3000; i++) {
    sampler.sample(position);
    flowerPositions.push(position.x, position.y, position.z);
}


const flowerGeometry = new THREE.BoxGeometry(2, 2, 30);
const flowerMaterial = new THREE.MeshPhongMaterial({
    color: 'pink'
});

const flowersGroup = new THREE.Group();

for (let i = 0; i < flowerPositions.length; i += 3) {
    const flower = new THREE.Mesh(flowerGeometry, flowerMaterial);
    const flowerPosition = new THREE.Vector3(
        flowerPositions[i],
        flowerPositions[i + 1],
        flowerPositions[i + 2]
    );

    flower.position.copy(flowerPosition);

    flowersGroup.add(flower);
}

mountainside.add(flowersGroup);
我们采样了 3000 个点,然后画了立方体。
看下效果:
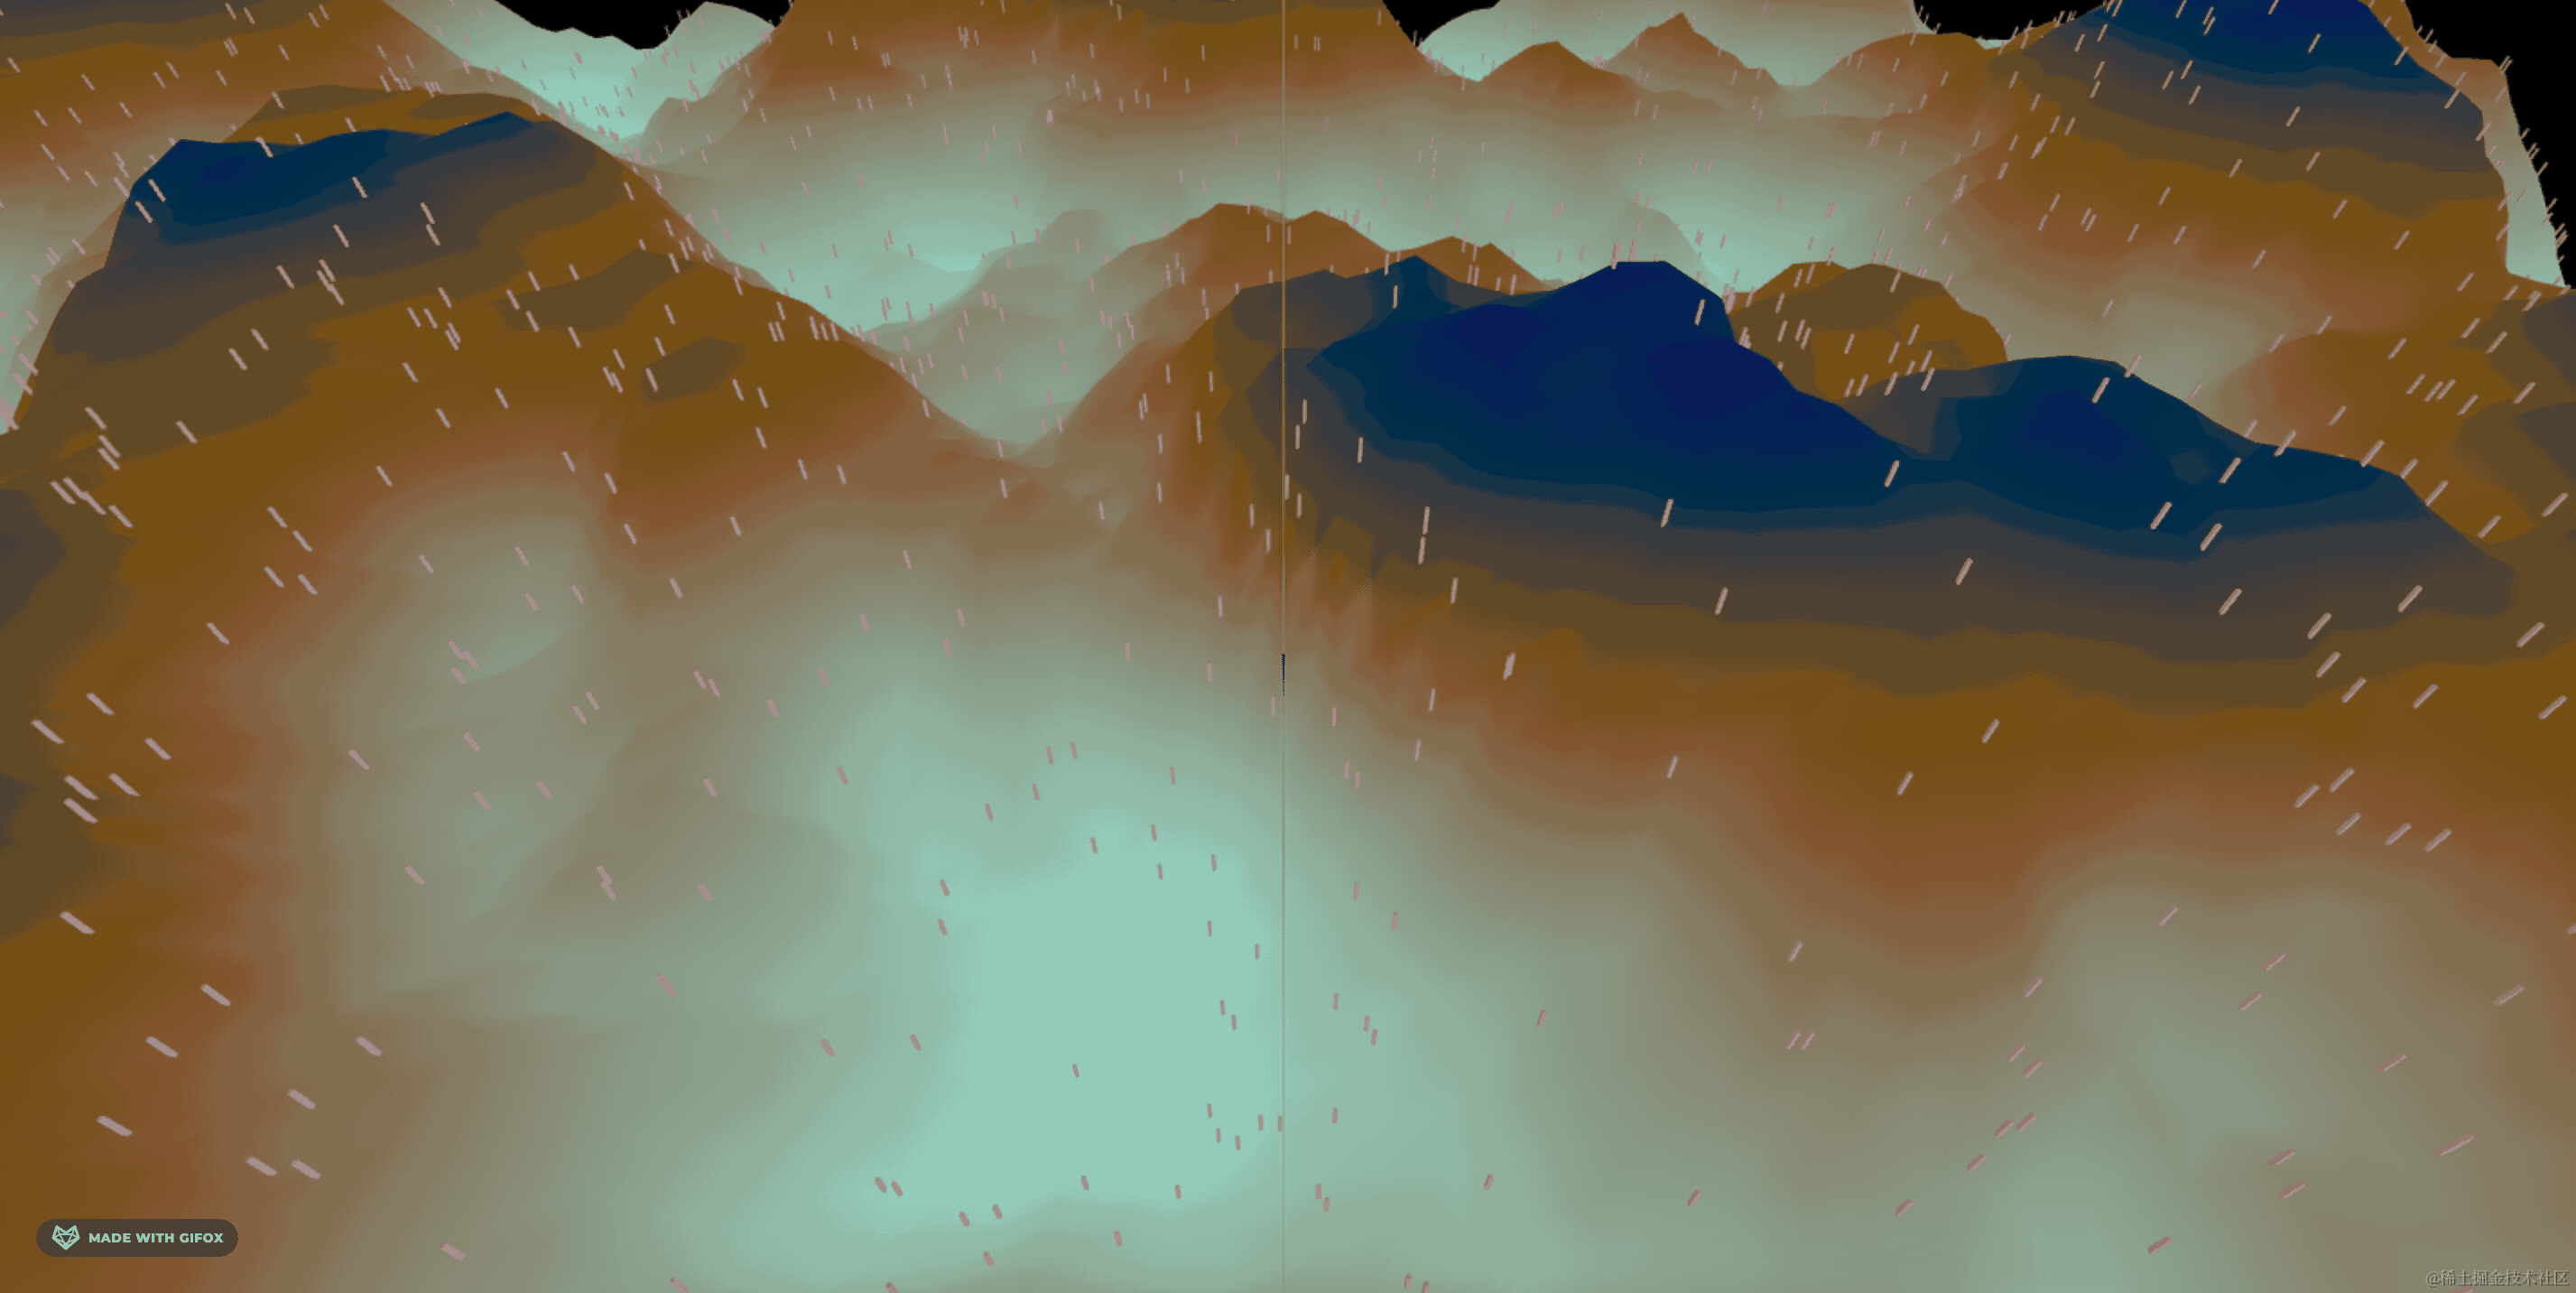
用采样器可比我们随机取简单多了。
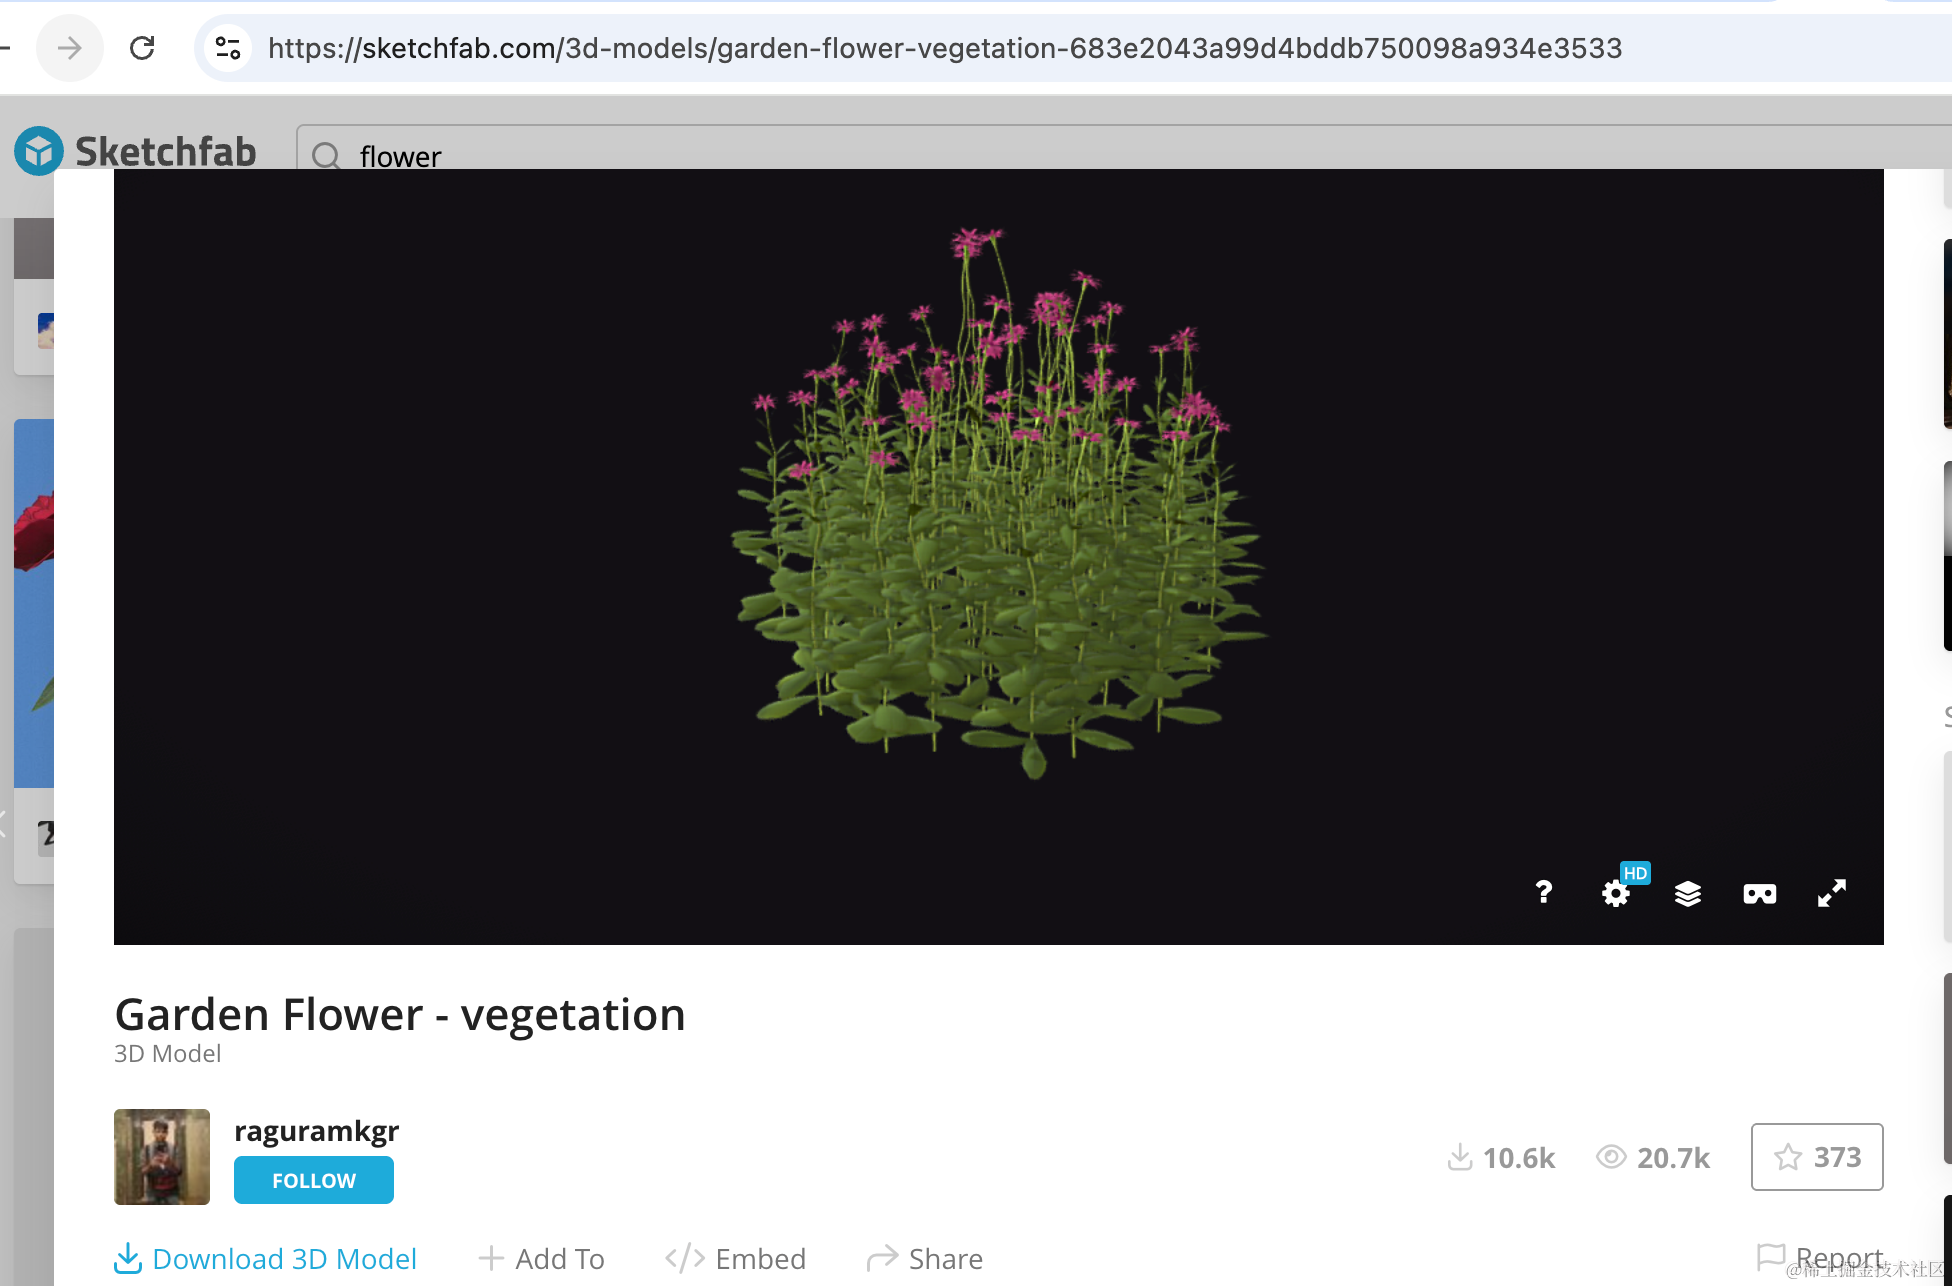
然后找个花的模型:
https://sketchfab.com/3d-models/garden-flower-vegetation-683e2043a99d4bddb750098a934e3533
下载 glb 放到 public 目录:
引入下:
const loader = new GLTFLoader();
const flowersGroup = new THREE.Group();
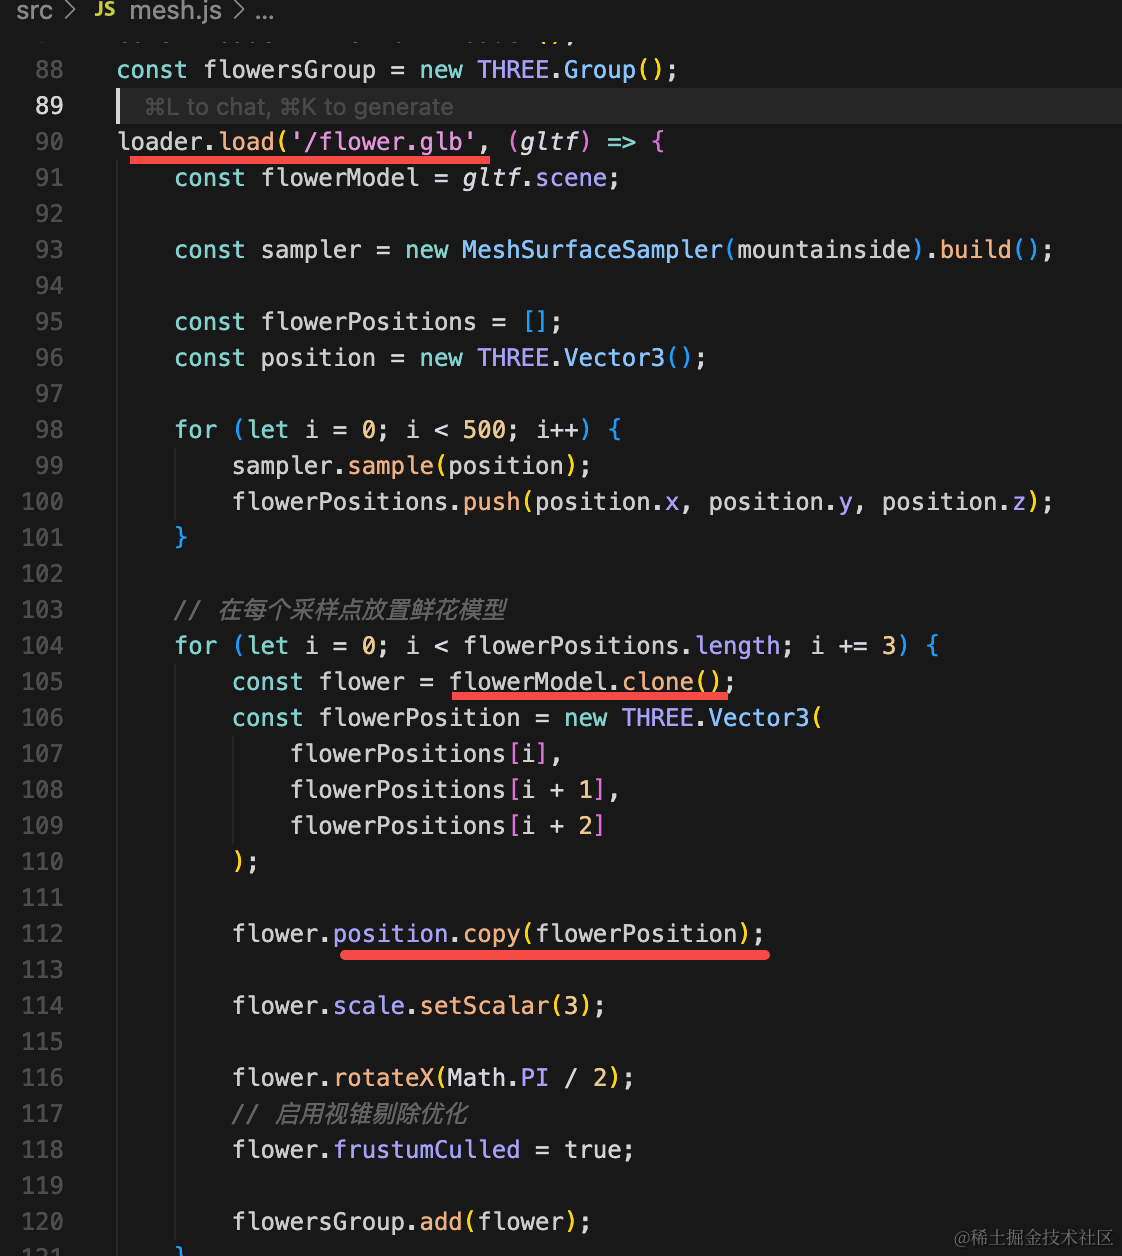
loader.load('/flower.glb', (gltf) => {
const flowerModel = gltf.scene;
const sampler = new MeshSurfaceSampler(mountainside).build();
const flowerPositions = [];
const position = new THREE.Vector3();
for (let i = 0; i < 500; i++) {
sampler.sample(position);
flowerPositions.push(position.x, position.y, position.z);
}
// 在每个采样点放置鲜花模型
for (let i = 0; i < flowerPositions.length; i += 3) {
const flower = flowerModel.clone();
const flowerPosition = new THREE.Vector3(
flowerPositions[i],
flowerPositions[i + 1],
flowerPositions[i + 2]
);
flower.position.copy(flowerPosition);
flower.scale.setScalar(3);
flower.rotateX(Math.PI / 2);
// 启用视锥剔除优化
flower.frustumCulled = true;
flowersGroup.add(flower);
}
mountainside.add(flowersGroup);
});这样代码比较重要:
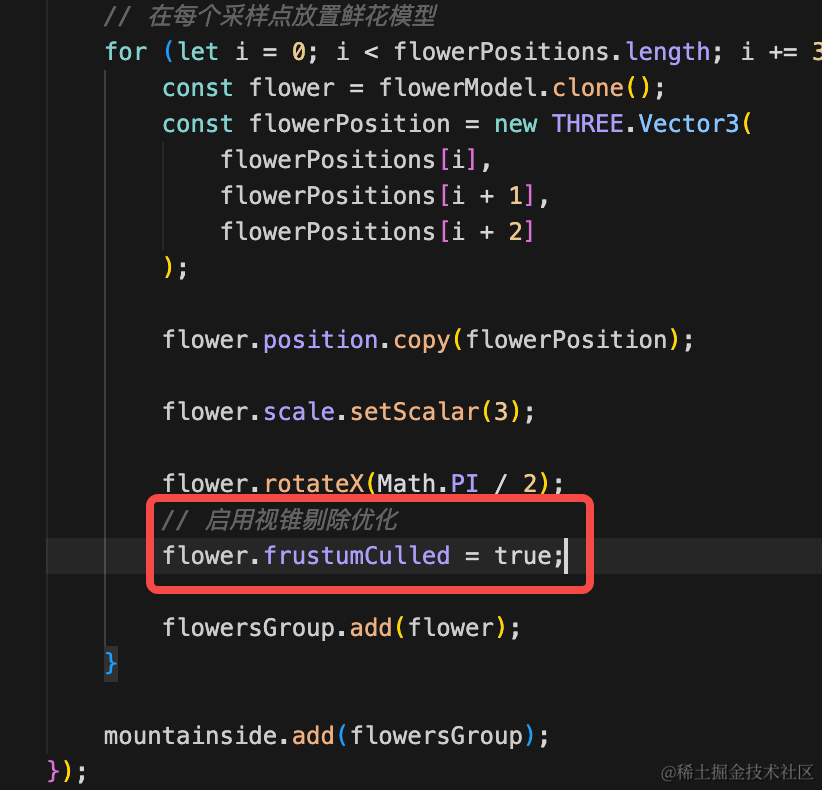
它是只渲染看到的模型,视椎体内看不到的不渲染。
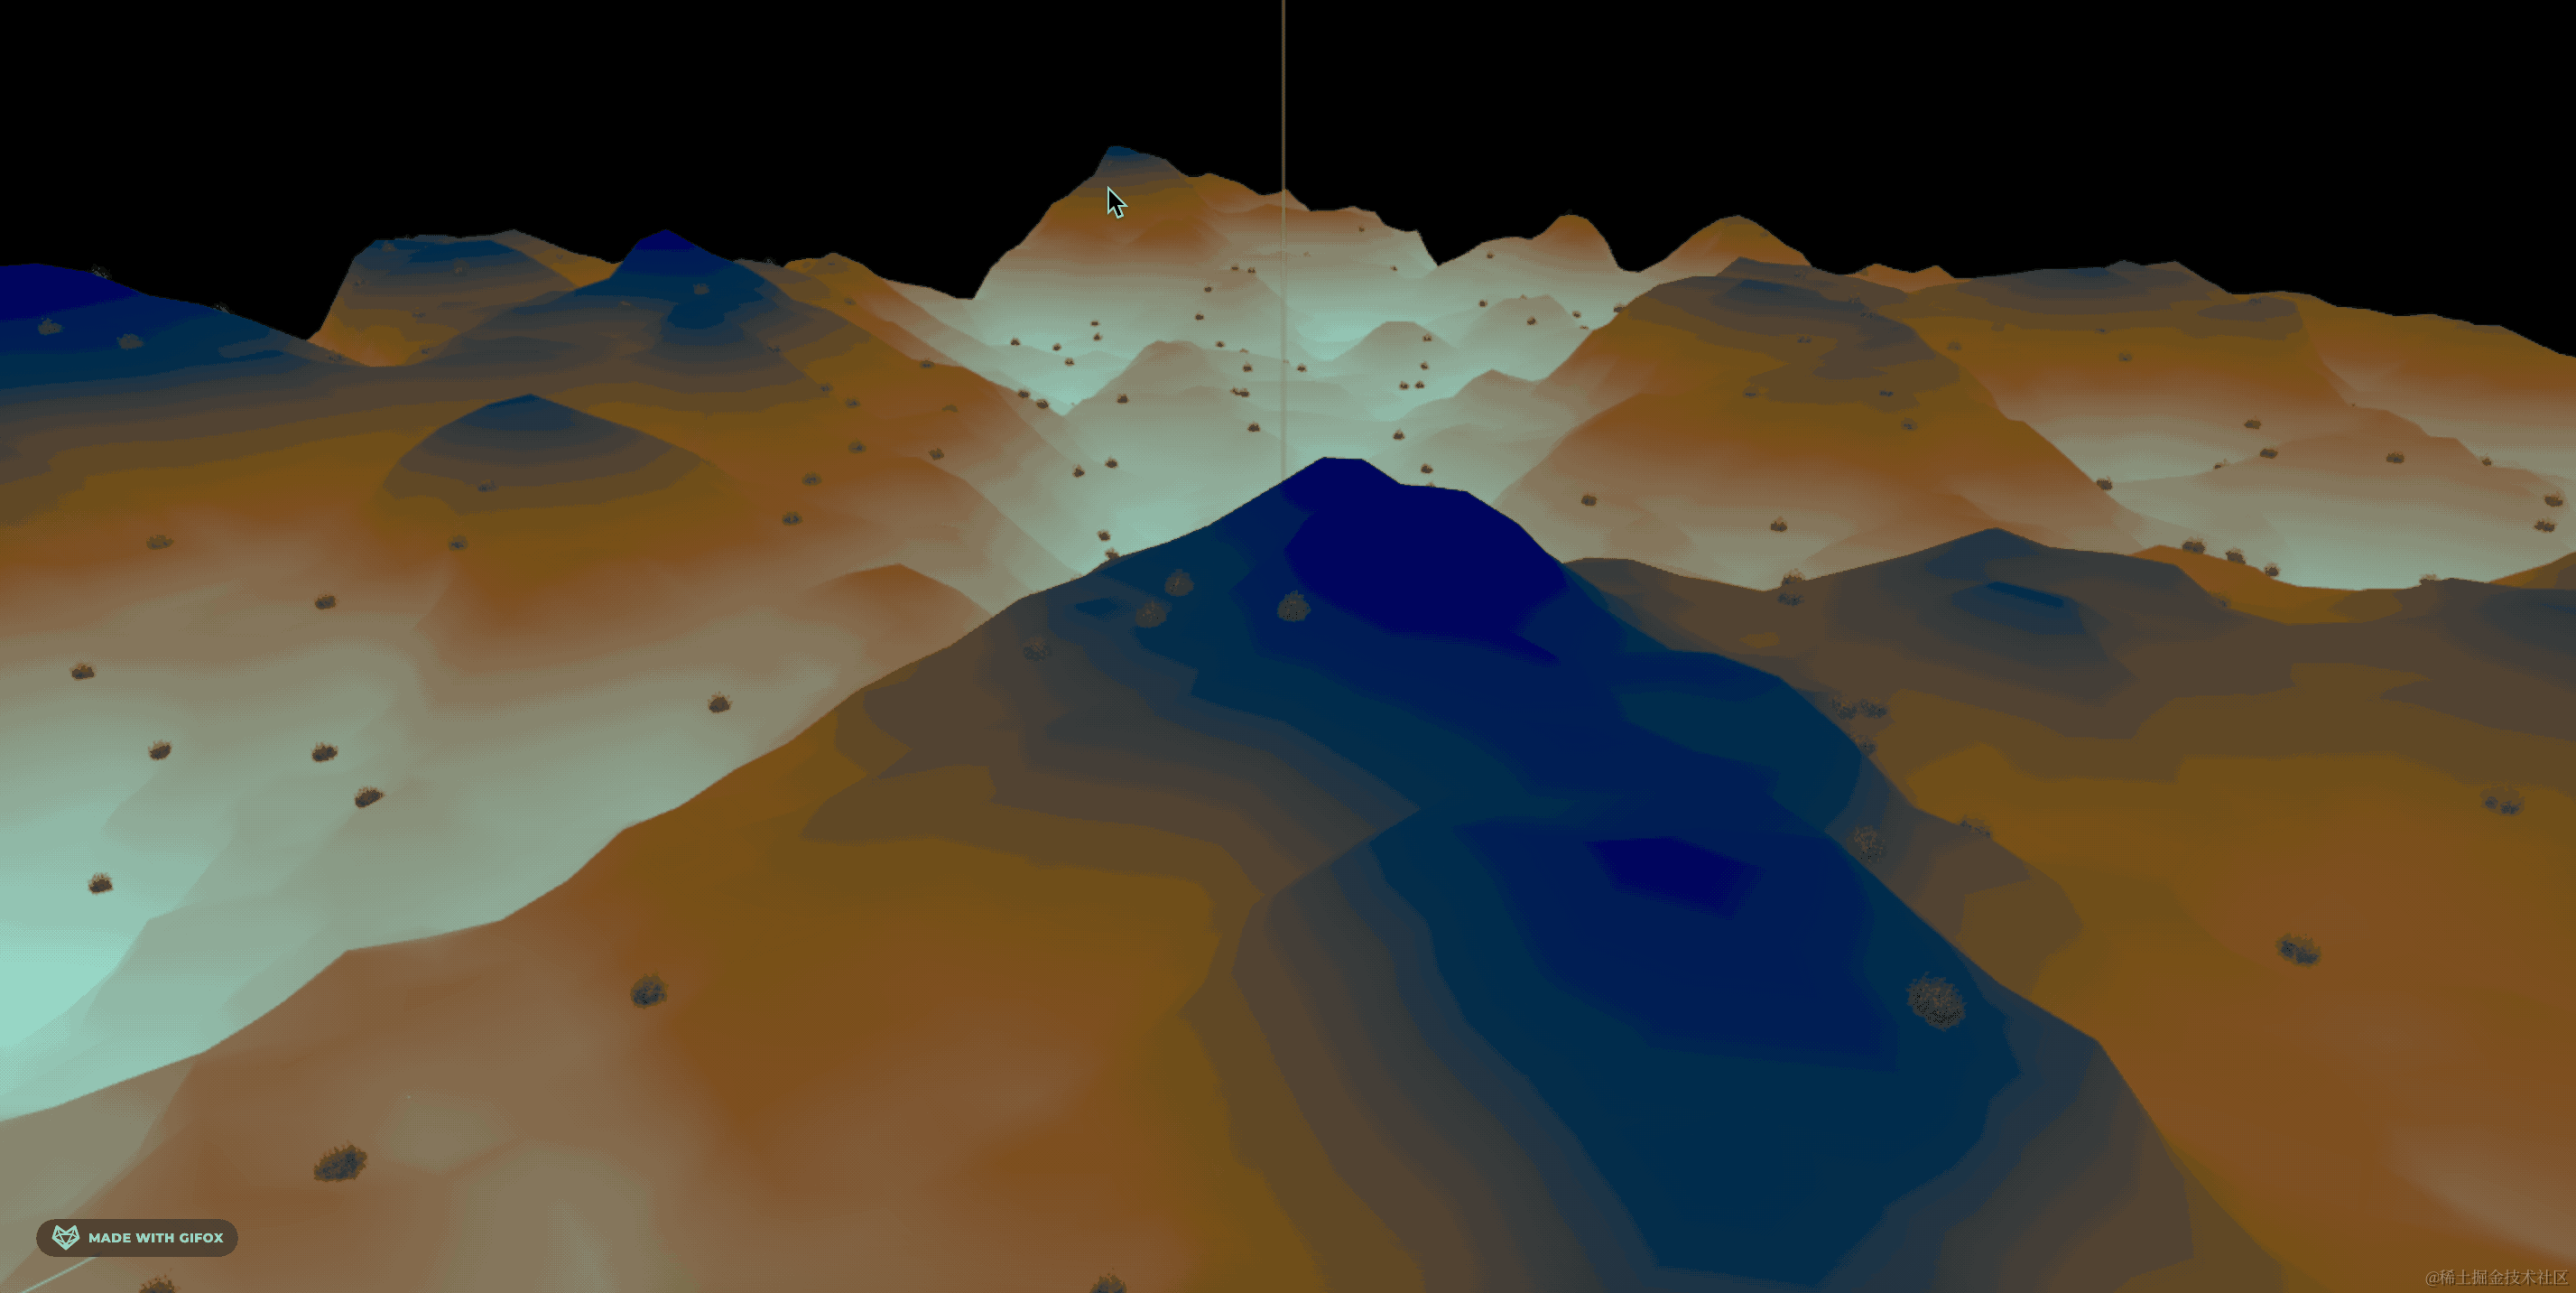
只有花还是太突兀了,我们再加一些树。
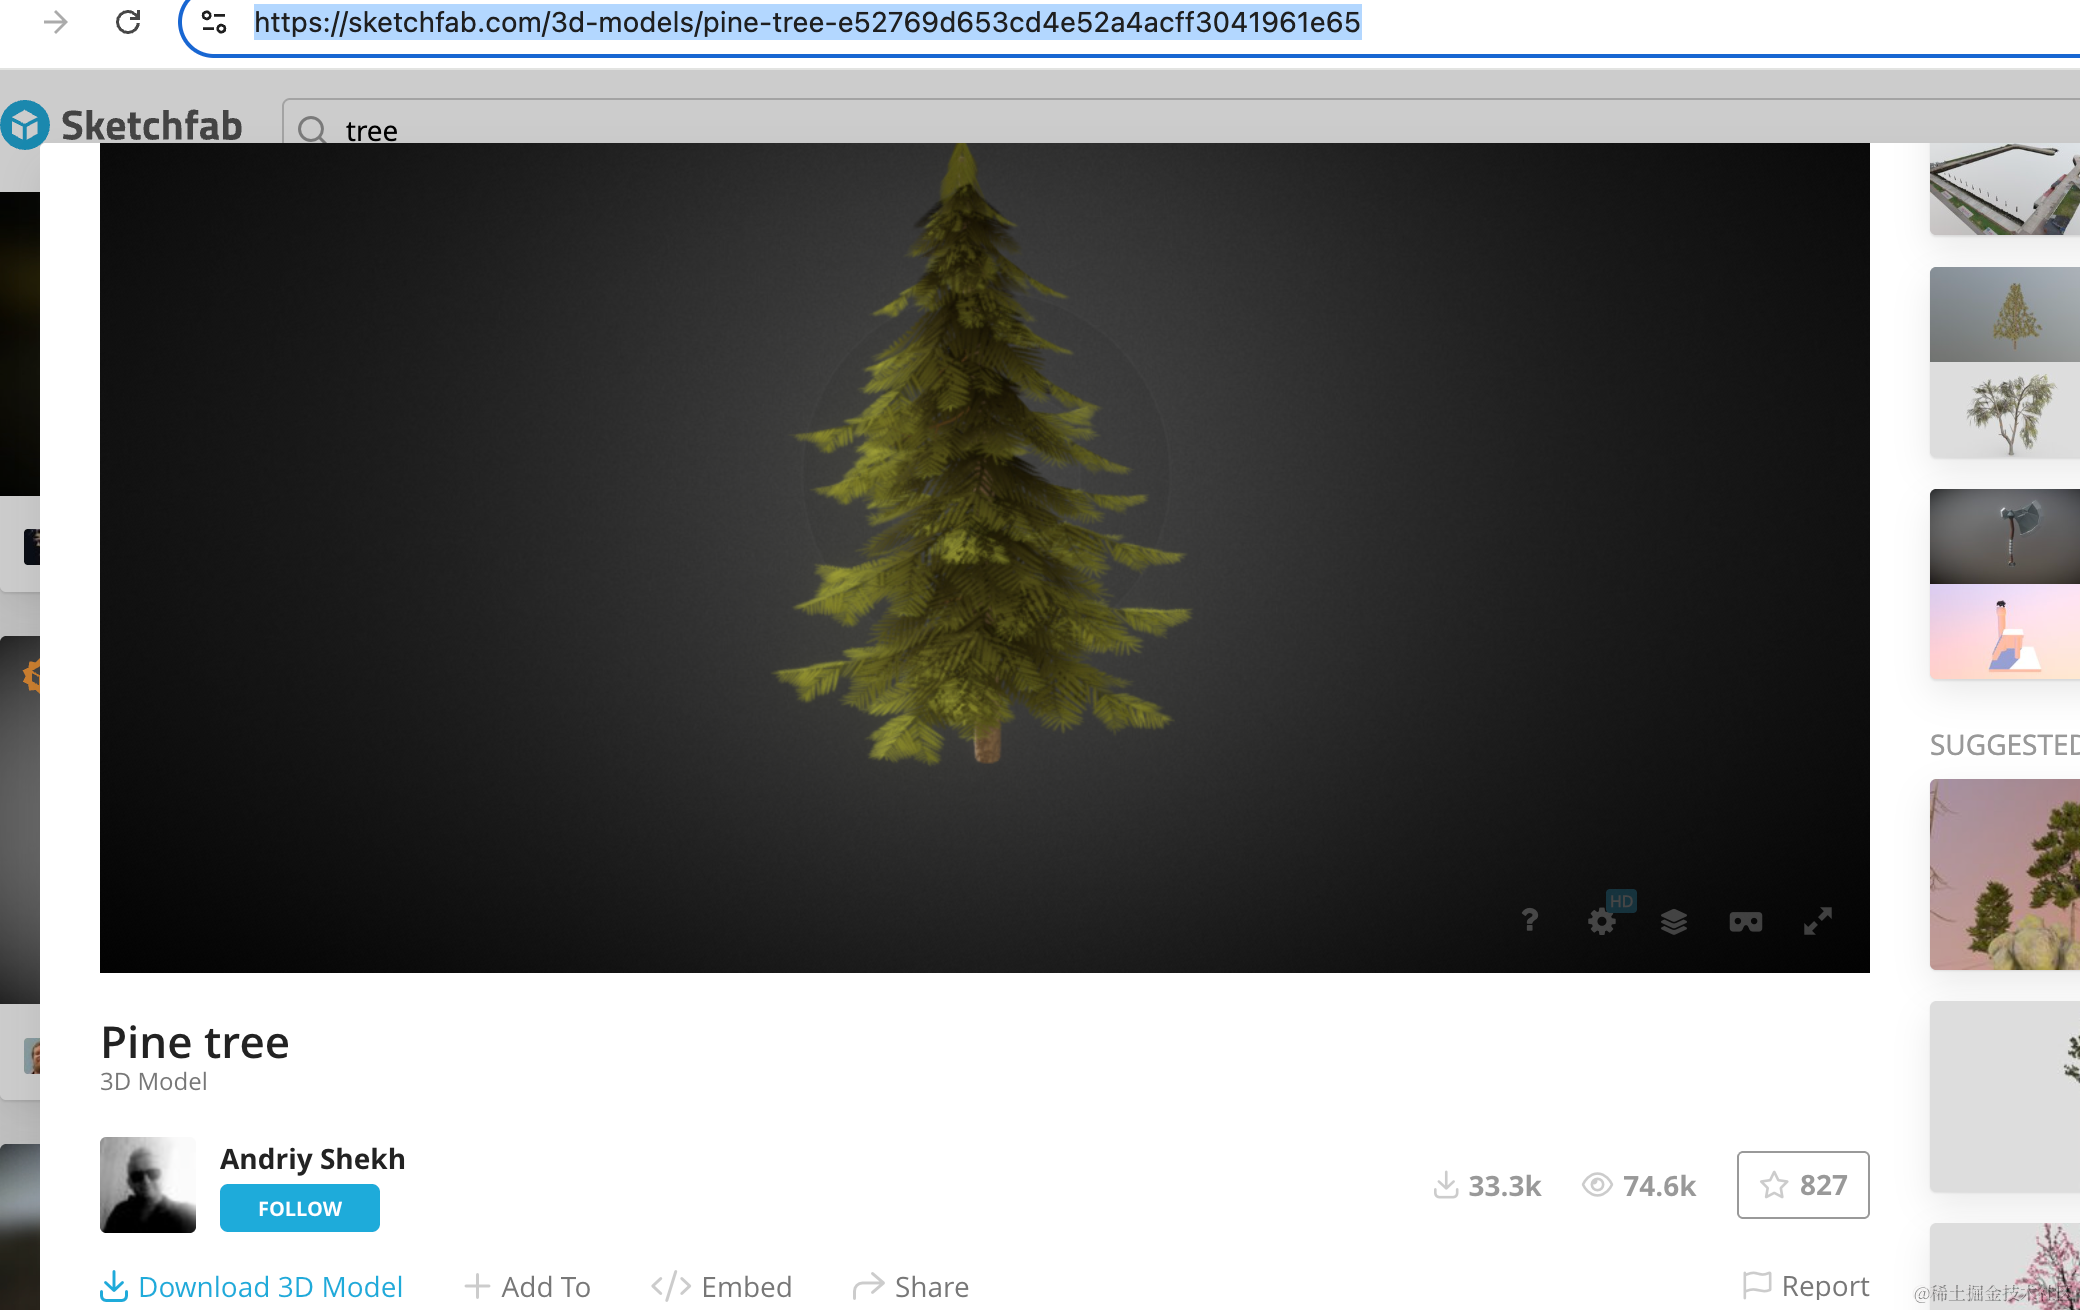
https://sketchfab.com/3d-models/pine-tree-e52769d653cd4e52a4acff3041961e65

引入下:
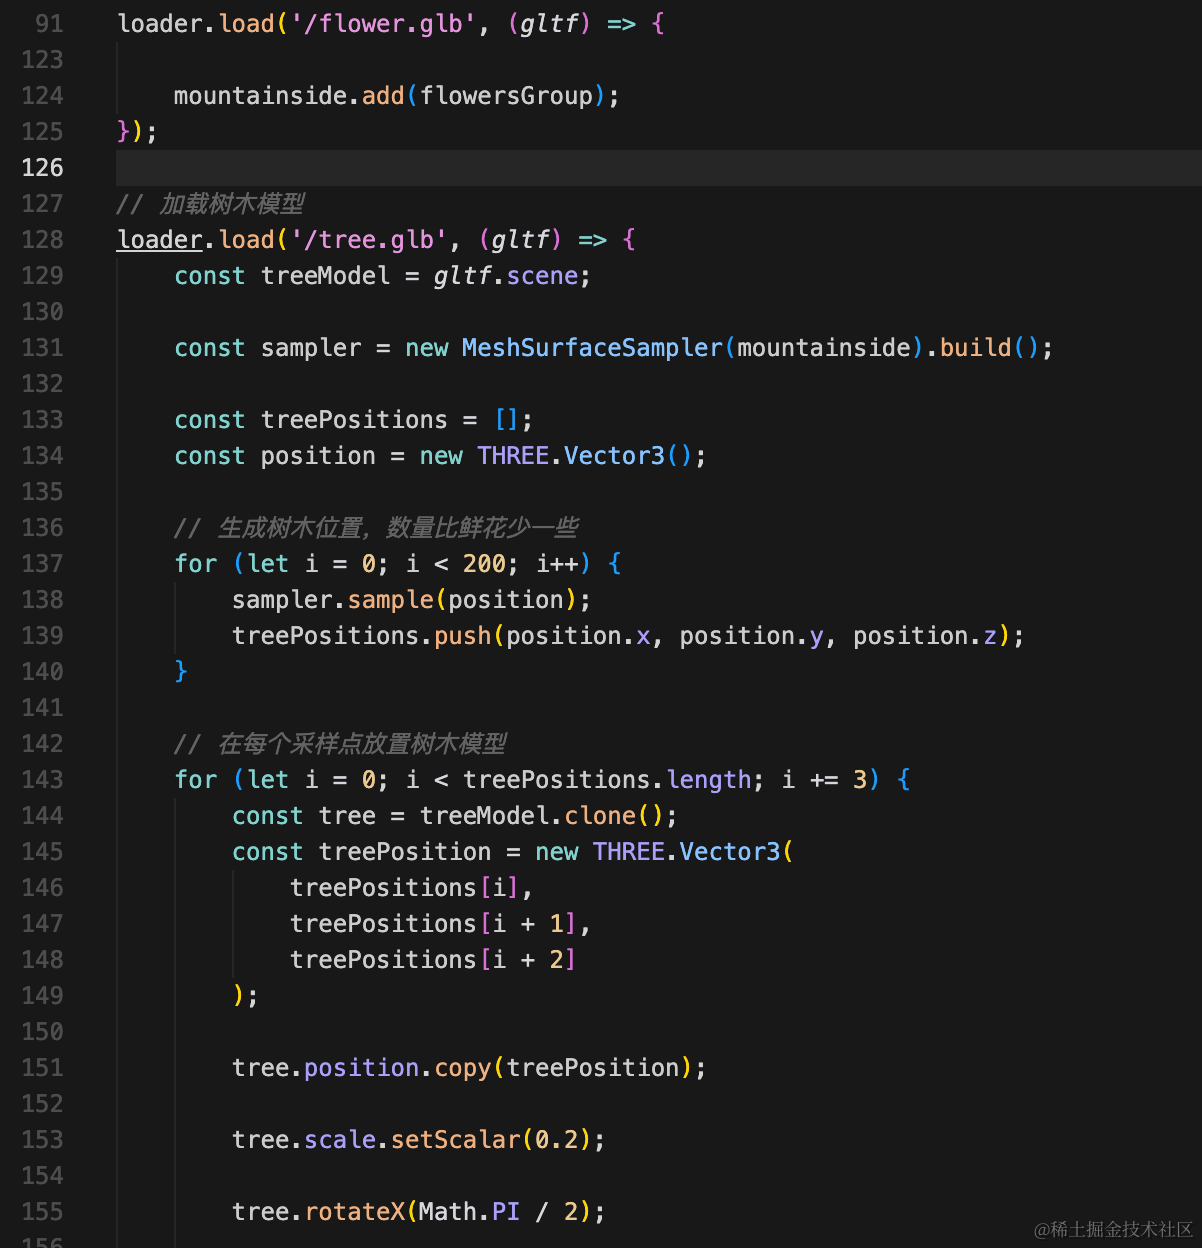
// 加载树木模型
loader.load('/tree.glb', (gltf) => {
    const treeModel = gltf.scene;

    const sampler = new MeshSurfaceSampler(mountainside).build();

    const treePositions = [];
    const position = new THREE.Vector3();

    // 生成树木位置,数量比鲜花少一些
    for (let i = 0; i < 200; i++) {
        sampler.sample(position);
        treePositions.push(position.x, position.y, position.z);
    }

    // 在每个采样点放置树木模型
    for (let i = 0; i < treePositions.length; i += 3) {
        const tree = treeModel.clone();
        const treePosition = new THREE.Vector3(
            treePositions[i],
            treePositions[i + 1],
            treePositions[i + 2]
        );

        tree.position.copy(treePosition);

        tree.scale.setScalar(0.2);

        tree.rotateX(Math.PI / 2);

        // 添加随机的Y轴旋转(绕垂直轴旋转)
        const randomRotationY = Math.random() * Math.PI * 2; // 0 到 2π 的随机旋转
        tree.rotateY(randomRotationY);

        // 启用视锥剔除优化
        tree.frustumCulled = true;

        treesGroup.add(tree);
    }

    mountainside.add(treesGroup);
});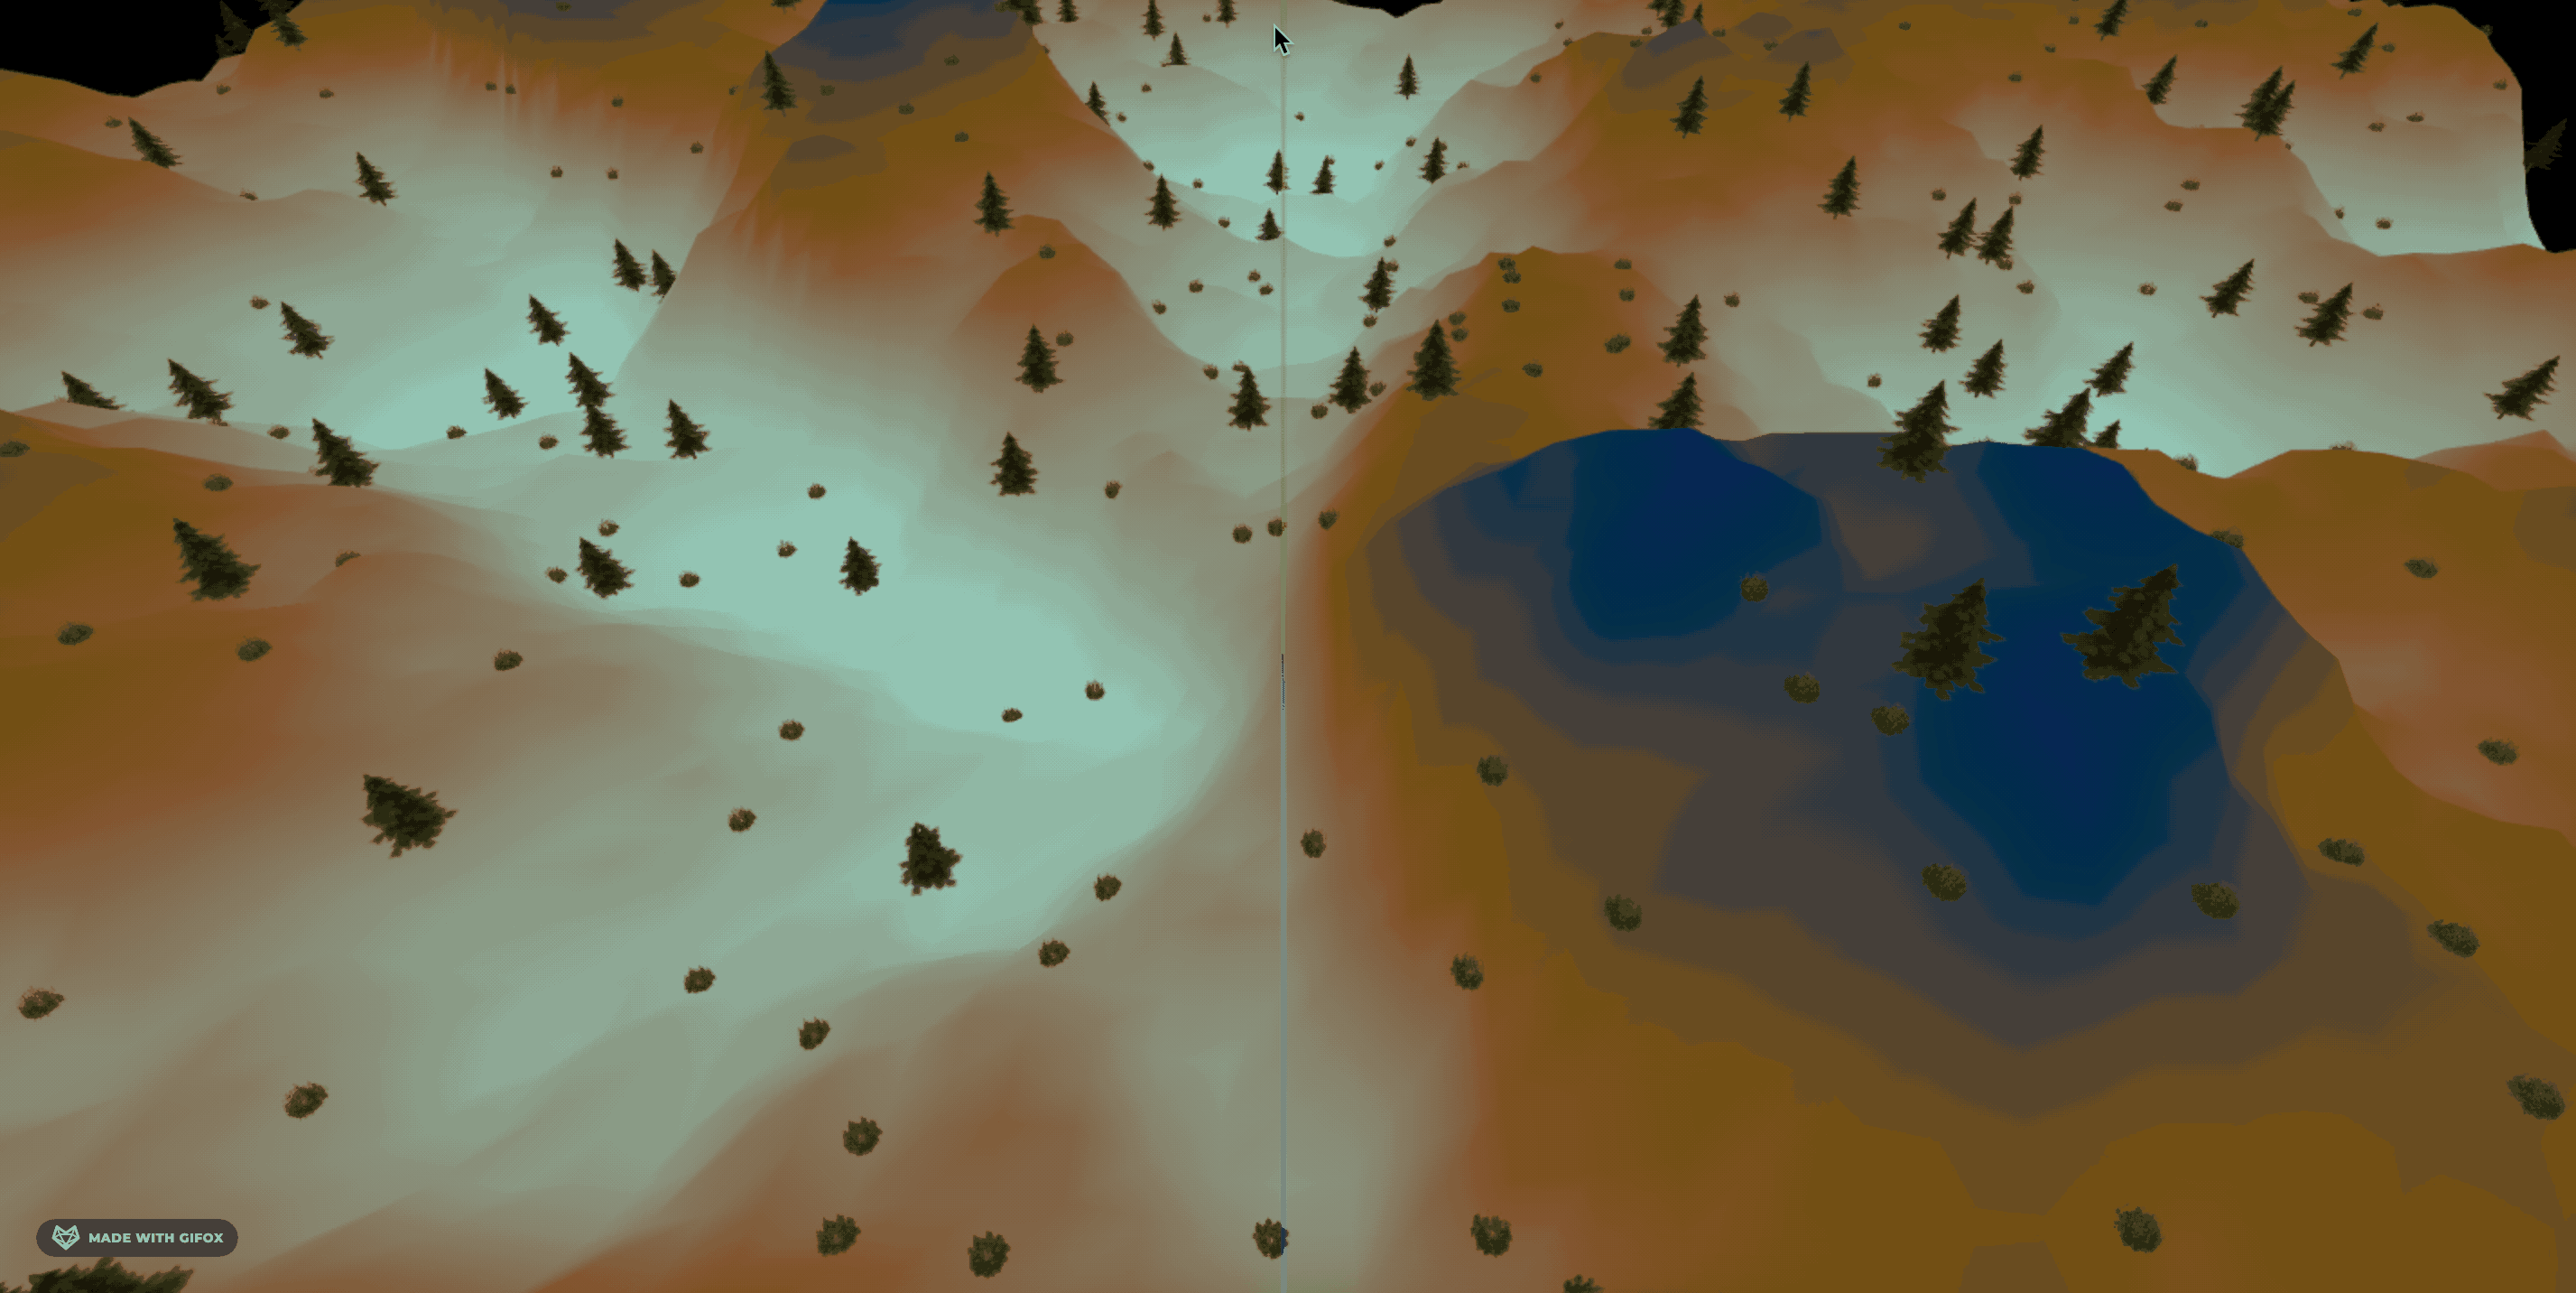
这样好多了。
现在山的颜色有点奇怪,我们改一下。
自己找个网页用调色板调好复制出来就行:
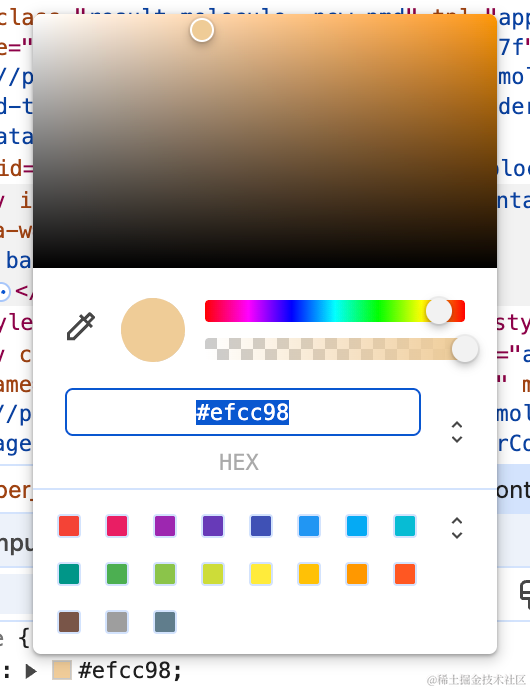
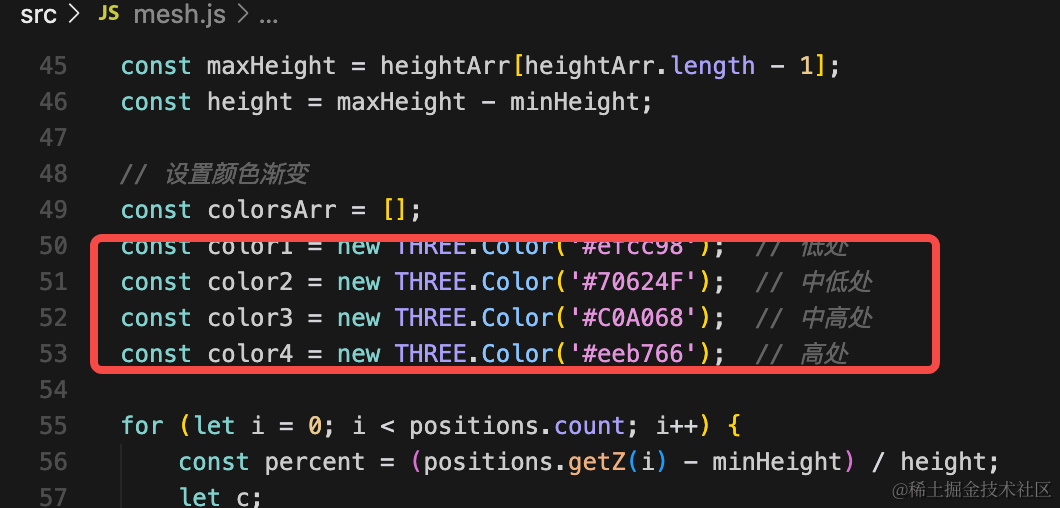
const color1 = new THREE.Color('#efcc98');  // 低处
const color2 = new THREE.Color('#70624F');  // 中低处
const color3 = new THREE.Color('#C0A068');  // 中高处
const color4 = new THREE.Color('#eeb766');  // 高处
灯光也调一下,去掉环境光,平行光亮度调低:
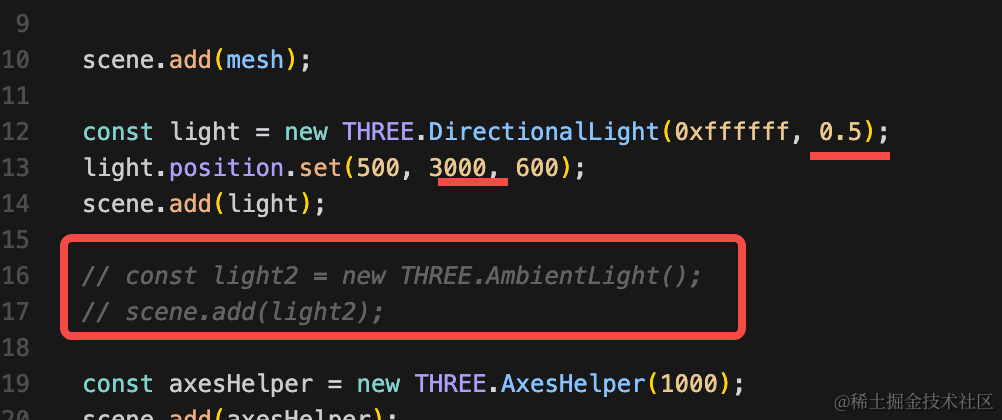
const light = new THREE.DirectionalLight(0xffffff, 0.5);
light.position.set(500, 3000, 600);
scene.add(light);
顺便去掉坐标轴。
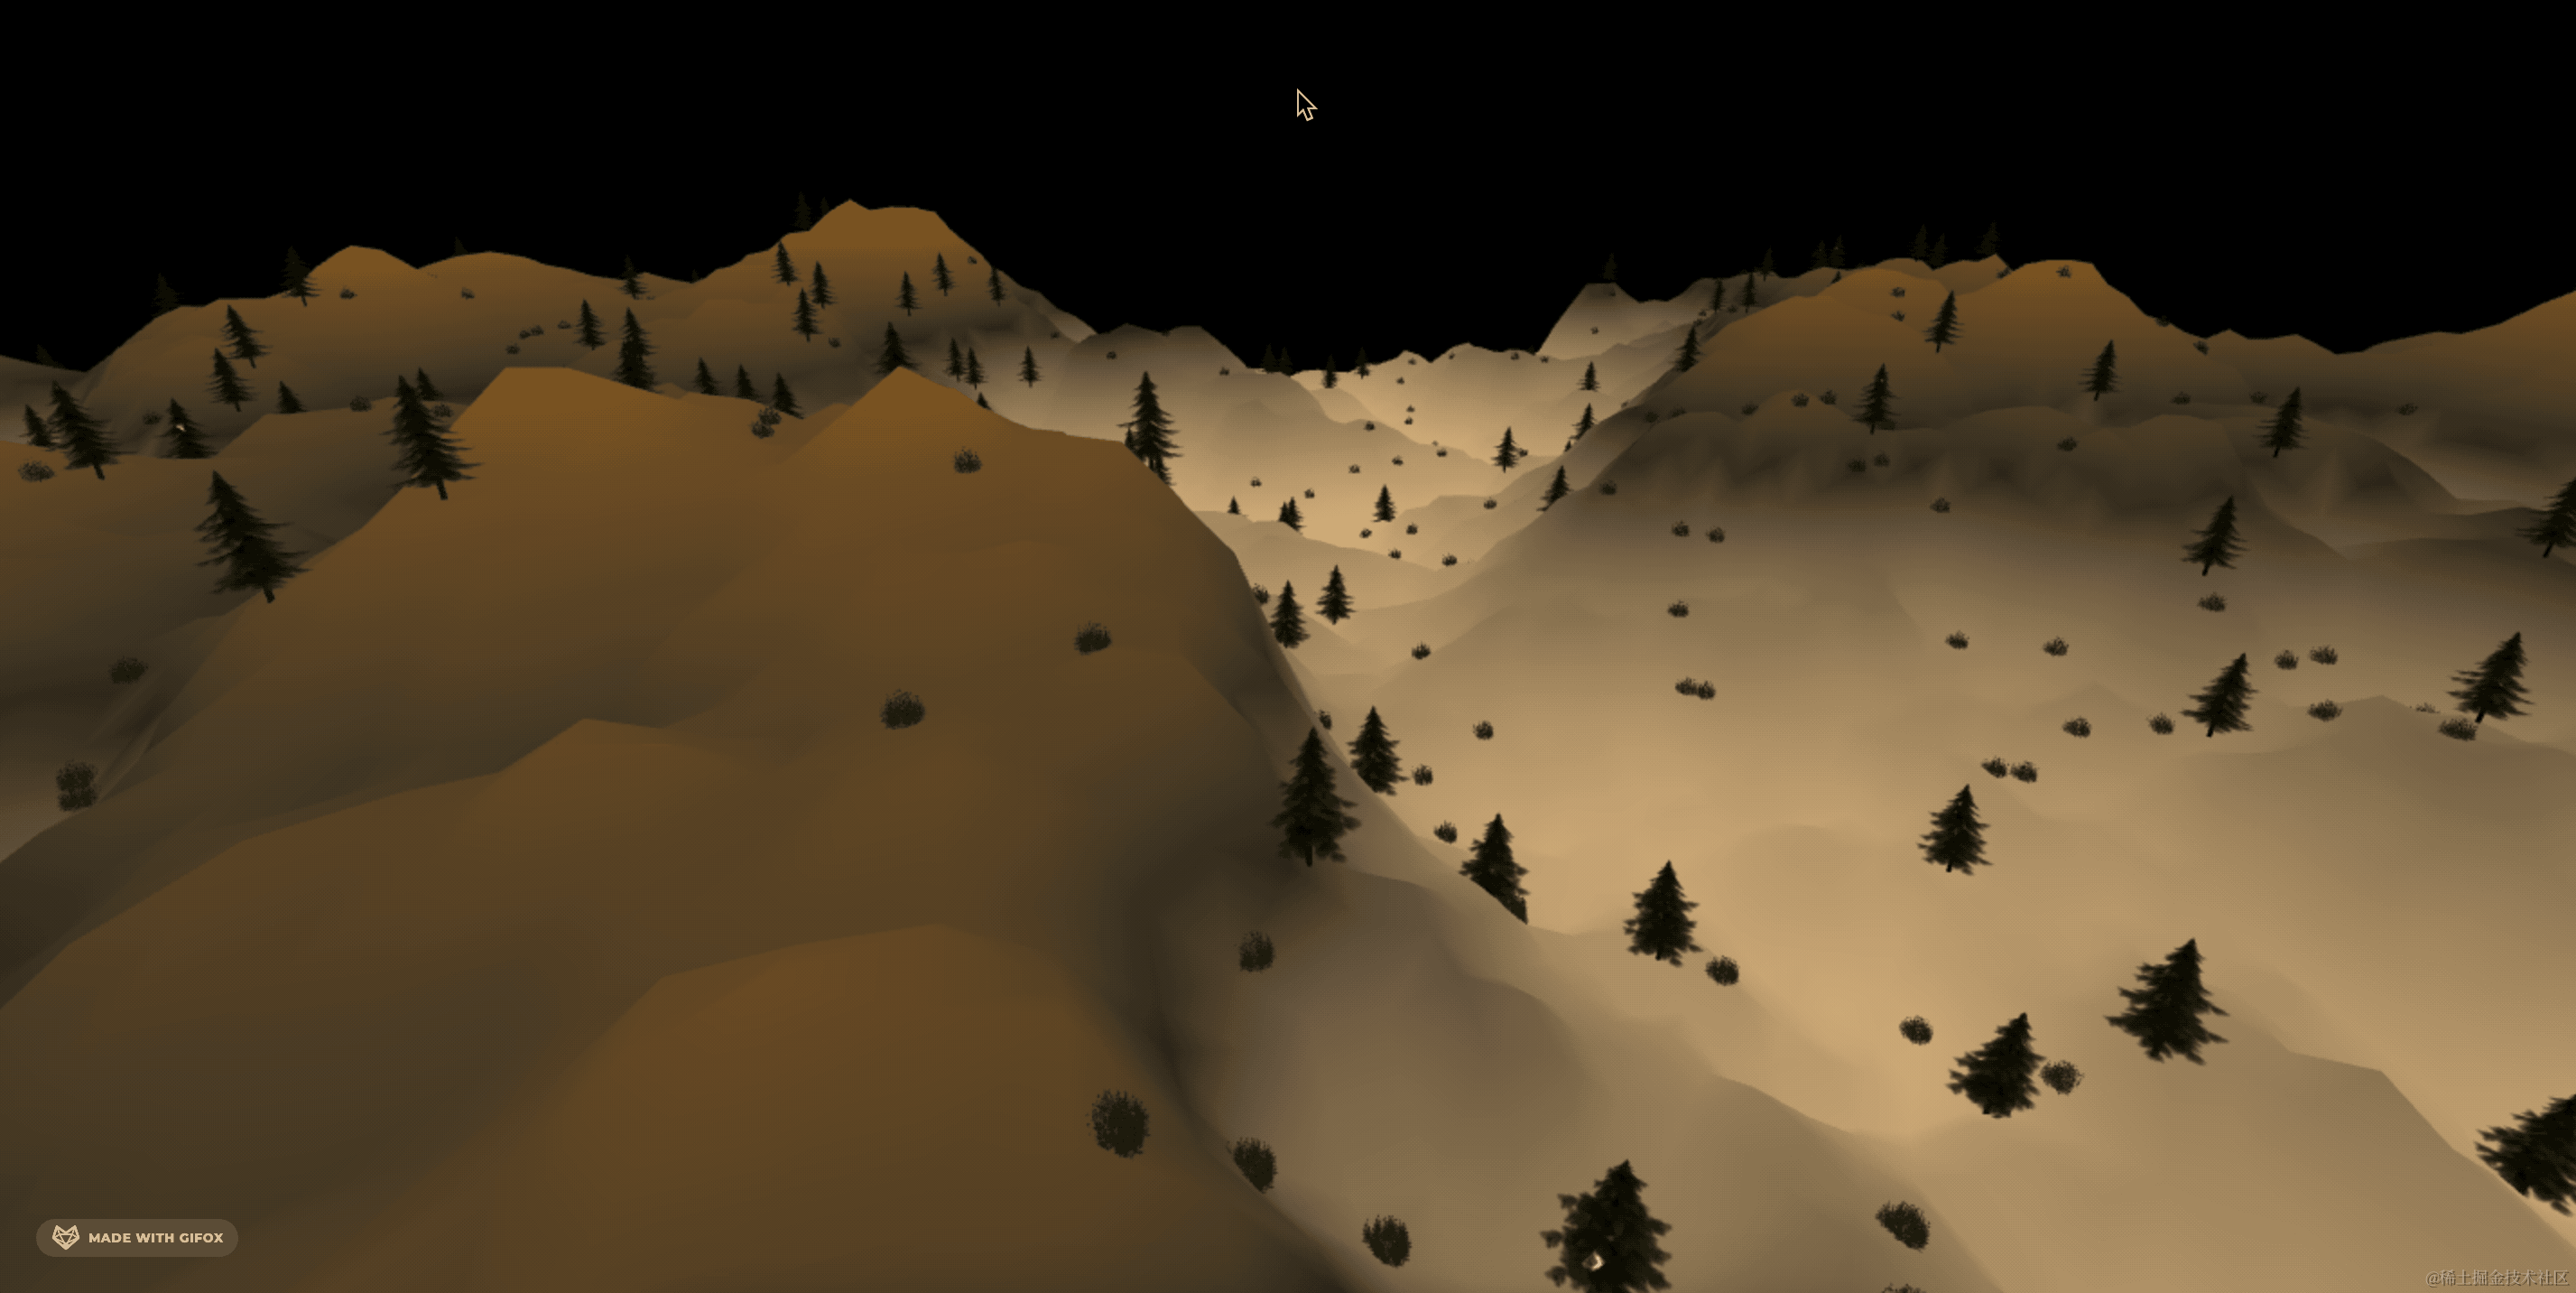
这样就好多了。
案例代码上传了小册仓库
总结
这节我们给山坡加上了树和鲜花。
用的是采样器实现的,这也是这个案例的主要练习的东西。
以后遇到这种需要在物体表面随机加一些东西的时候,就可以用表面采样器来做。