上节我们实现了物体位置的编辑:
在 Three.js Editor 里还支持旋转、放缩的编辑:
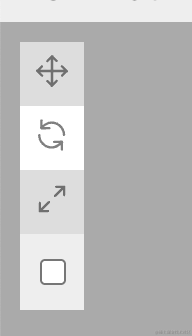
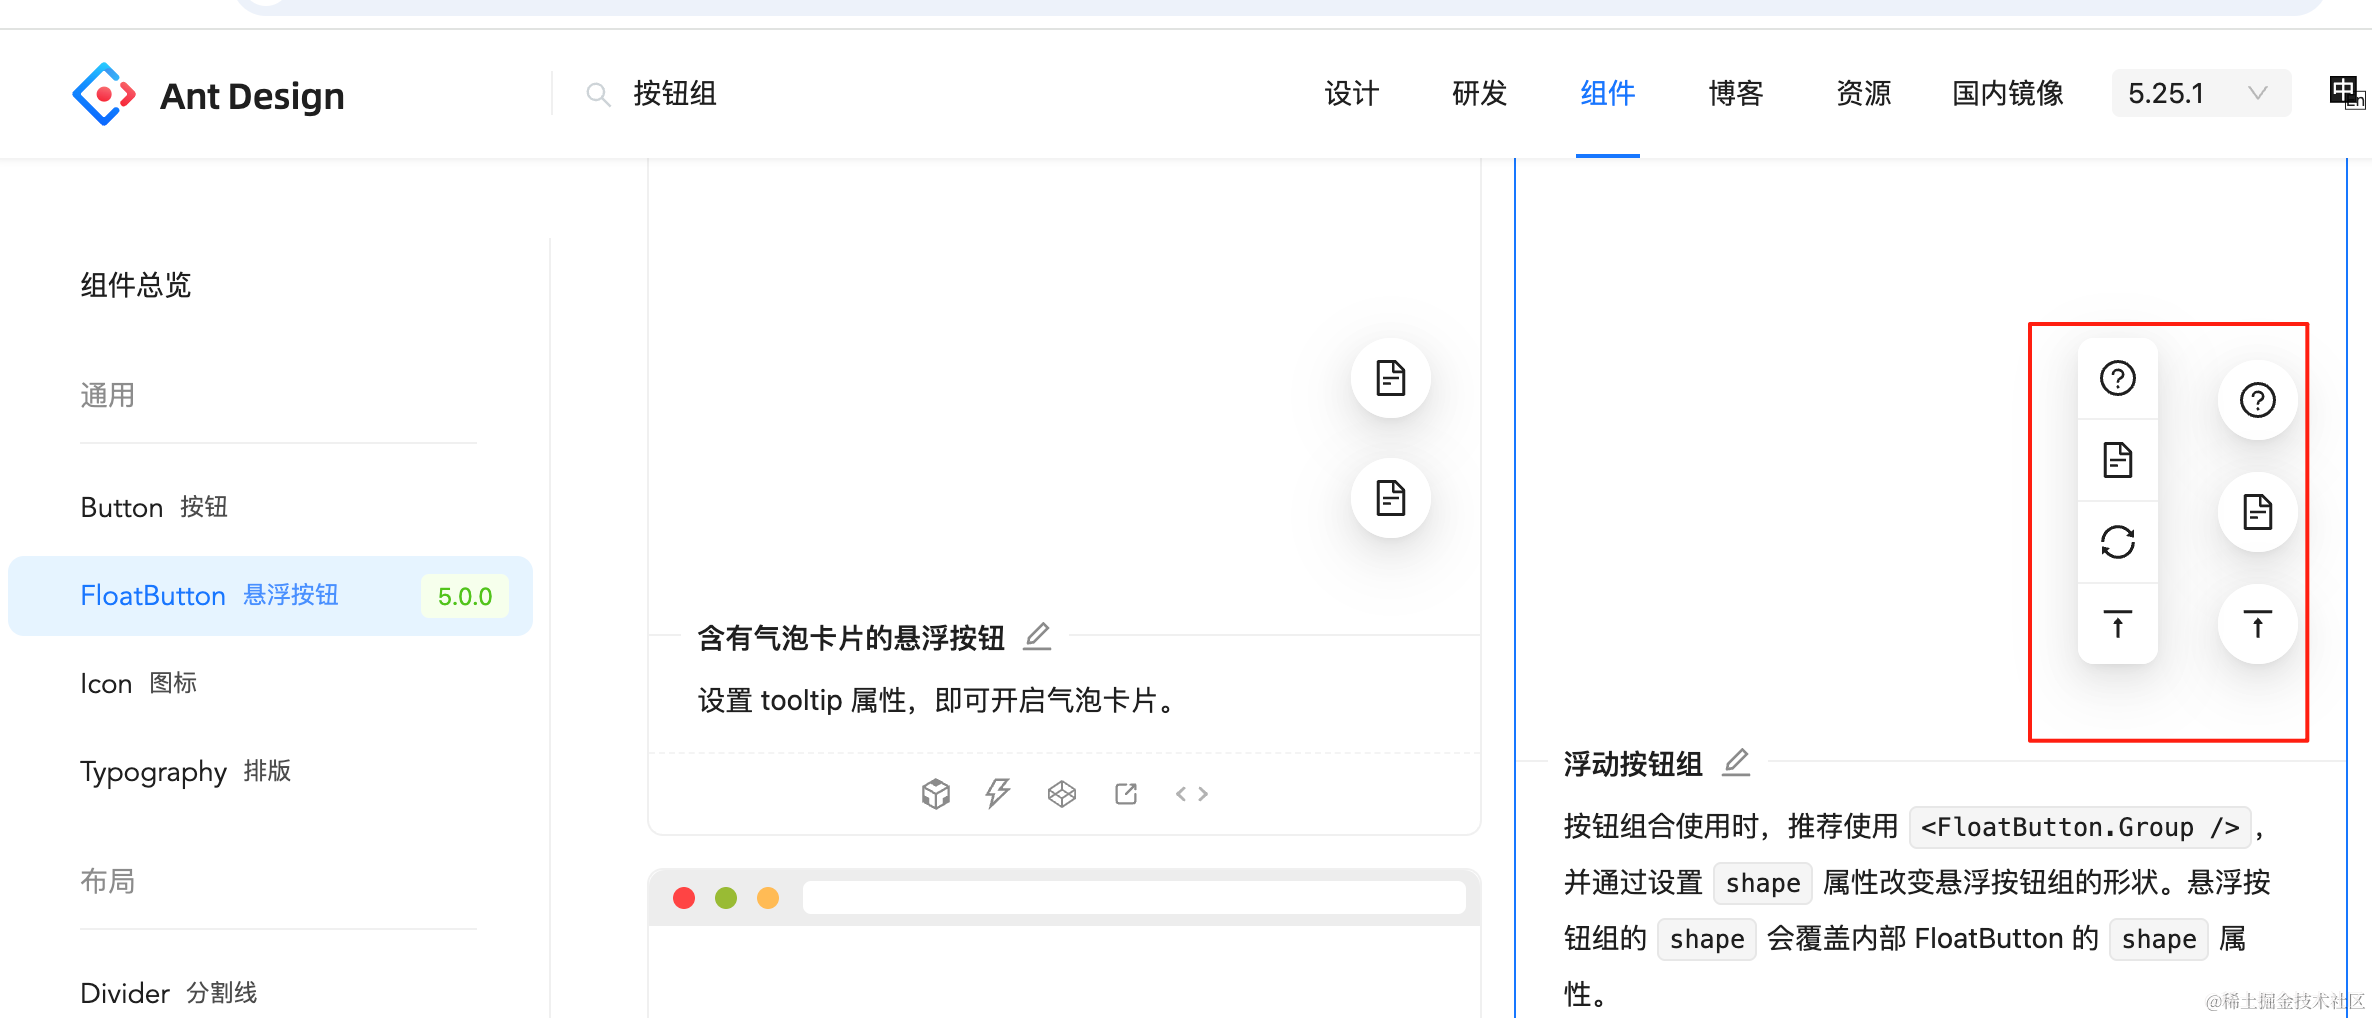
点击左侧的按钮,可以切换不同的编辑模式:
这节我们来实现这些按钮以及对应的编辑功能。
先来写下这些按钮:
直接用 antd 的悬浮按钮就行:
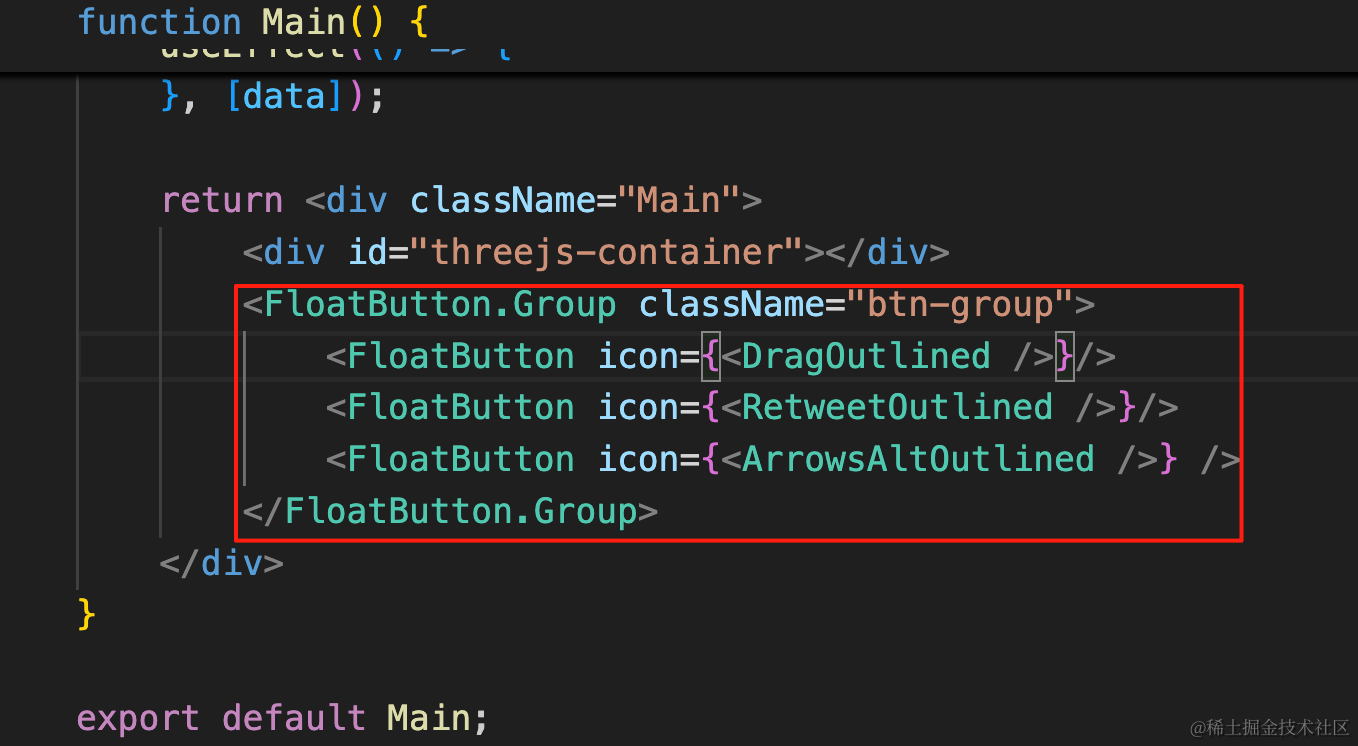
改下 Main/index.jsx
import { FloatButton } from "antd";
import { ArrowsAltOutlined, DragOutlined, RetweetOutlined } from "@ant-design/icons";
return <div className="Main">
<div id="threejs-container"></div>
<FloatButton.Group className="btn-group">
<FloatButton icon={<DragOutlined />}/>
<FloatButton icon={<RetweetOutlined />}/>
<FloatButton icon={<ArrowsAltOutlined />} />
</FloatButton.Group>
</div>创建三个按钮。
安装下用到的图标库:
npm install --save @ant-design/icons改下 App.scss 的样式:
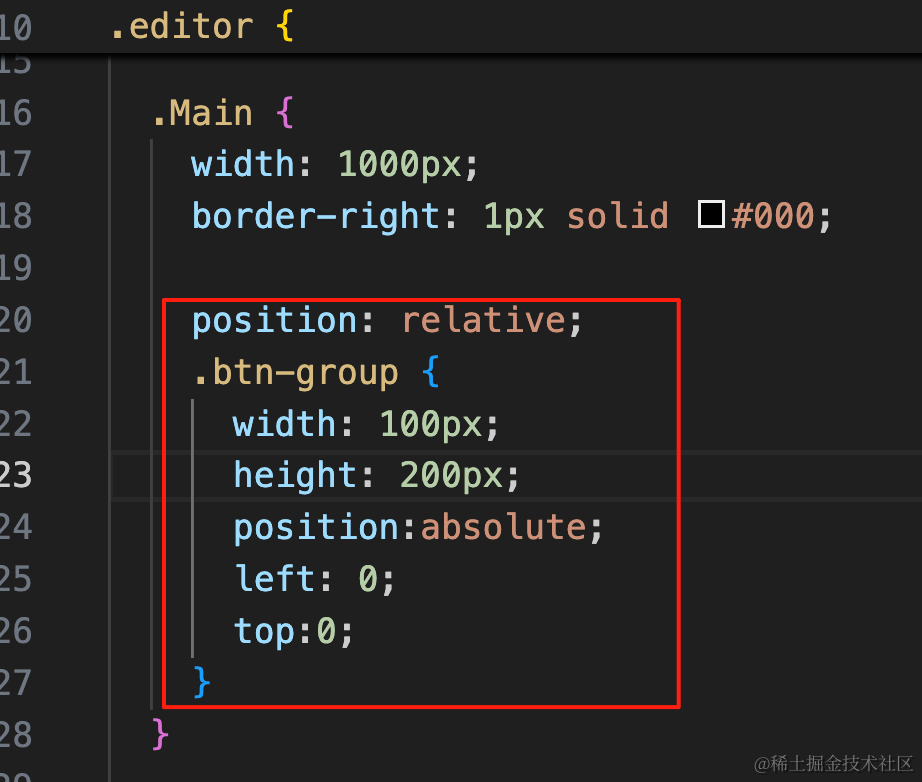
position: relative;
.btn-group {
  width: 100px;
  height: 200px;
  position:absolute;
  left: 0;
  top:0;
}
设置宽、高、绝对定位。
看下效果:
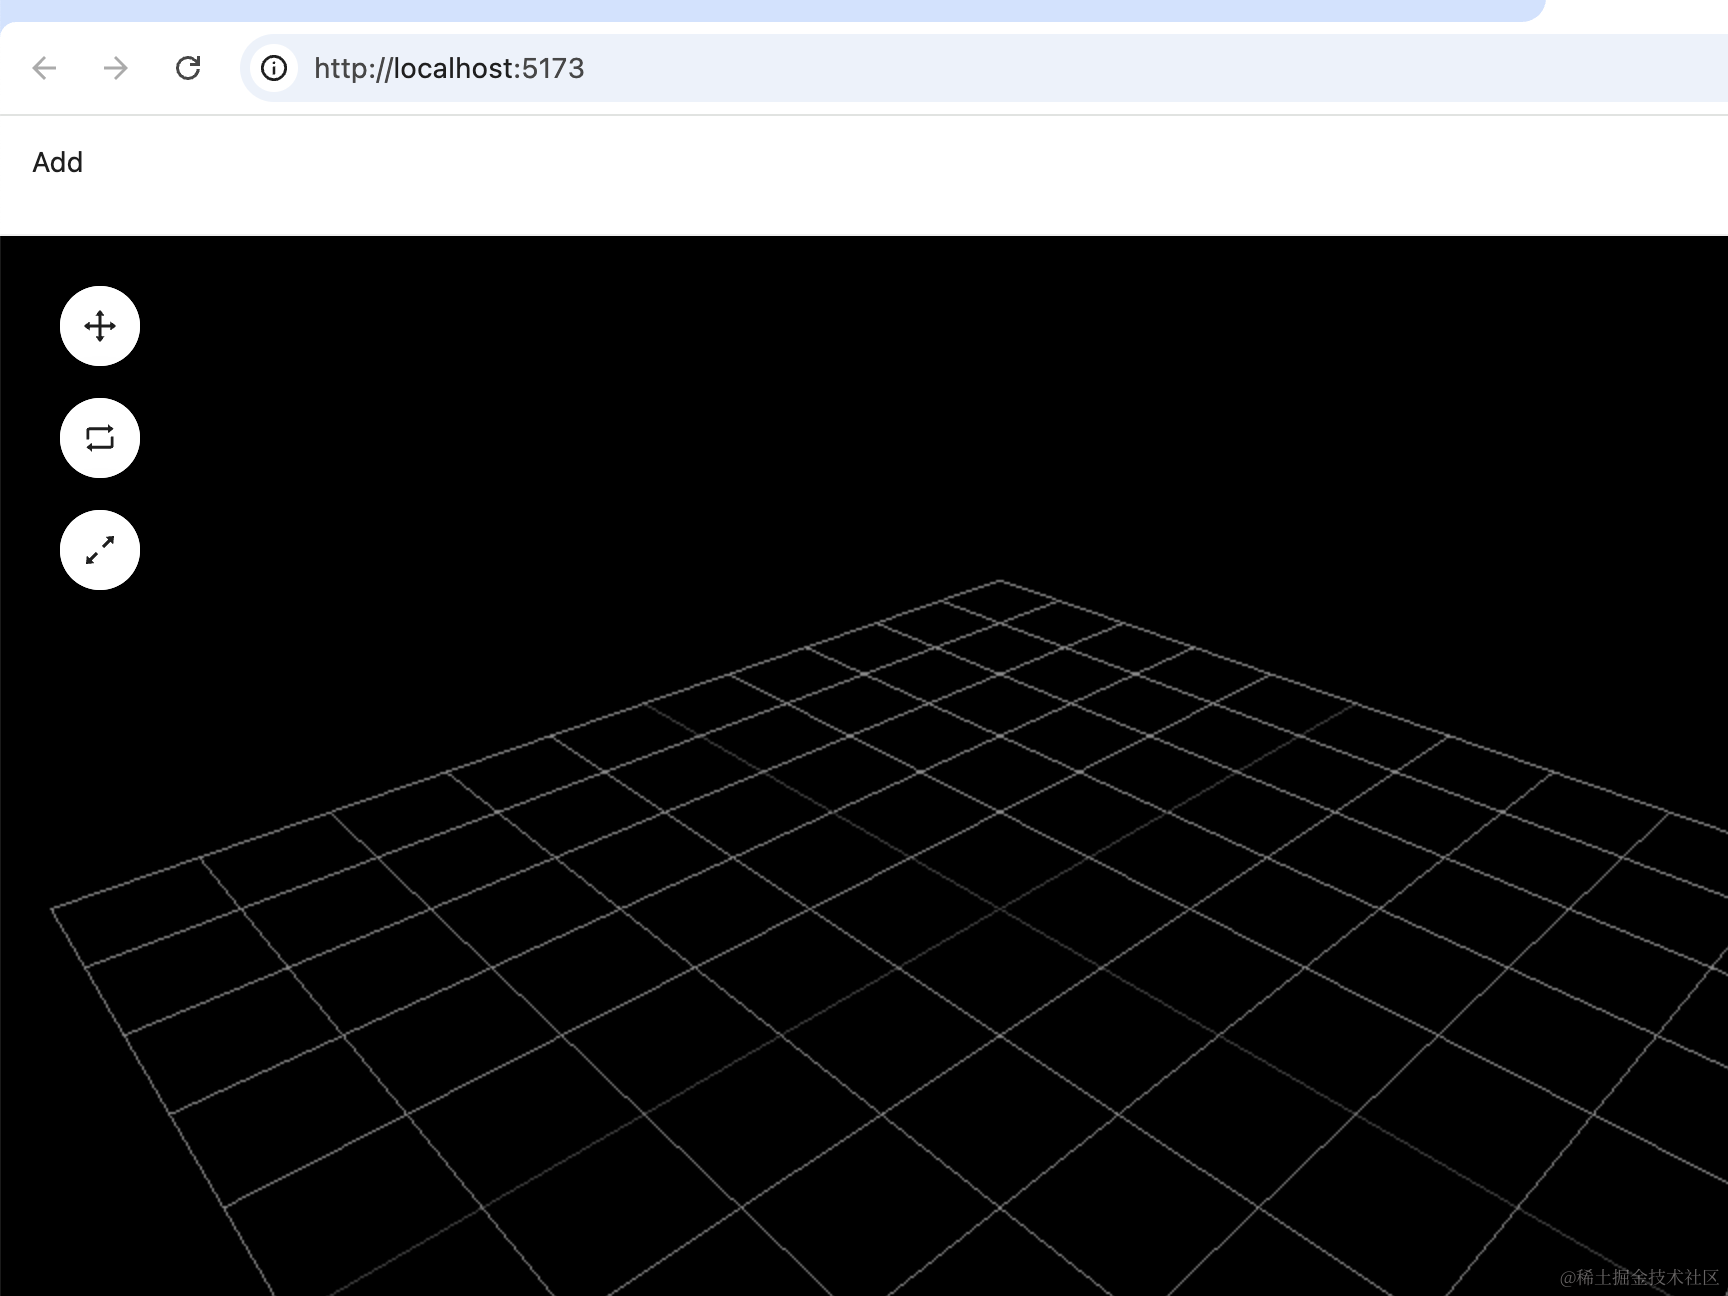
接下来就可以实现三种编辑模式了。
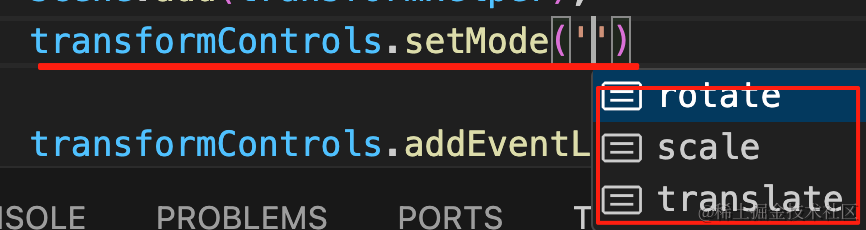
这个就是修改 TransformControls 的 mode
点不同的按钮设置不同的 mode 就好了。
我们封装一个方法返回:
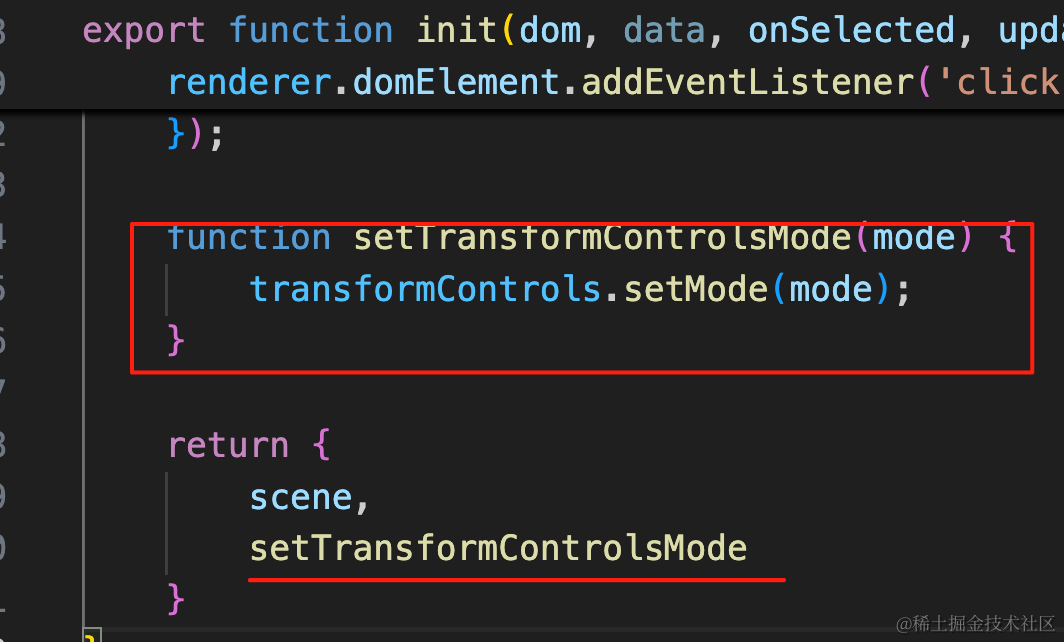
function setTransformControlsMode(mode) {
    transformControls.setMode(mode);
}

return {
    scene,
    setTransformControlsMode
}
在组件里用 useRef 来保存:
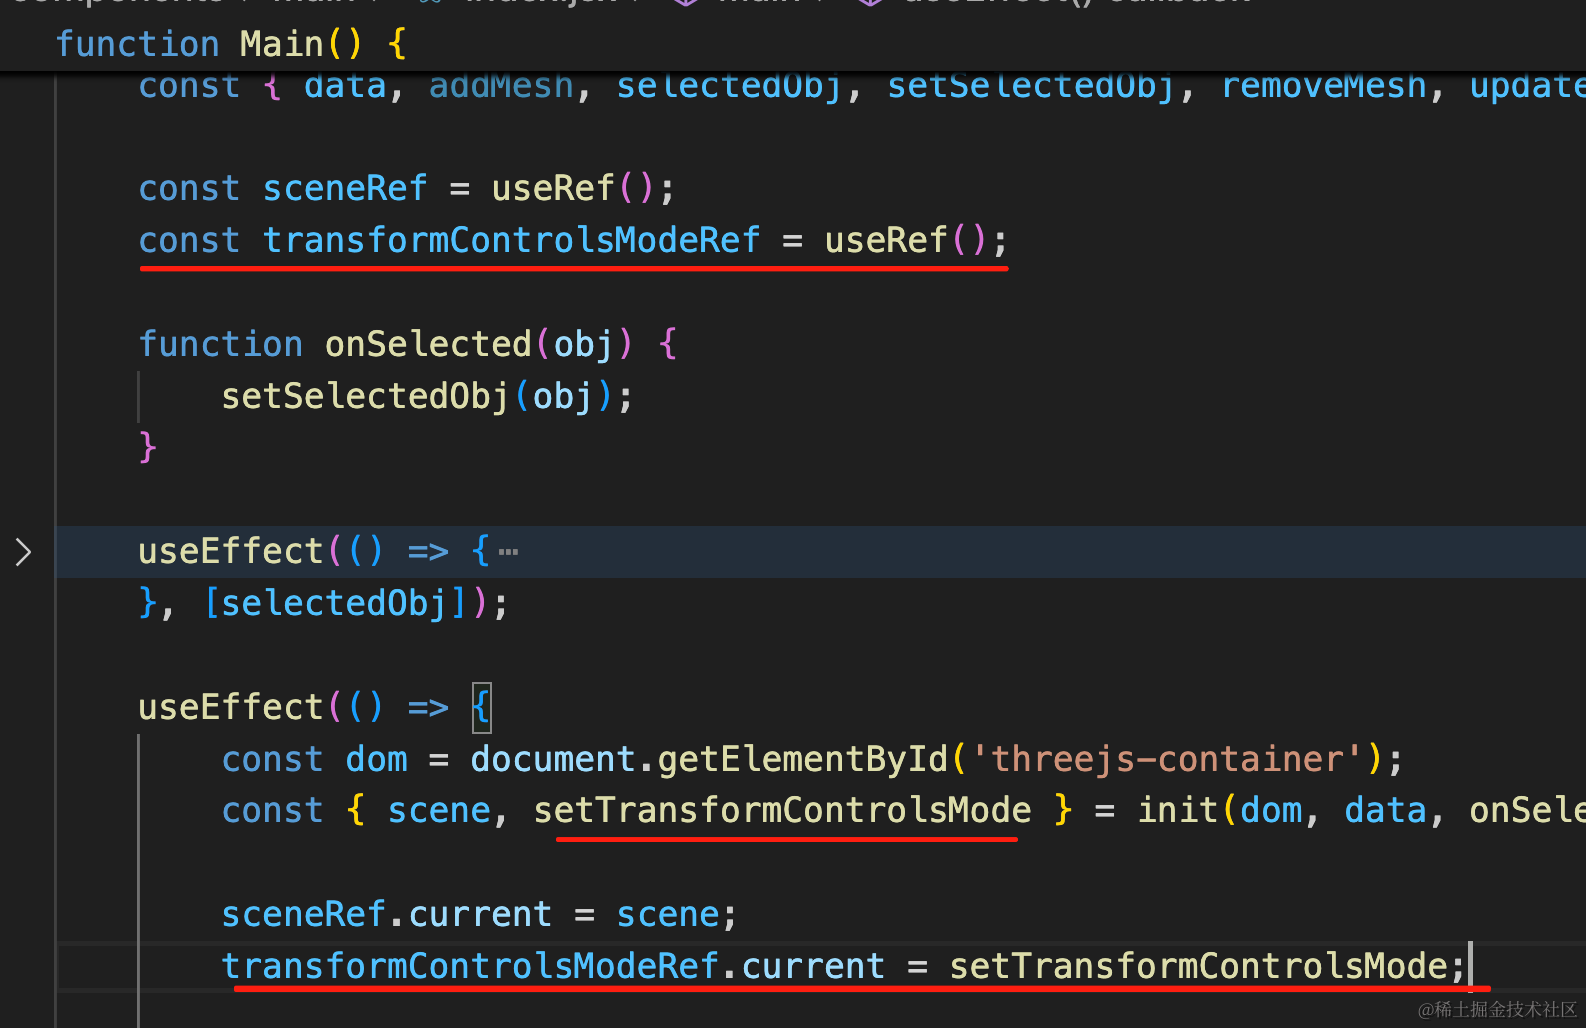
const transformControlsModeRef = useRef();transformControlsModeRef.current = setTransformControlsMode;点击按钮的时候调用下:
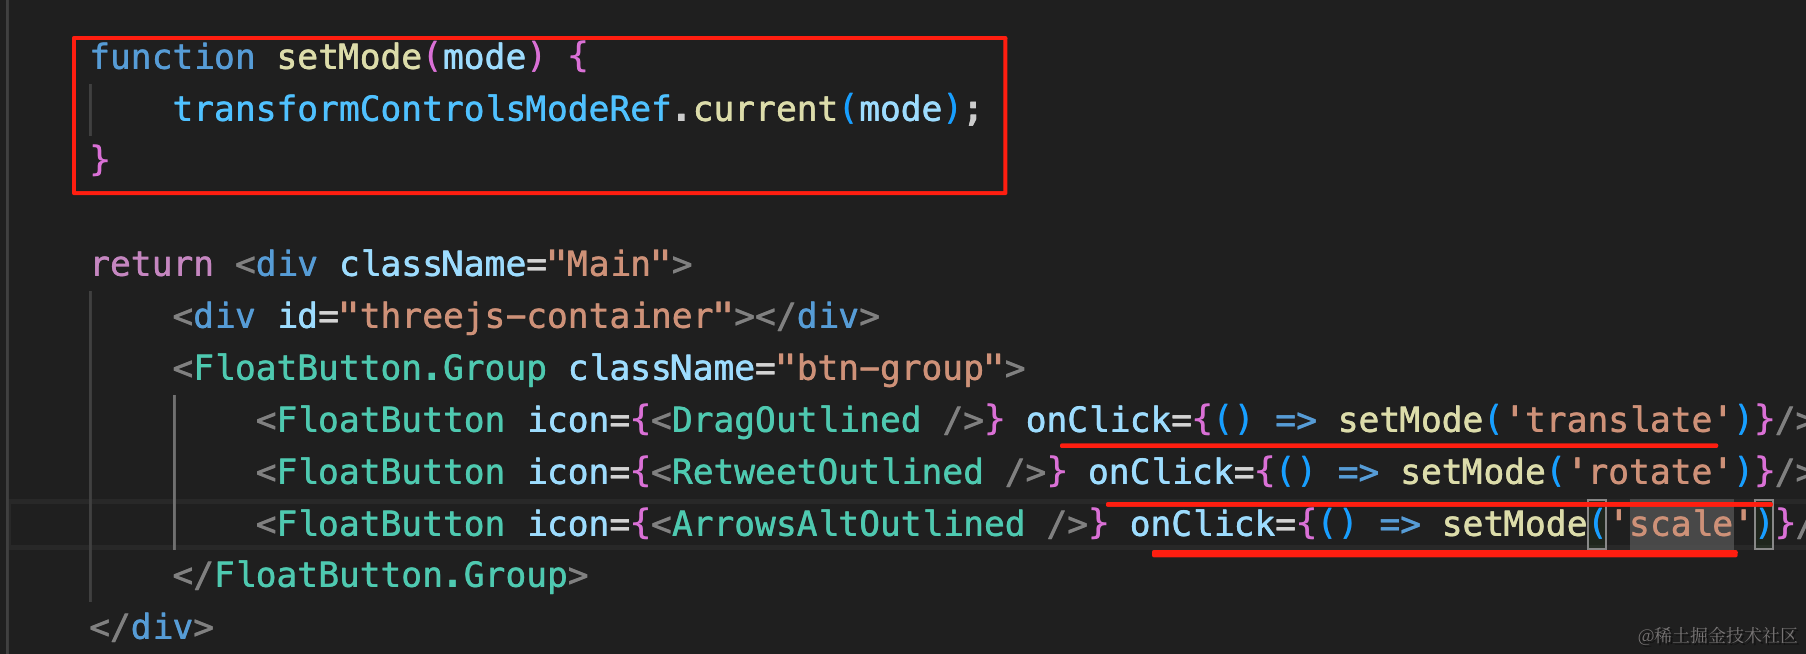
function setMode(mode) {
    transformControlsModeRef.current(mode);
}

return <div className="Main">
    <div id="threejs-container"></div>
    <FloatButton.Group className="btn-group">
        <FloatButton icon={<DragOutlined />} onClick={() => setMode('translate')}/>
        <FloatButton icon={<RetweetOutlined />} onClick={() => setMode('rotate')}/>
        <FloatButton icon={<ArrowsAltOutlined />} onClick={() => setMode('scale')}/>
    </FloatButton.Group>
</div>
试下效果:
这样,三种编辑模式的切换就完成了。
但 json 里只保存了位置,并没有保存旋转和缩放的数据:
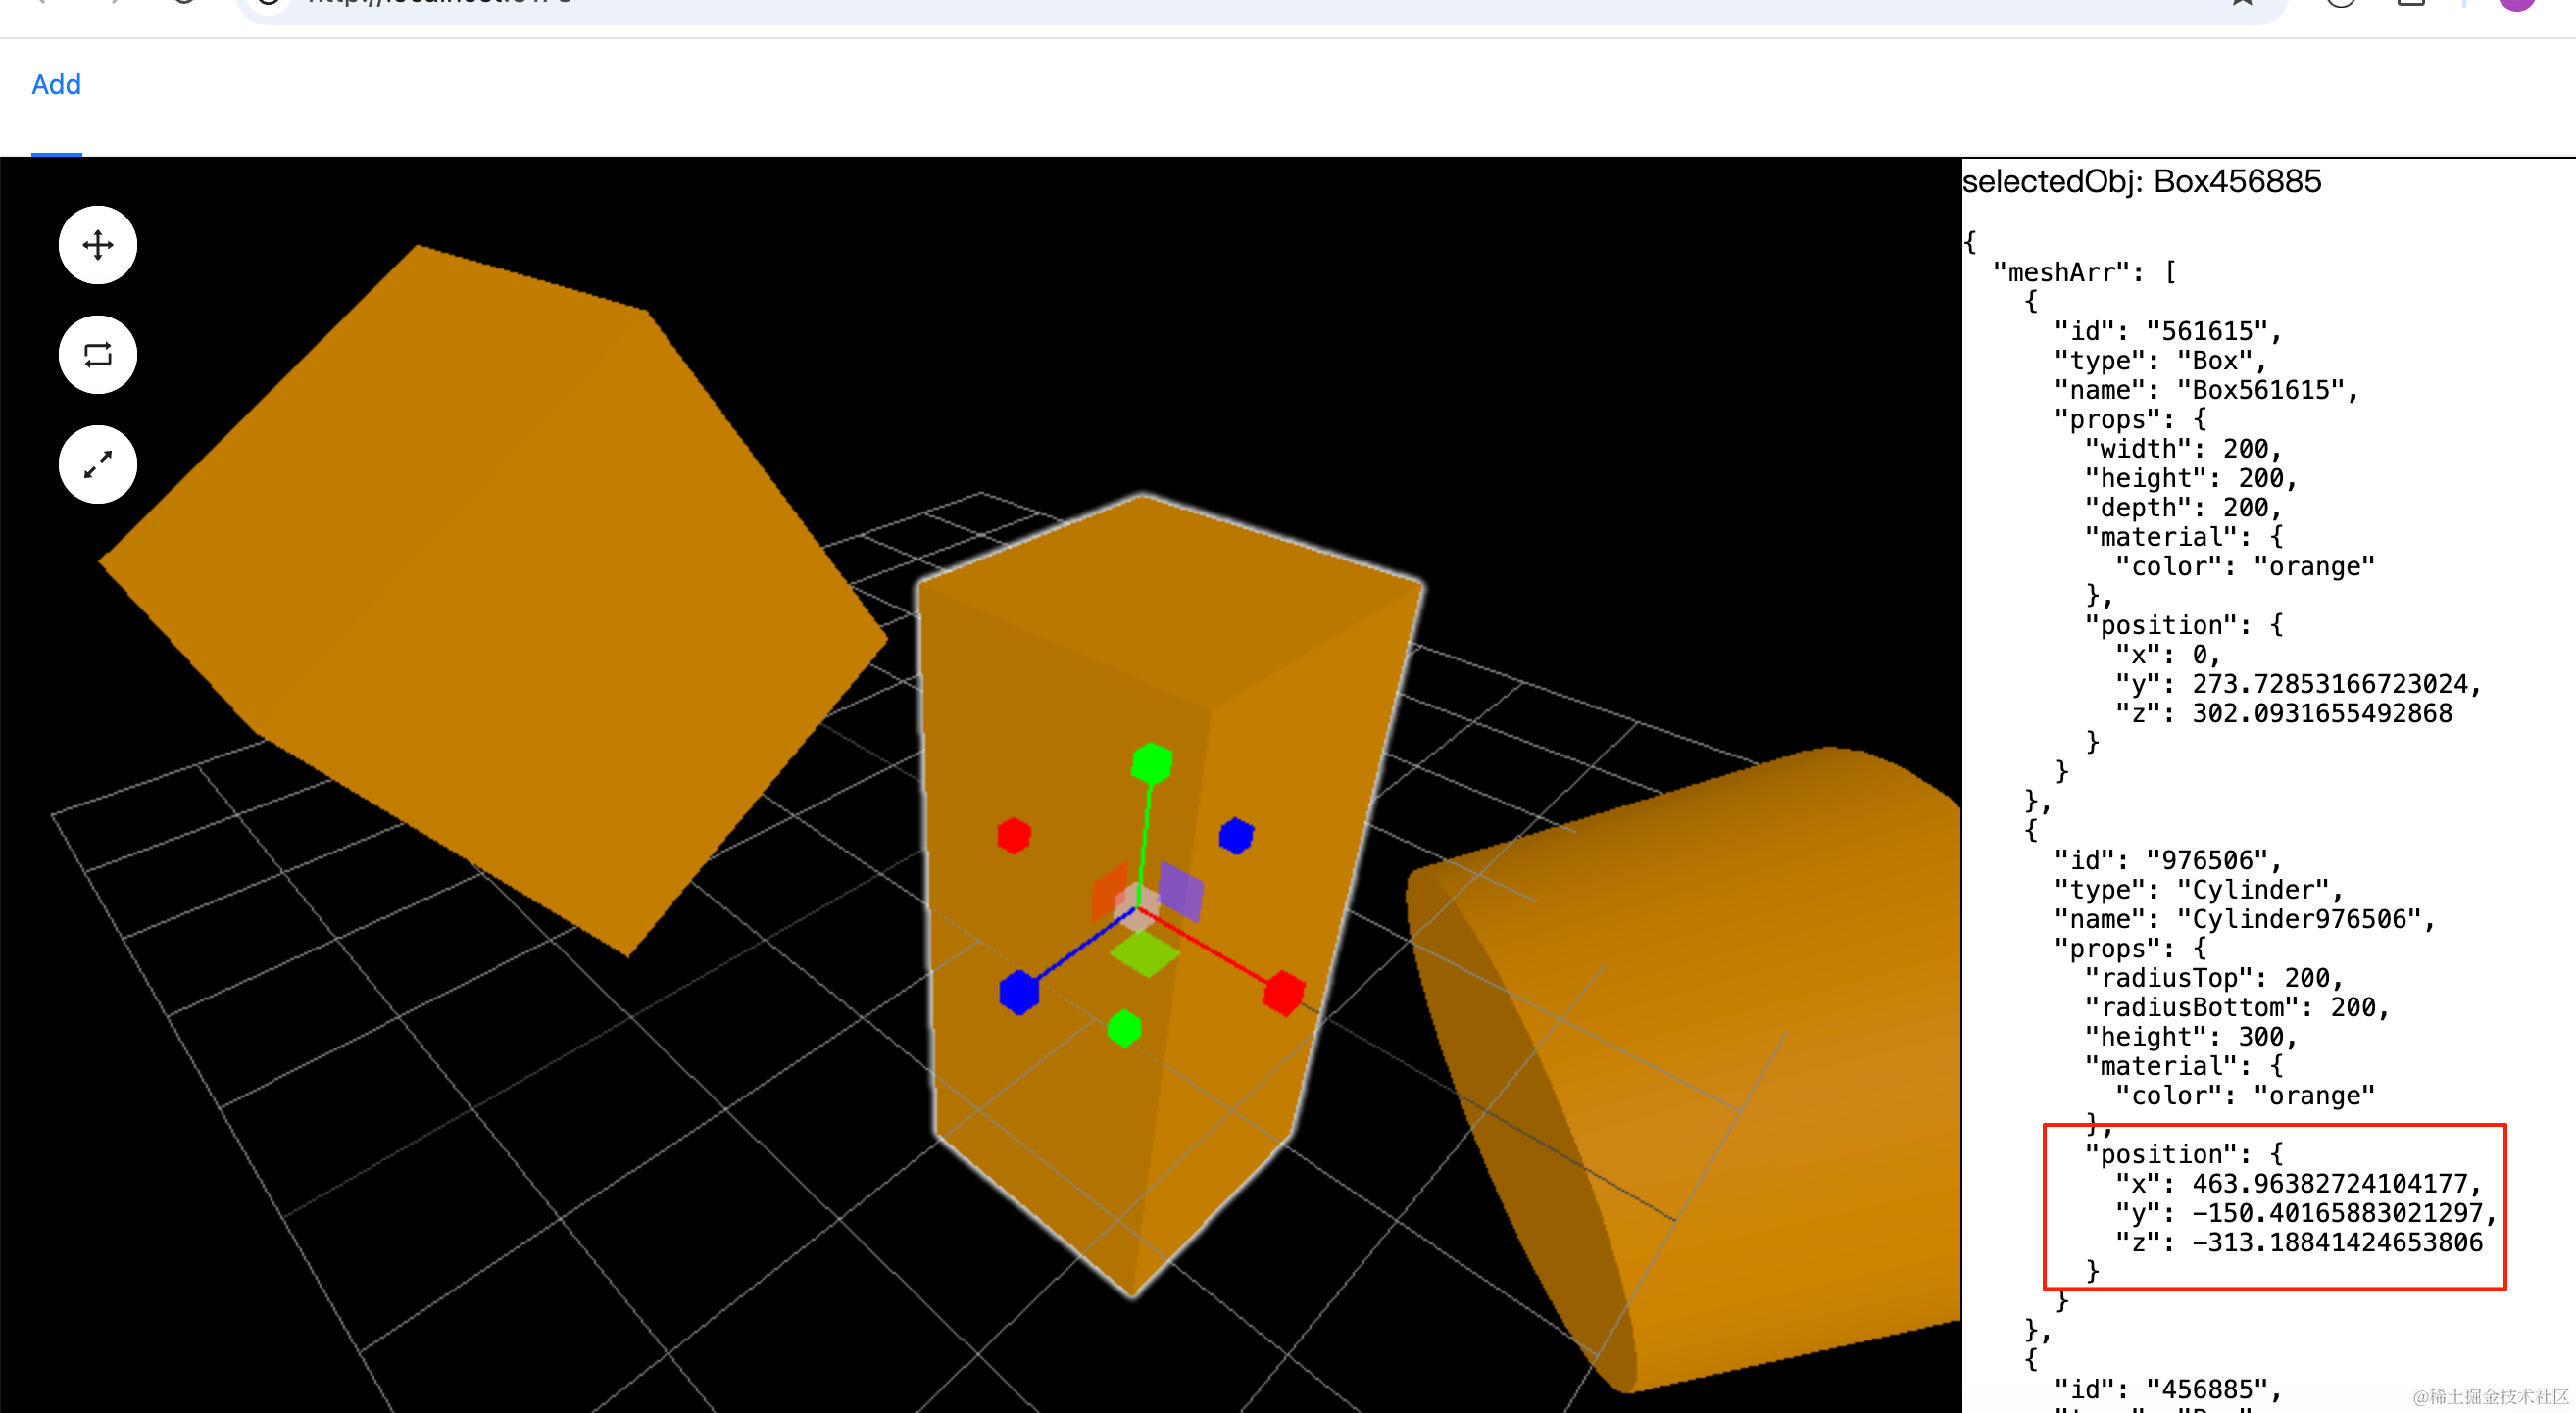
我们来加一下:
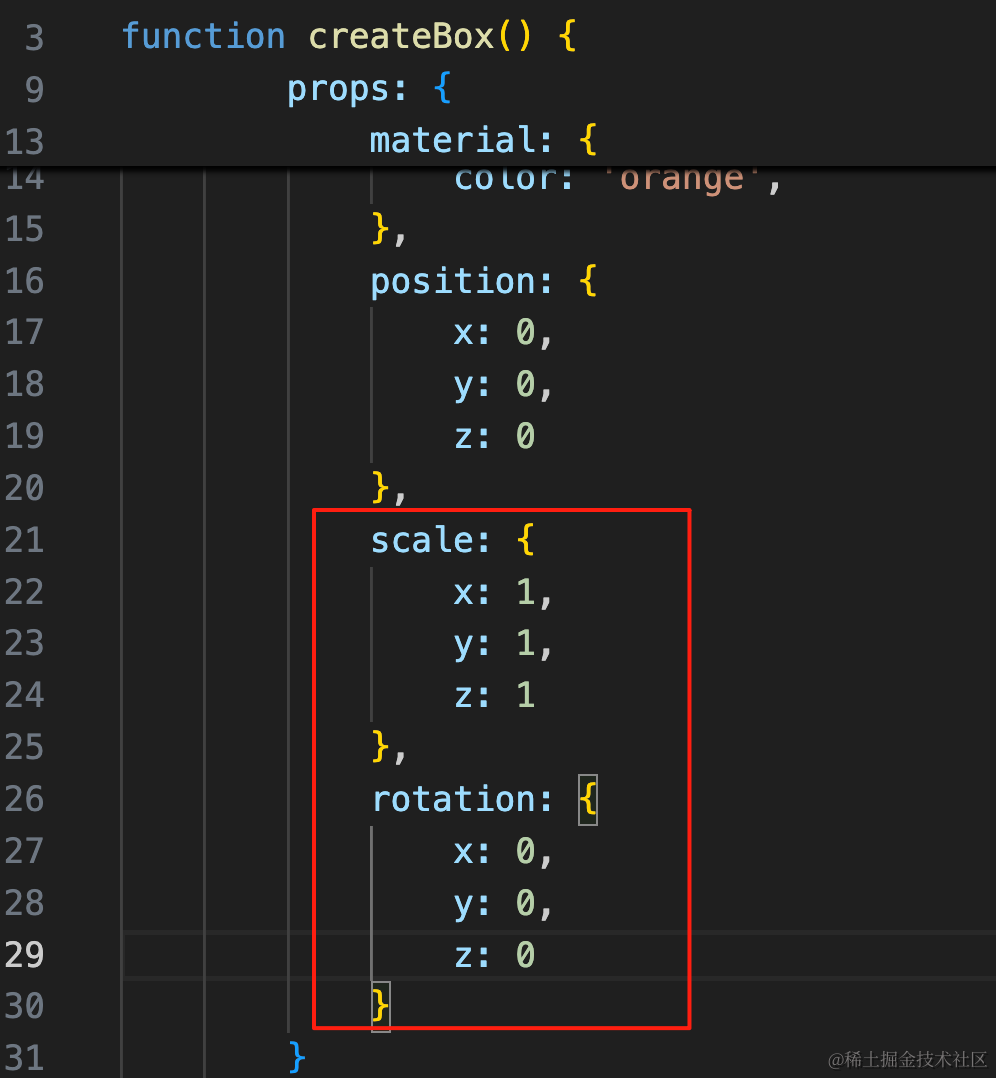
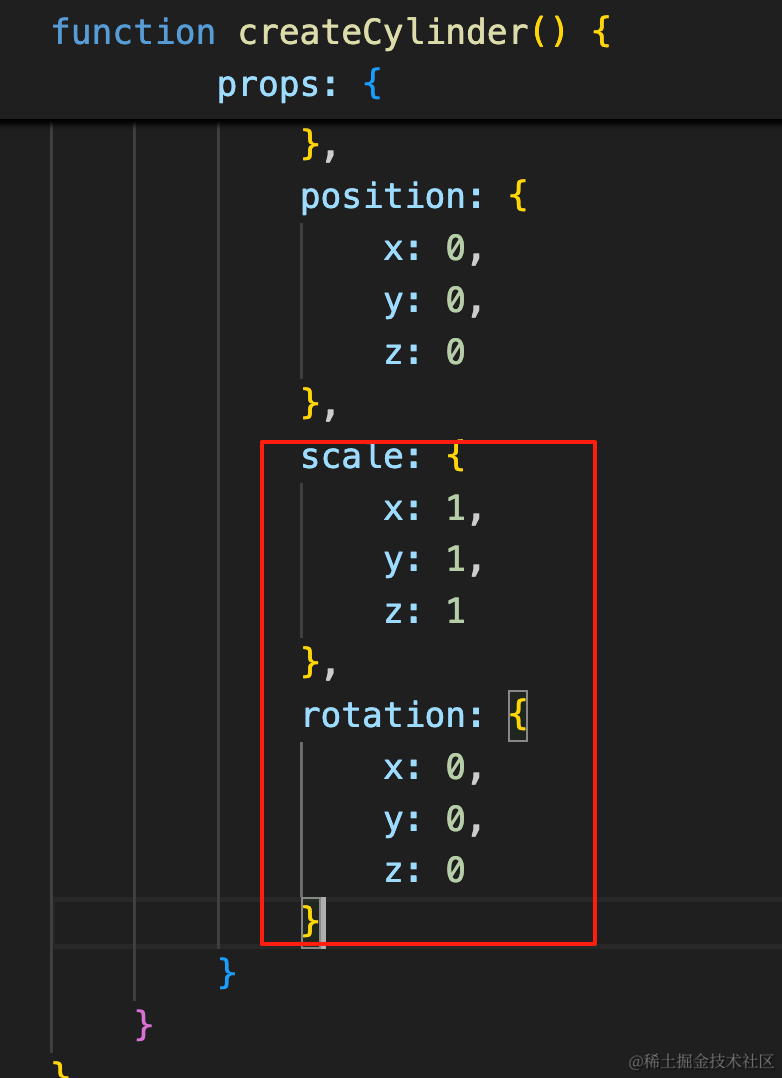
分别在 createBox、createCylinder 里加一下 scale 和 rotation 数据:
scale: {
    x: 1,
    y: 1,
    z: 1
},
rotation: {
    x: 0,
    y: 0,
    z: 0
}
在渲染的时候设置下:
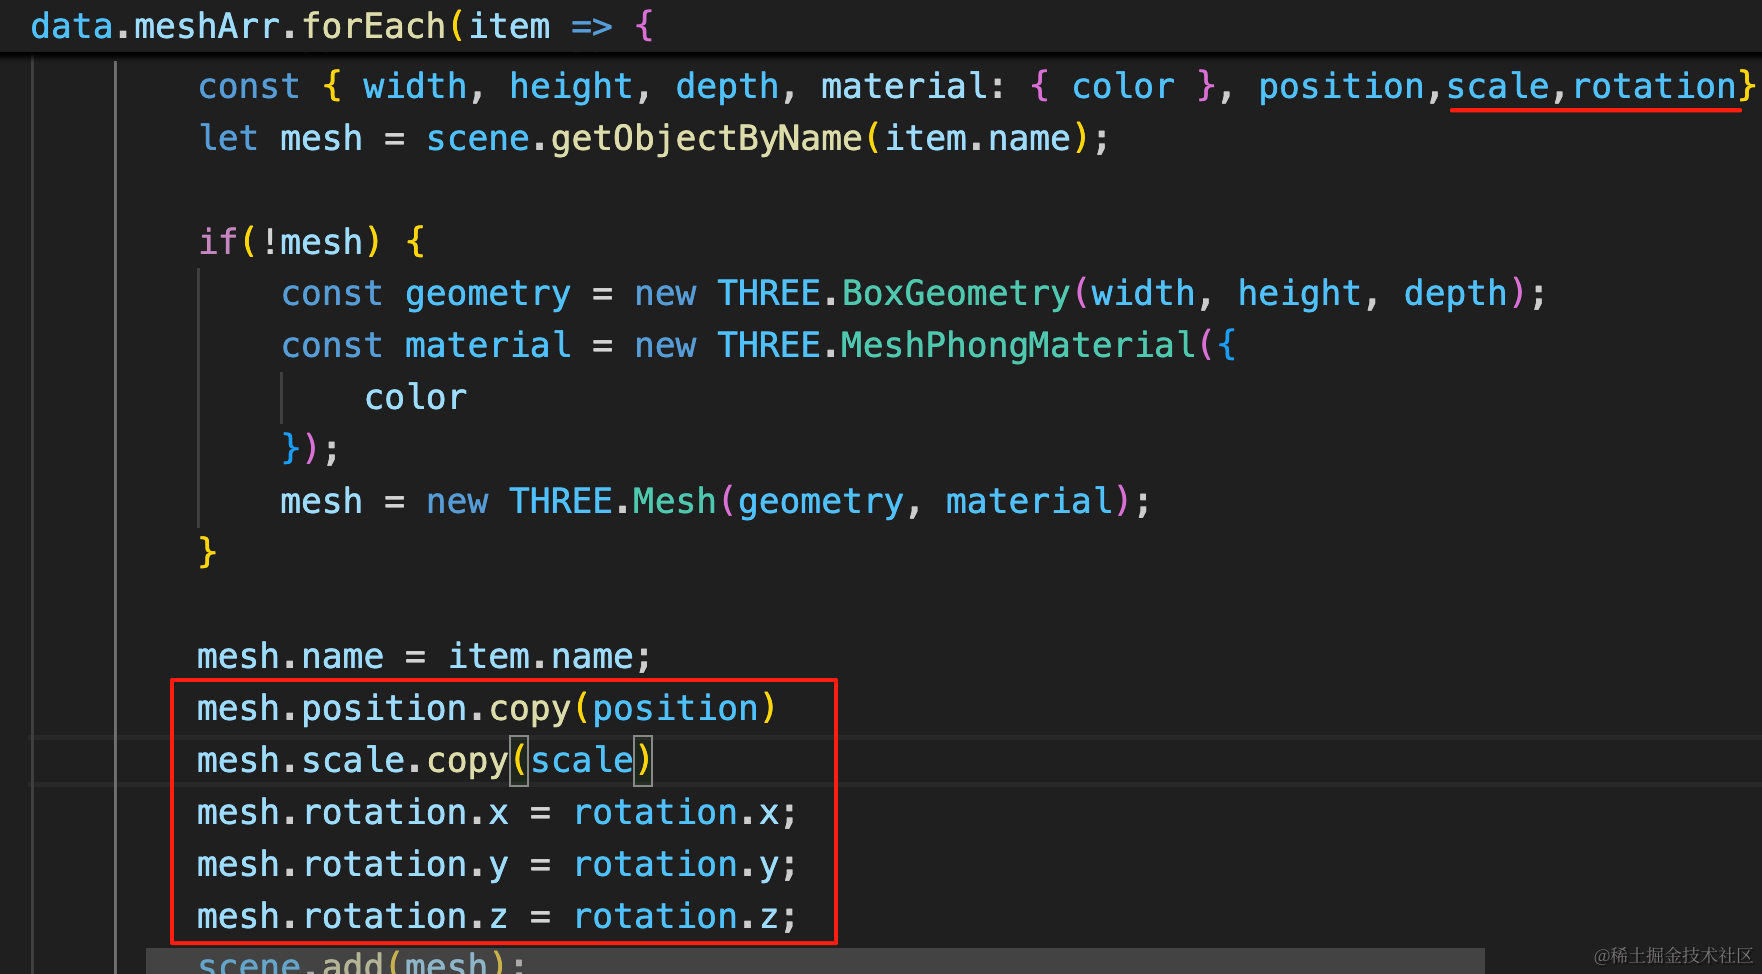
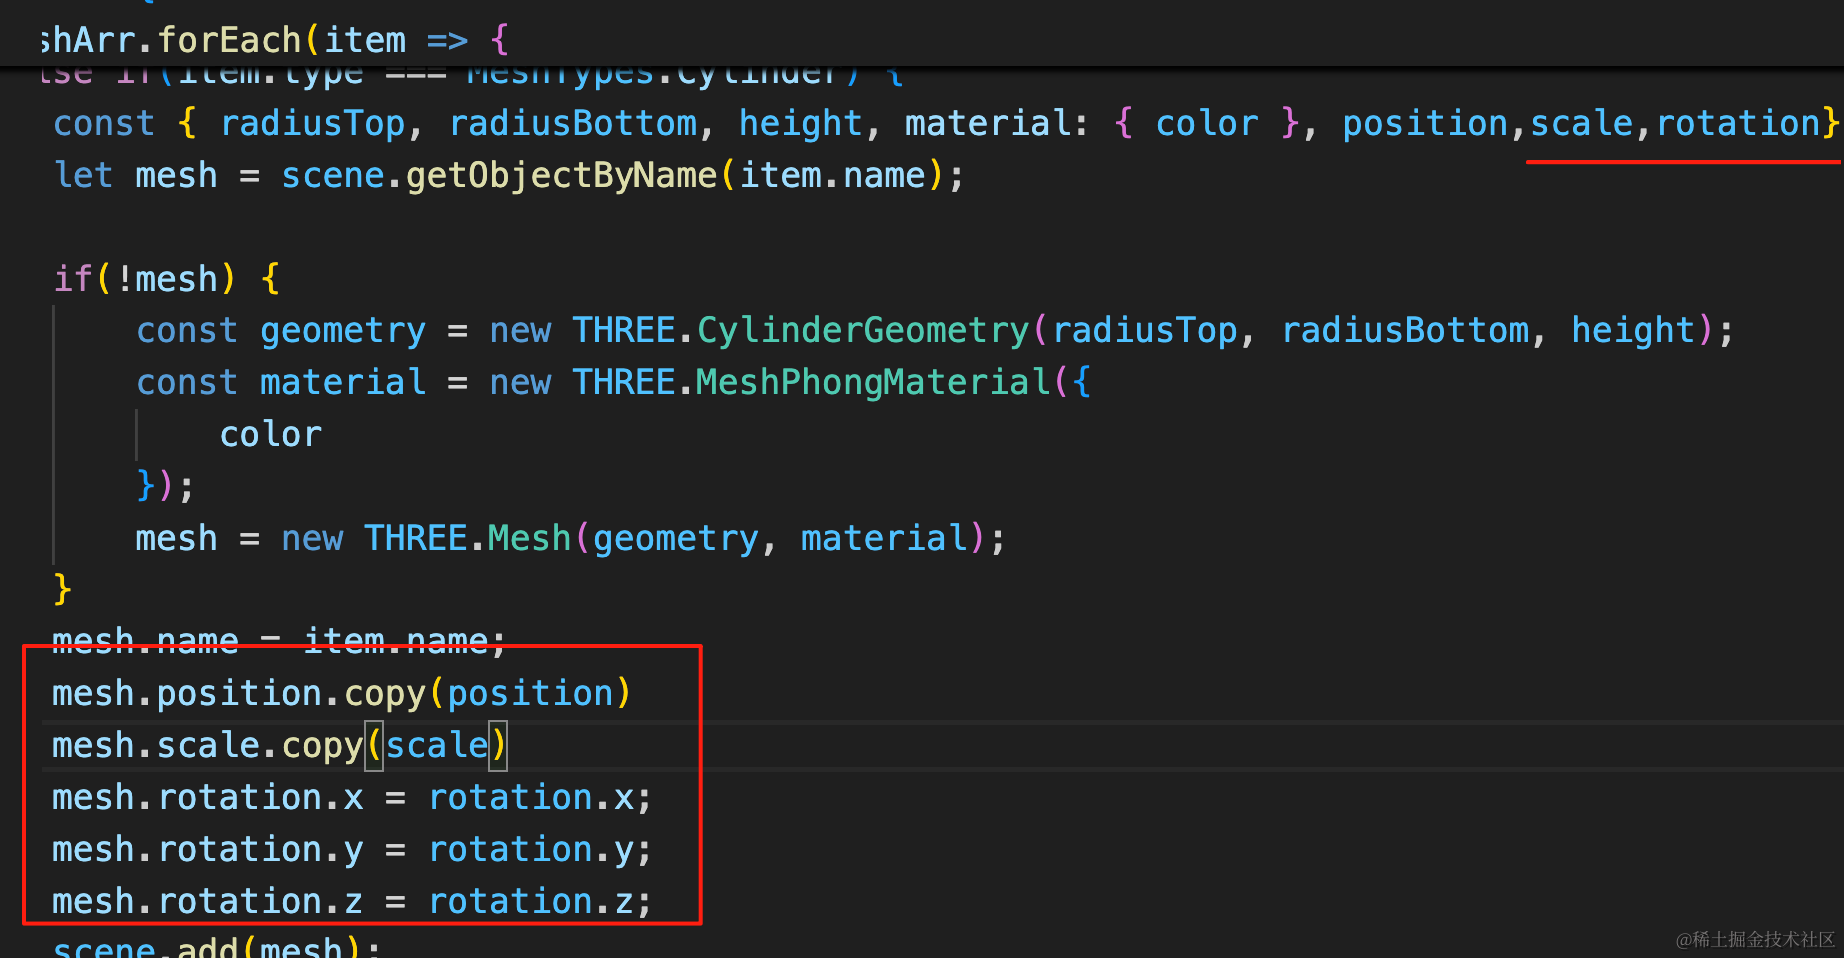
mesh.scale.copy(scale)
mesh.rotation.x = rotation.x;
mesh.rotation.y = rotation.y;
mesh.rotation.z = rotation.z;
然后在用 TransformControls 编辑的时候,把 position、scale、ratation 都更新到 json。
rotation 需要分别设置 x、y、z
把 updatePosition 方法改造下:
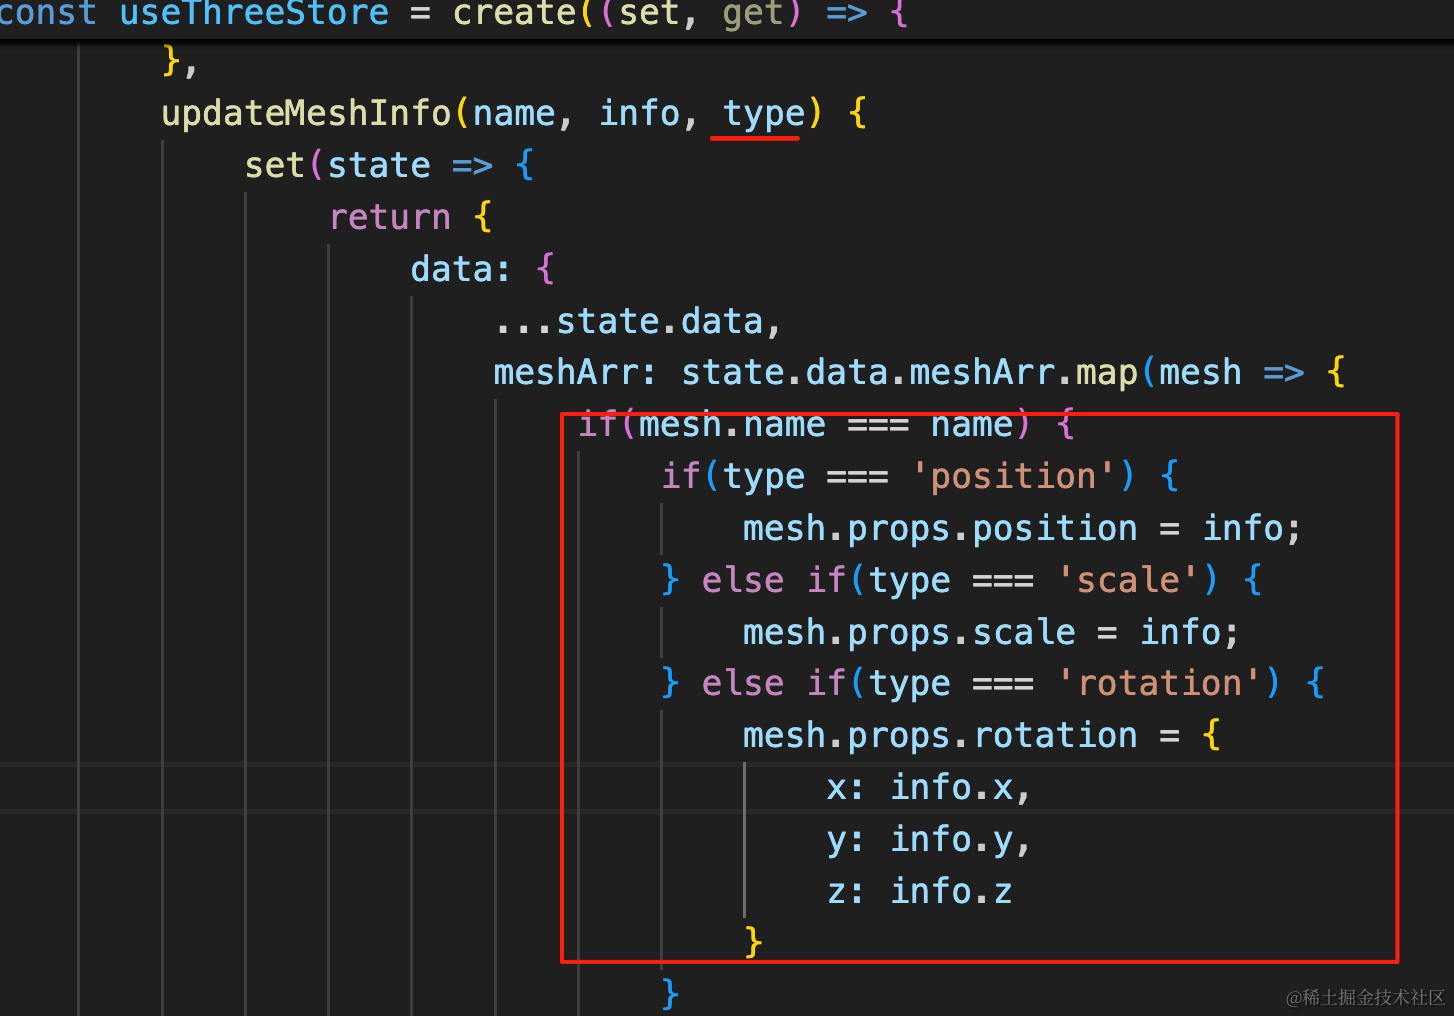
根据不同的 type 来分别修改 position、scale、rotation
updateMeshInfo(name, info, type) {
    set(state => {
        return {
            data: {
                ...state.data,
                meshArr: state.data.meshArr.map(mesh => {
                    if(mesh.name === name) {
                        if(type === 'position') {
                            mesh.props.position = info;
                        } else if(type === 'scale') {
                            mesh.props.scale = info;
                        } else if(type === 'rotation') {
                            mesh.props.rotation = {
                                x: info.x,
                                y: info.y,
                                z: info.z
                            }
                        }
                    }
                    return mesh;
                })
            }
        }
    })
}
改下用的方法:
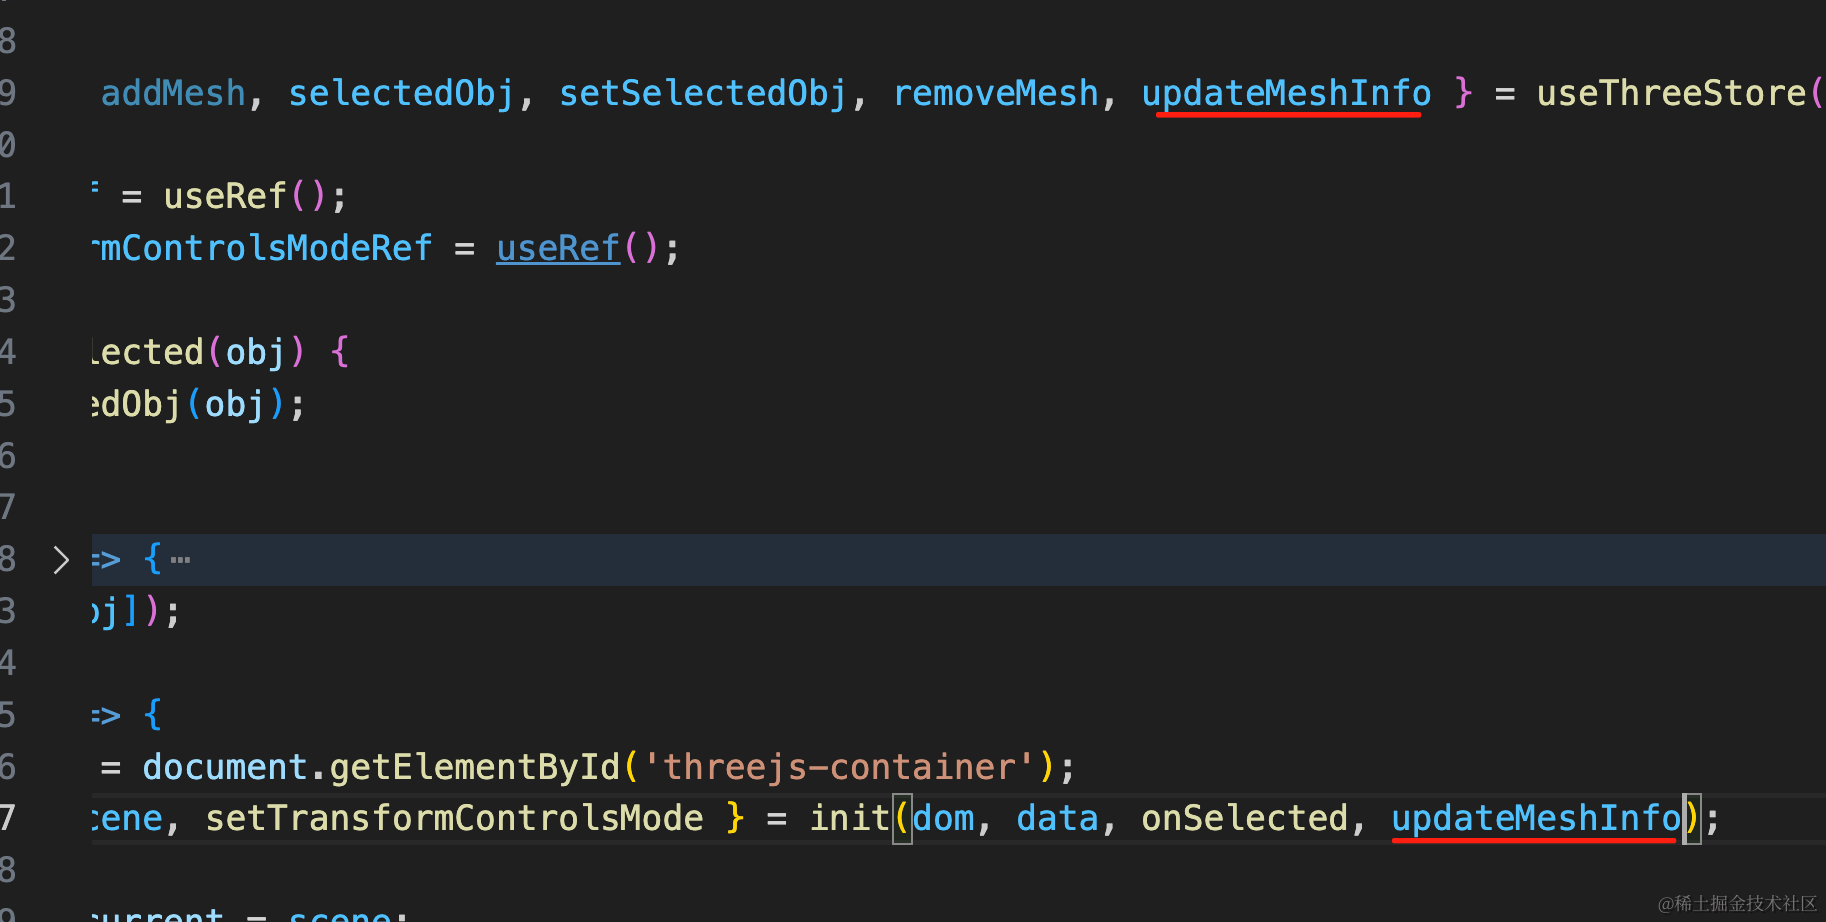
然后编辑的时候根据 mode 修改不同的数据:
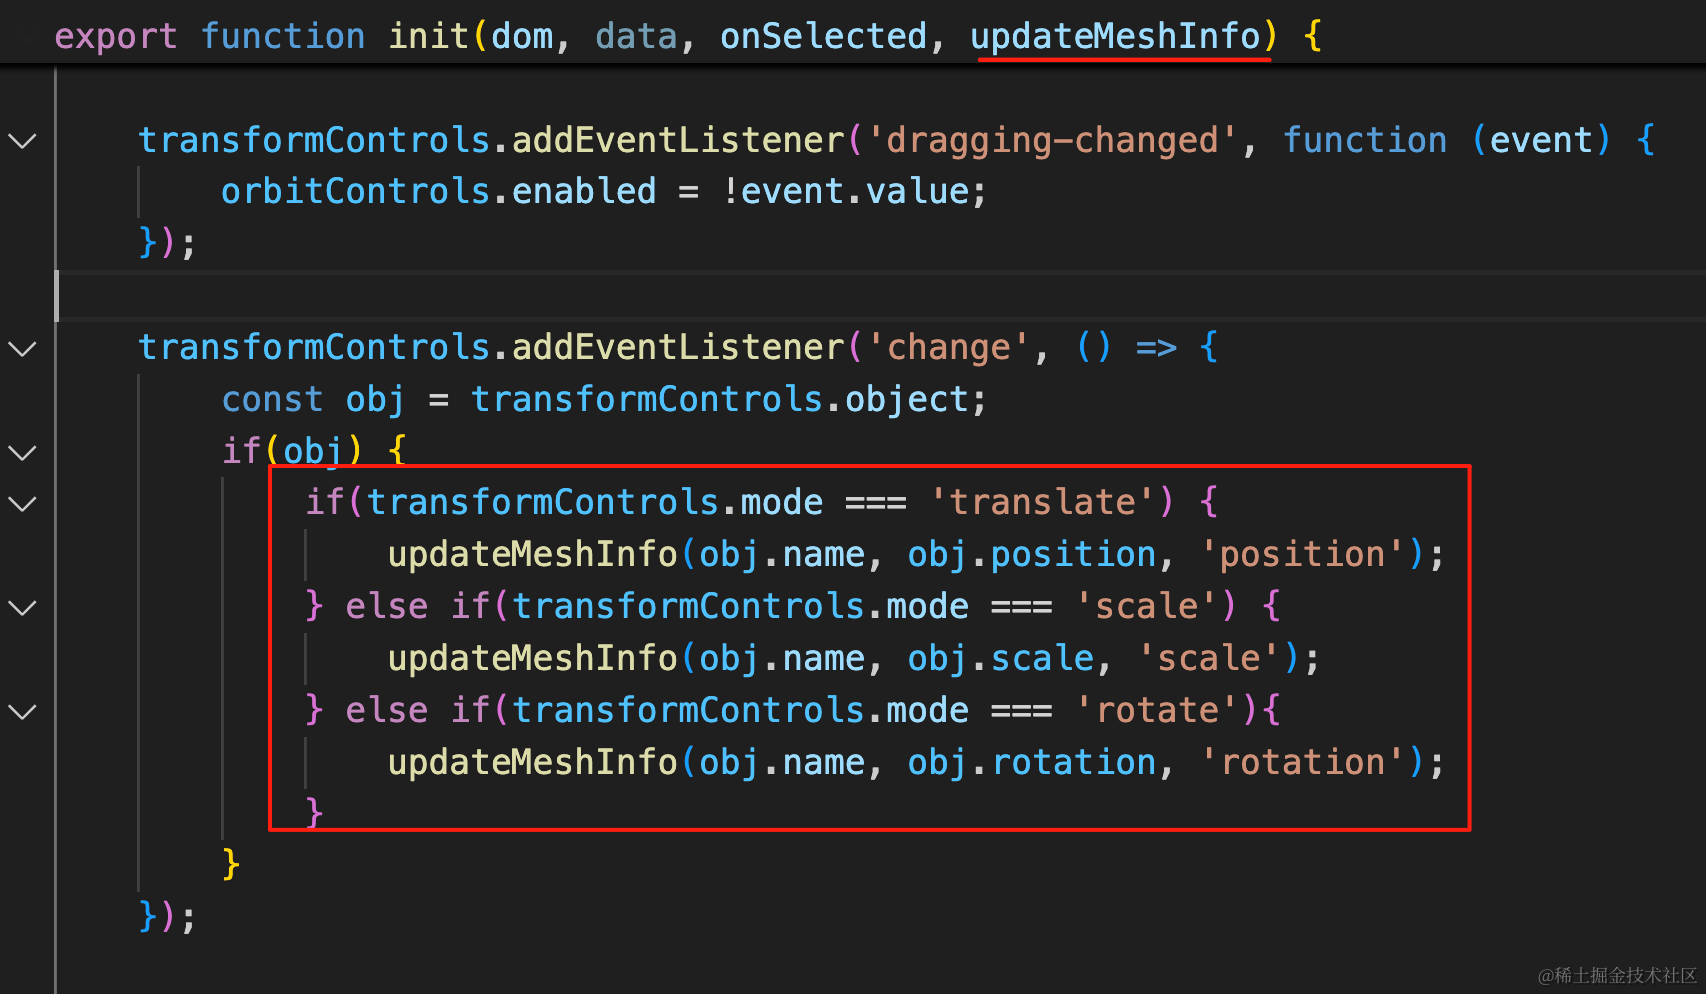
transformControls.addEventListener('change', () => {
    const obj = transformControls.object;
    if(obj) {
        if(transformControls.mode === 'translate') {
            updateMeshInfo(obj.name, obj.position, 'position');
        } else if(transformControls.mode === 'scale') {
            updateMeshInfo(obj.name, obj.scale, 'scale');
        } else if(transformControls.mode === 'rotate'){
            updateMeshInfo(obj.name, obj.rotation, 'rotation');
        }
    }
});
试下效果:
这样,旋转、缩放的编辑就完成了。
案例代码上传了小册仓库
总结
这节我们实现了旋转、缩放的编辑功能。
原理就是 TransformControls 设置 translate、rotate、scale 三种 mode。
我们加了三个按钮,点击的时候来切换 mode。
并且在编辑的时候根据 mode 来分别把数据同步到 json 中。
这样,位移、旋转、缩放的编辑功能就都完成了。