上节绘制了最简单的一个户型:
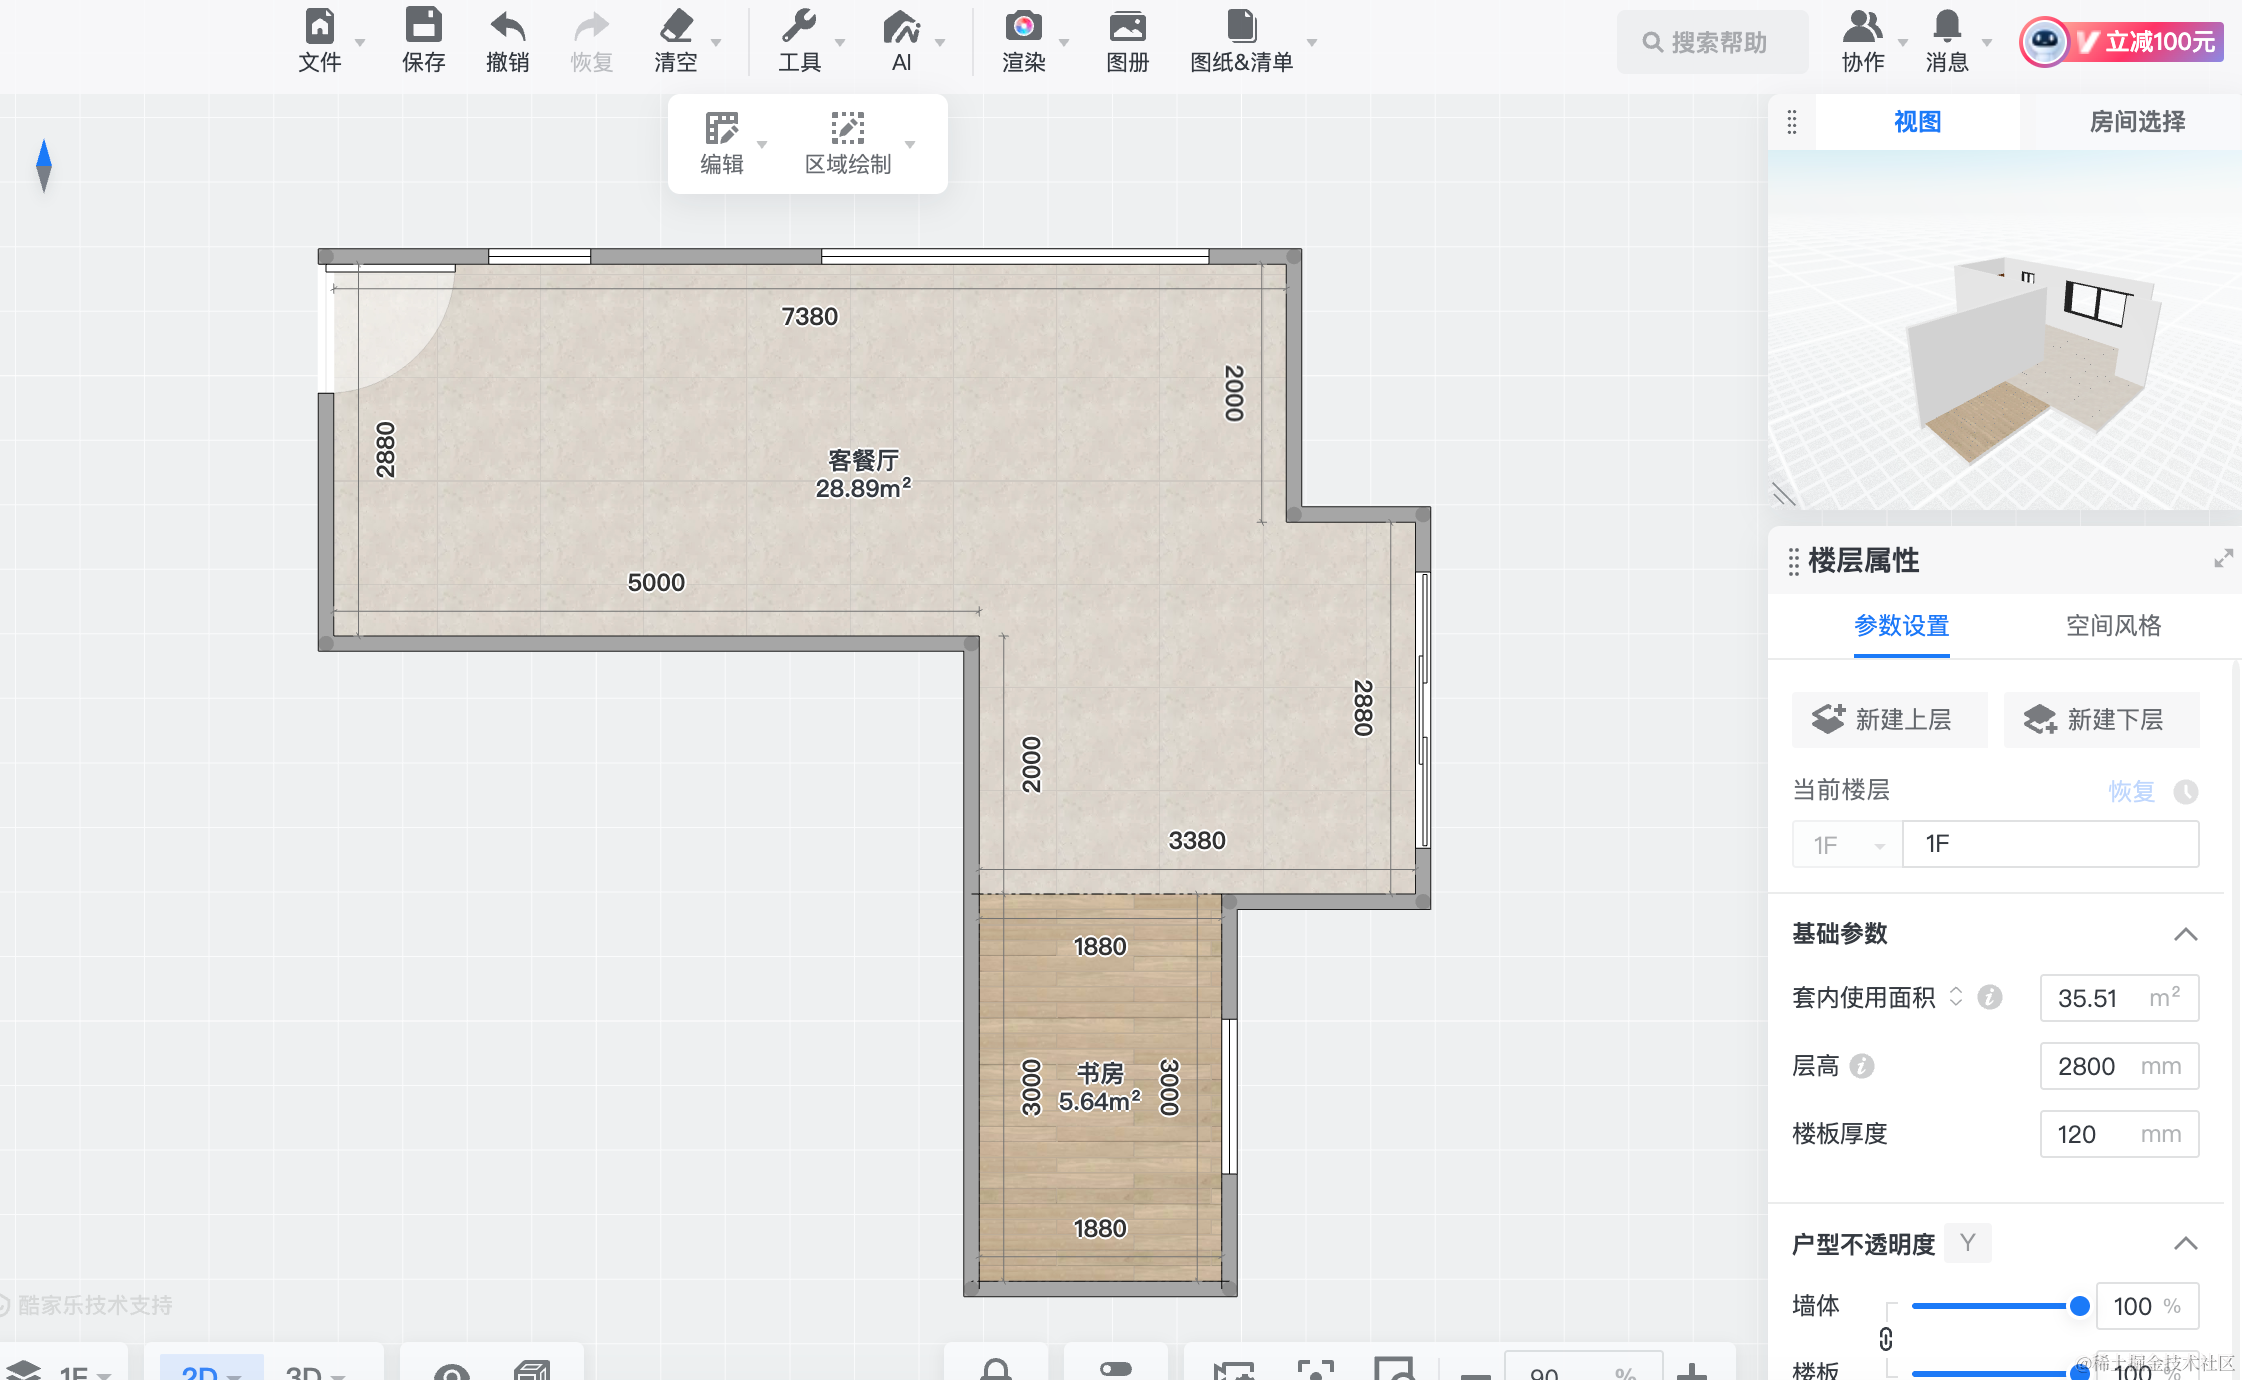
这节再绘制一个更复杂一点的户型:
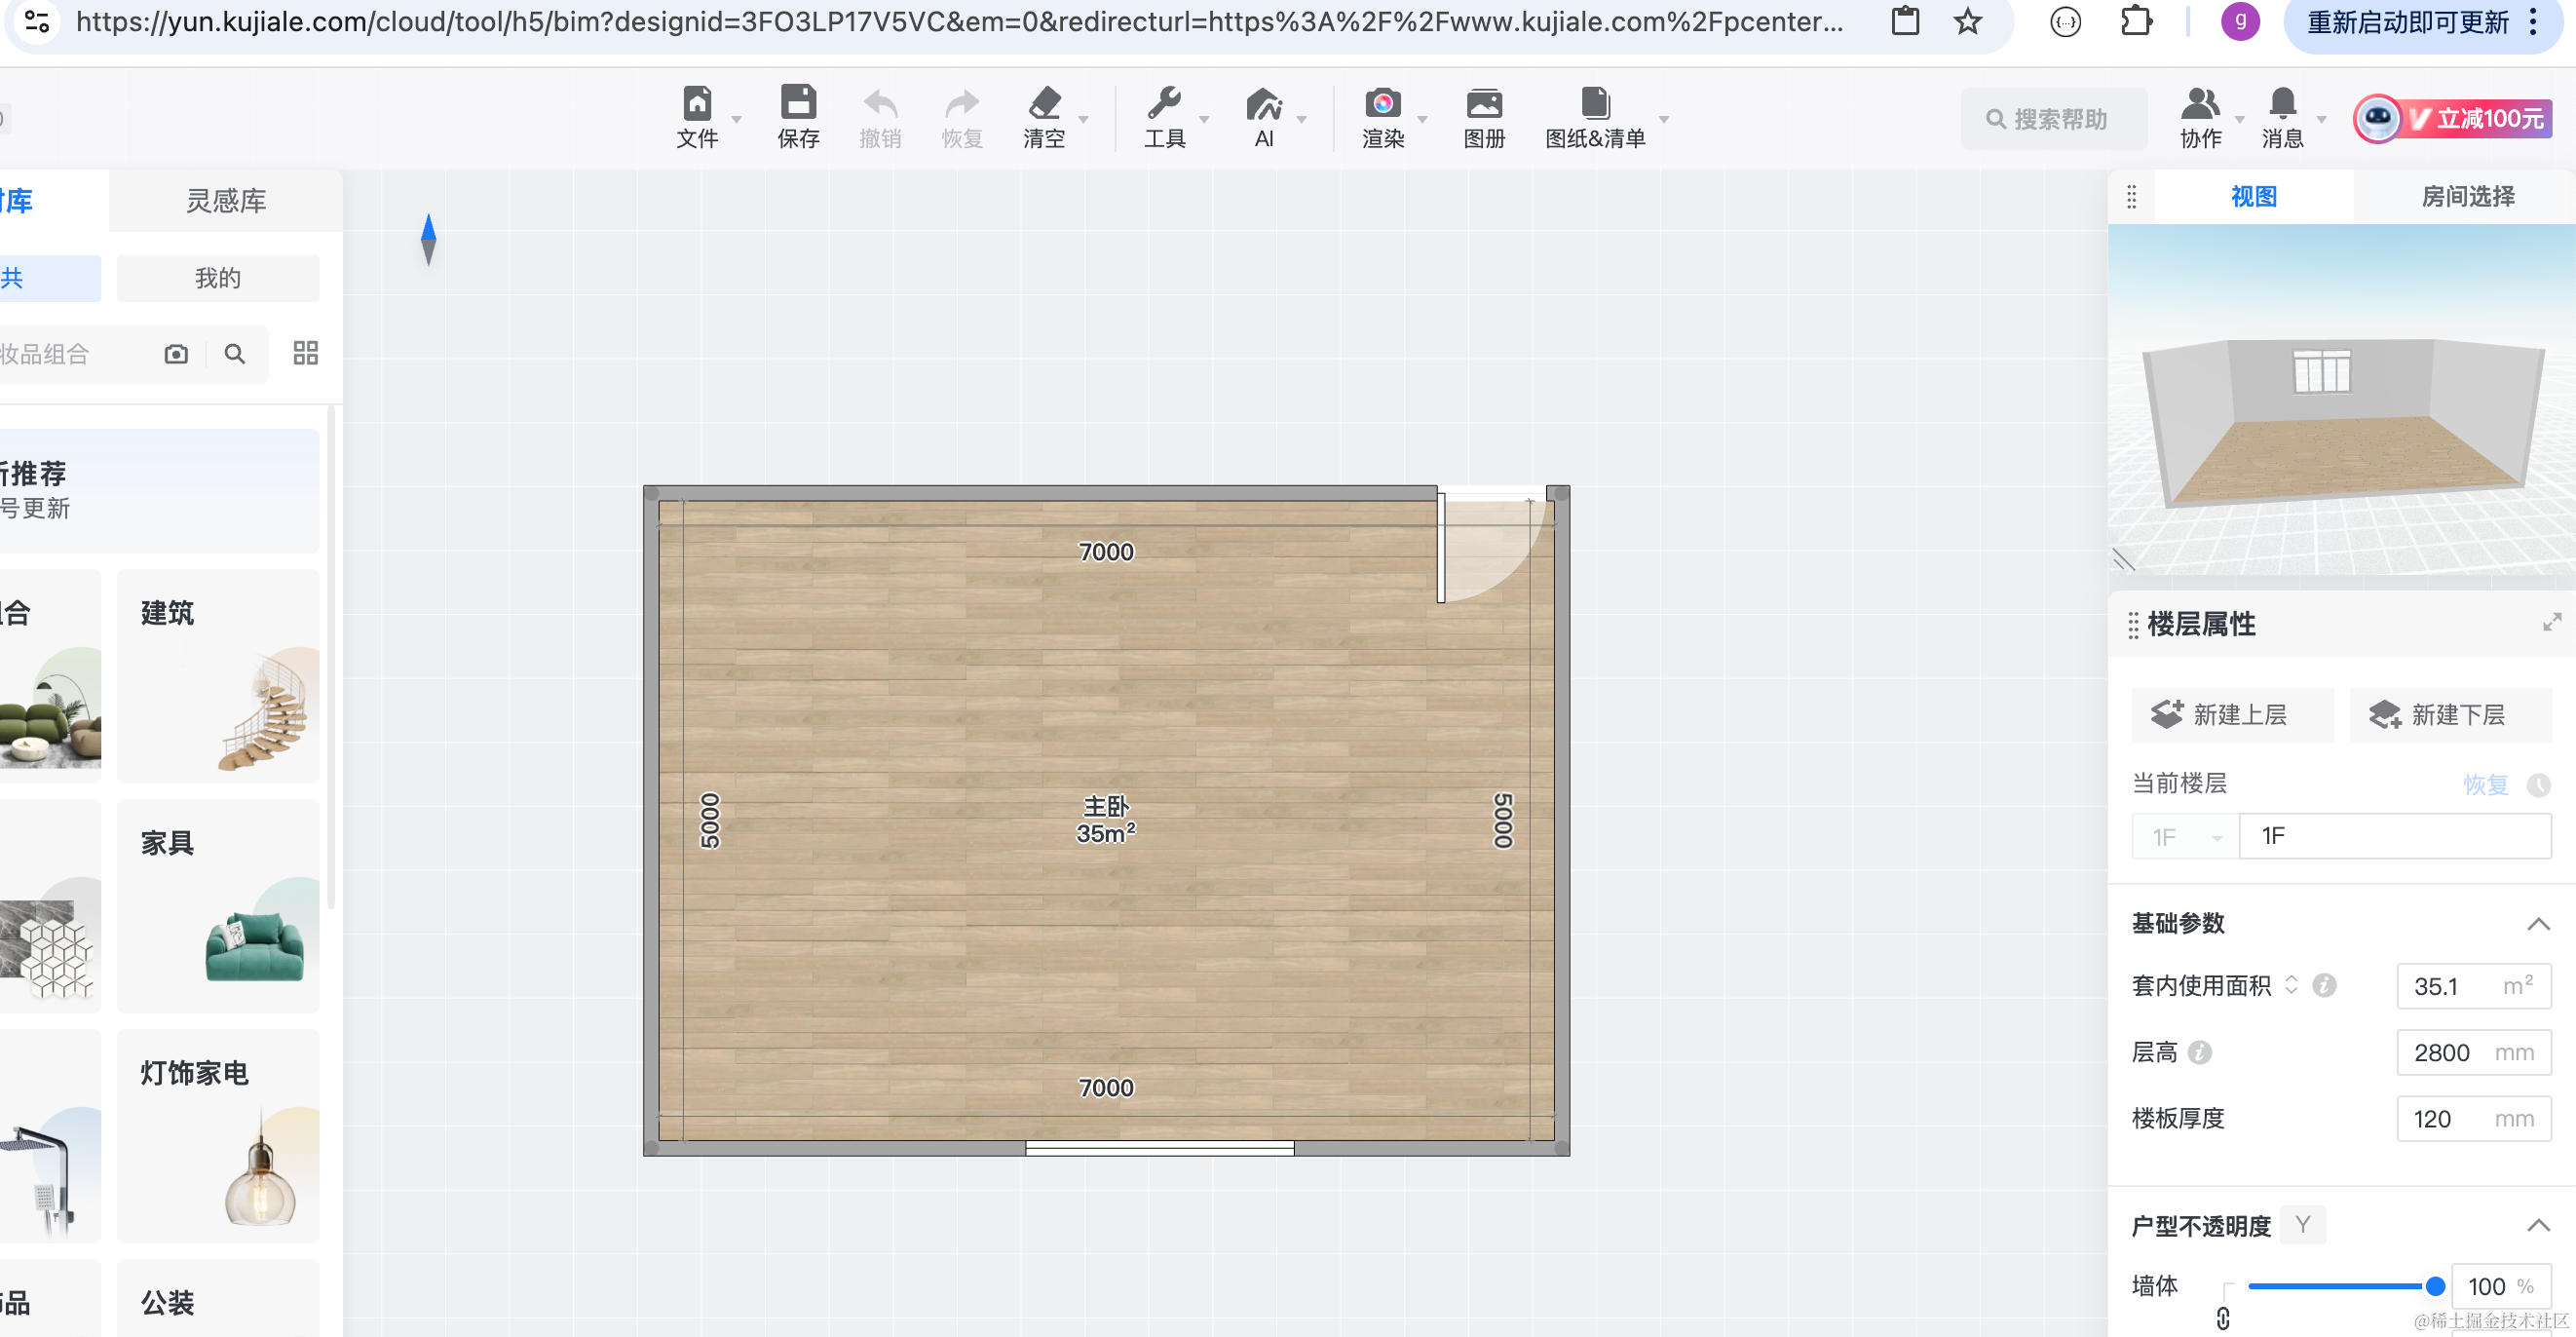
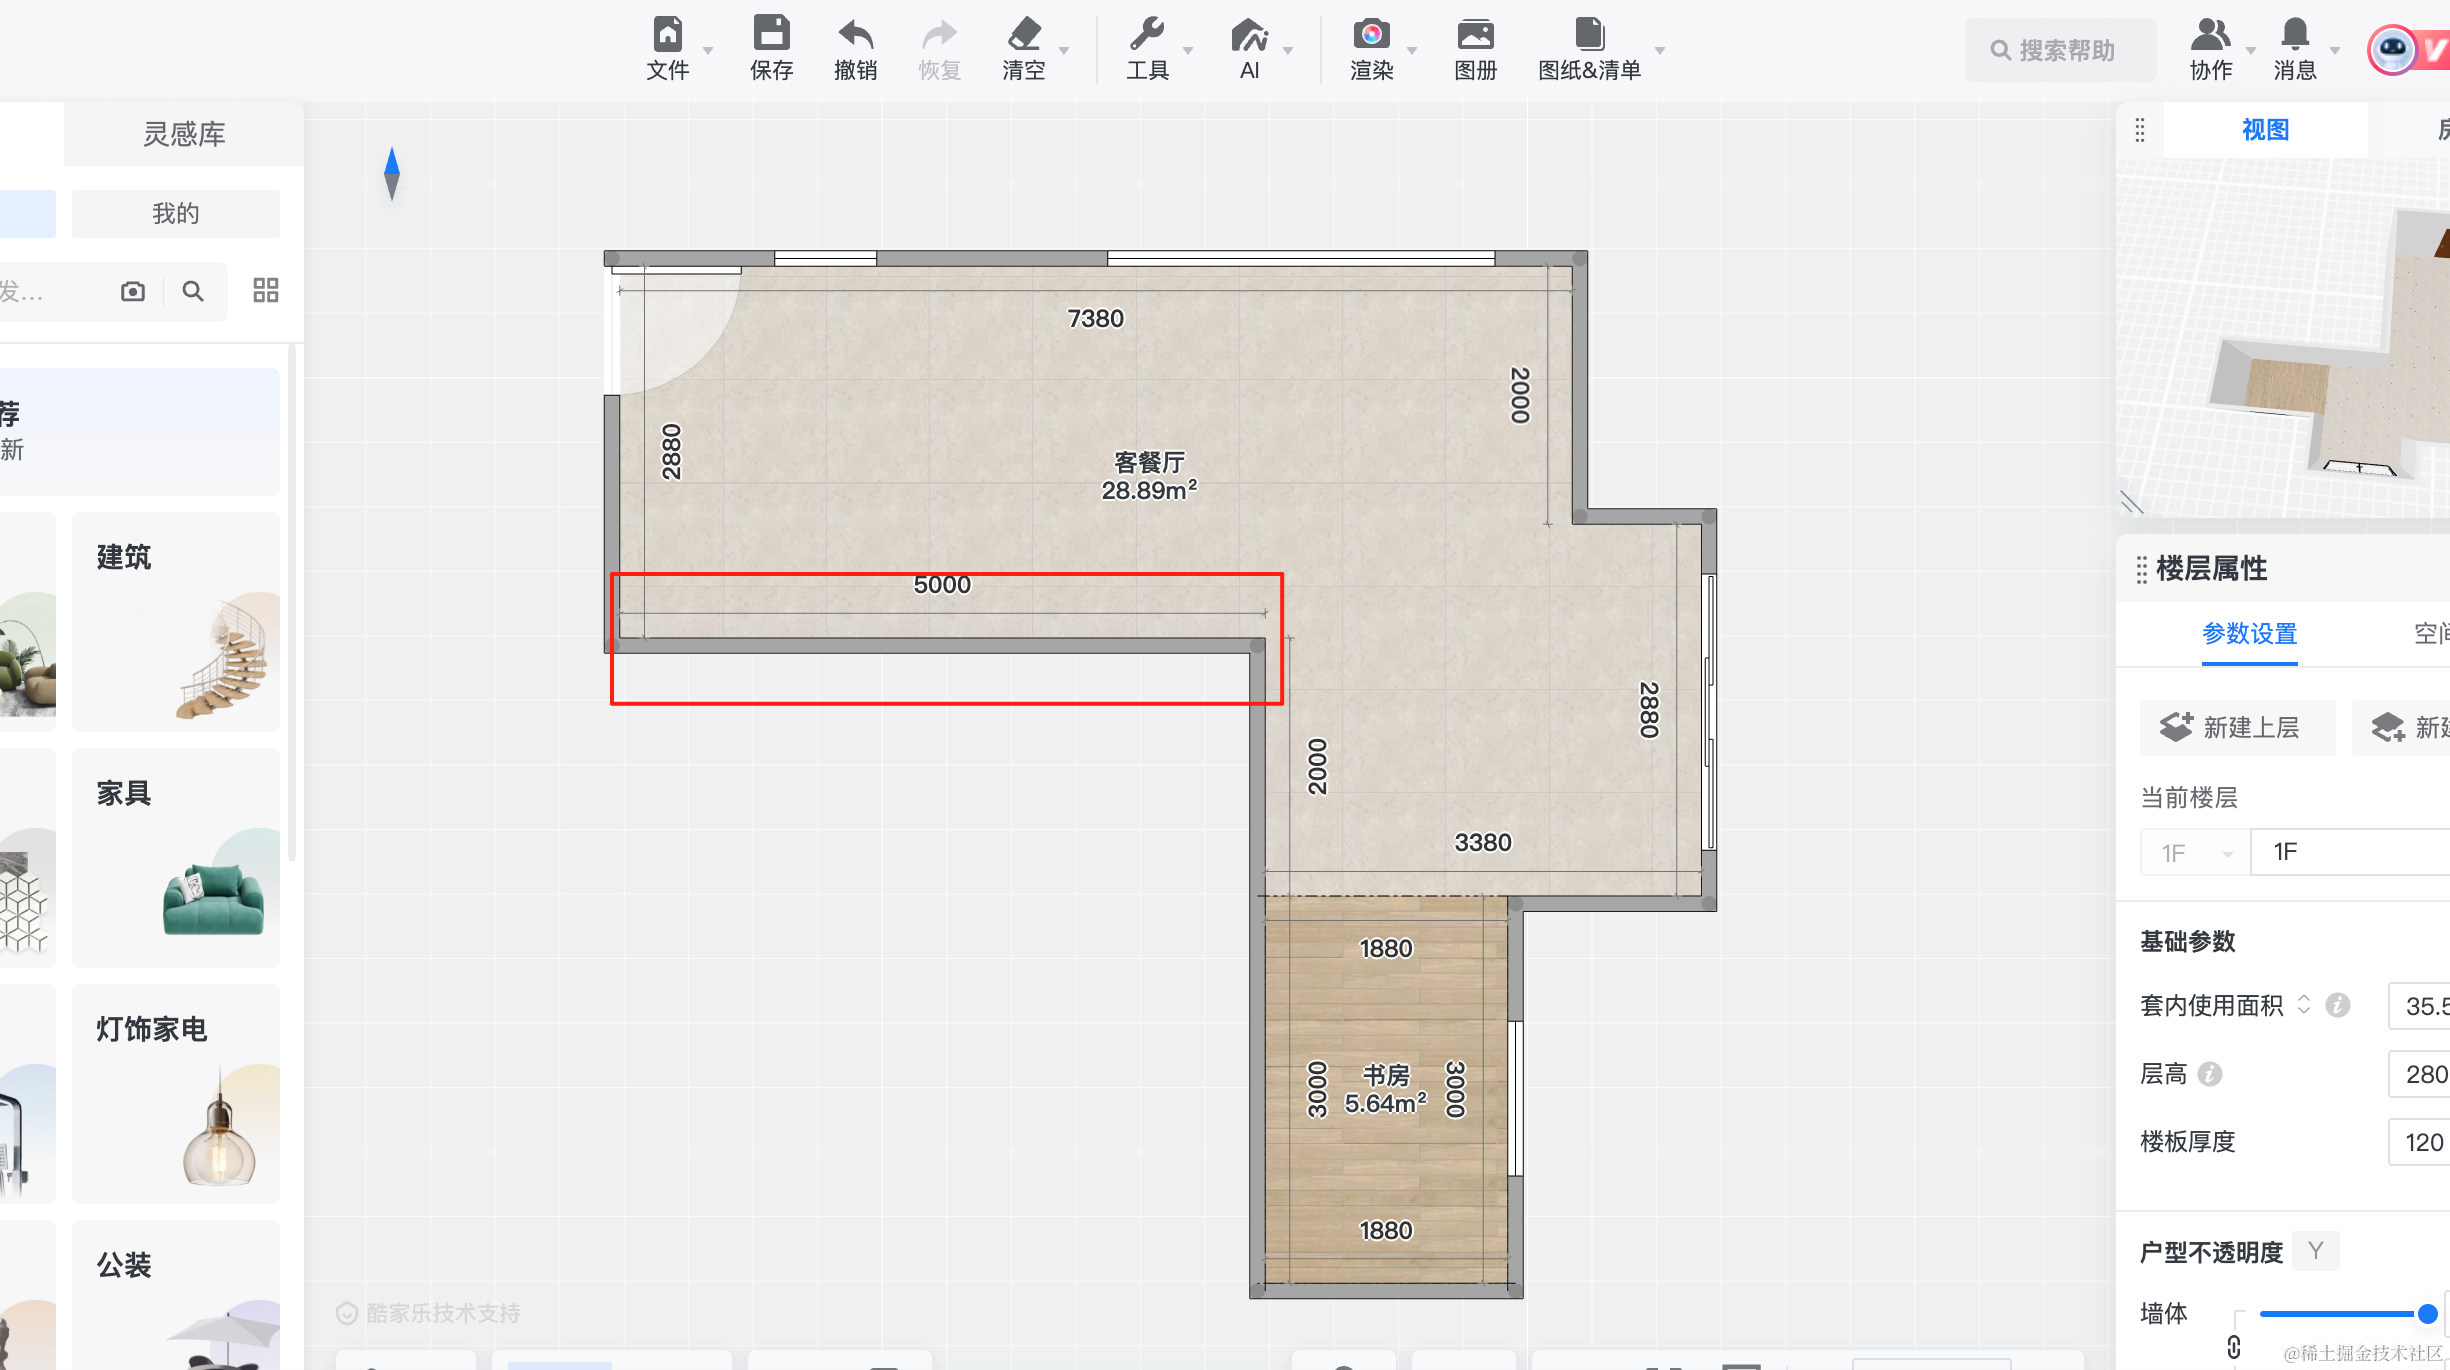
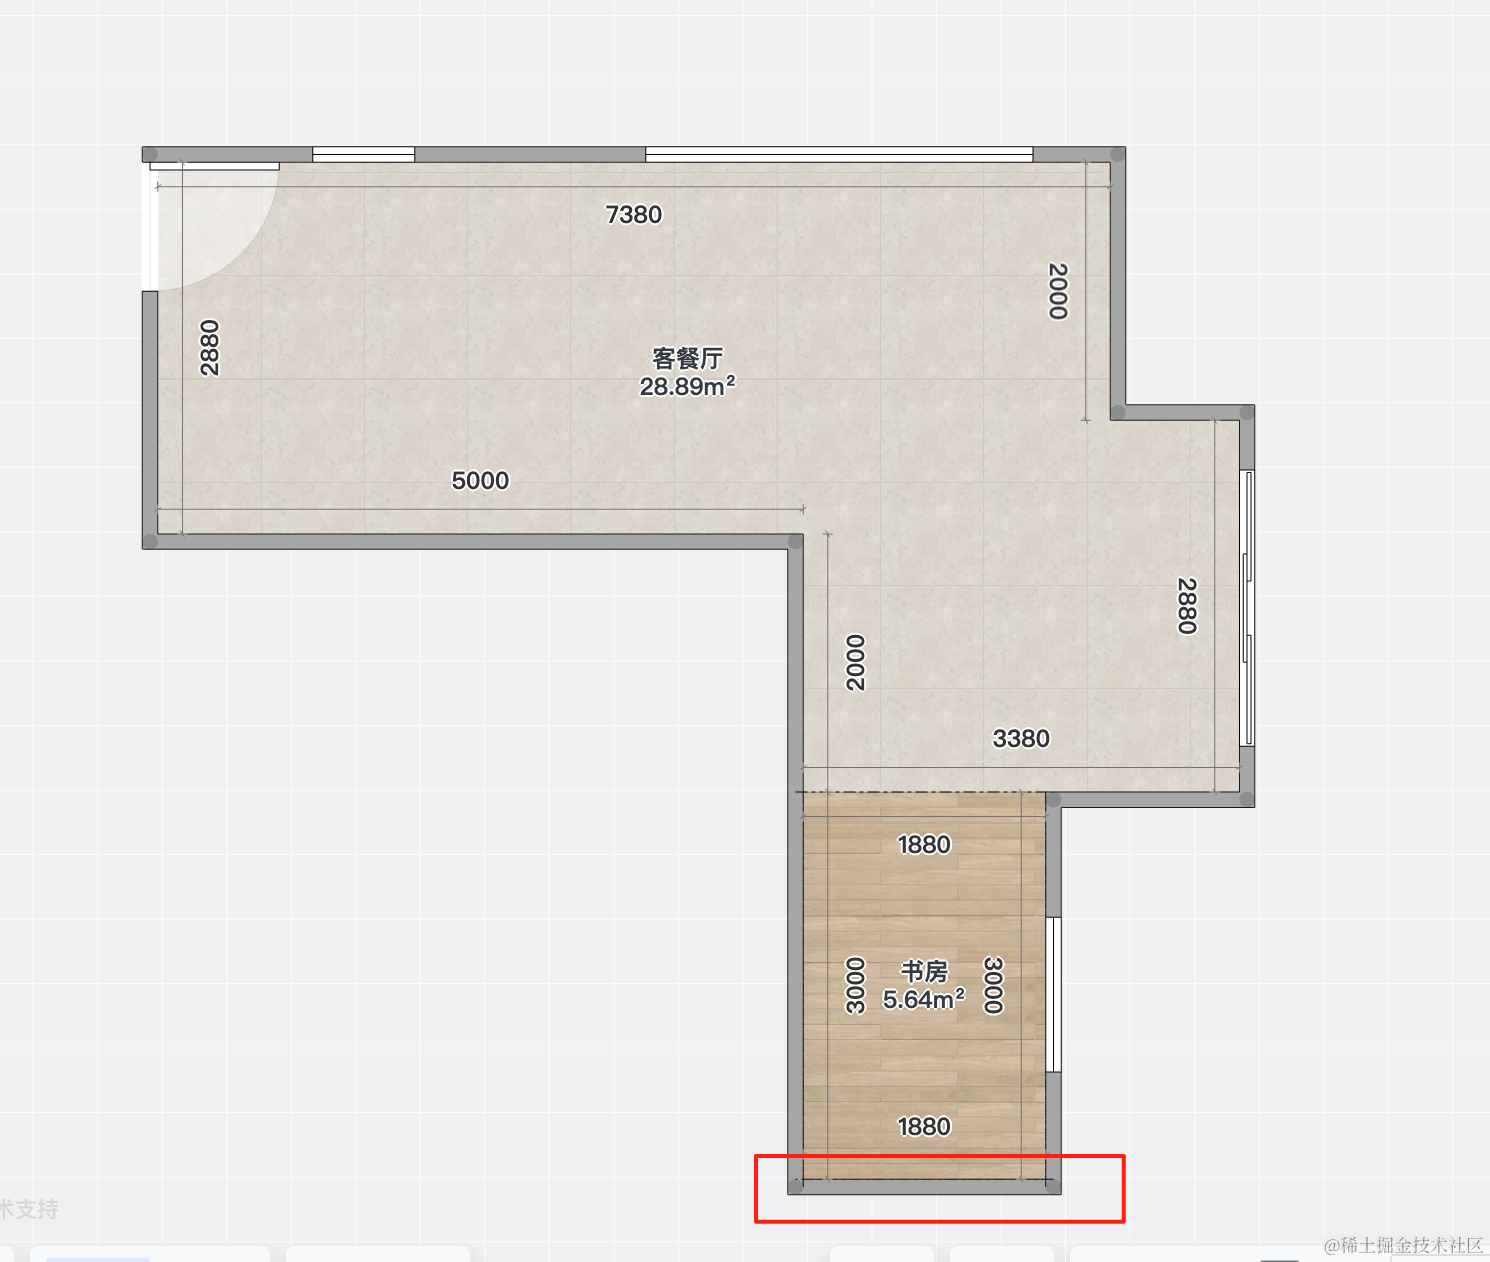
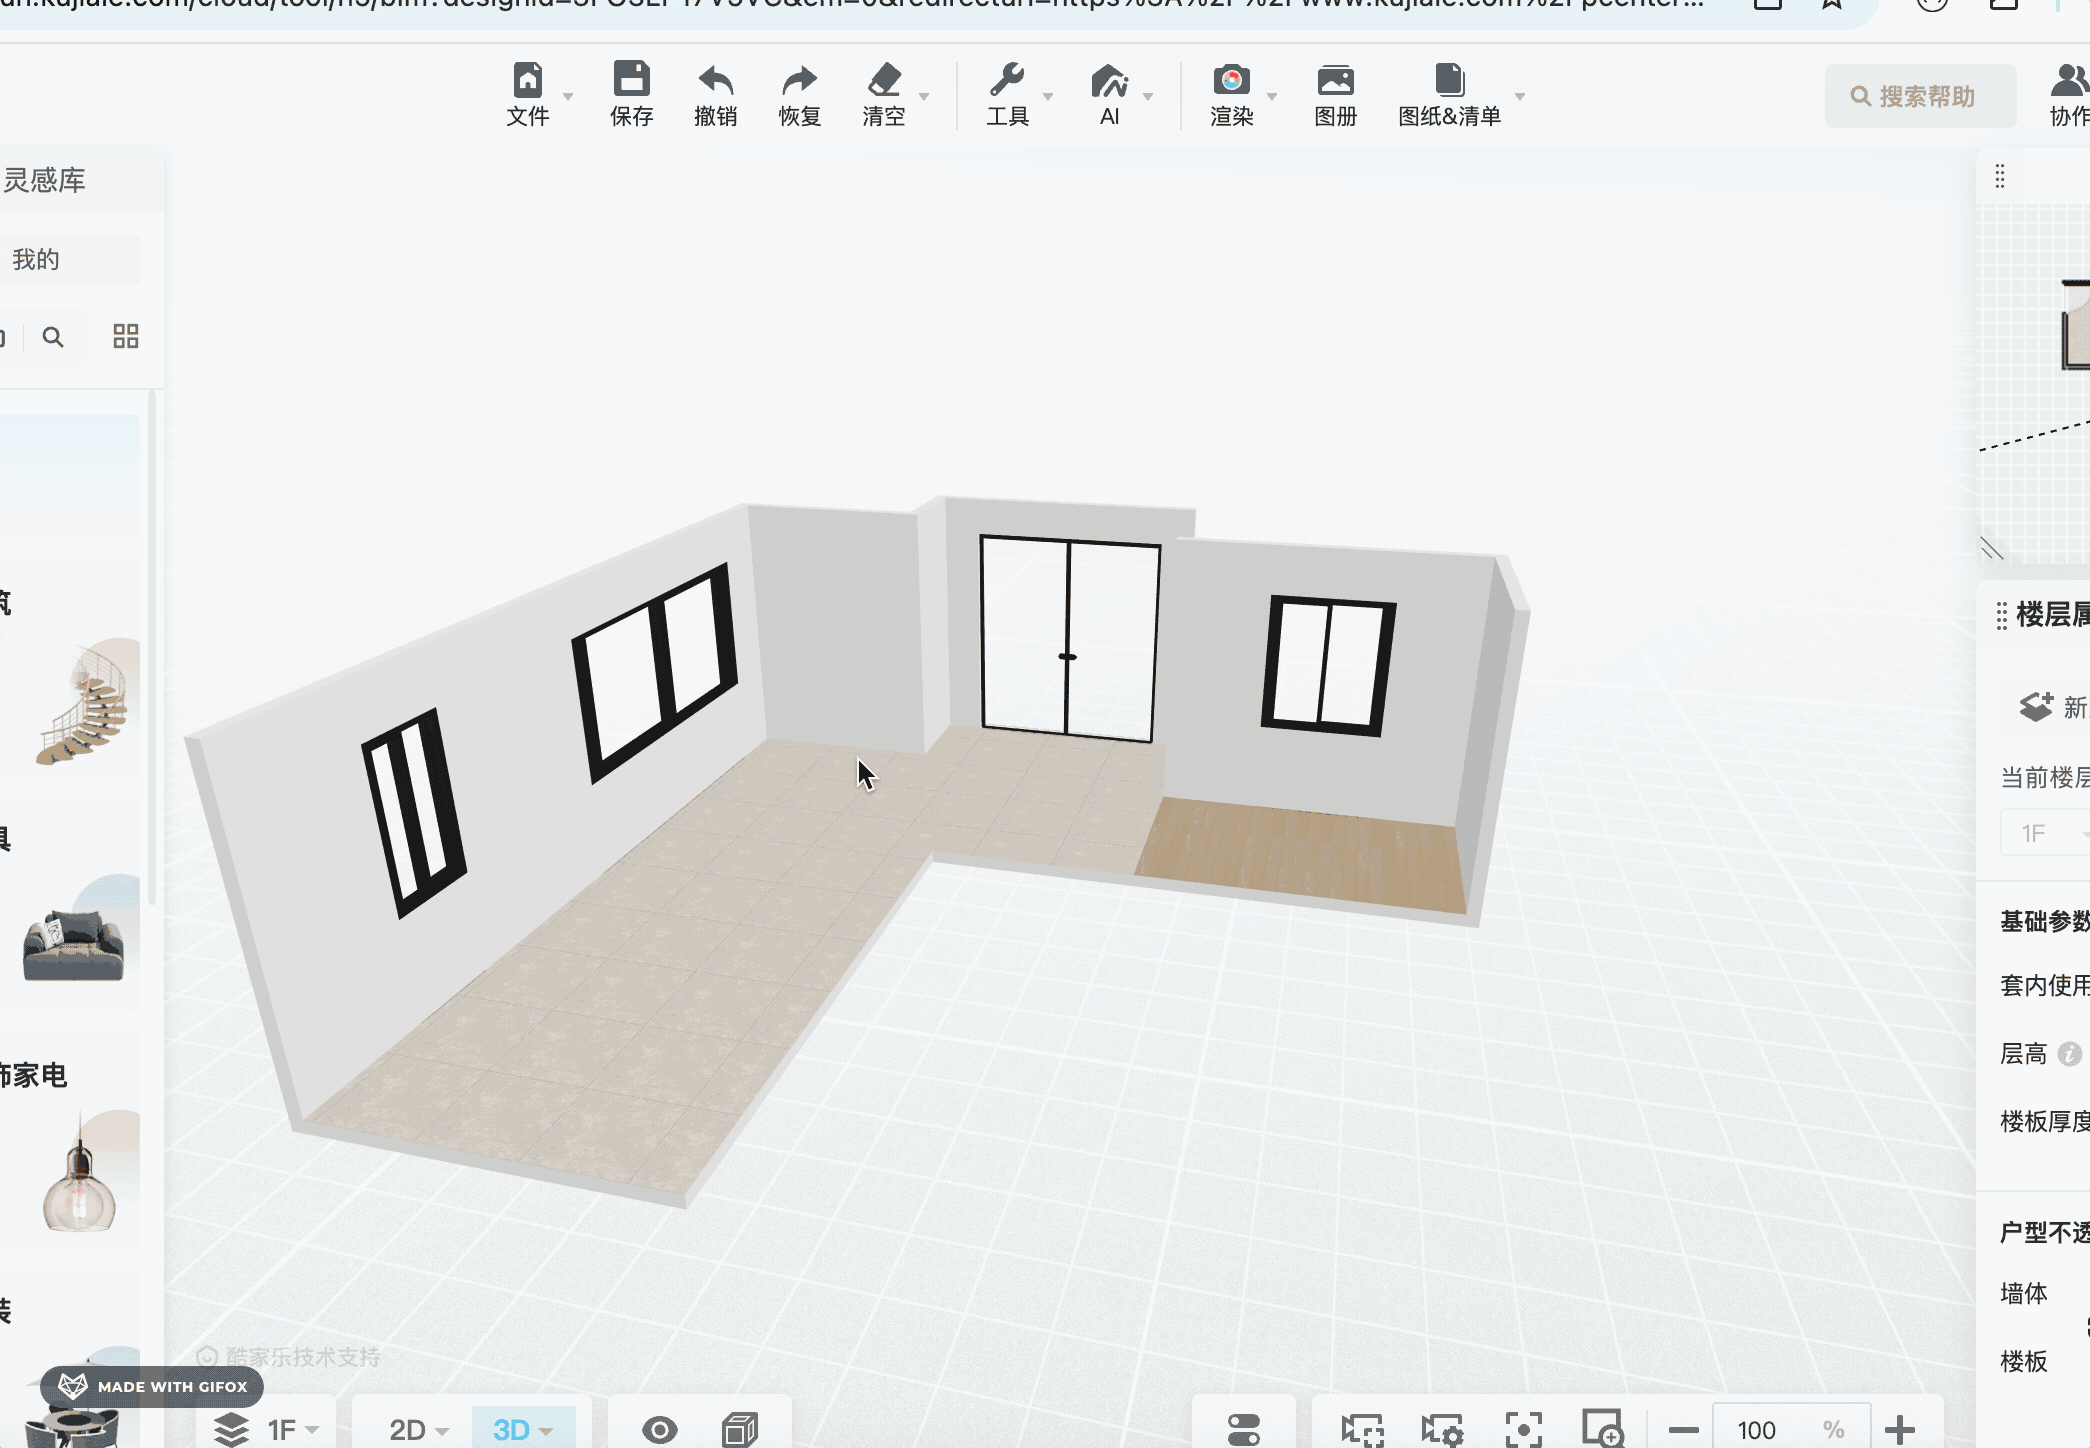
你可以在酷家乐里搜一下这个户型:
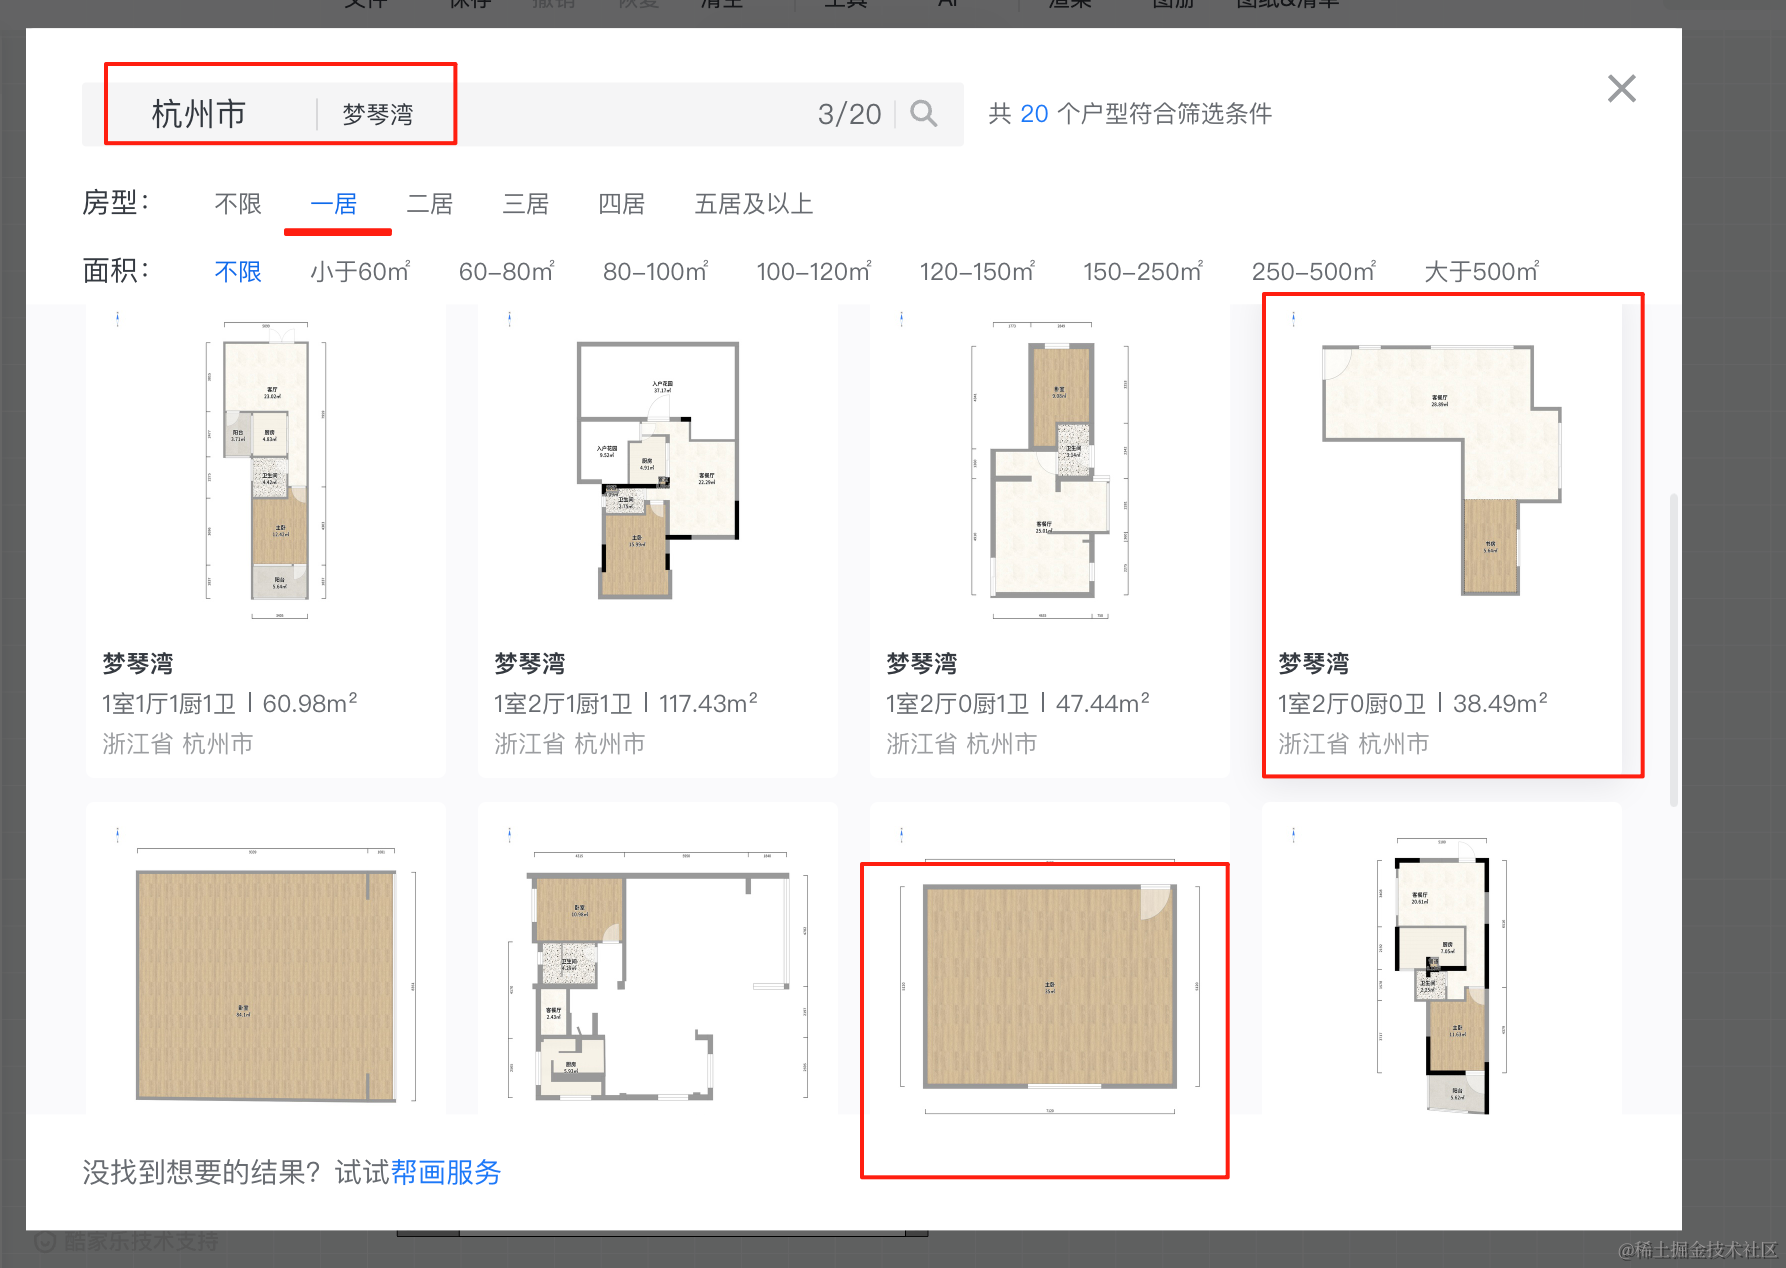
从酷家乐的户型库里搜杭州 > 梦琴湾 > 一室 的这俩户型。
然后我们开始绘制:
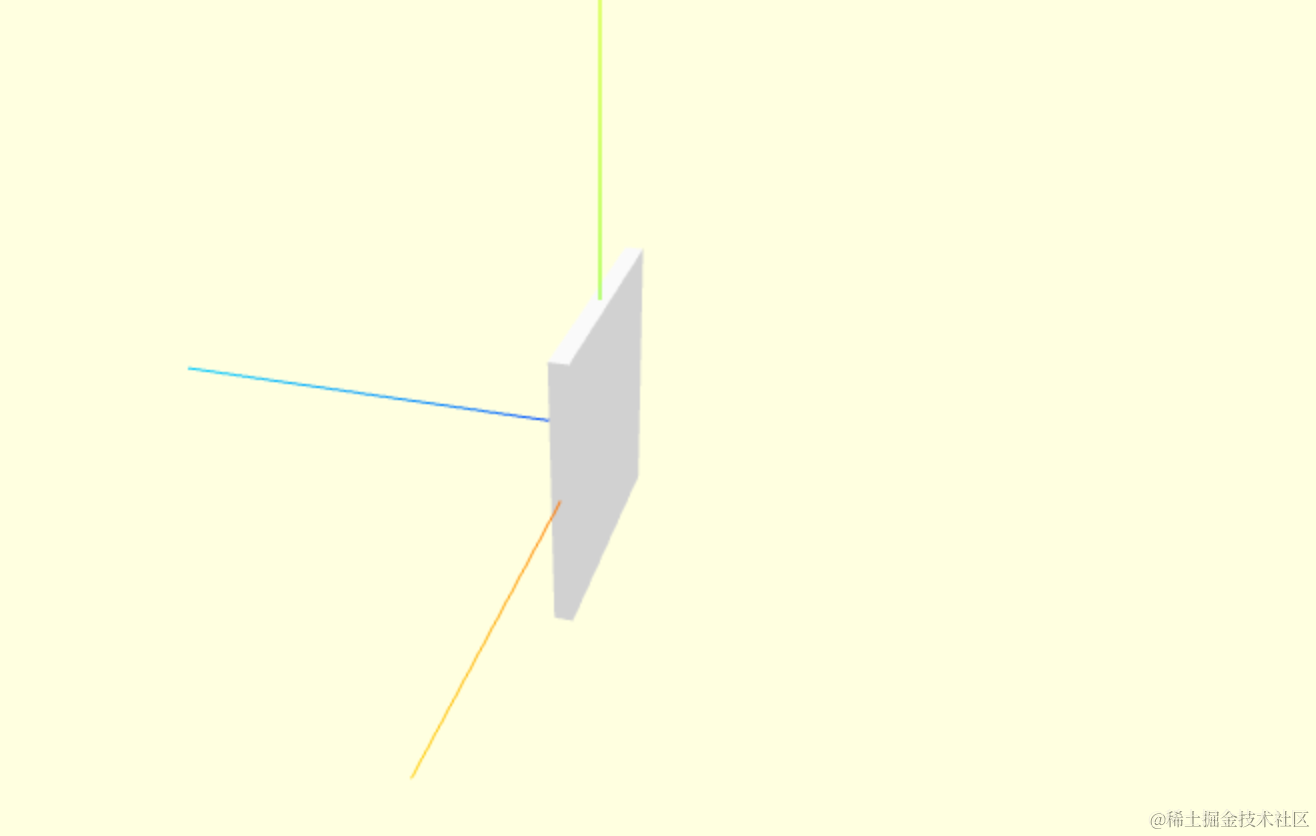
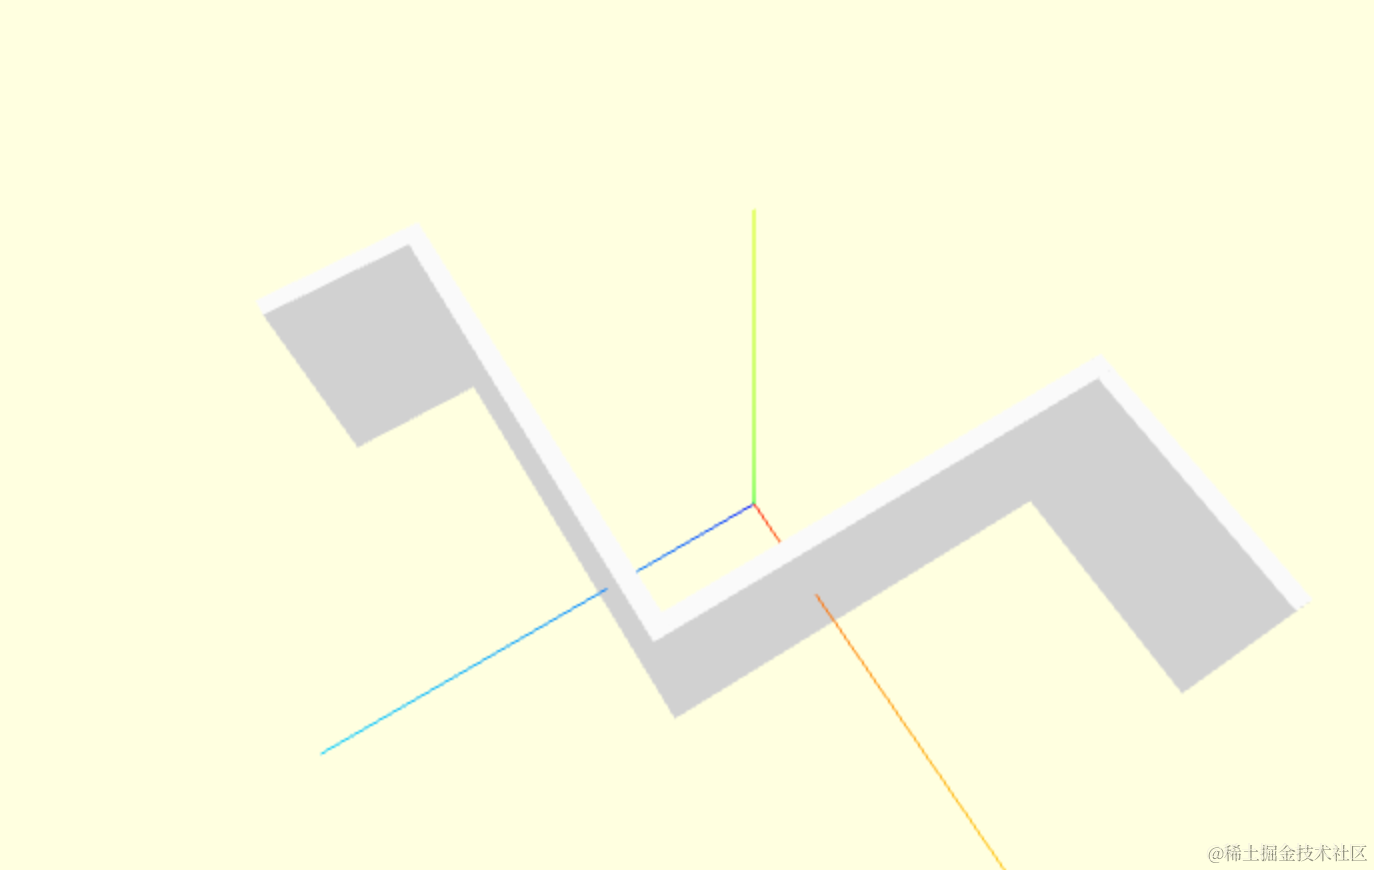
先绘制这面墙:
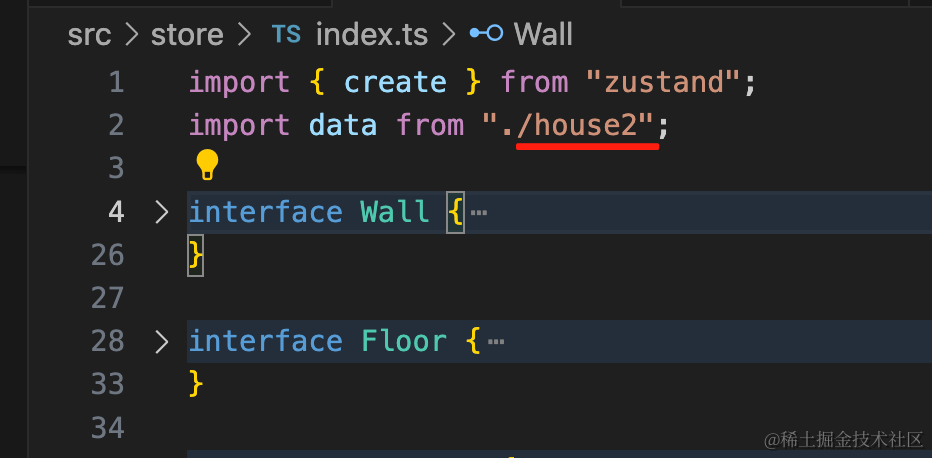
创建 store/house2.ts
import type { State } from ".";
const data: State['data'] = {
walls: [
{
position: { x: 0, y: 0, z: 0},
width: 2800,
height: 3000,
depth: 200,
windows: []
},
],
floors: [
],
ceilings: [
]
};
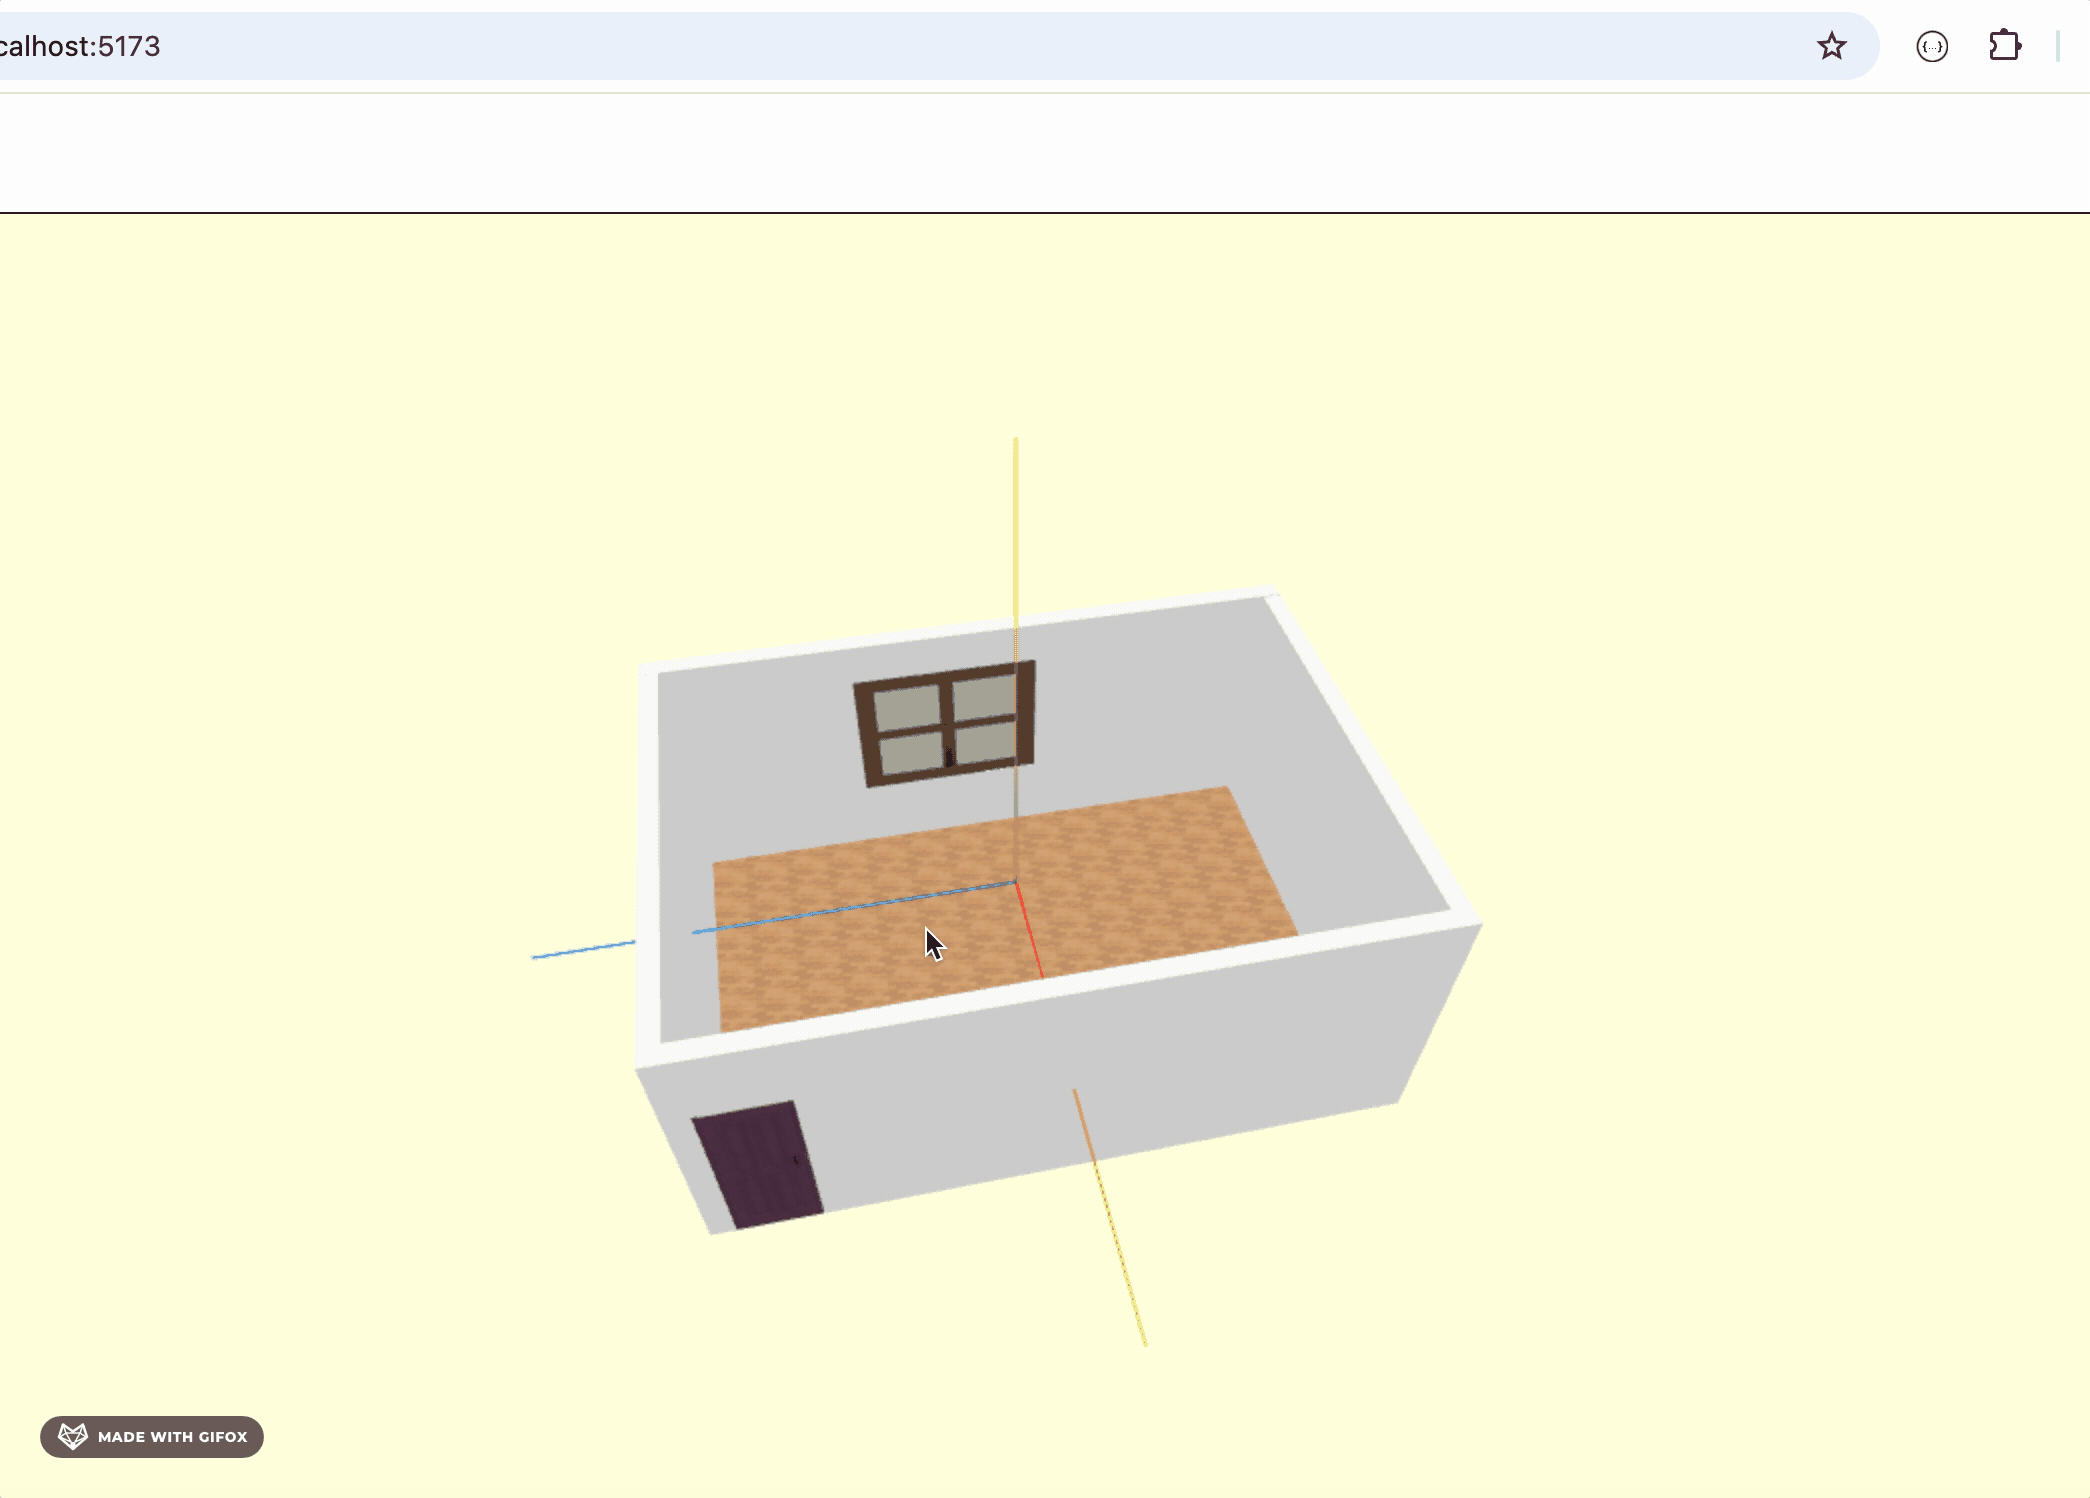
export default data;引入看下效果:
然后是这面:
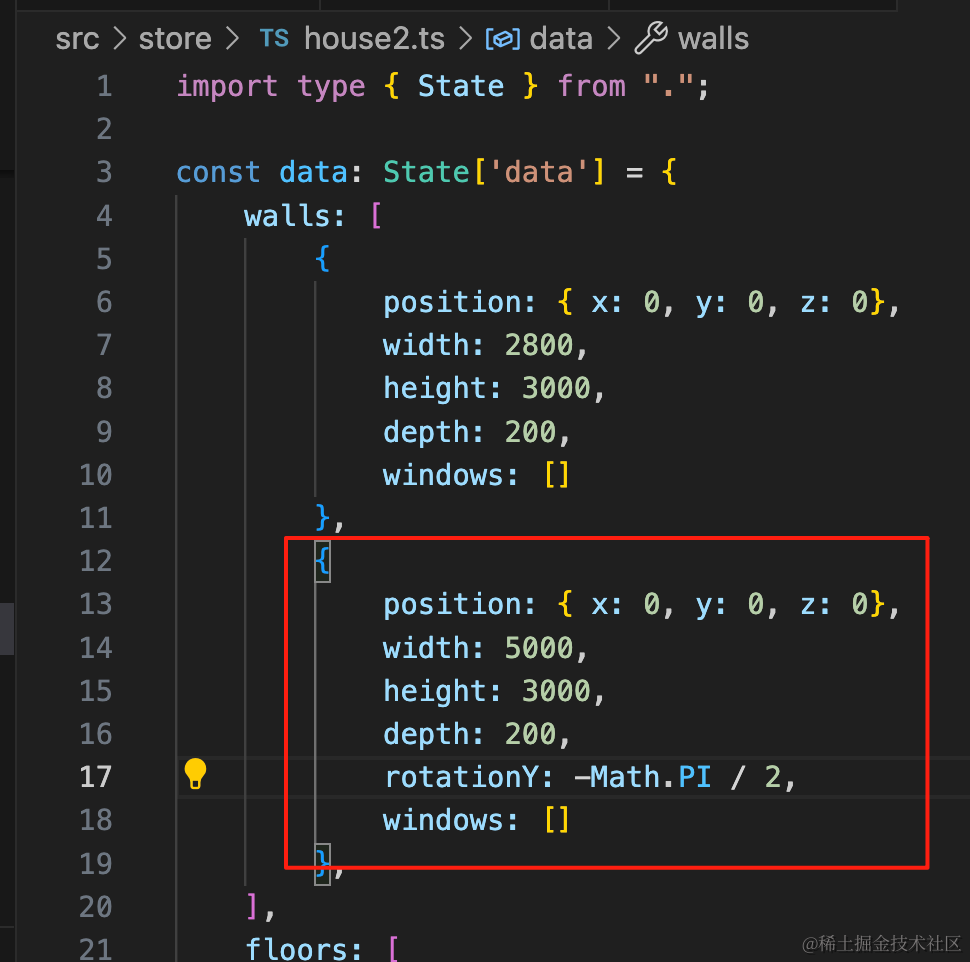
{
    position: { x: 0, y: 0, z: 0},
    width: 5000,
    height: 3000,
    depth: 200,
    rotationY: -Math.PI / 2,
    windows: []
},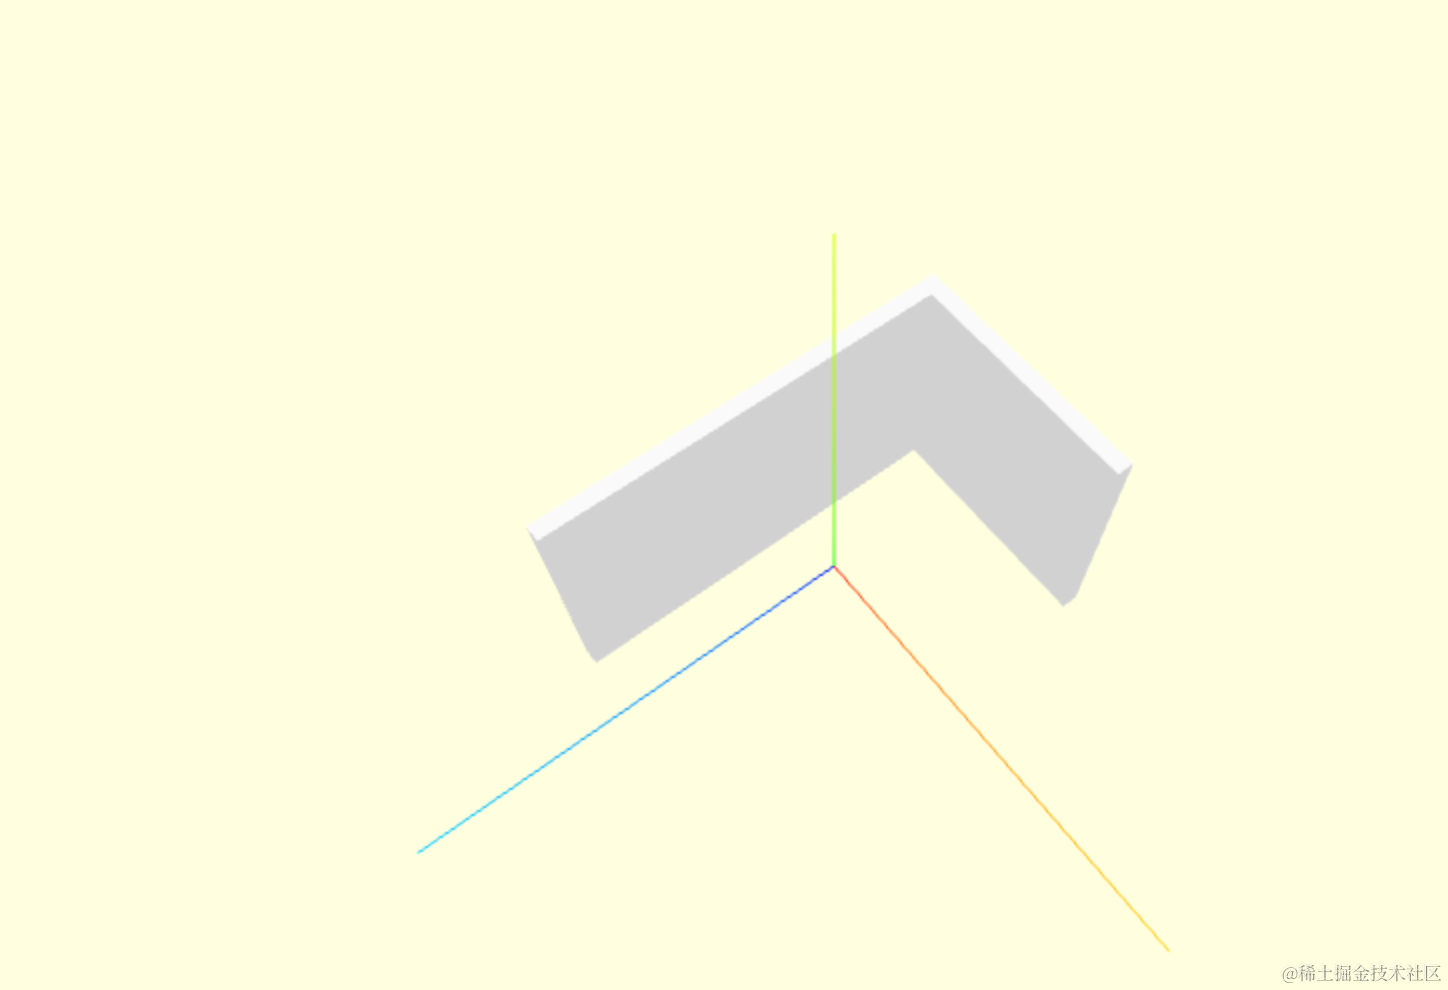
然后是这面:
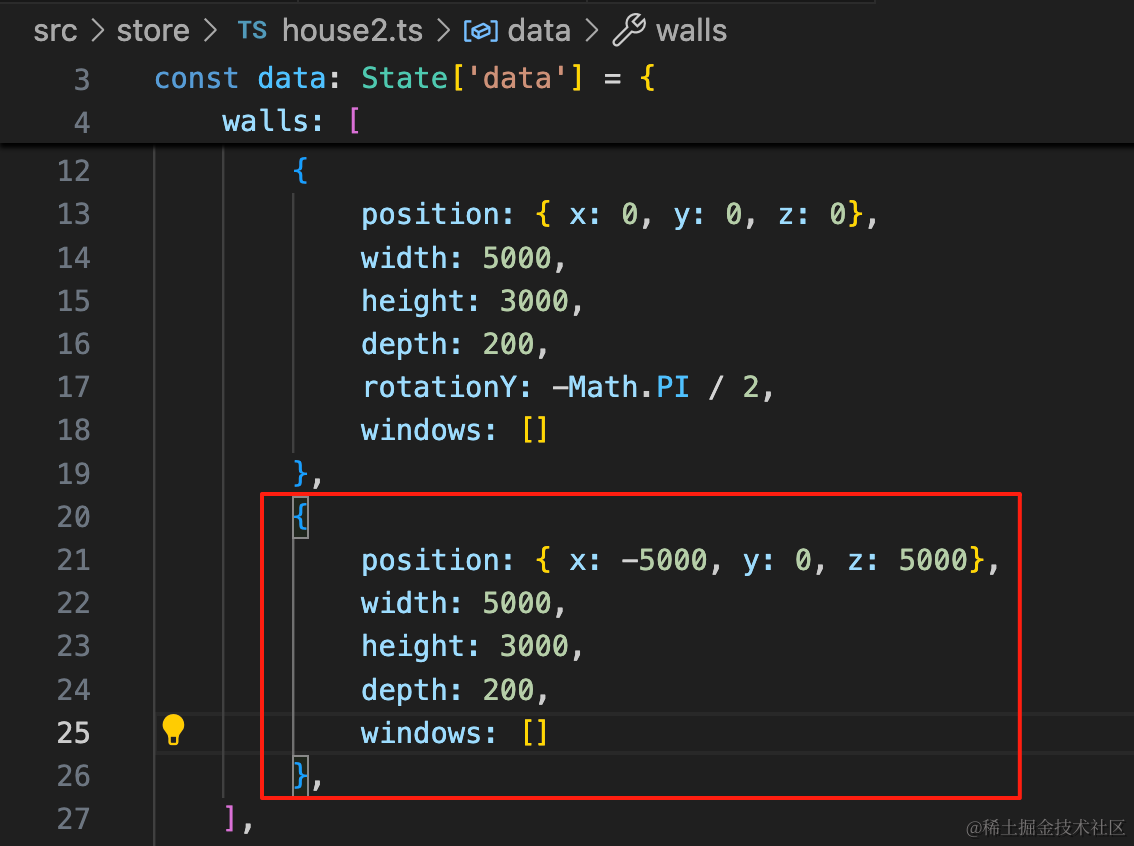
{
    position: { x: -5000, y: 0, z: 5000},
    width: 5000,
    height: 3000,
    depth: 200,
    windows: []
},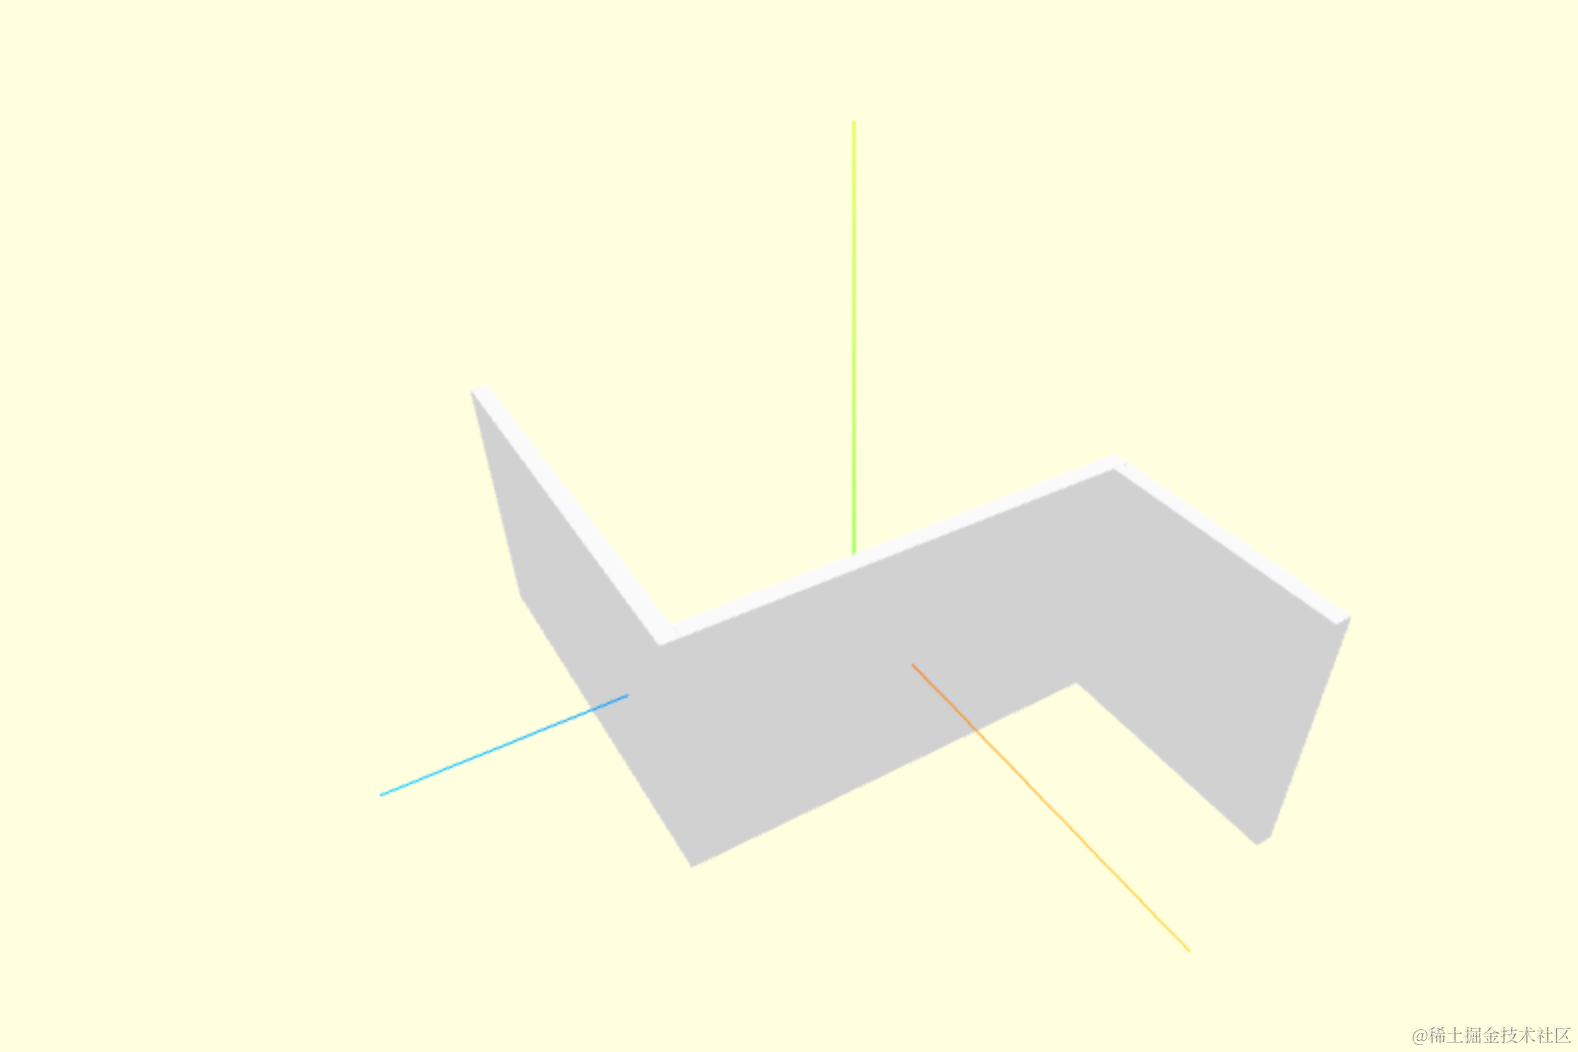
再继续画这面:
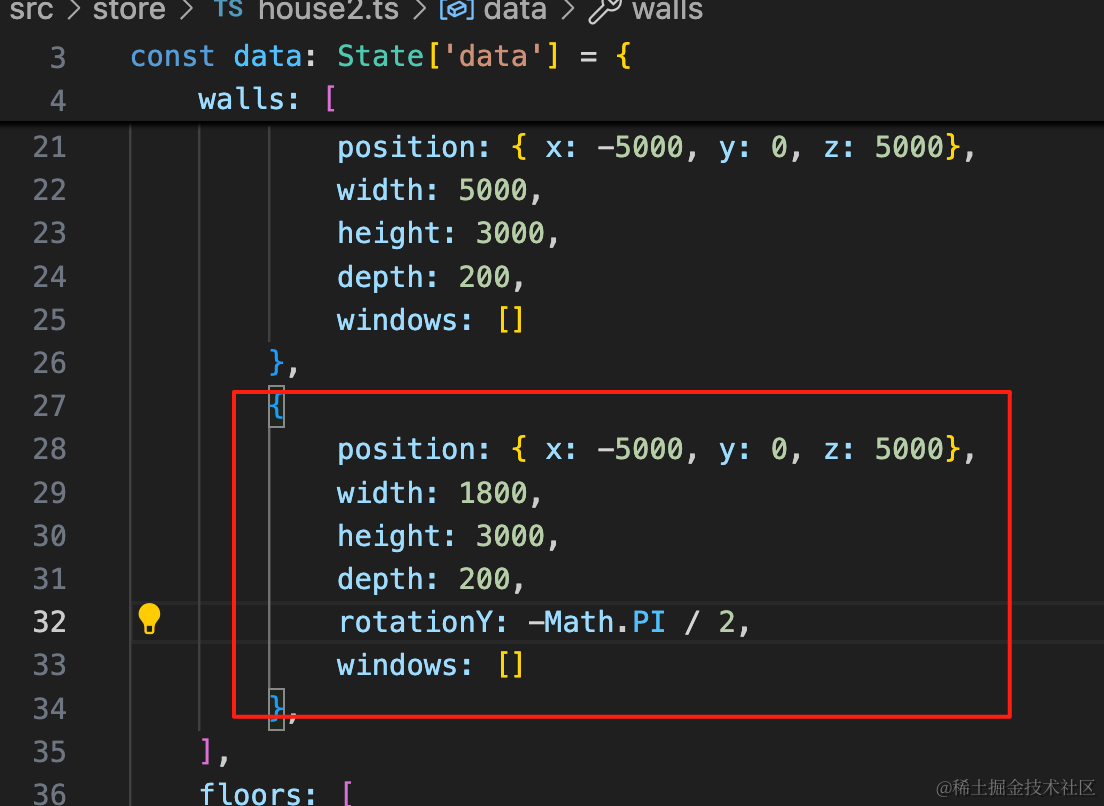
{
    position: { x: -5000, y: 0, z: 5000},
    width: 1800,
    height: 3000,
    depth: 200,
    rotationY: -Math.PI / 2,
    windows: []
},
剩下的就不一个个展示了,我们一次性画完:
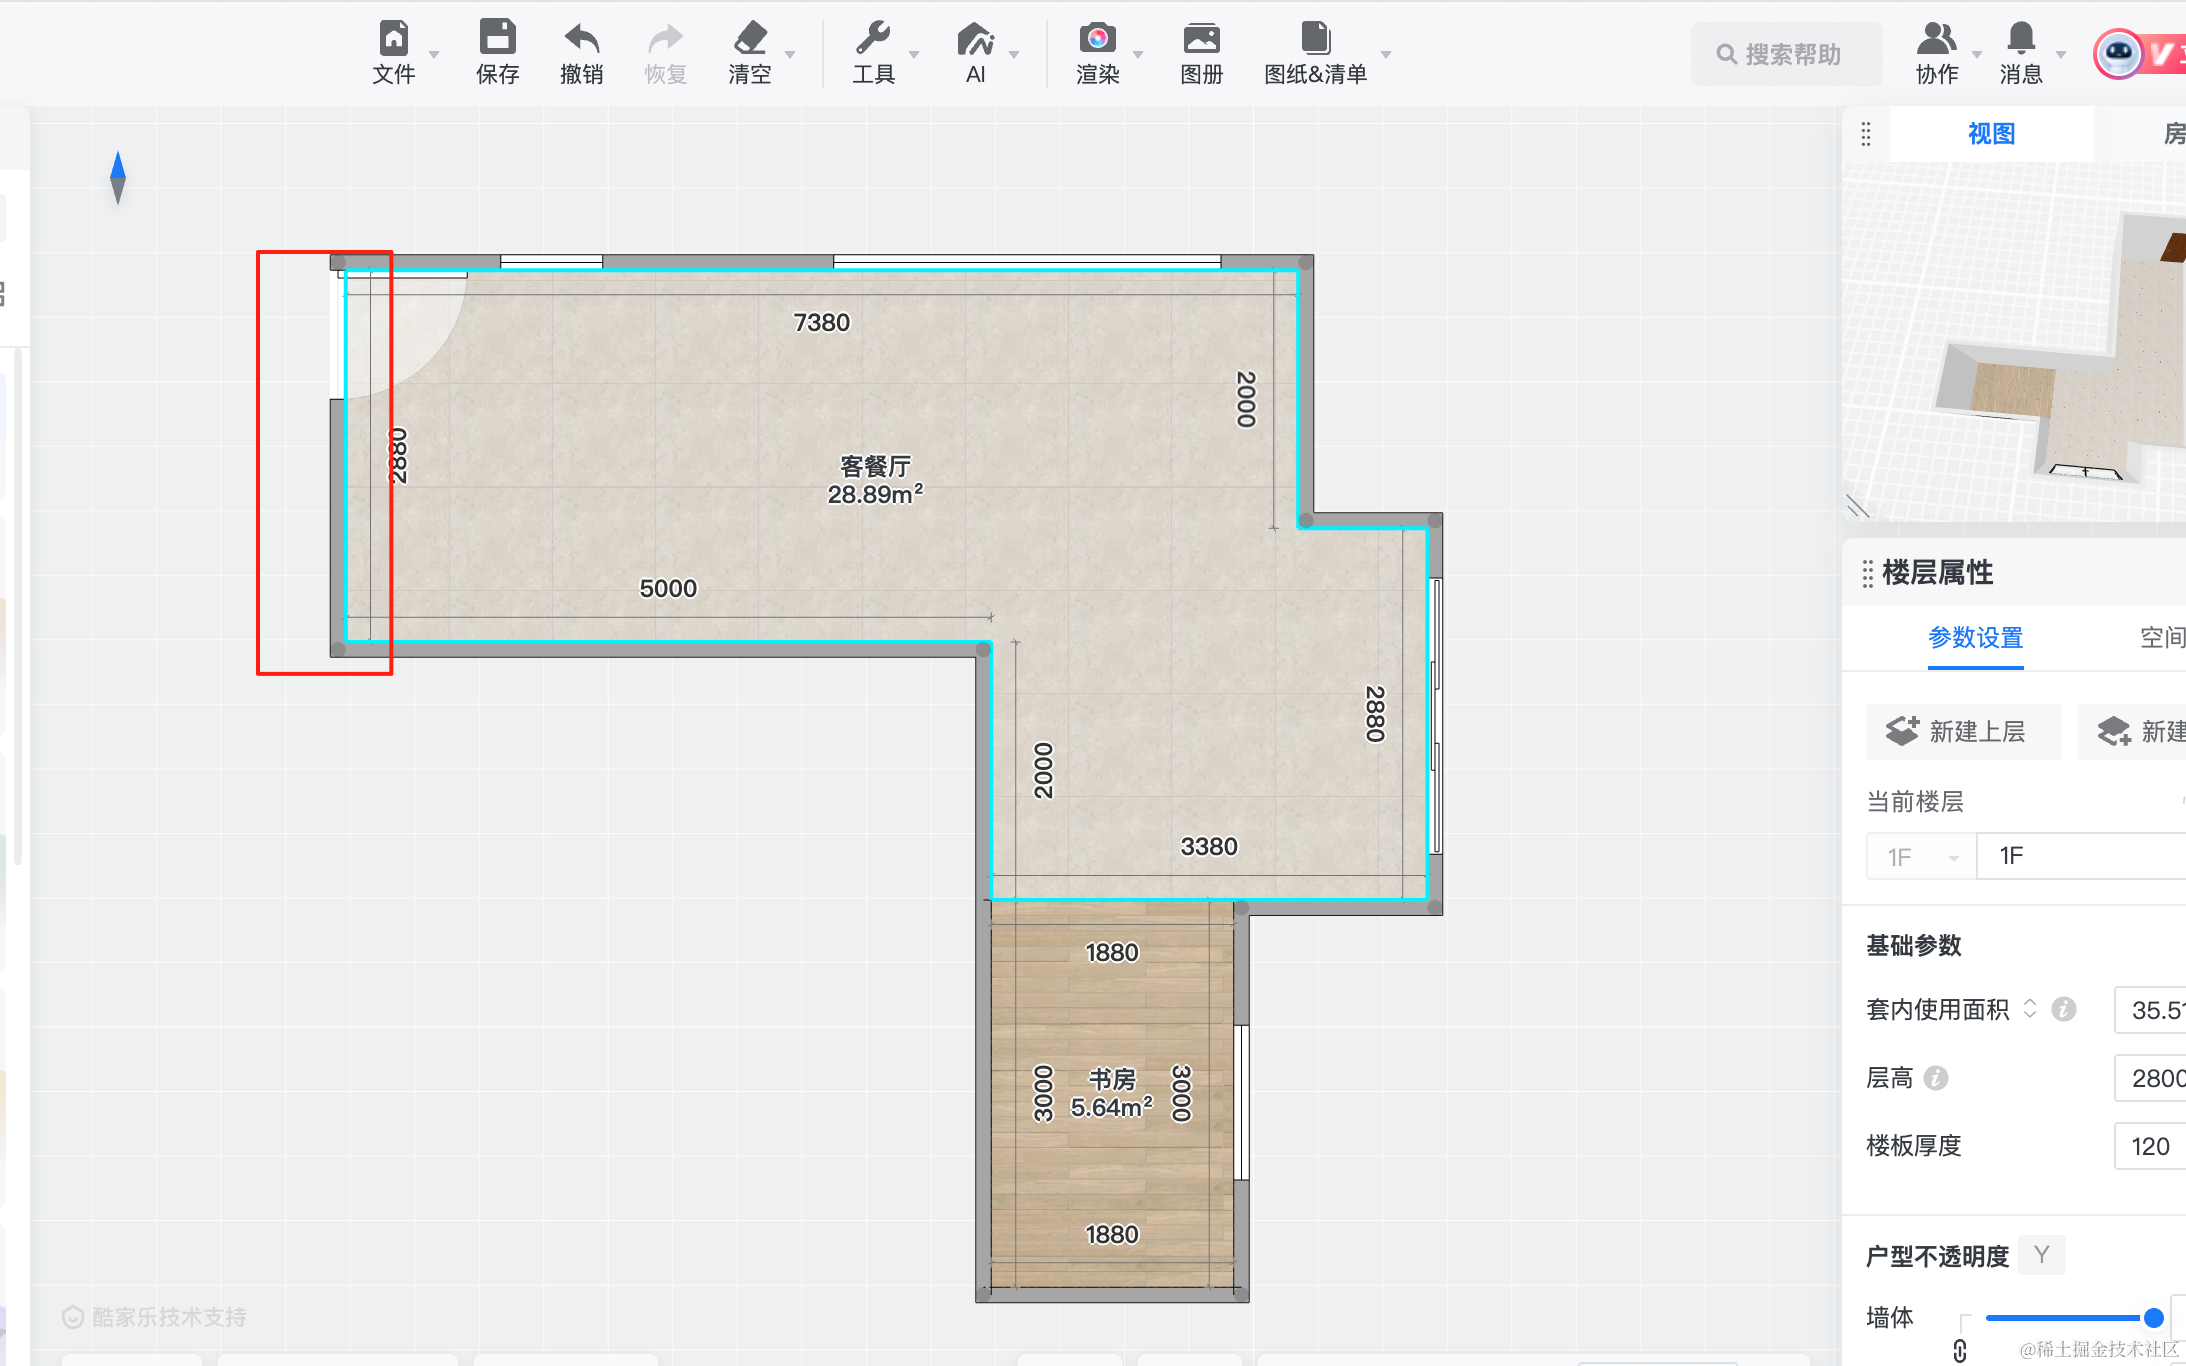
其中计算位置的时候这样算:
比如这面墙的位置:
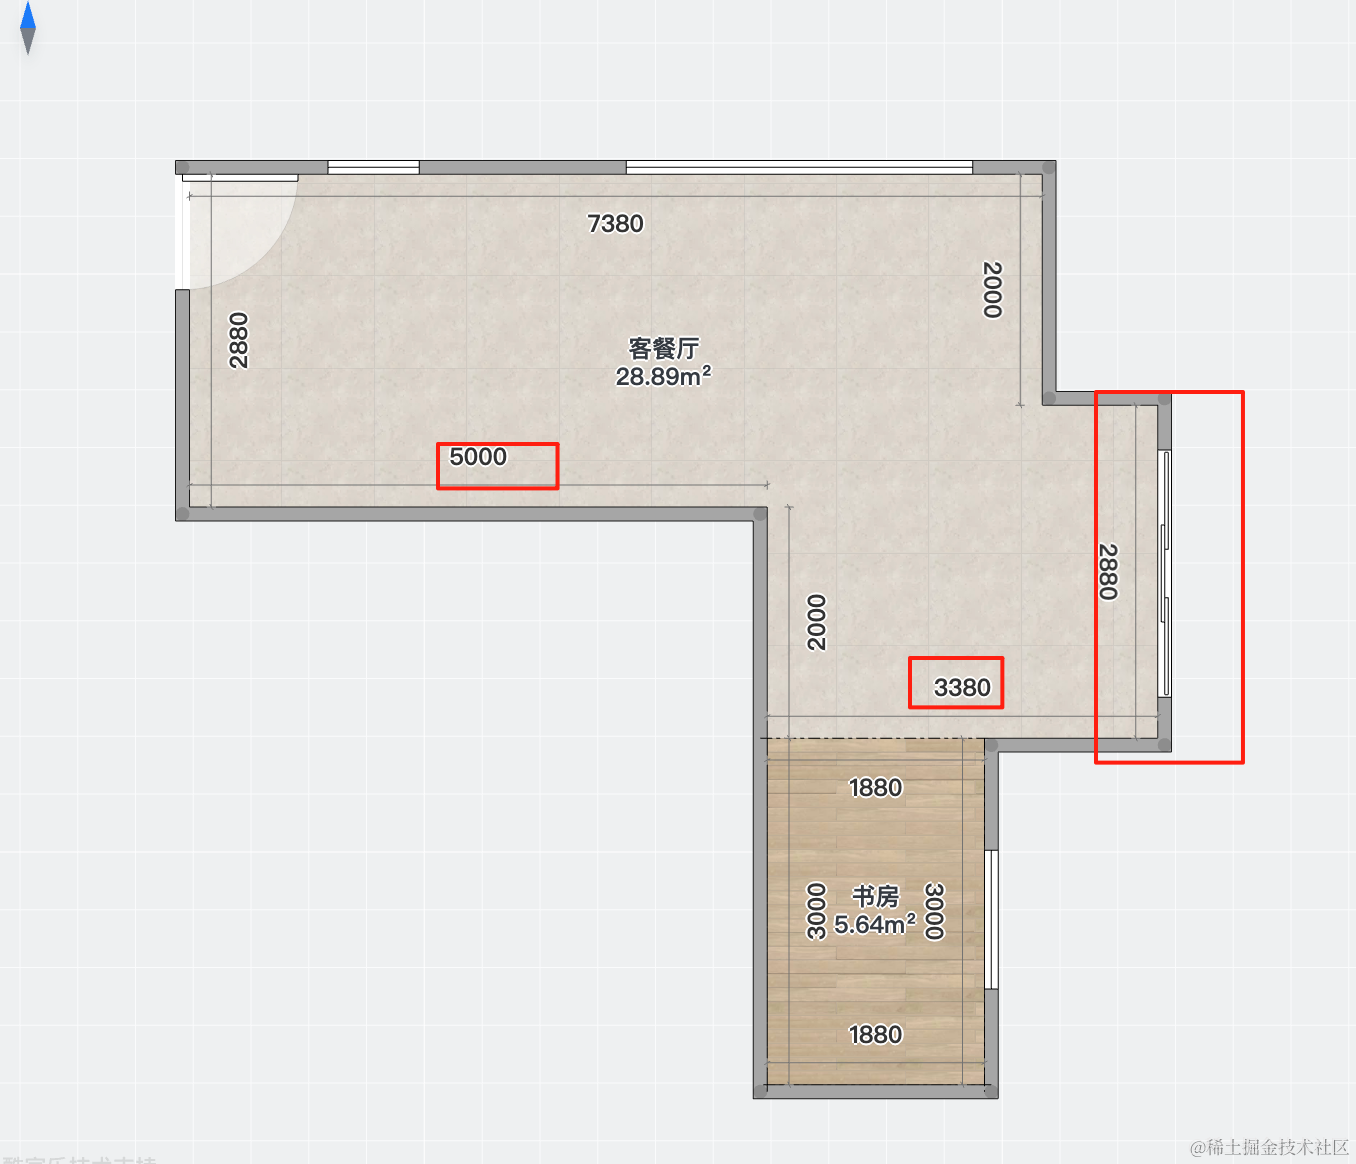
就是 8380 的位置,宽度为 2880。
这样就可以依次画出所有的墙。
import type { State } from ".";

const data: State['data'] = {
    walls: [
        {
            position: { x: 0, y: 0, z: 0},
            width: 2800,
            height: 3000,
            depth: 200,
            windows: []
        },
        {
            position: { x: 0, y: 0, z: 0},
            width: 5000,
            height: 3000,
            depth: 200,
            rotationY: -Math.PI / 2,
            windows: []
        },
        {
            position: { x: -5000, y: 0, z: 5000},
            width: 5000,
            height: 3000,
            depth: 200,
            windows: []
        },
        {
            position: { x: -5000, y: 0, z: 5000},
            width: 1880,
            height: 3000,
            depth: 200,
            rotationY: -Math.PI / 2,
            windows: []
        },
        {
            position: { x: -5200, y: 0, z: 6880},
            width: 3000,
            height: 3000,
            depth: 200,
            windows: []
        },
        {
            position: { x: -2000, y: 0, z: 6880},
            width: 1580,
            height: 3000,
            depth: 200,
            rotationY: -Math.PI / 2,
            windows: []
        },
        {
            position: { x: -2200, y: 0, z: 8260},
            width: 2880,
            height: 3000,
            depth: 200,
            windows: []
        },
        {
            position: { x: 880, y: 0, z: 7080},
            width: 1380,
            height: 3000,
            depth: 200,
            rotationY: -Math.PI / 2,
            windows: []
        },
        {
            position: { x: 880, y: 0, z: 7080},
            width: 2000,
            height: 3000,
            depth: 200,
            windows: []
        },
        {
            position: { x: 2880, y: 0, z: 0},
            width: 7180,
            height: 3000,
            depth: 200,
            rotationY: -Math.PI / 2,
            windows: []
        },
    ],
    floors: [
    ],
    ceilings: [
    ]
};

export default data;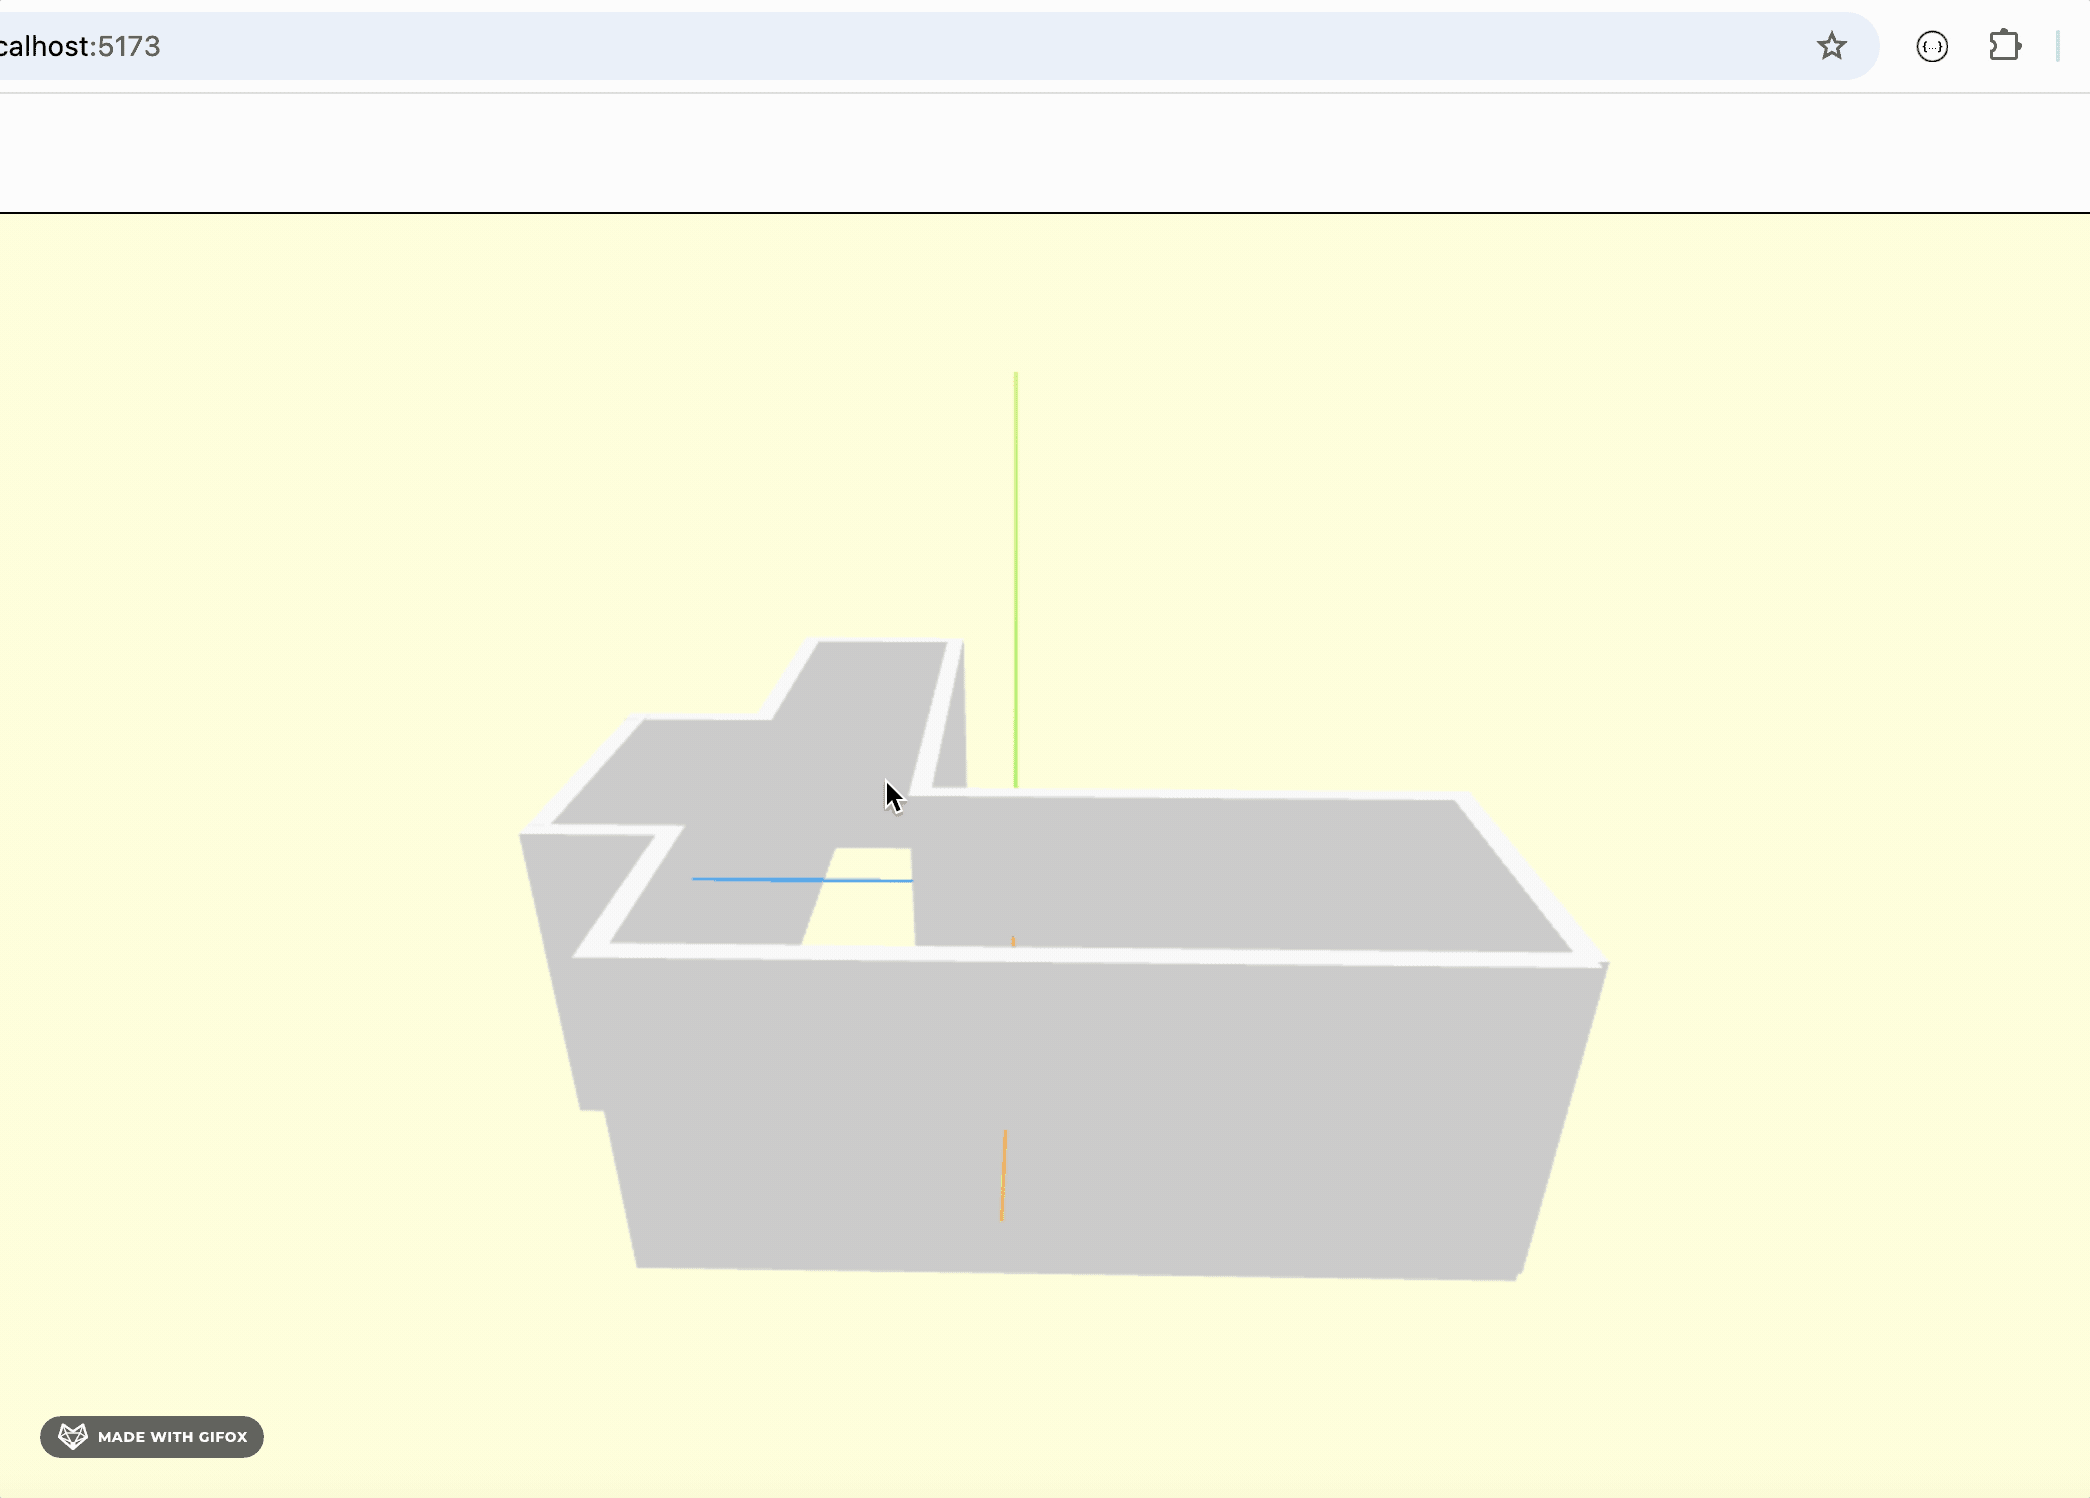
先不着急画门窗。
我们先把两个房间的地板画出来:
这里有两种纹理,我们要把它加到数据里:
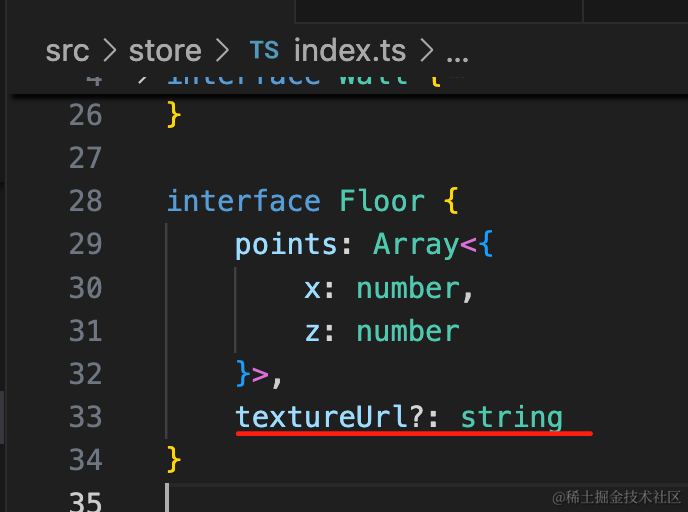
绘制的时候做下处理:
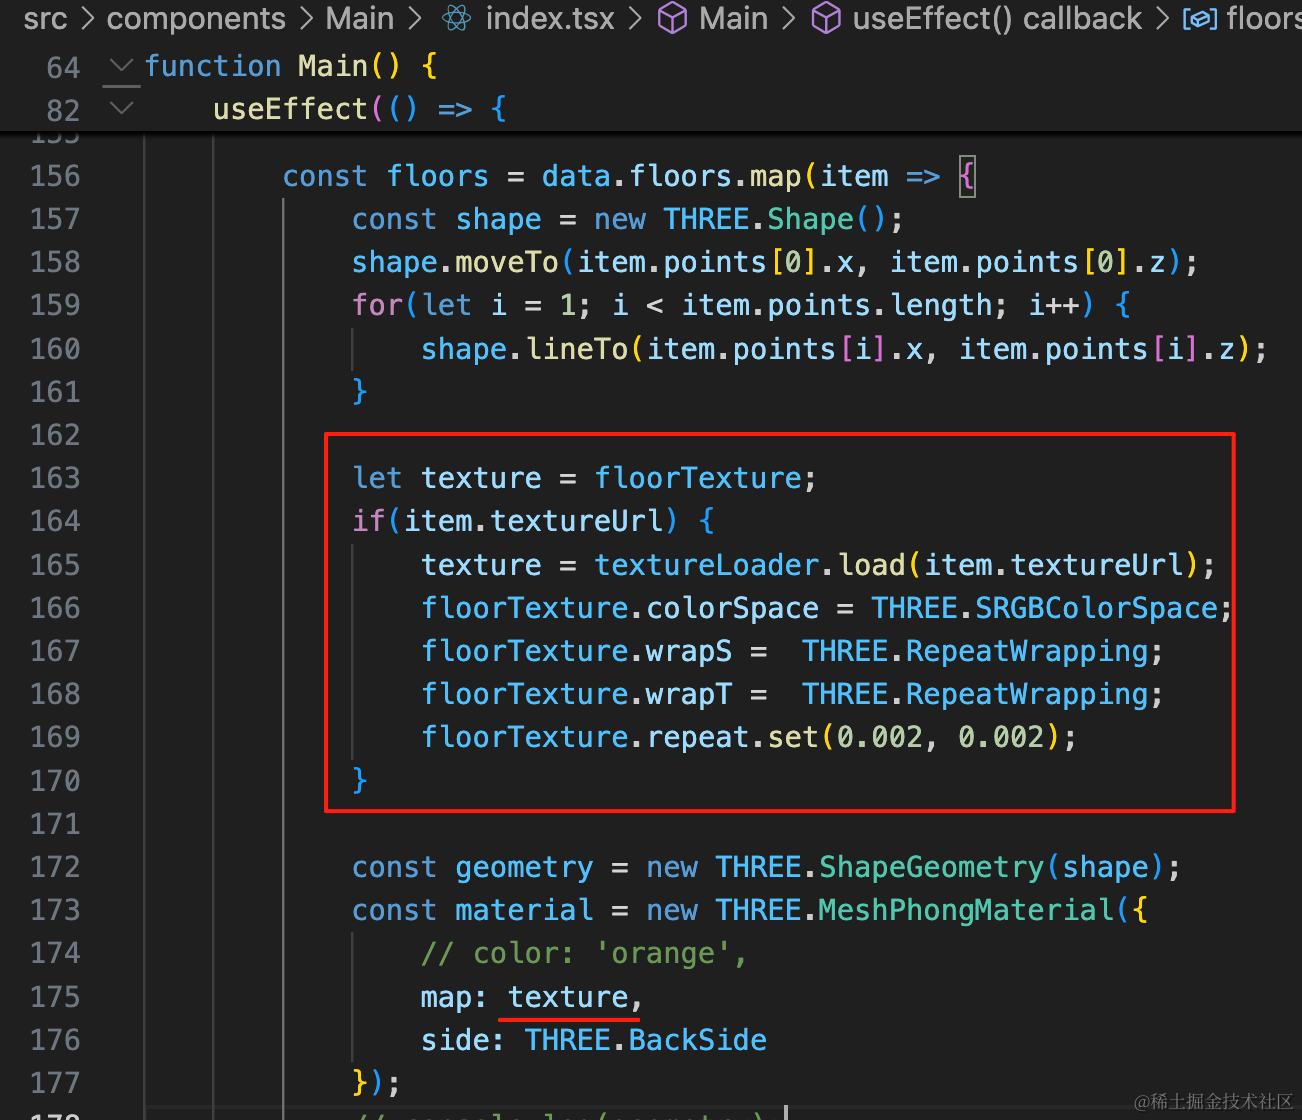
let texture = floorTexture;
if(item.textureUrl) {
    texture = textureLoader.load(item.textureUrl);
    floorTexture.colorSpace = THREE.SRGBColorSpace;
    floorTexture.wrapS =  THREE.RepeatWrapping;
    floorTexture.wrapT =  THREE.RepeatWrapping;
    floorTexture.repeat.set(0.002, 0.002);
}

const geometry = new THREE.ShapeGeometry(shape);
const material = new THREE.MeshPhongMaterial({
    // color: 'orange',
    map: texture,
    side: THREE.BackSide
});
就是如果有纹理,就加载这个,否则就默认的。
加一下两个房间的地板:

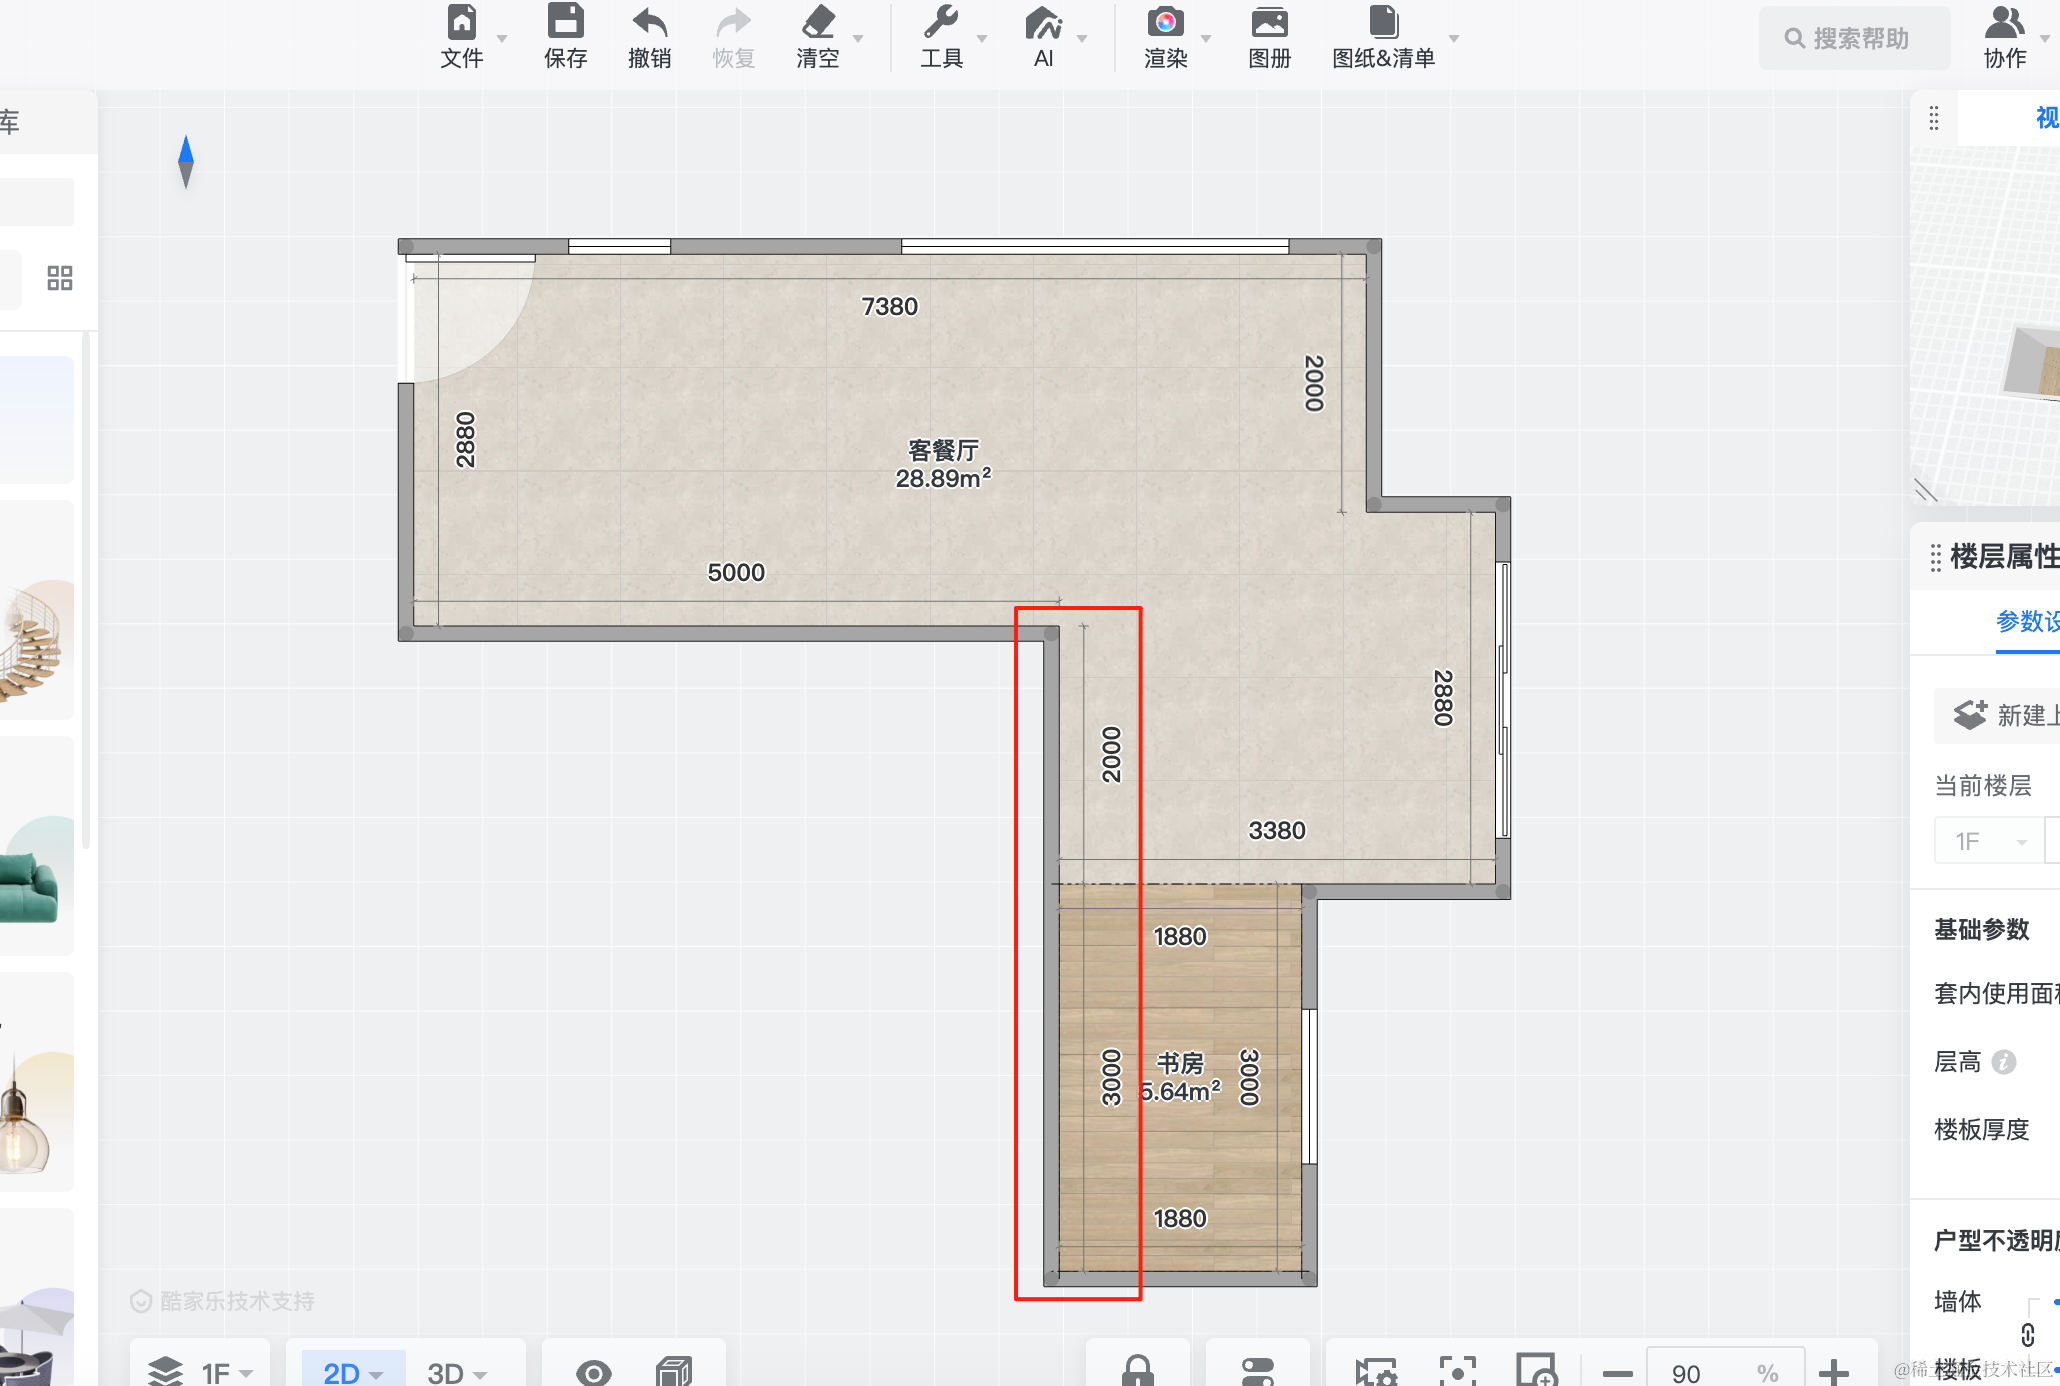
先画一个
{
points: [
{ x: -2000, z: 5200},
{ x: -5000, z: 5200},
{ x: -5000, z: 7000},
{ x: -2000, z: 7000},
{ x: -2000, z: 5200},
],
textureUrl: './floor-texture2.png'
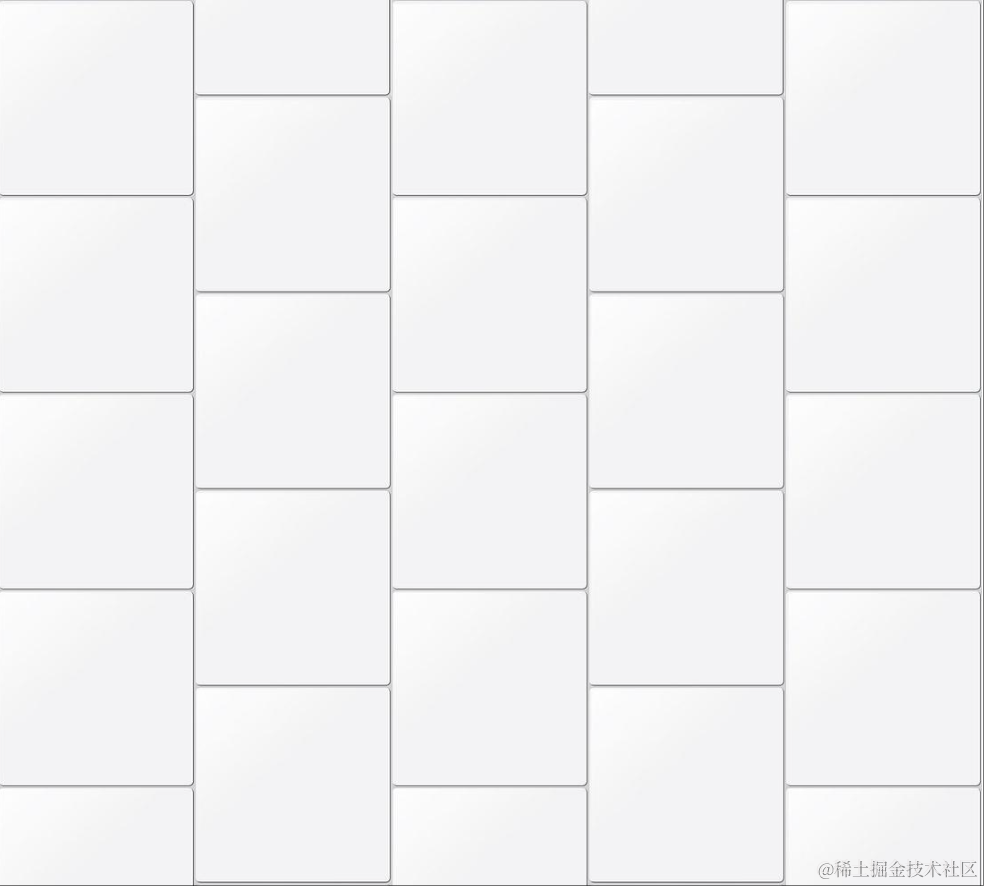
}用到的纹理图片是这个:
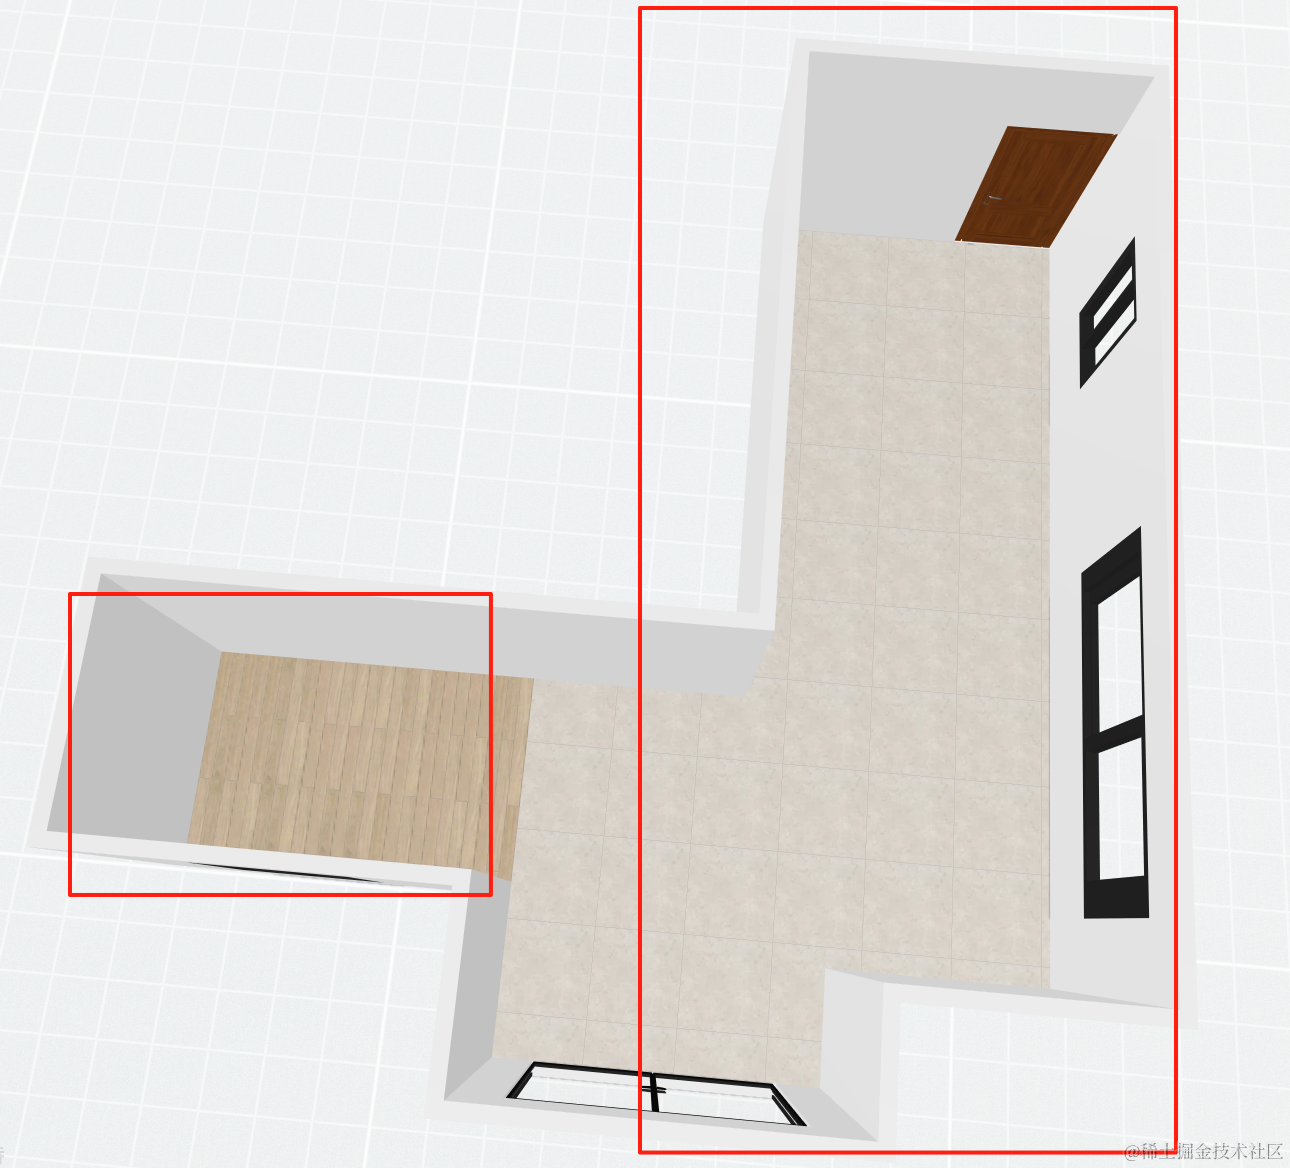
看下效果:
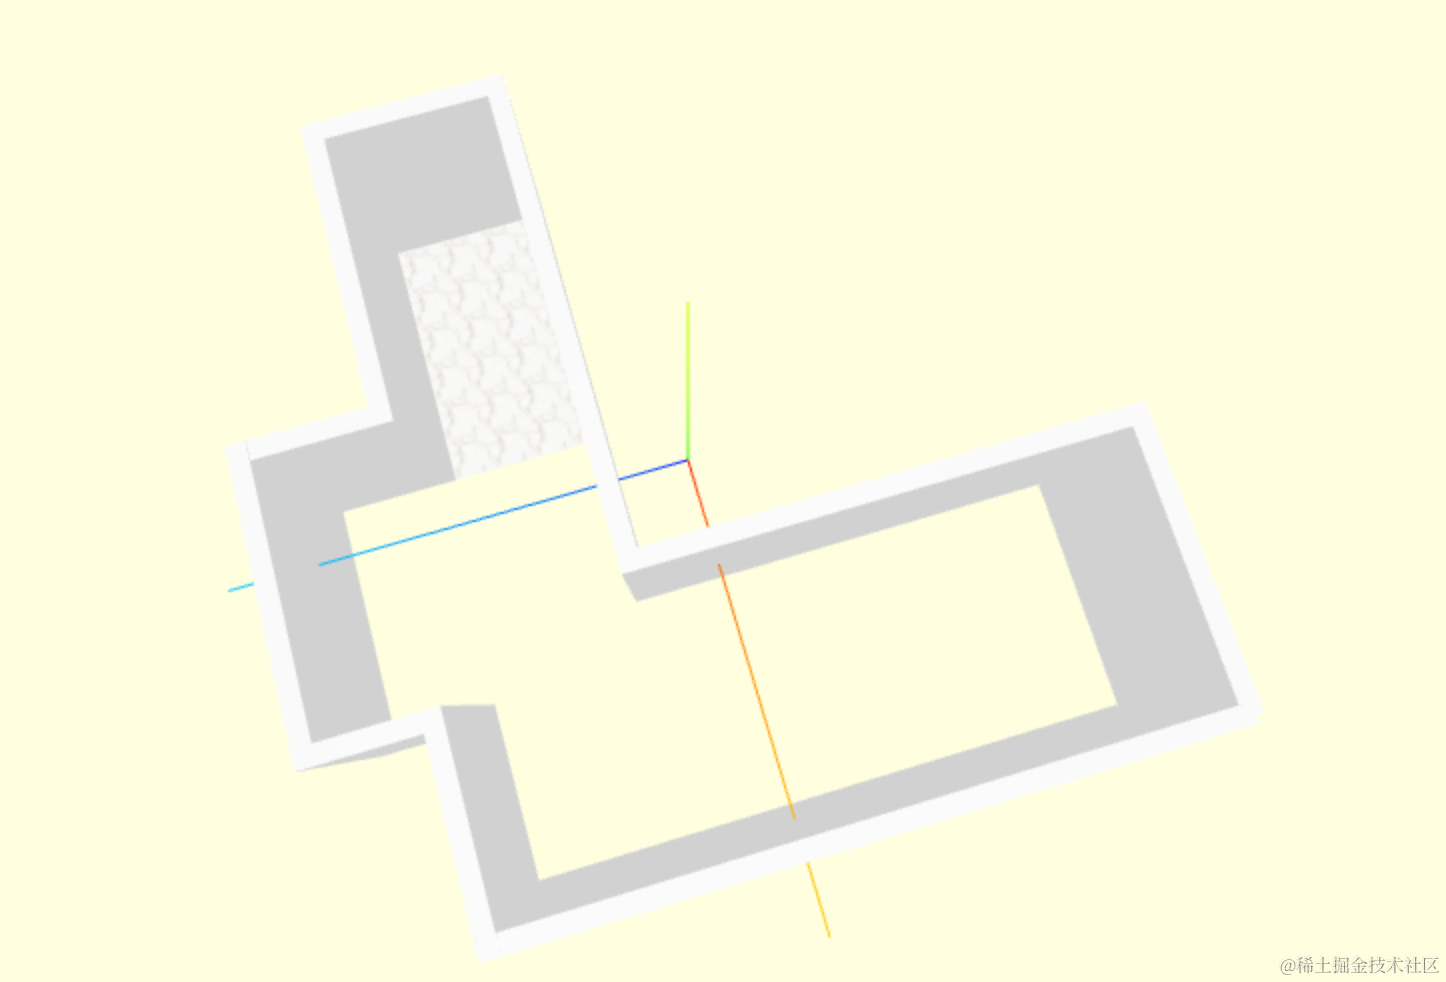
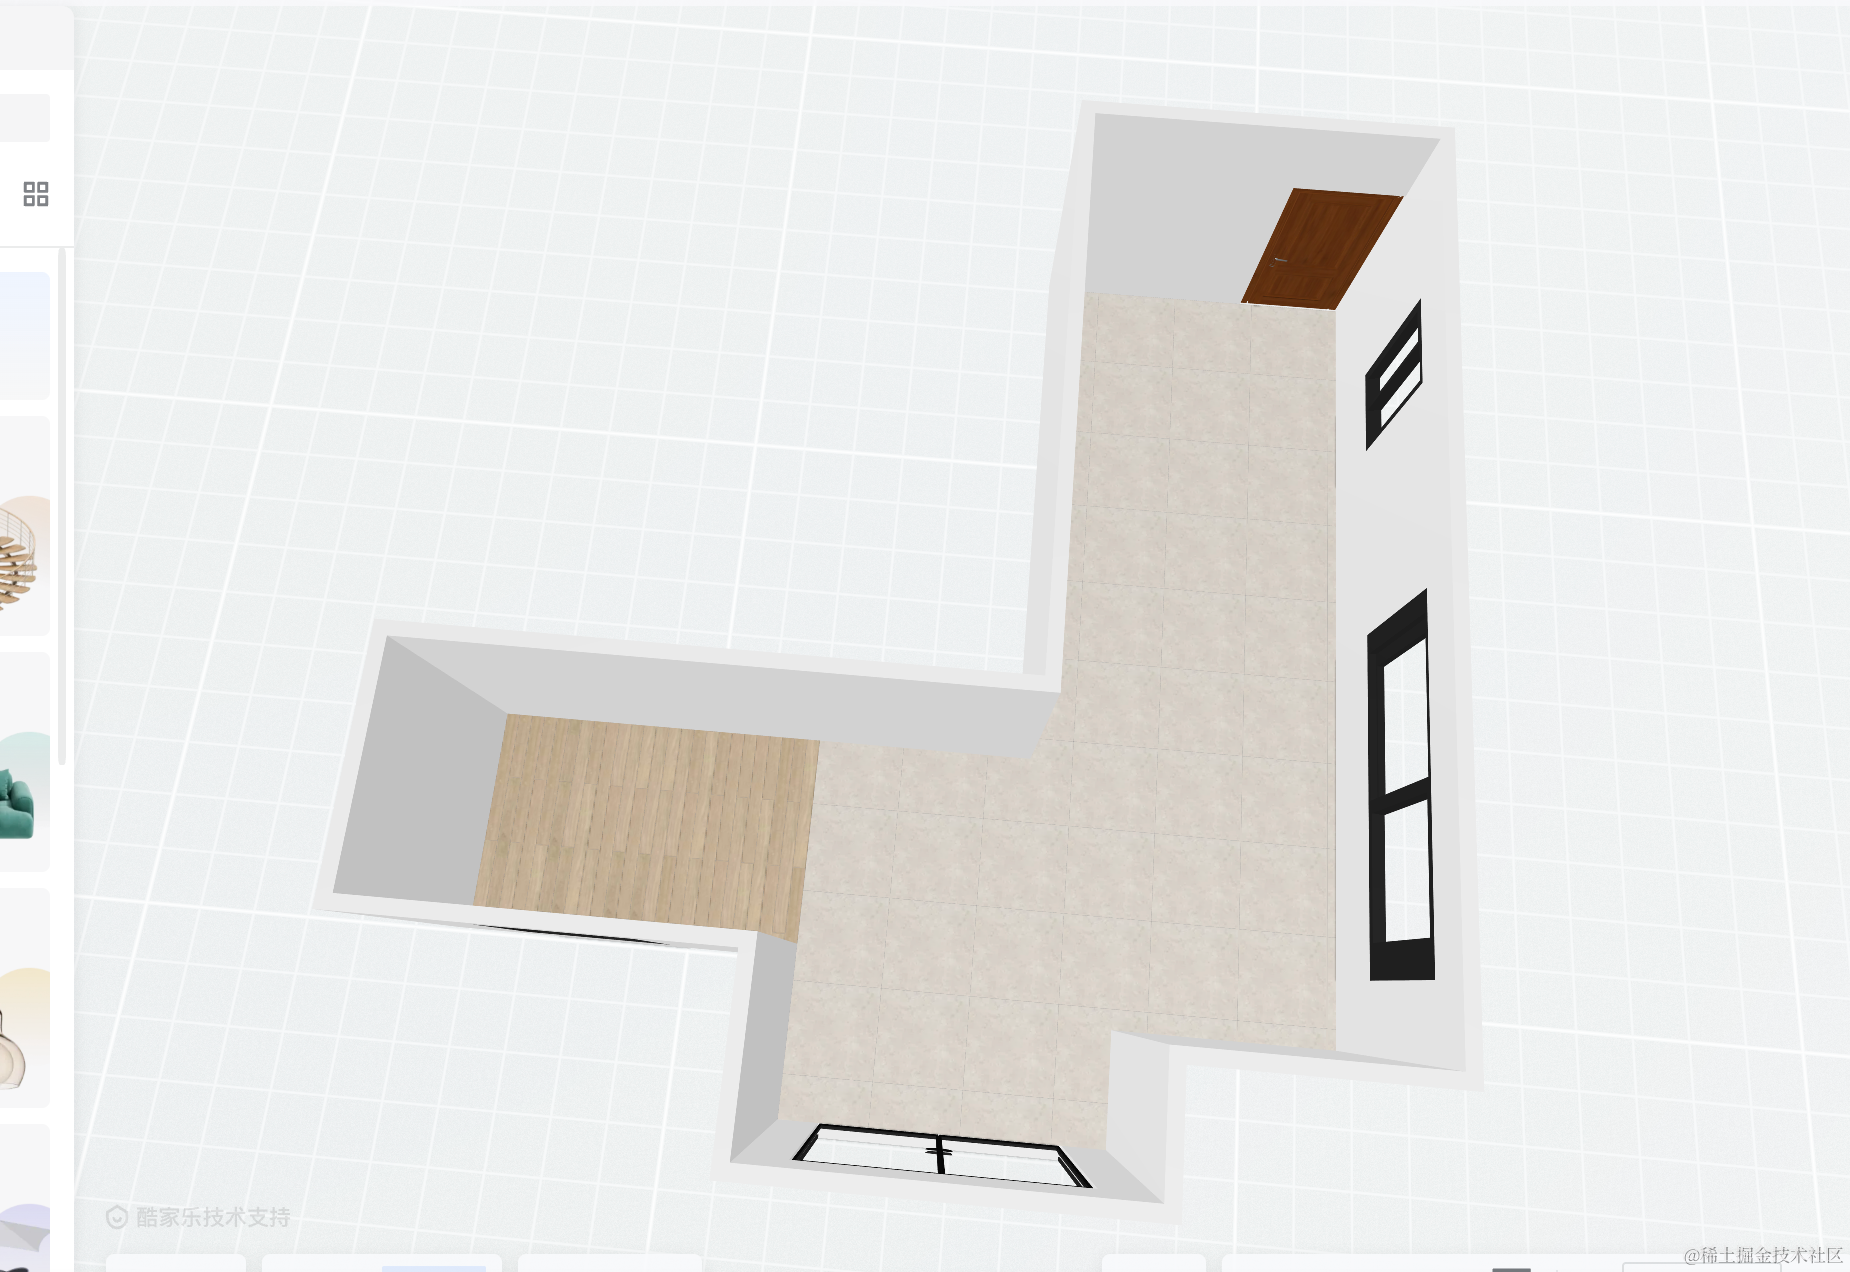
可以看到,绘制出来了。
我们把另一个房间的也绘制一下:
floors: [
    {
        points: [
            { x: -2000, z: 5200},
            { x: -5000, z: 5200},
            { x: -5000, z: 7000},
            { x: -2000, z: 7000},
            { x: -2000, z: 5200},
        ],
    },
    {
        points: [
            { x: 0, z: 0},
            { x: 2880, z: 0},
            { x: 2880, z: 7180},
            { x: 880, z: 7180},
            { x: 880, z: 8380},
            { x: -2000, z: 8380},
            { x: -2000, z: 6880},
            { x: -2000, z: 5000},
            { x: -2000, z: 5000},
            { x: 0, z: 5000},
            { x: 0, z: 0},
        ],
        textureUrl: './floor-texture2.png'
    }
],
这样,两个房间的地板就绘制好了。
天花板也一样:
ceilings: [
    {
        points: [
            { x: -2000, z: 5200},
            { x: -5000, z: 5200},
            { x: -5000, z: 7000},
            { x: -2000, z: 7000},
            { x: -2000, z: 5200},
        ],
        height: 3000
    },
    {
        points: [
            { x: 0, z: 0},
            { x: 2880, z: 0},
            { x: 2880, z: 7180},
            { x: 880, z: 7180},
            { x: 880, z: 8380},
            { x: -2000, z: 8380},
            { x: -2000, z: 6880},
            { x: -2000, z: 5000},
            { x: -2000, z: 5000},
            { x: 0, z: 5000},
            { x: 0, z: 0},
        ],
        height: 3000
    }
]
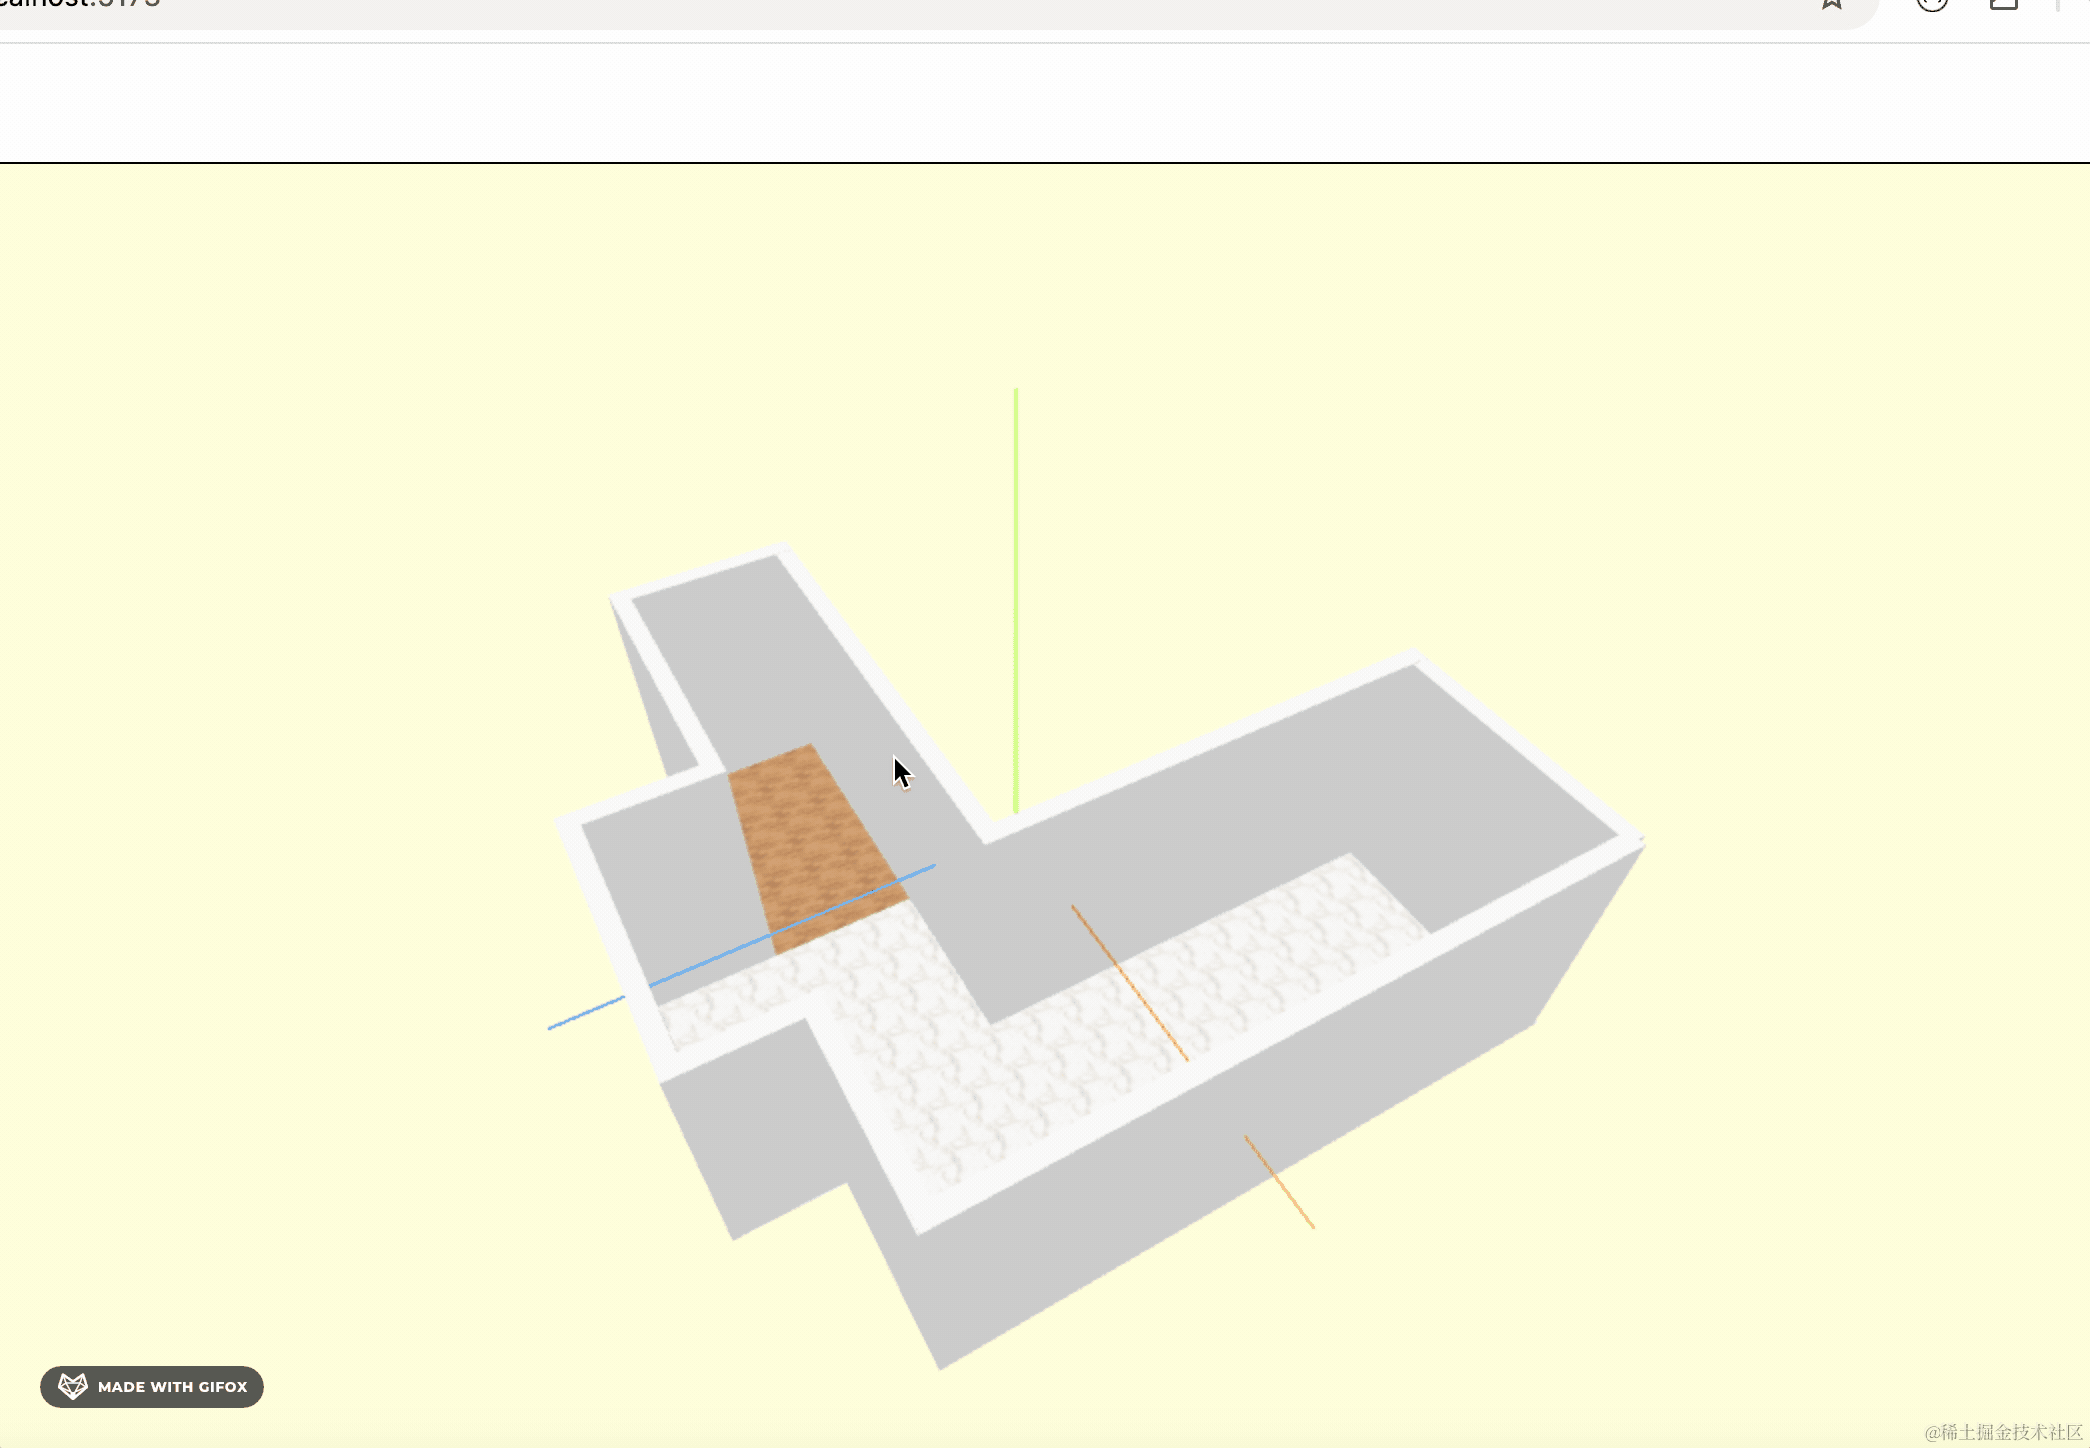
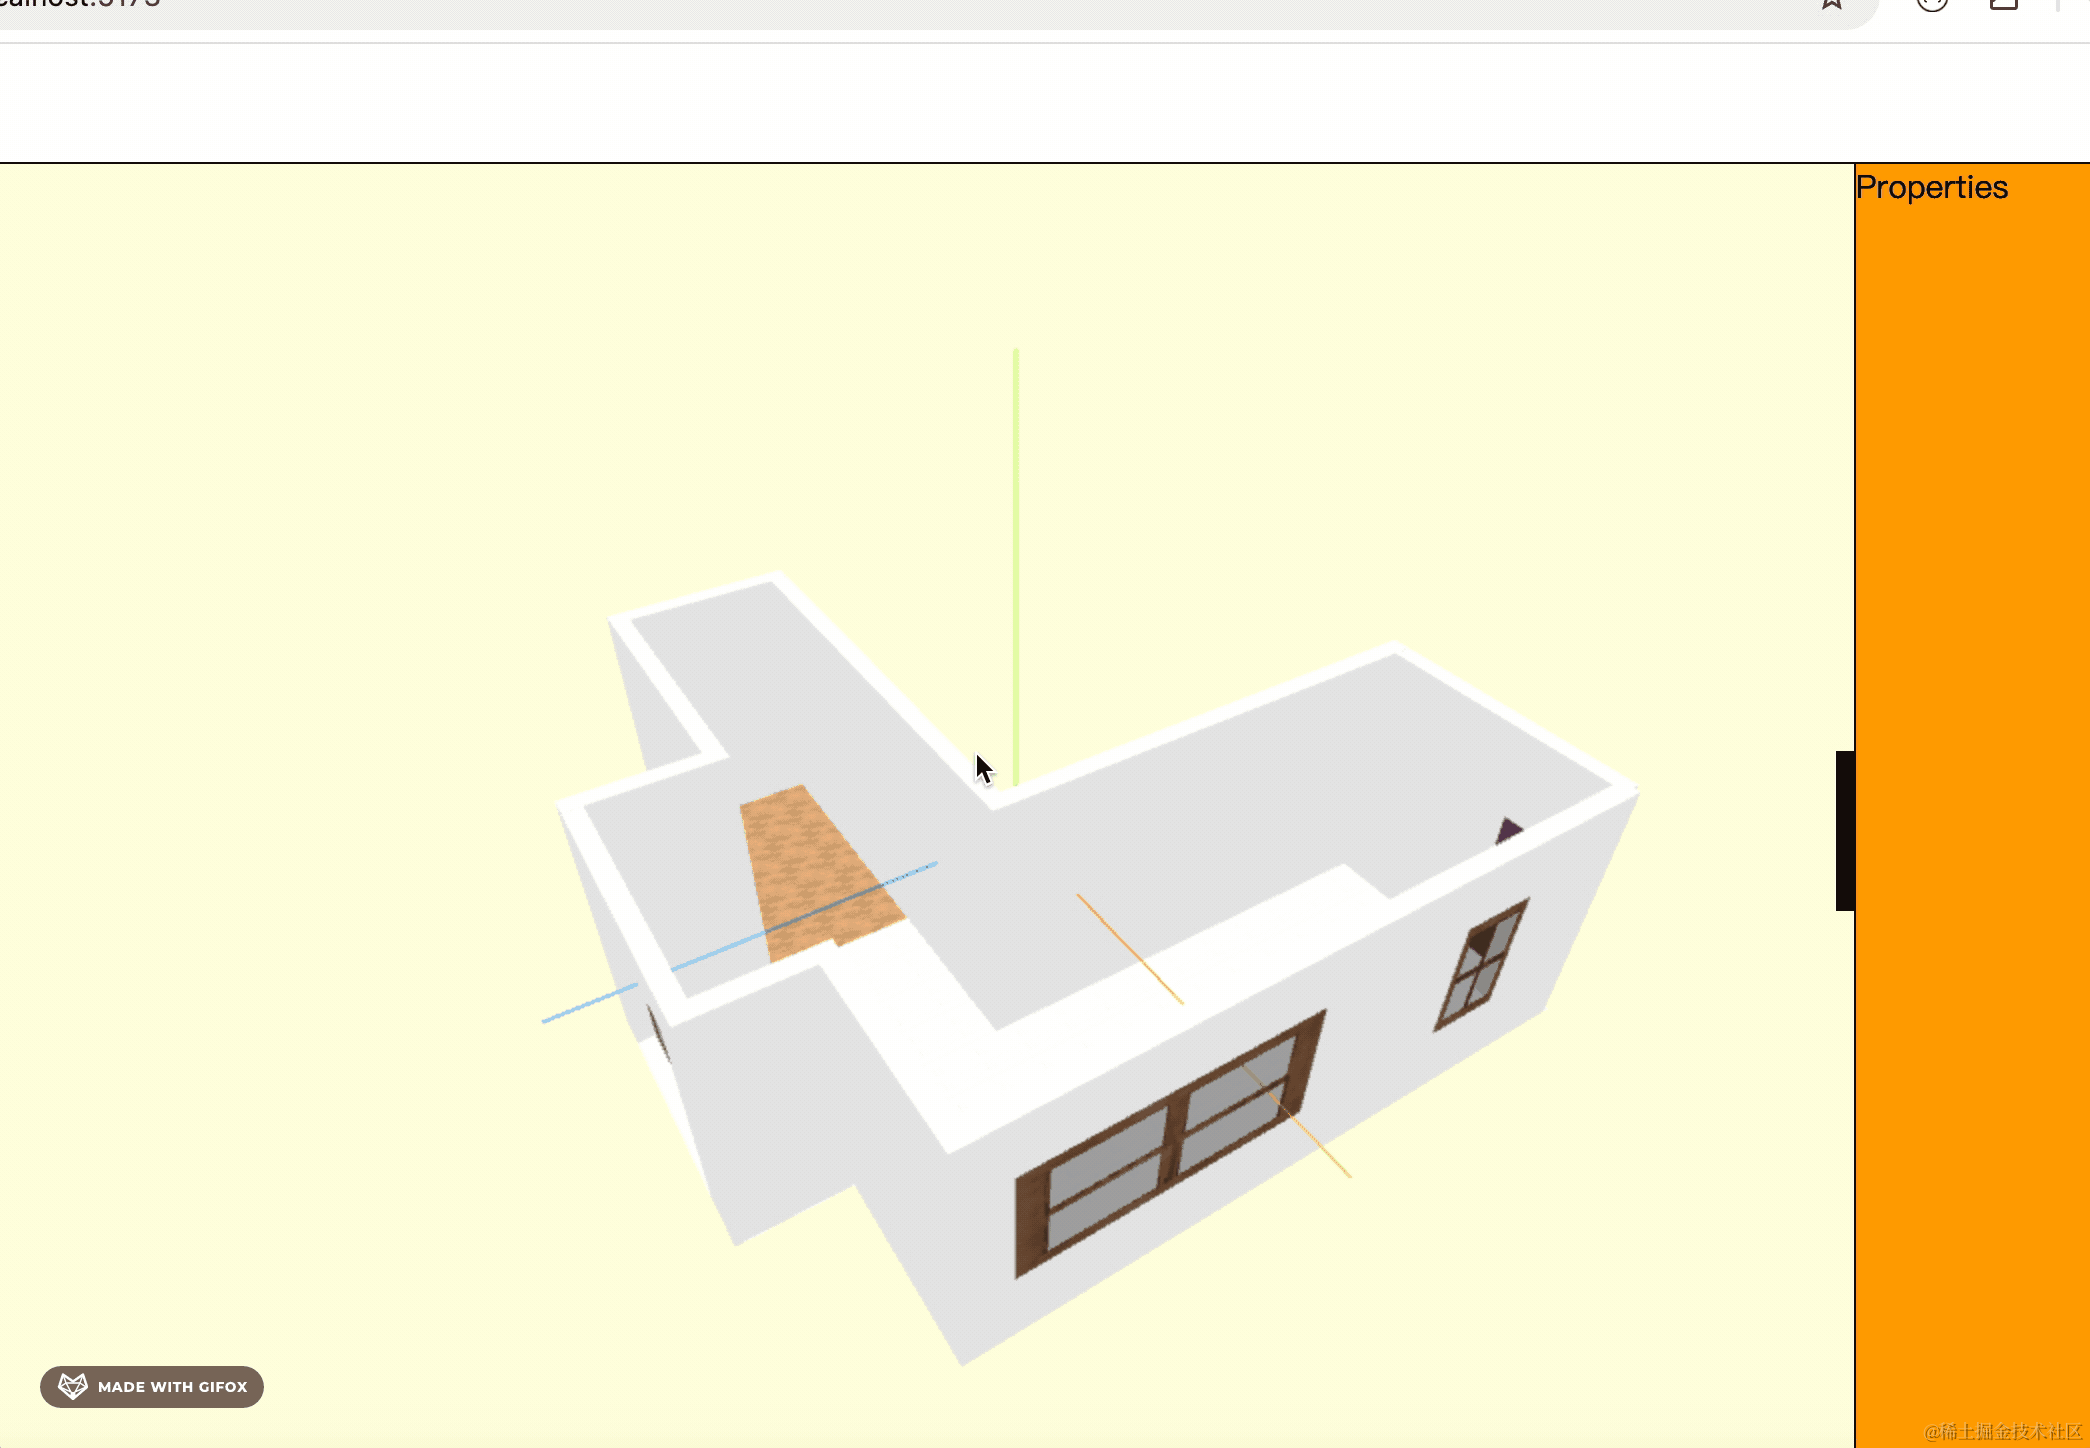
白墙还是有点暗,我们再加强一下环境光:
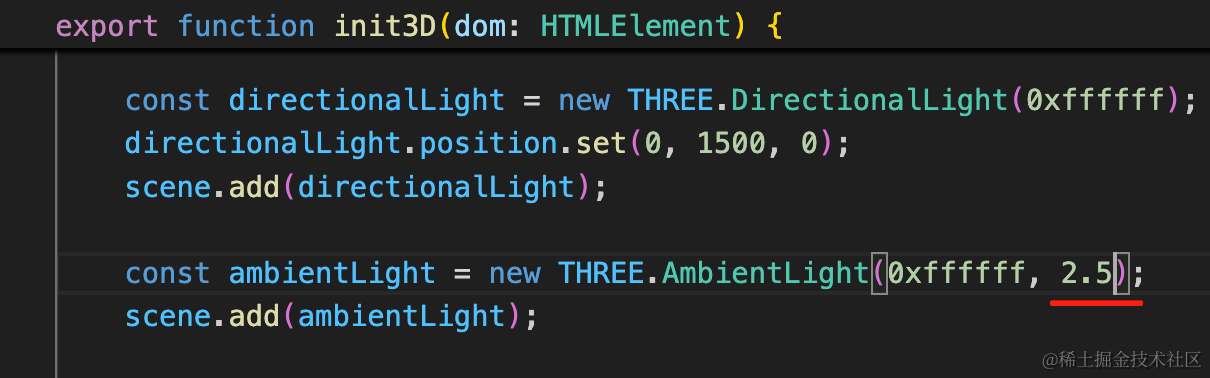
好多了。
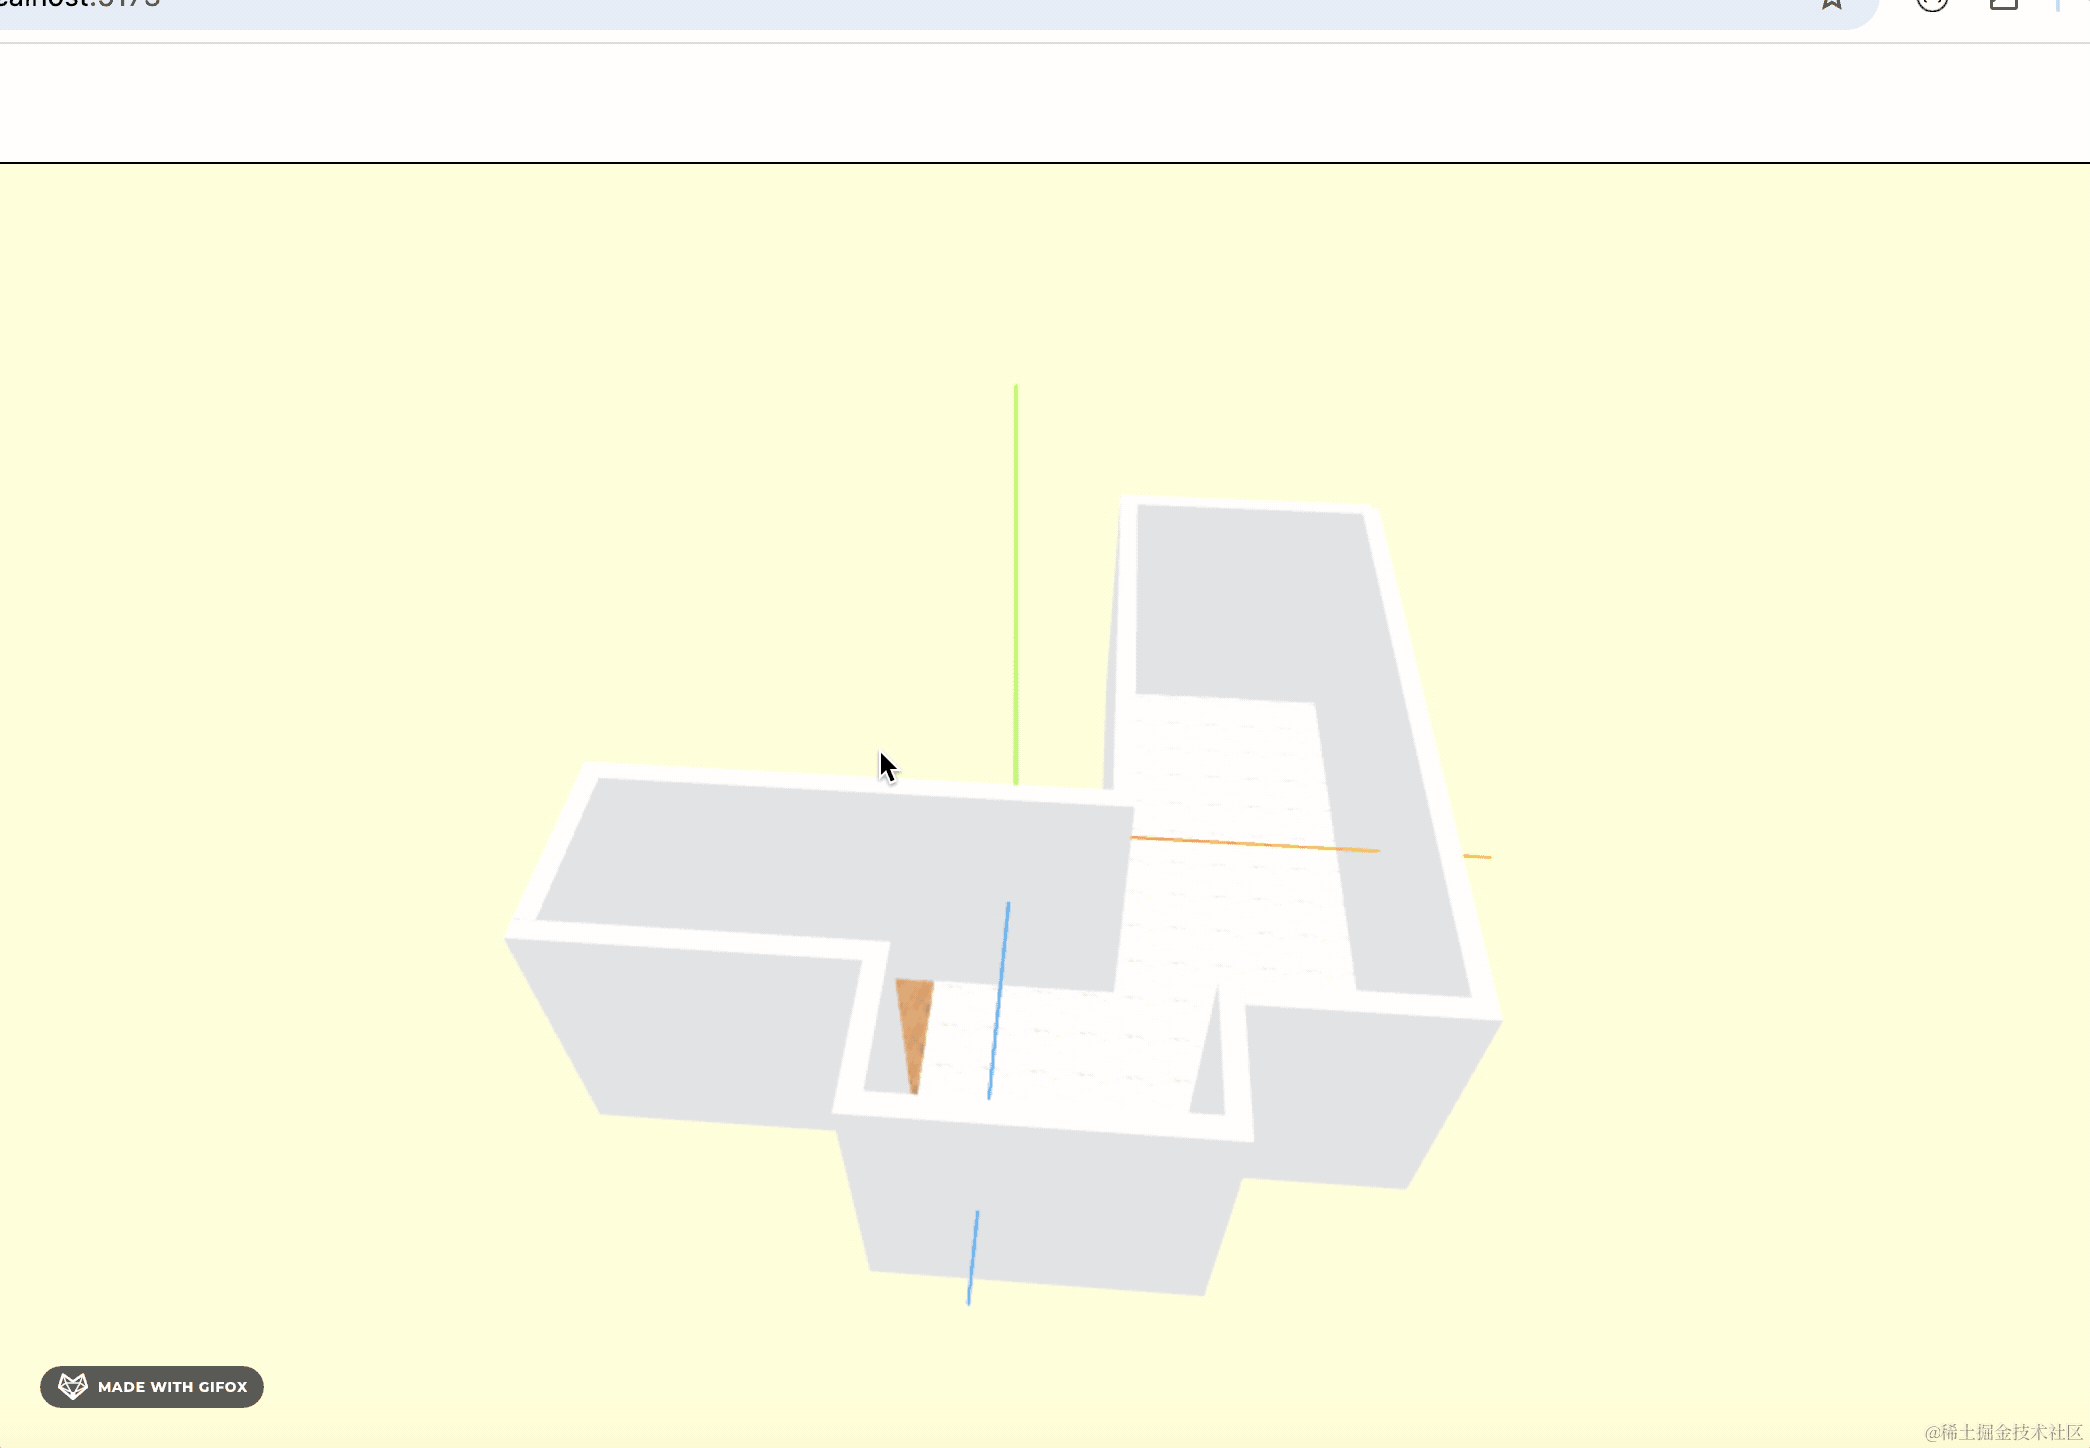
然后画上门和窗户。
一共有 4 个窗户 1 个门:
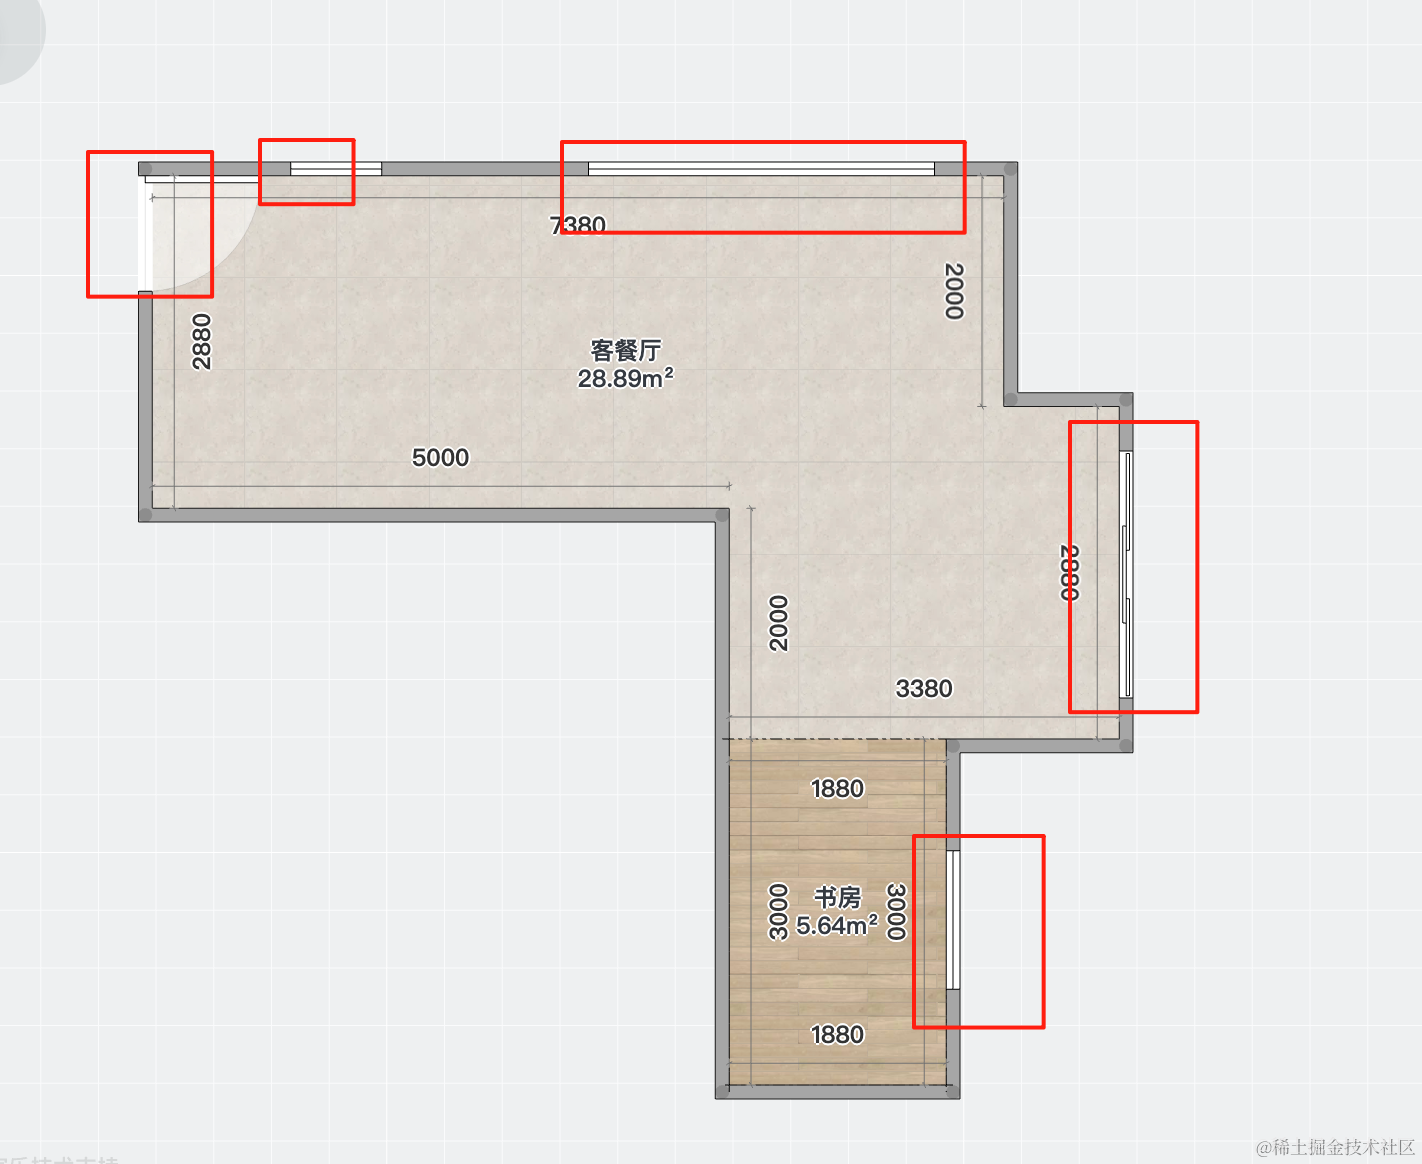
先画门:
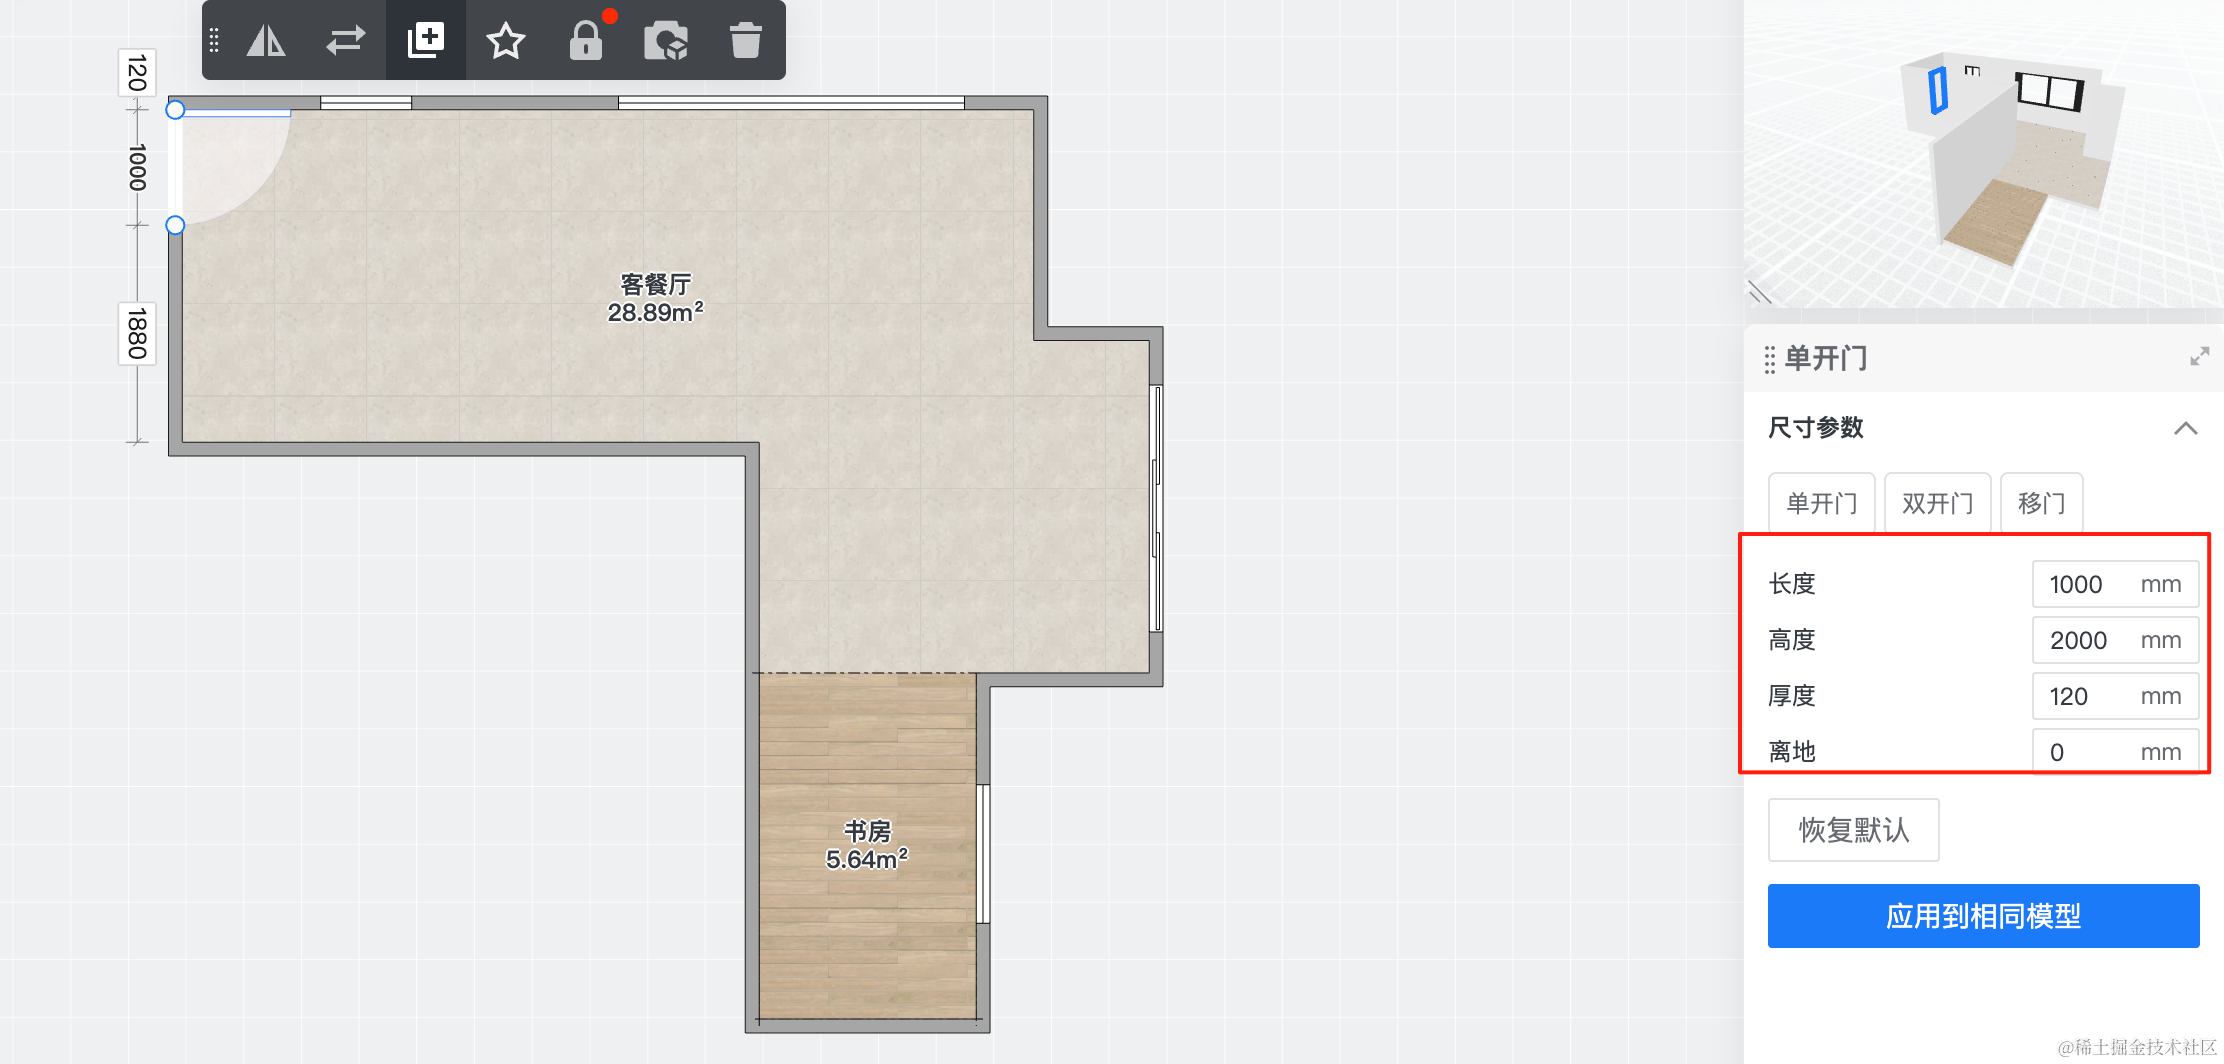
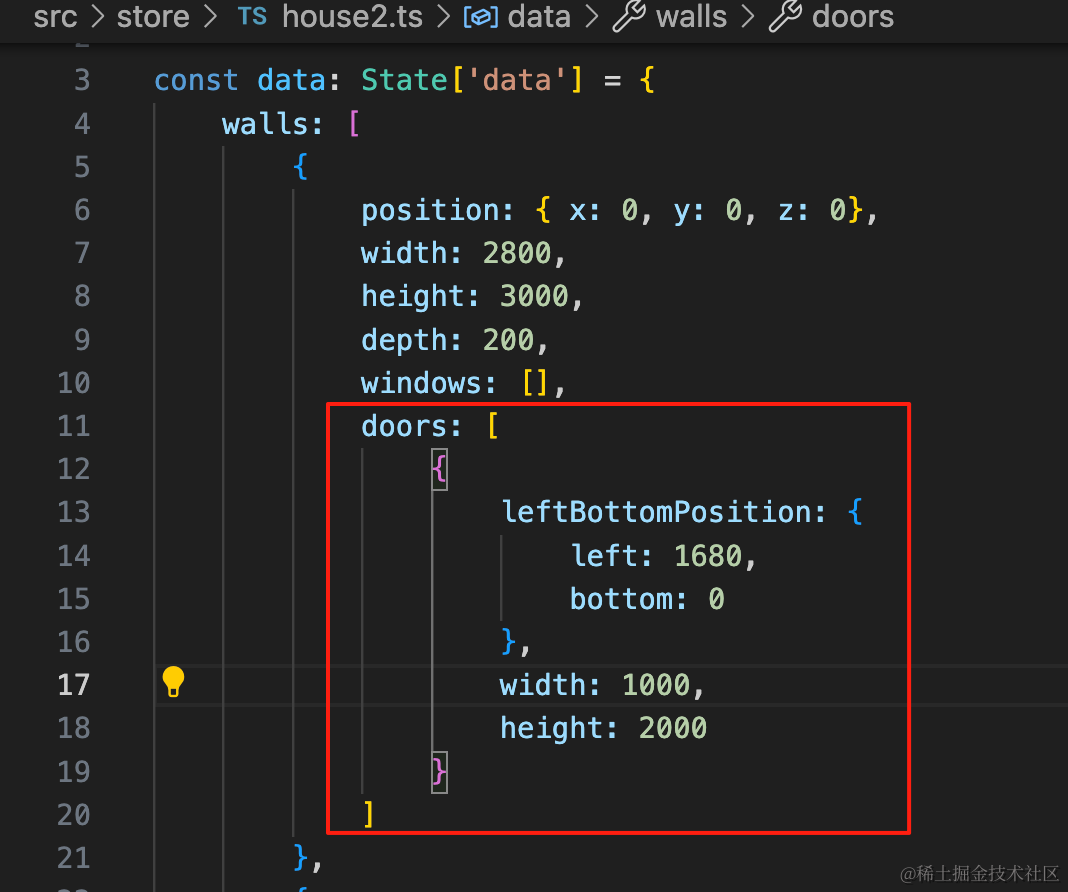
doors: [
    {
        leftBottomPosition: {
            left: 1680,
            bottom: 0
        },
        width: 1000,
        height: 2000
    }
]
再画 4 个窗户:
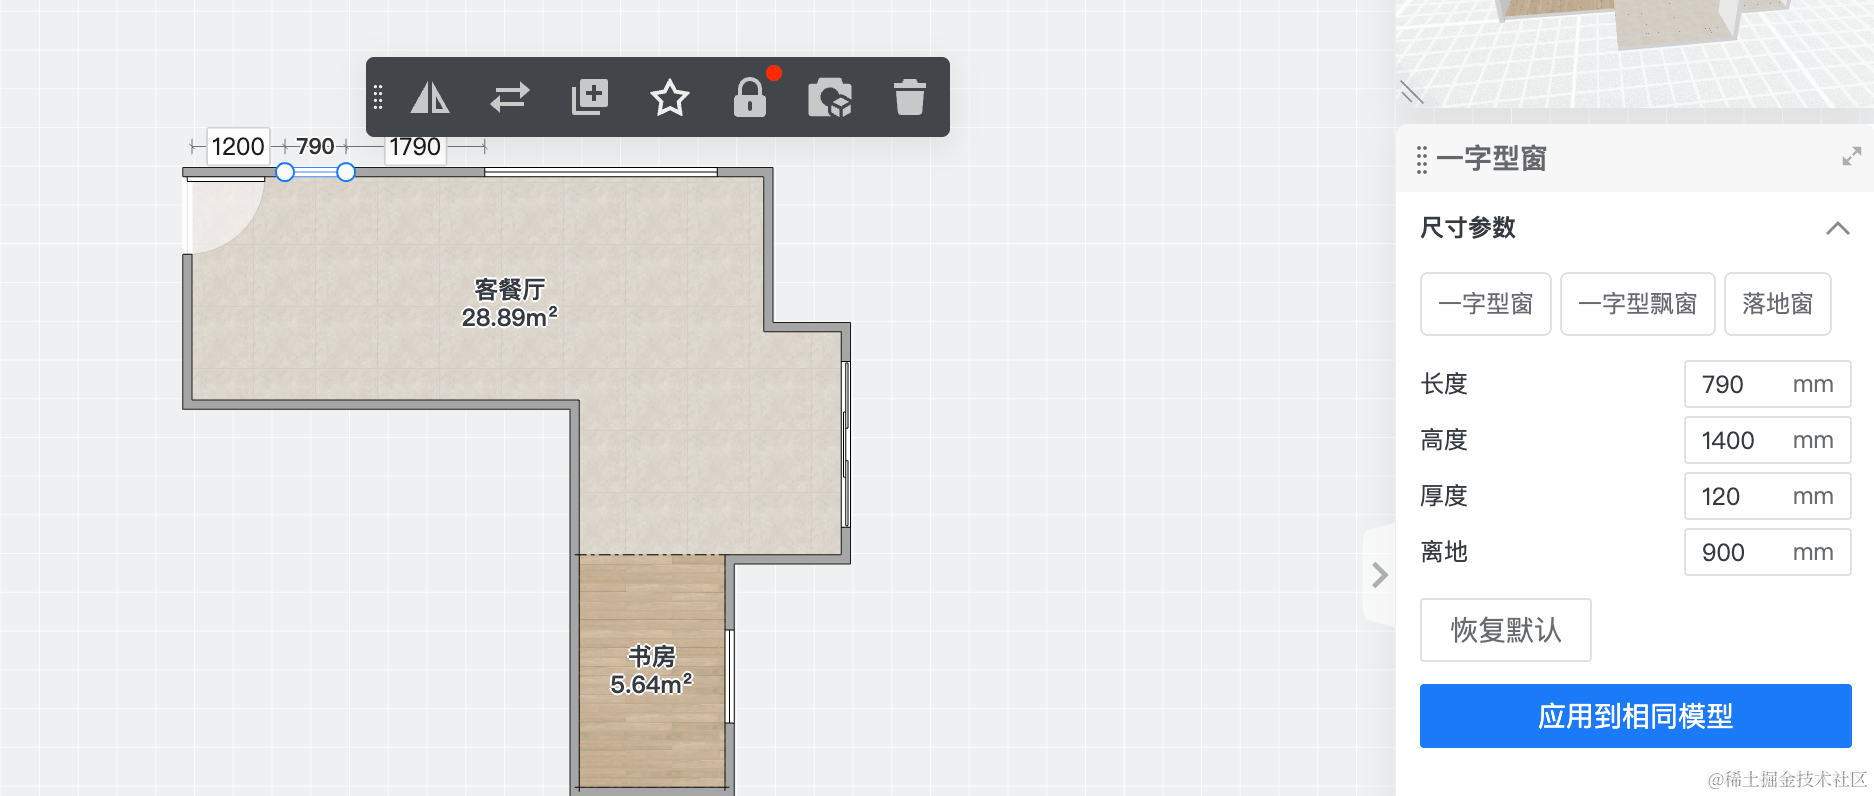
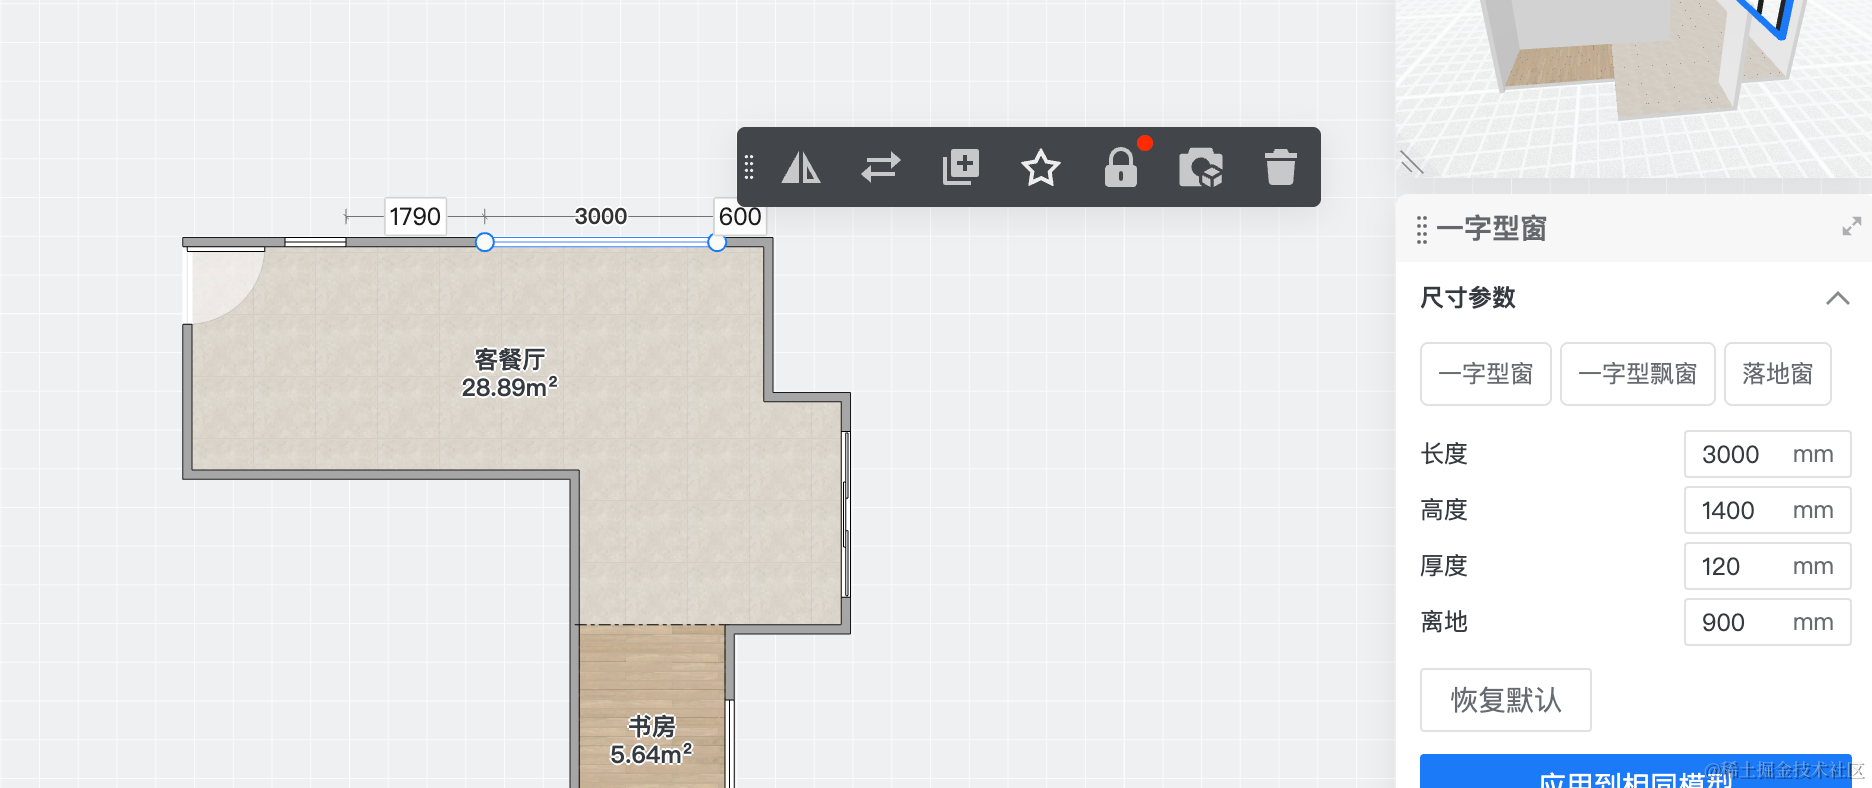
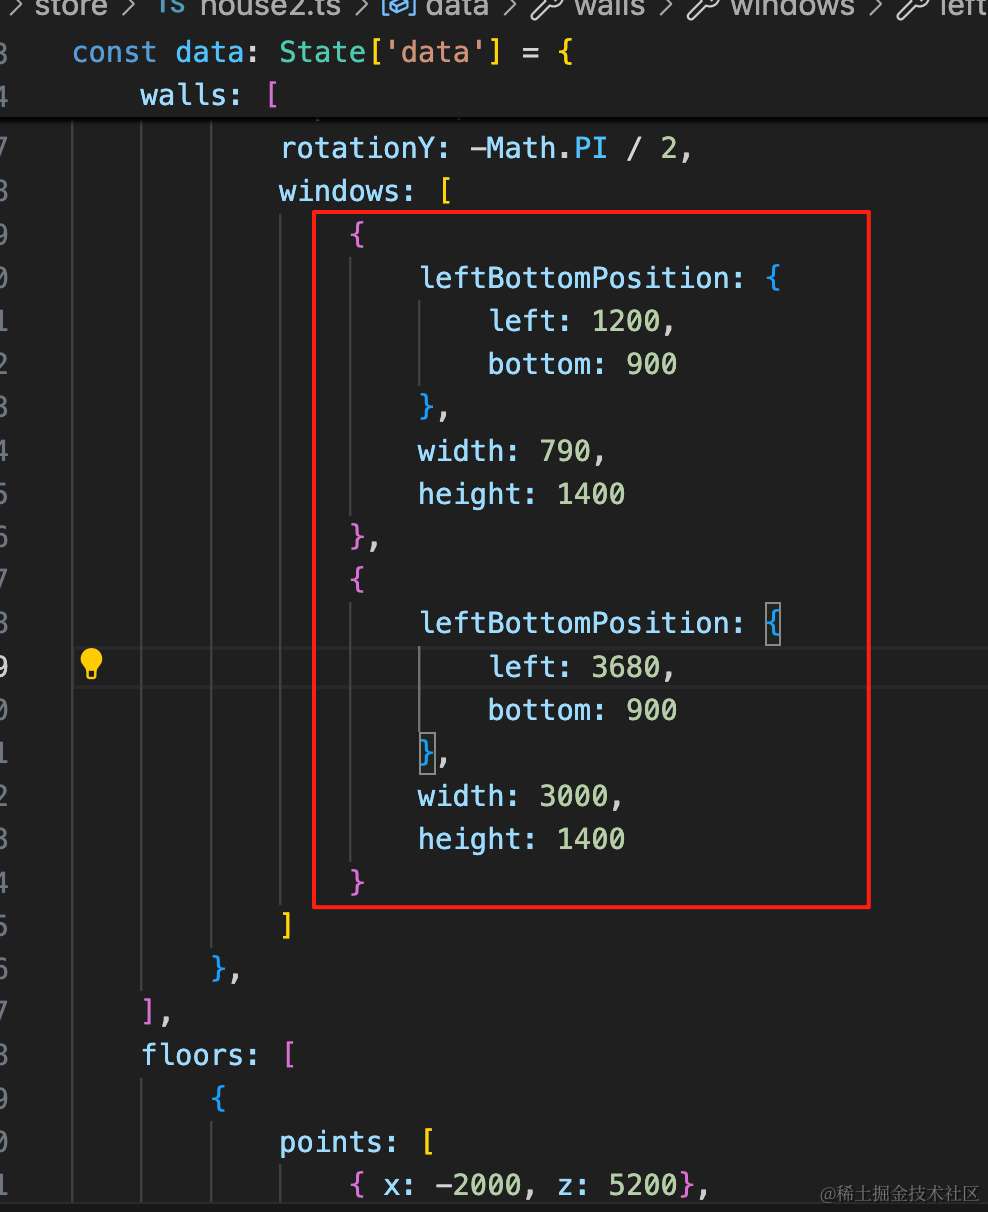
windows: [
    {
        leftBottomPosition: {
            left: 1200,
            bottom: 900
        },
        width: 790,
        height: 1400
    },
    {
        leftBottomPosition: {
            left: 3680,
            bottom: 900
        },
        width: 3000,
        height: 1400
    }
]
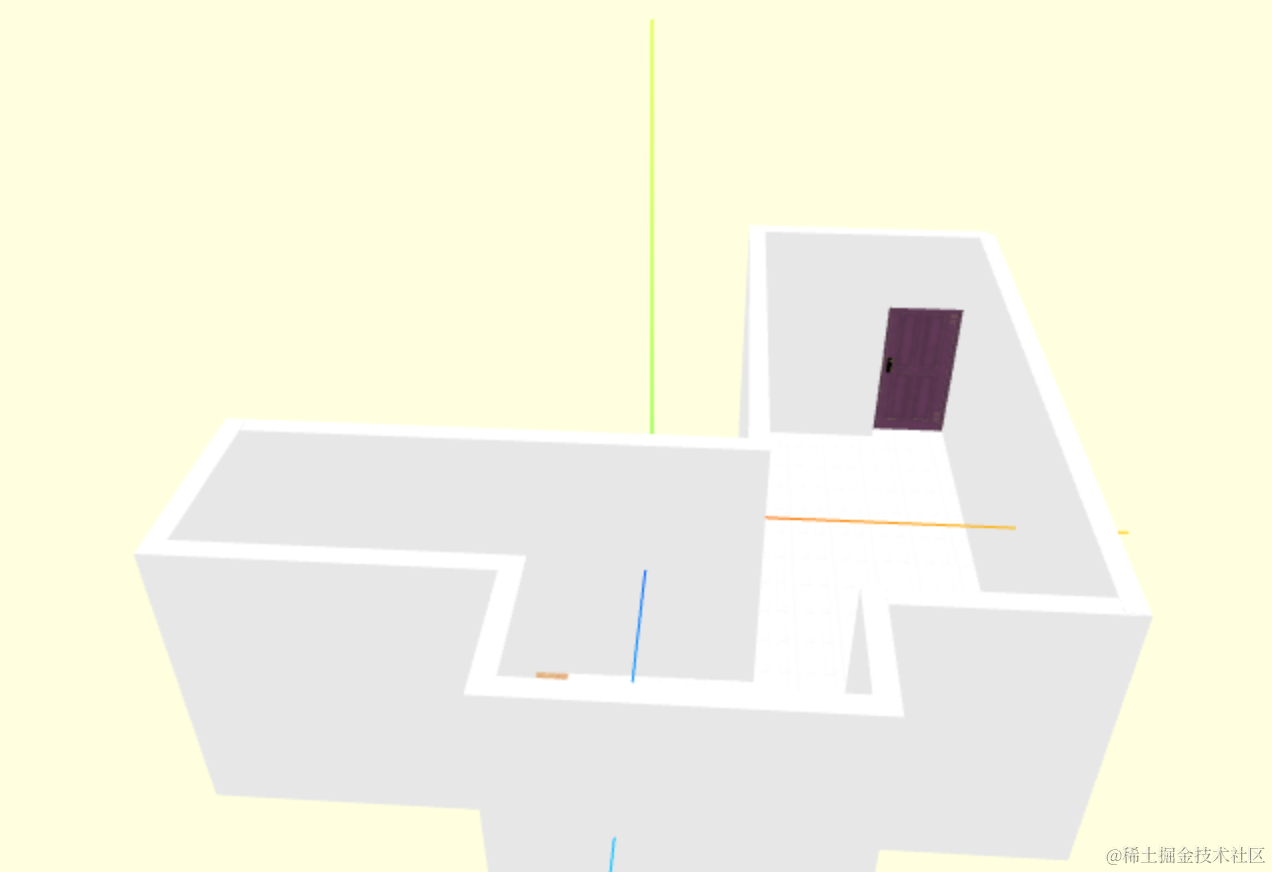
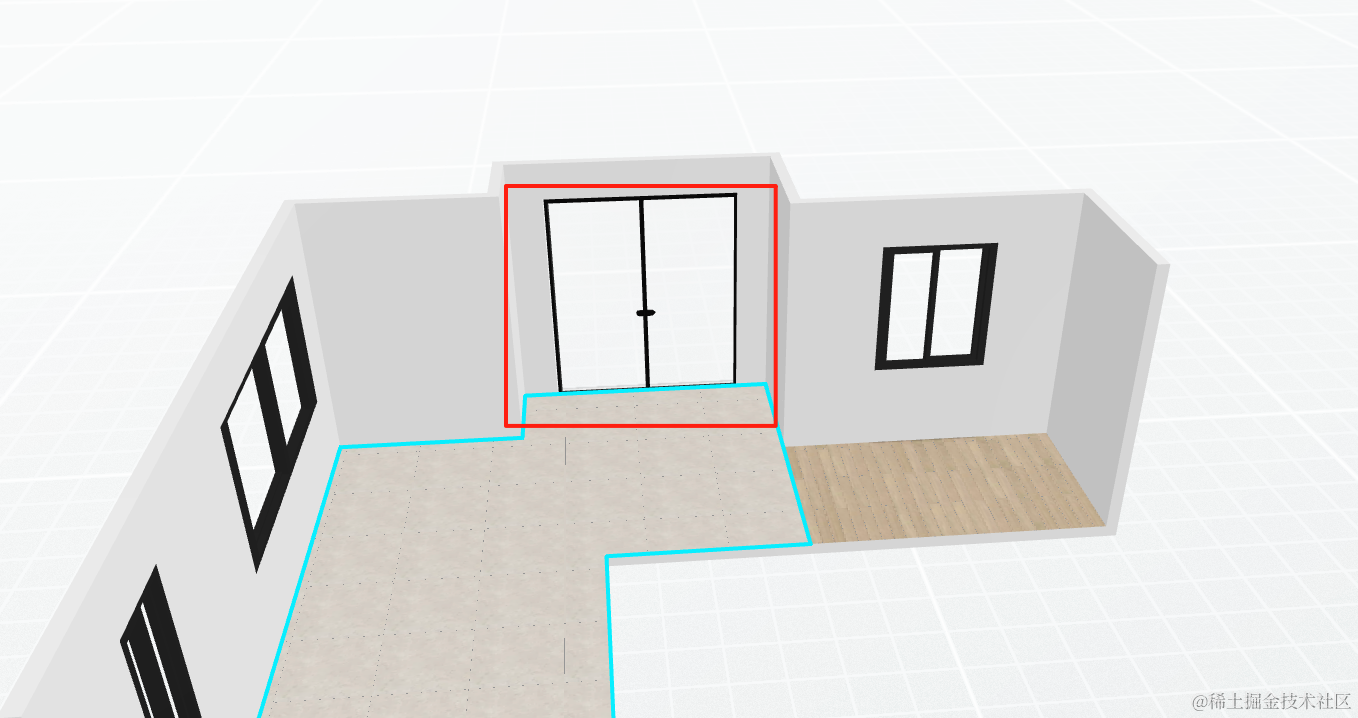
和酷家乐里的这俩窗户一样:
然后再画右边的窗户:
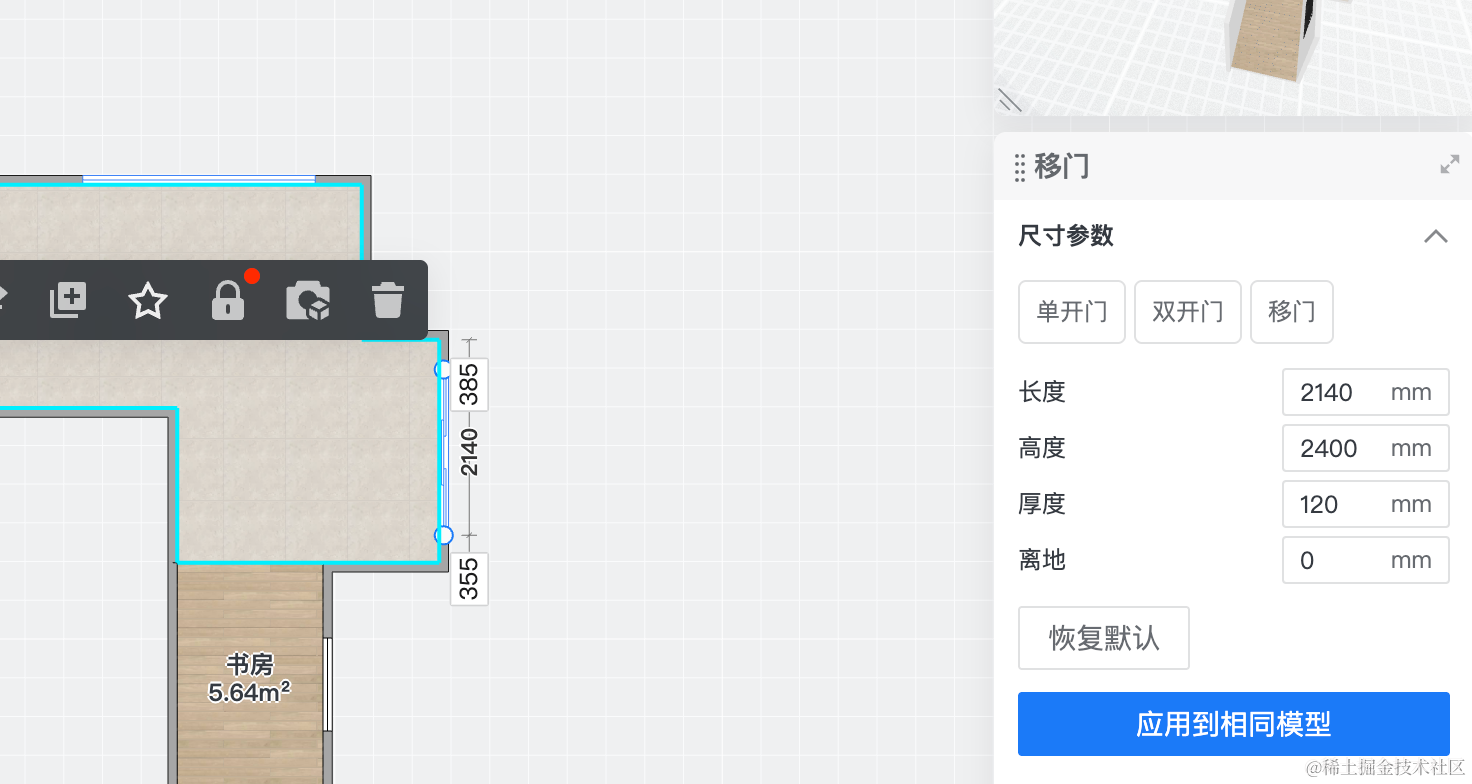
在倒数第四面墙:
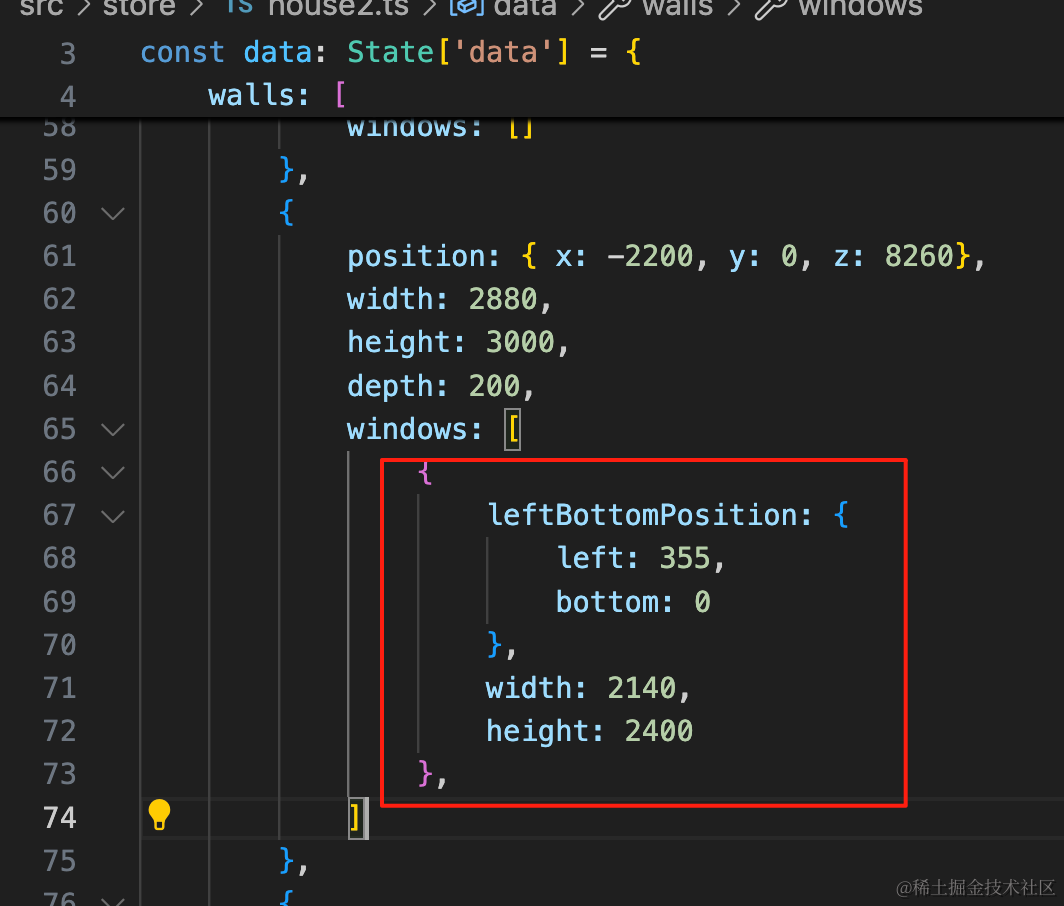
windows: [
{
leftBottomPosition: {
left: 355,
bottom: 0
},
width: 2140,
height: 2400
},
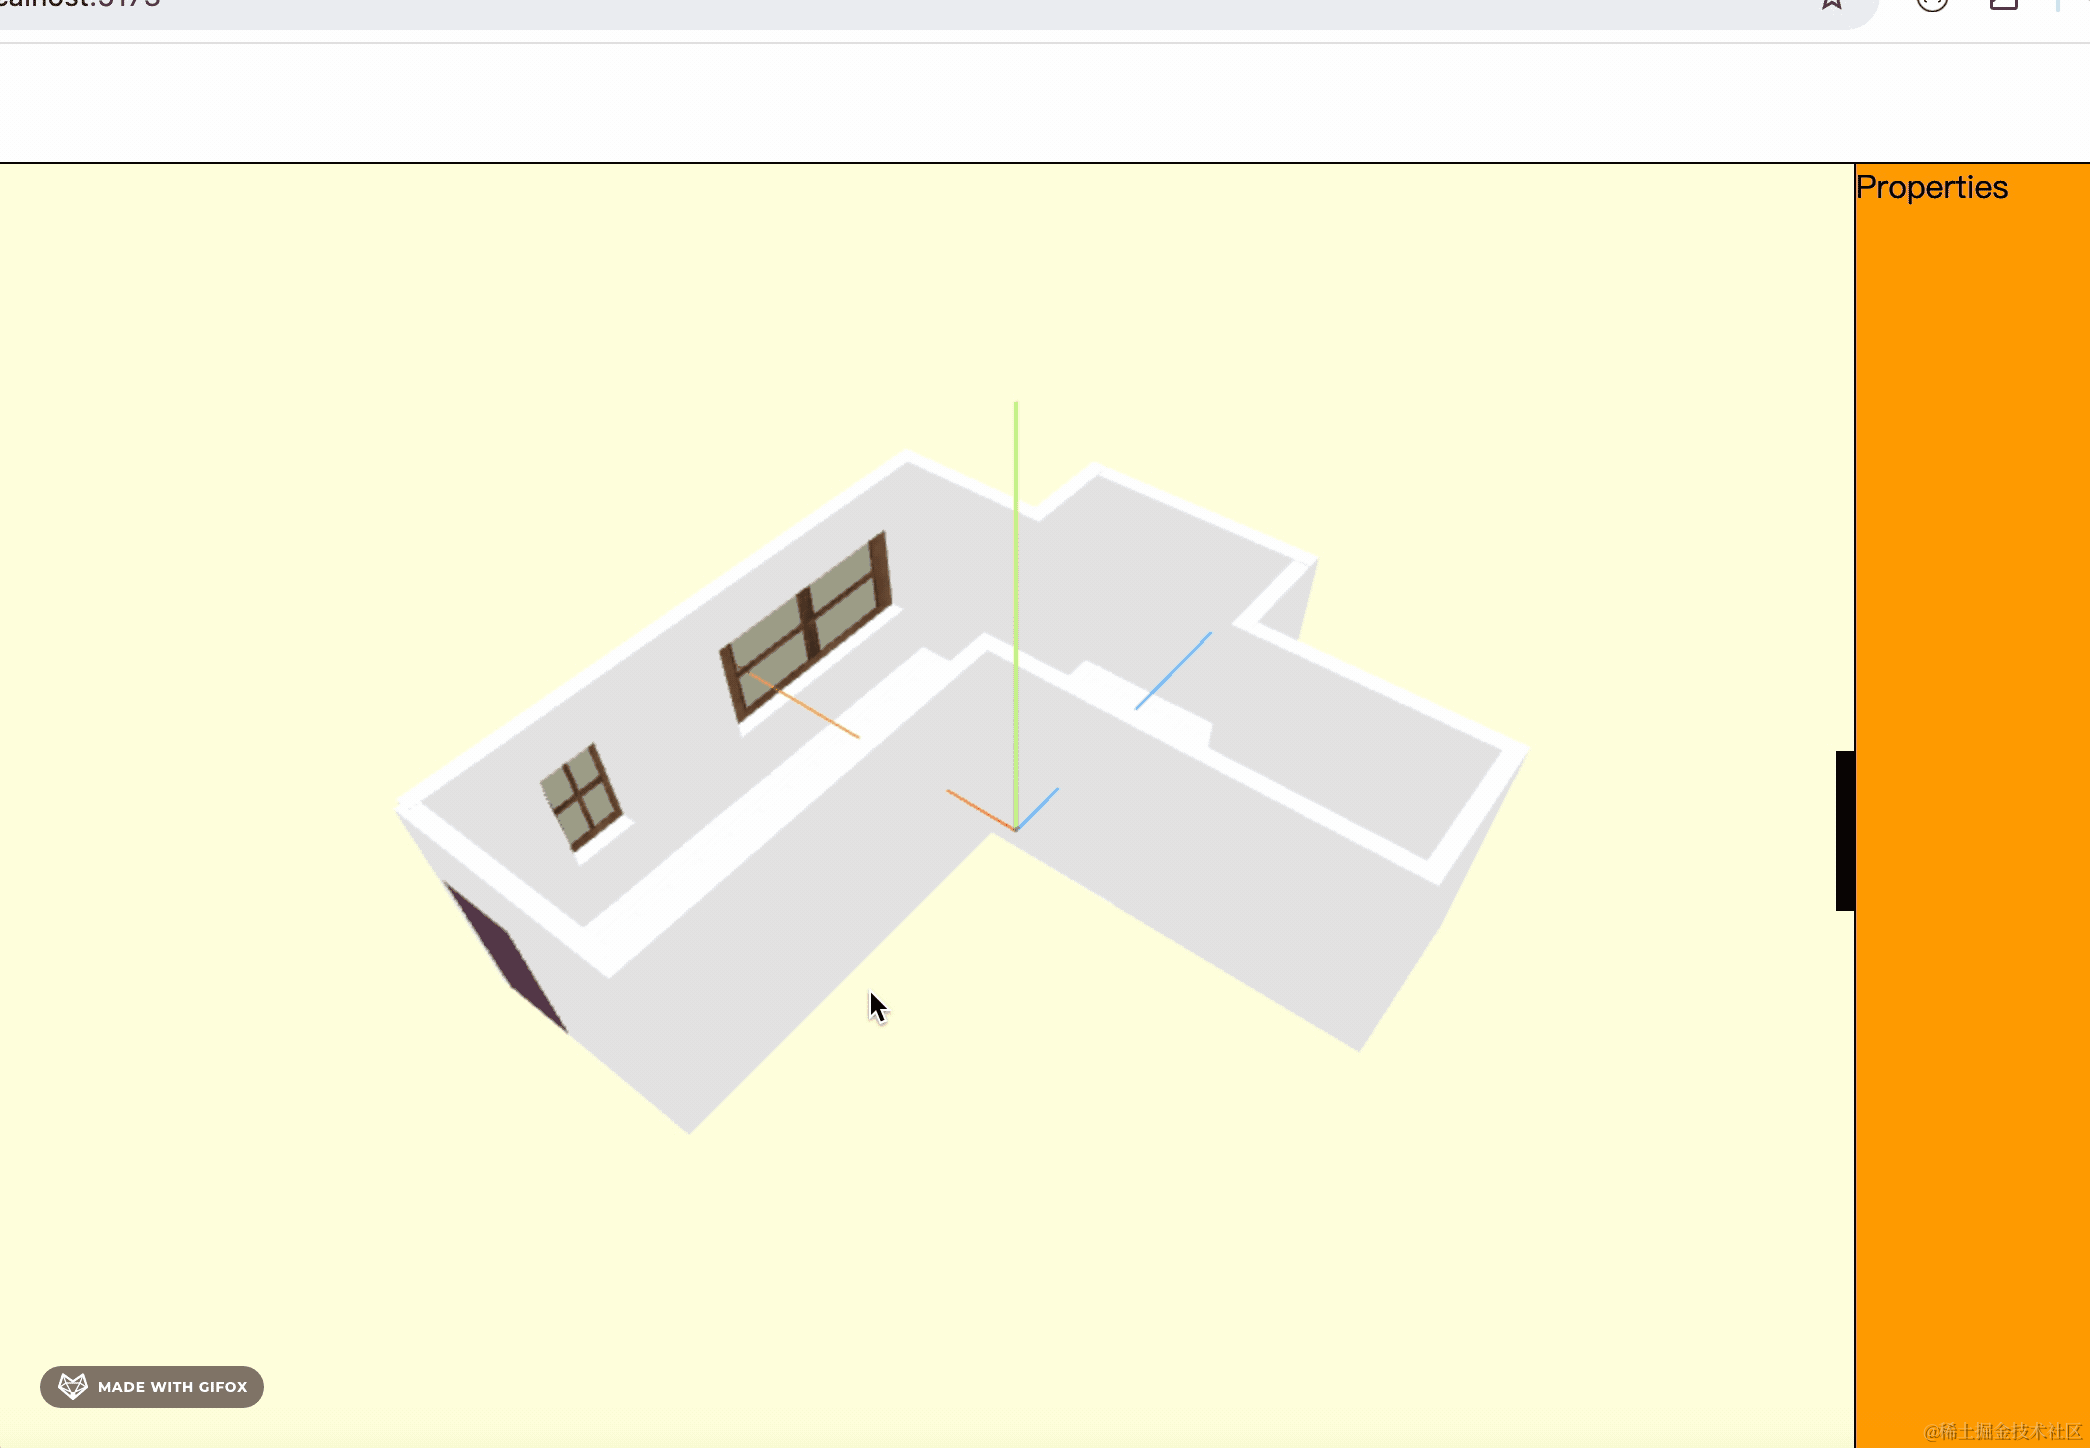
]看下效果:
对比下酷家乐里的:
然后再画最后一个窗户:
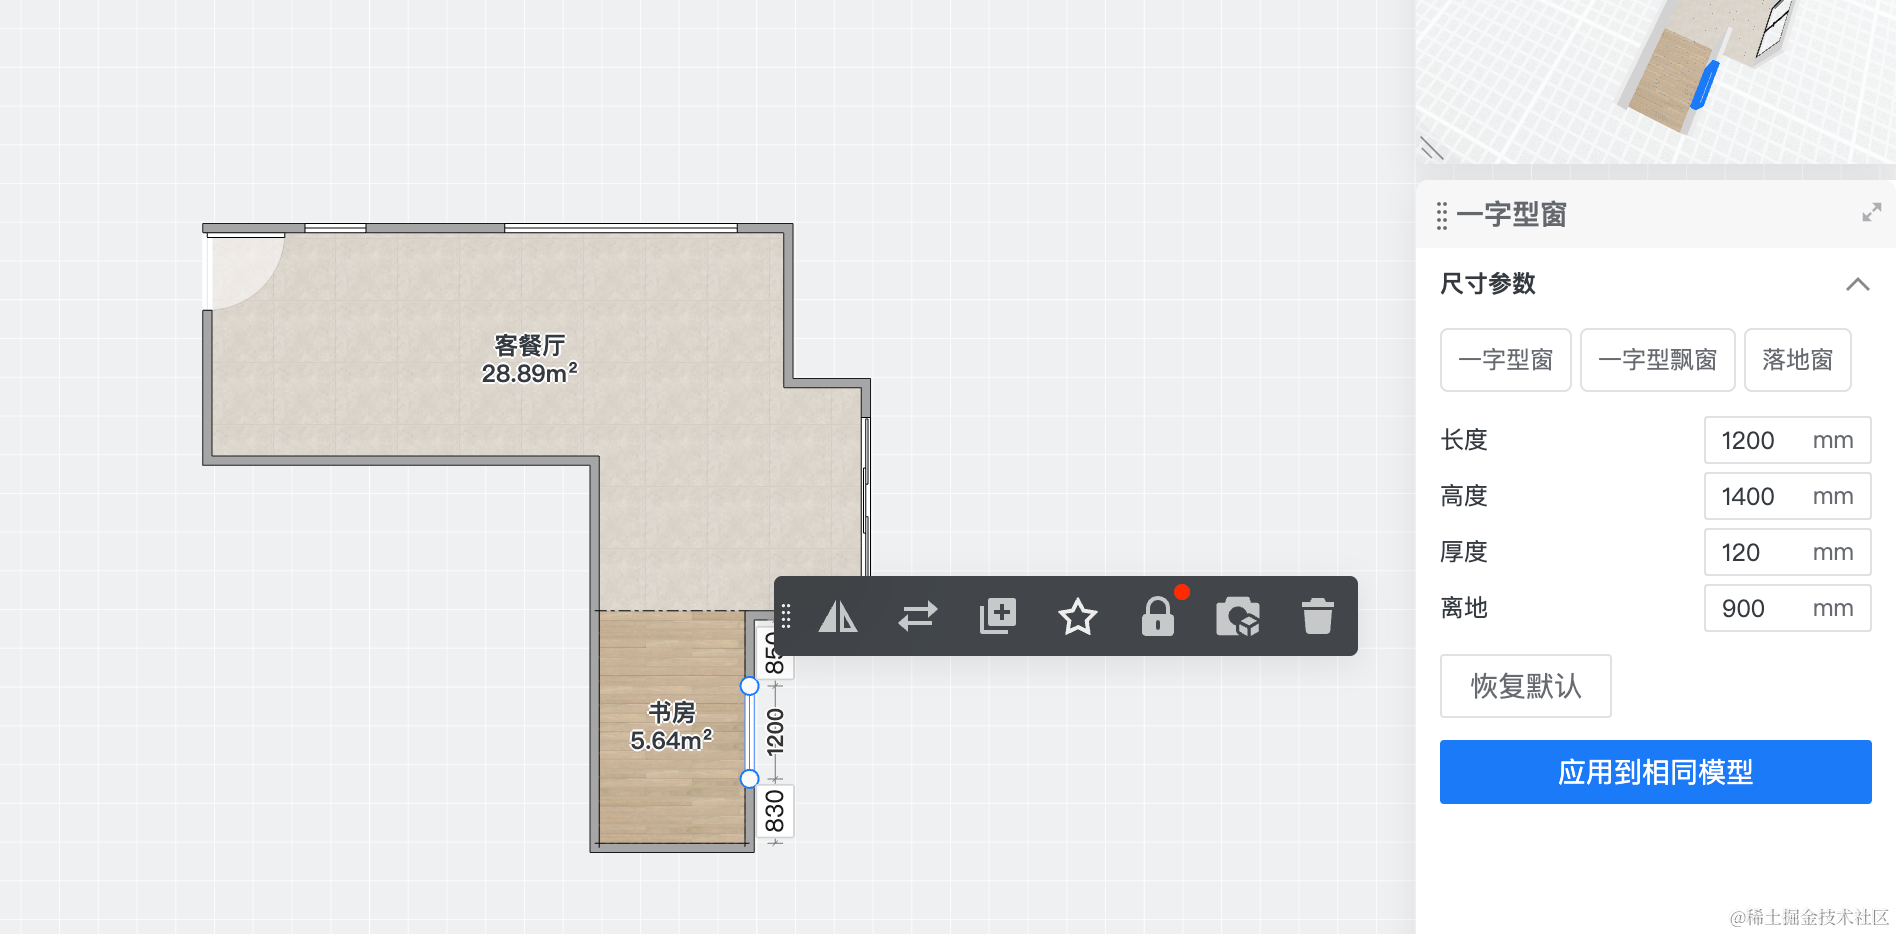
在第五面墙:
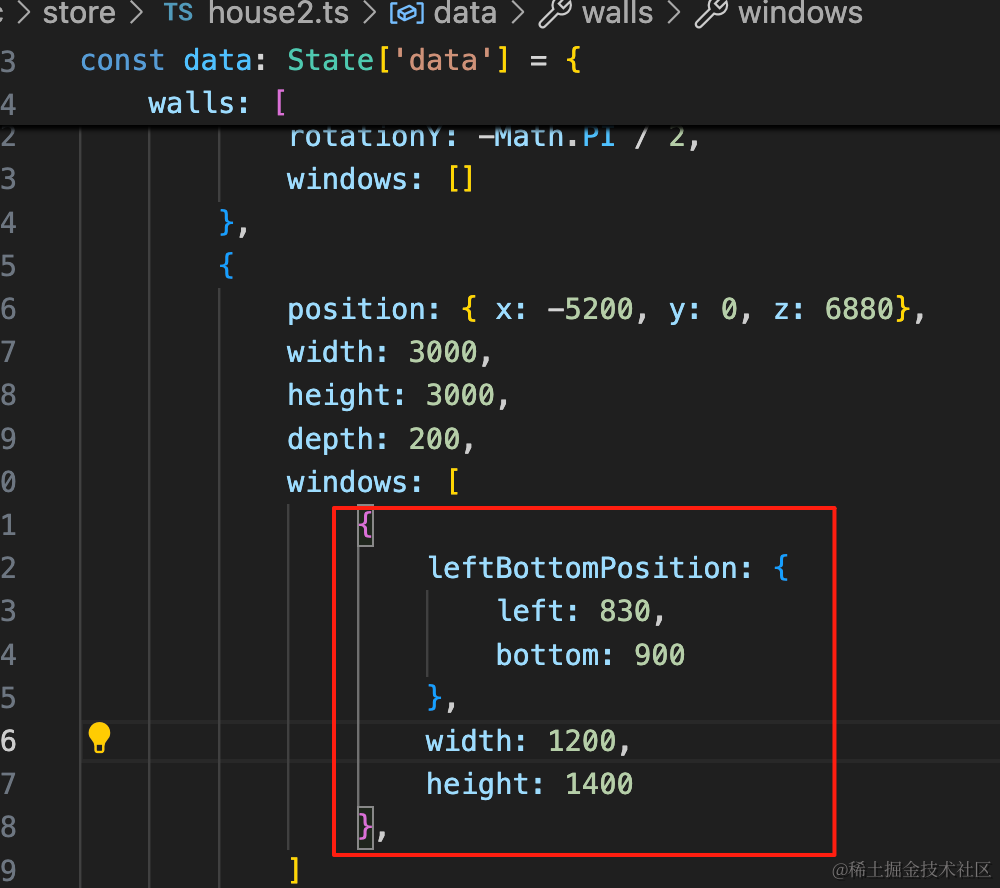
windows: [
    {
        leftBottomPosition: {
            left: 830,
            bottom: 900
        },
        width: 1200,
        height: 1400
    },
]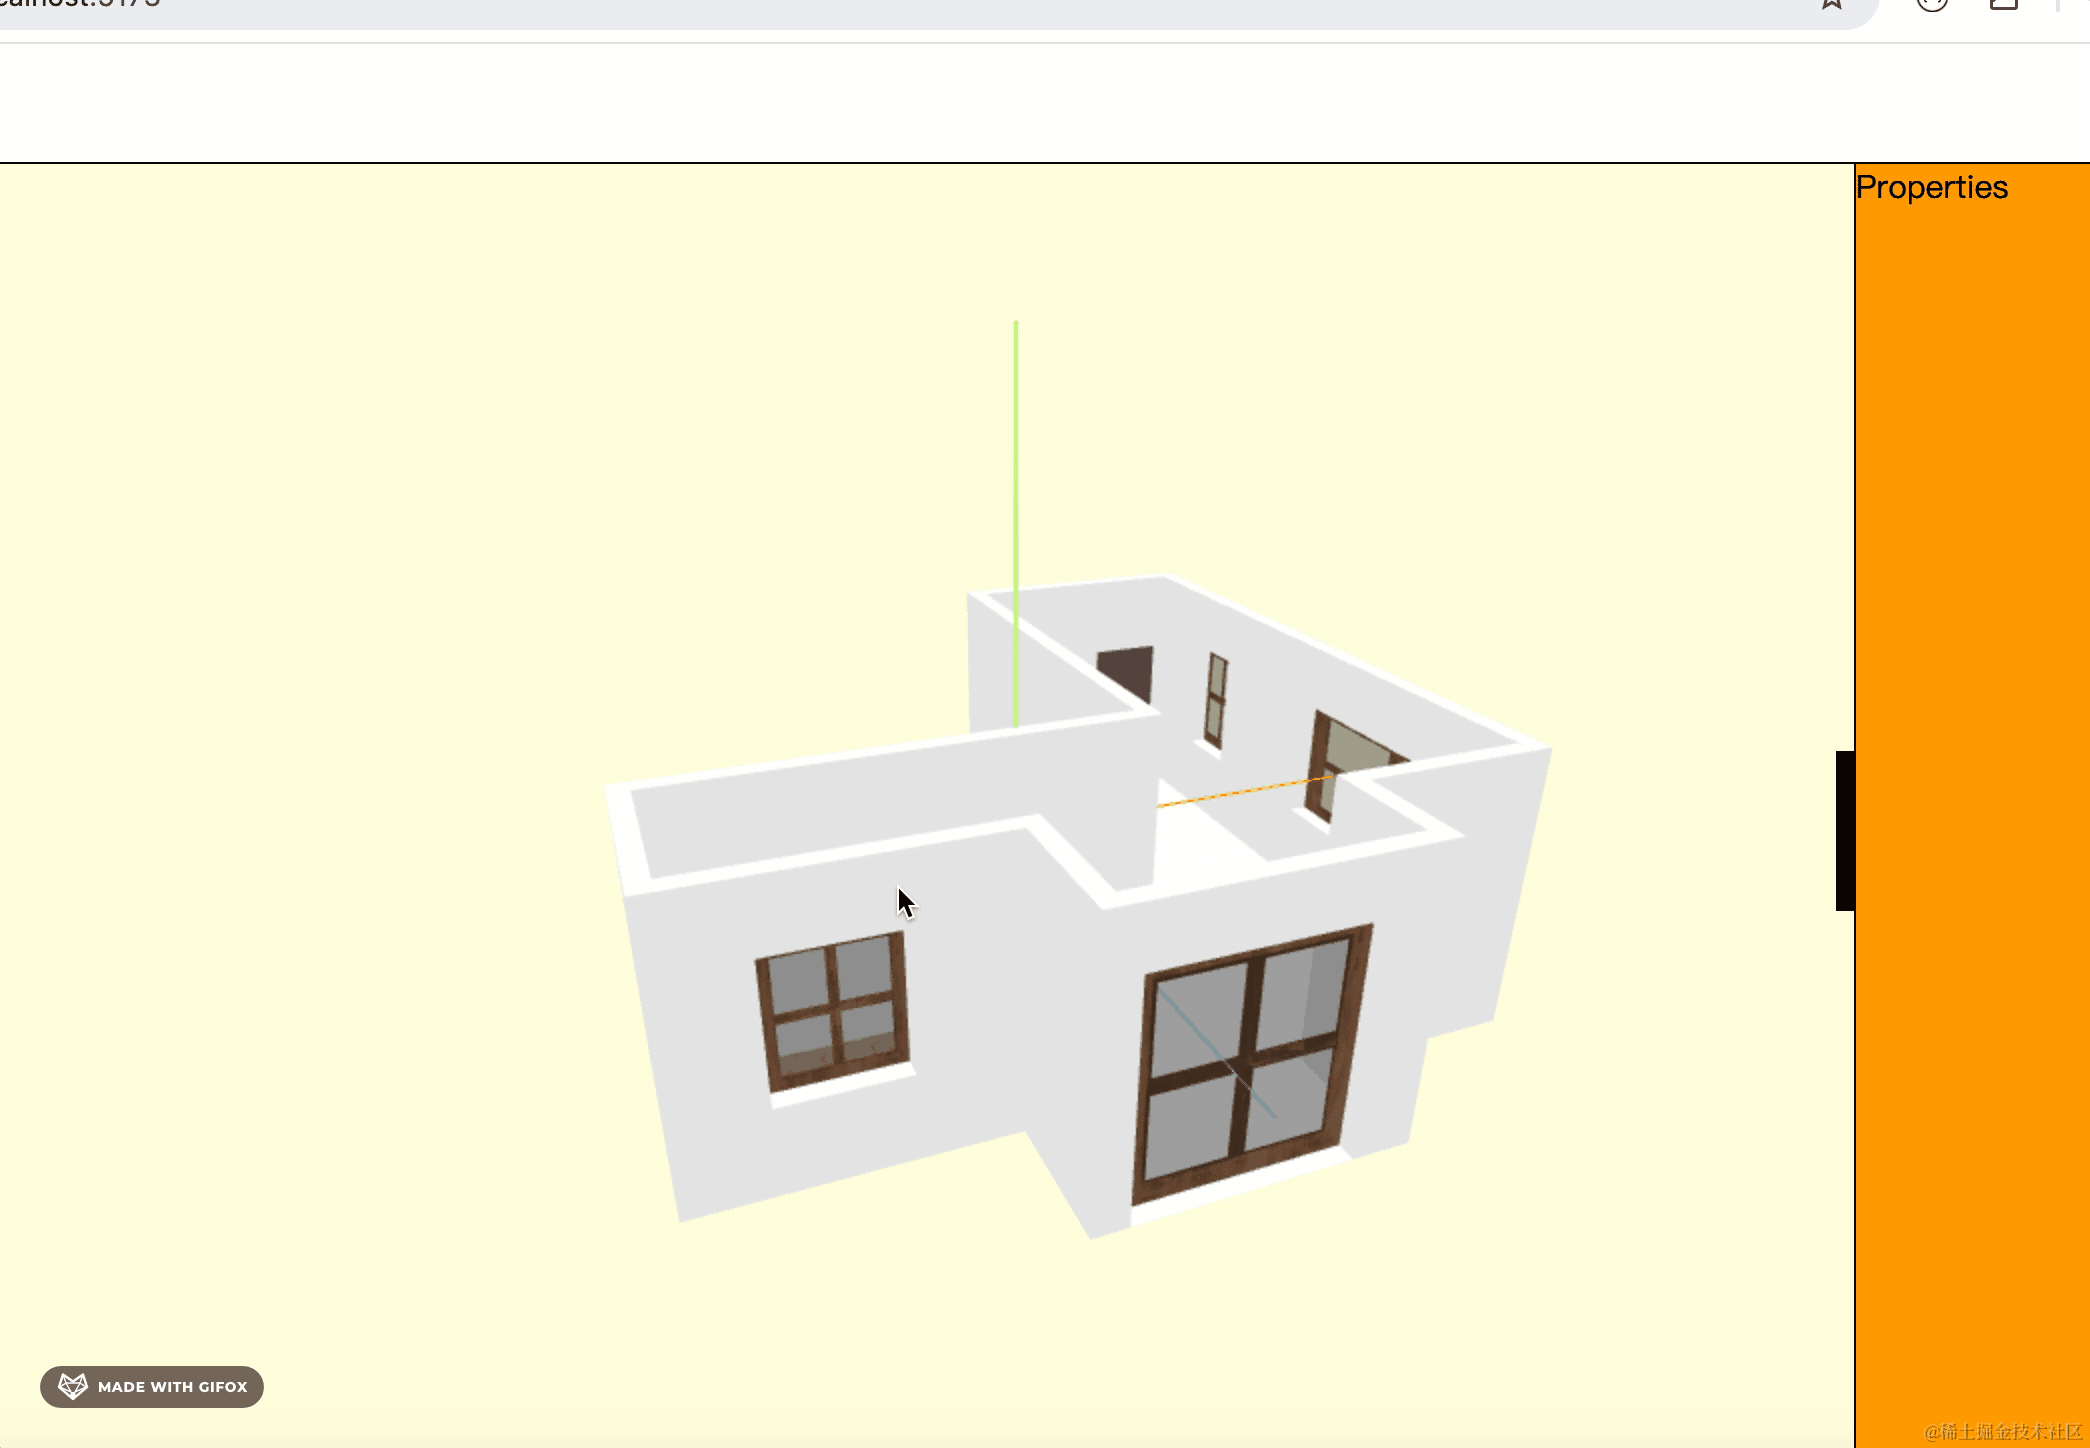
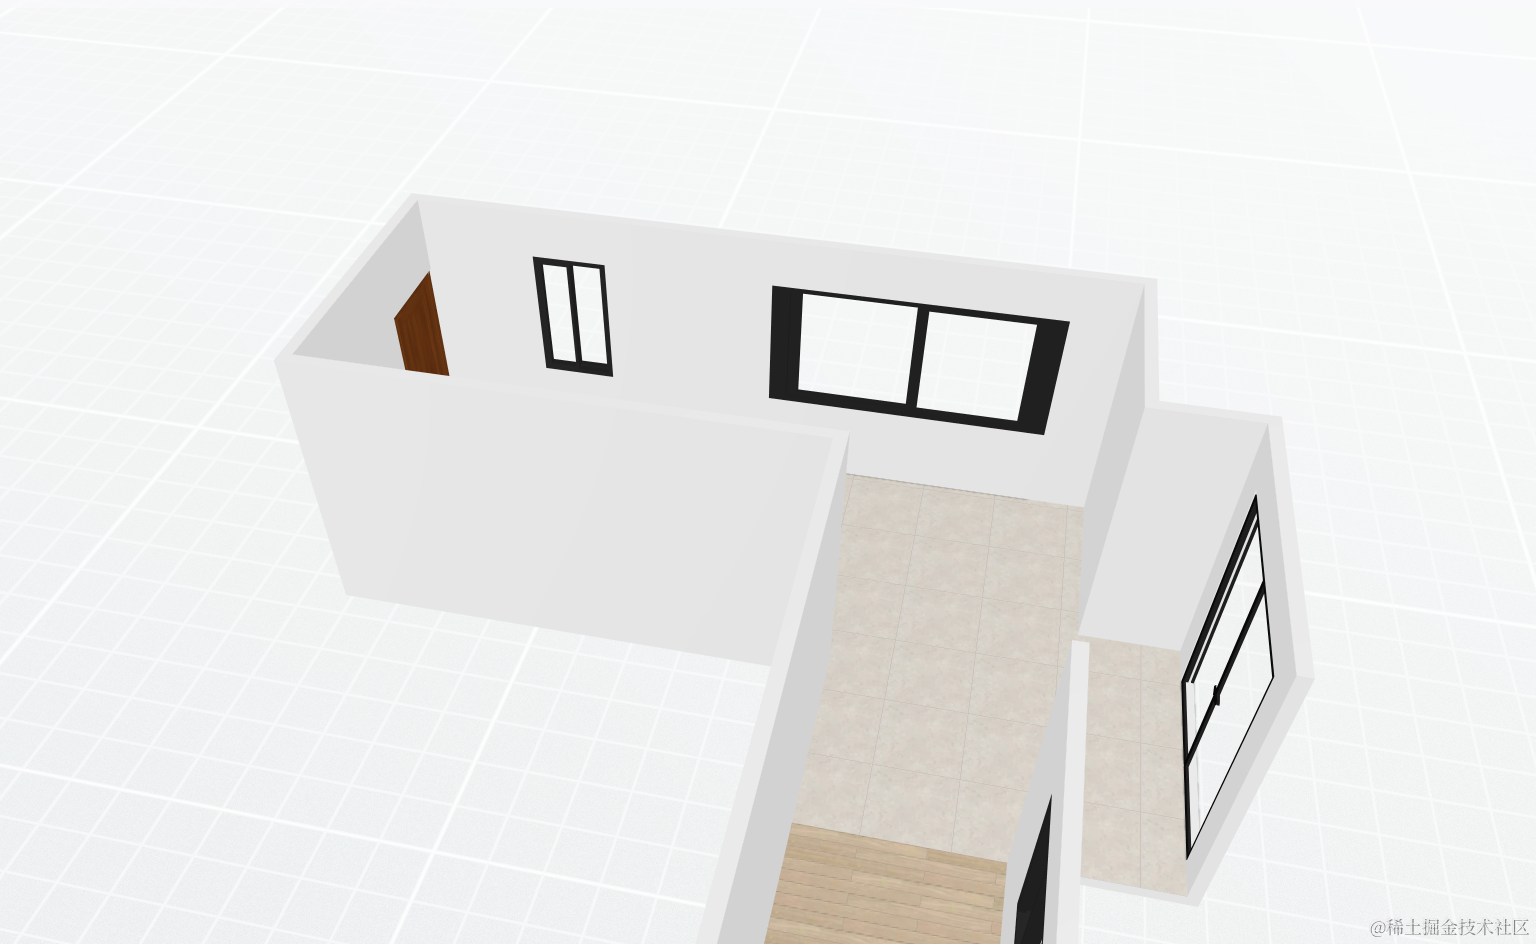
这样,整个户型就绘制完成了。
对比下酷家乐里的:

案例代码上传了小册仓库
总结
这节我们绘制了一个复杂一点的户型,有一个客厅、一个书房。
我们按照酷家乐里的户型数据绘制了墙、地板、天花板,然后又加上了门窗。
这样我们的户型库里就有两个户型了。