上节把 2D 视图的门窗画了出来:
这节继续来画尺寸:
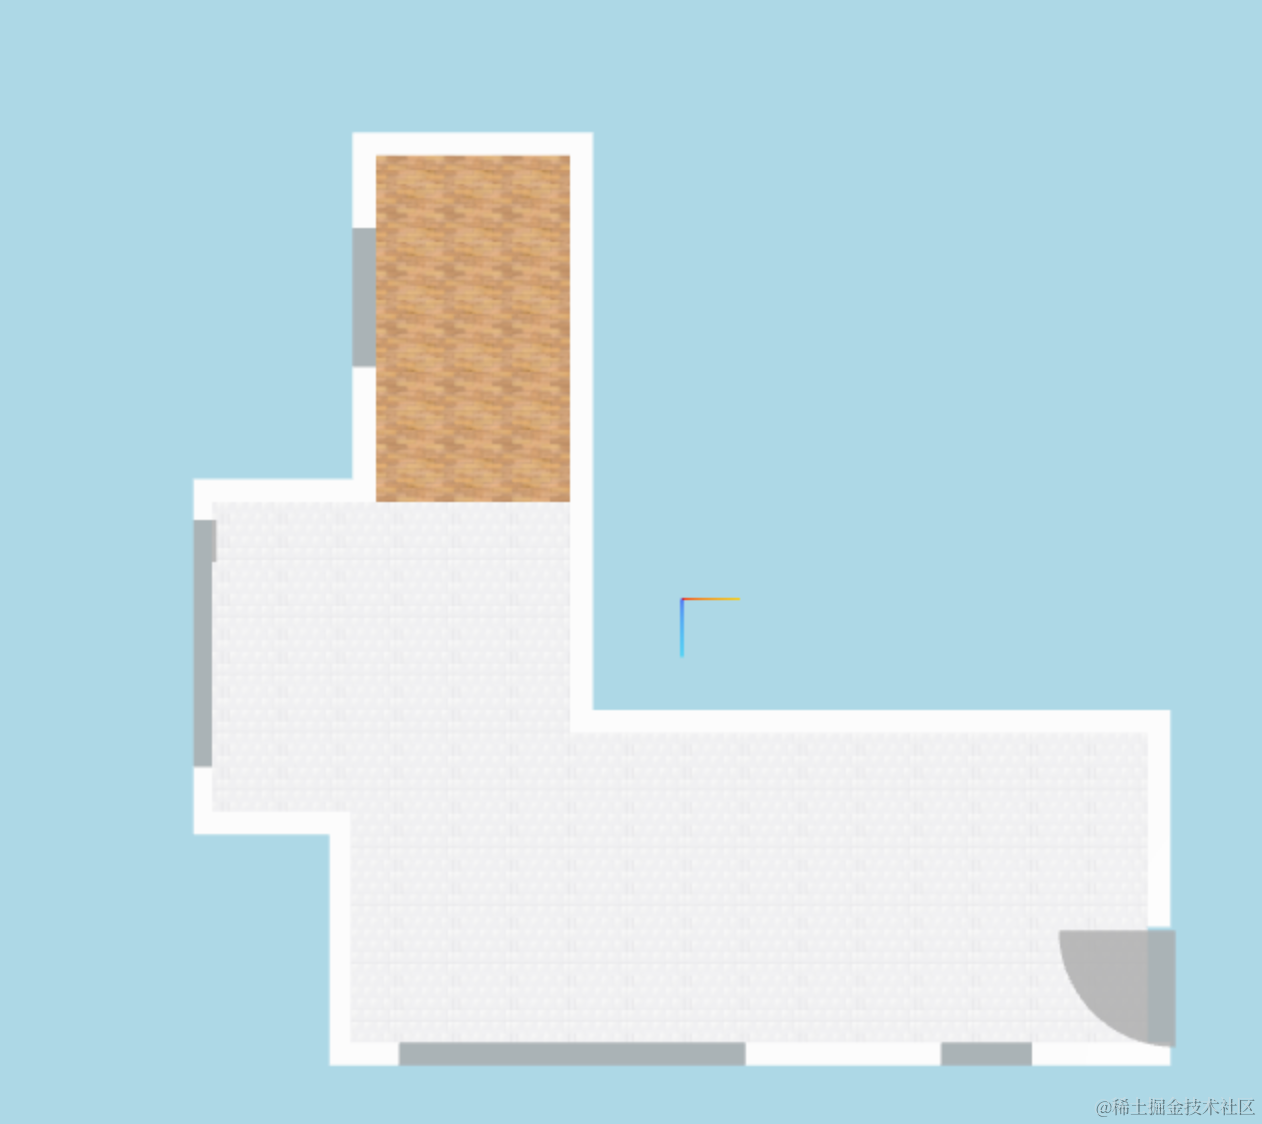
首先,可以看到每个房间有不同的名字,并且会有大小。
我们先把这个加上。
很明显这个数据是要加在地板的数据里:
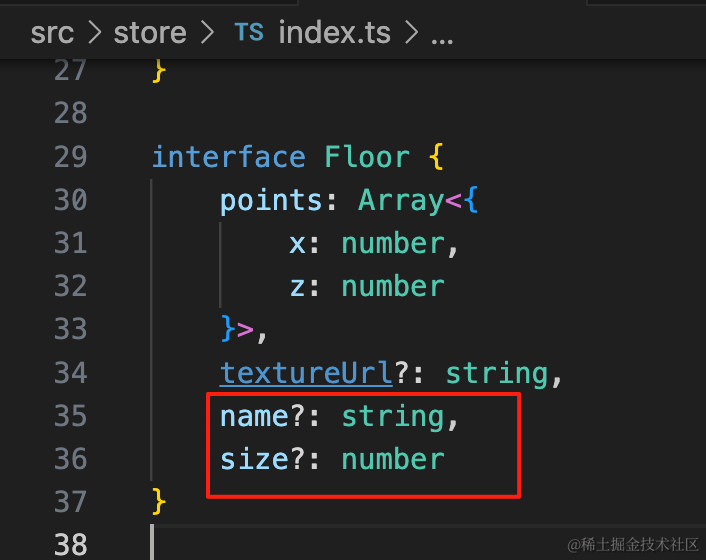
先改下类型,加上 name、size
name?: string,
size?: number
在 house2.ts 加一下数据:
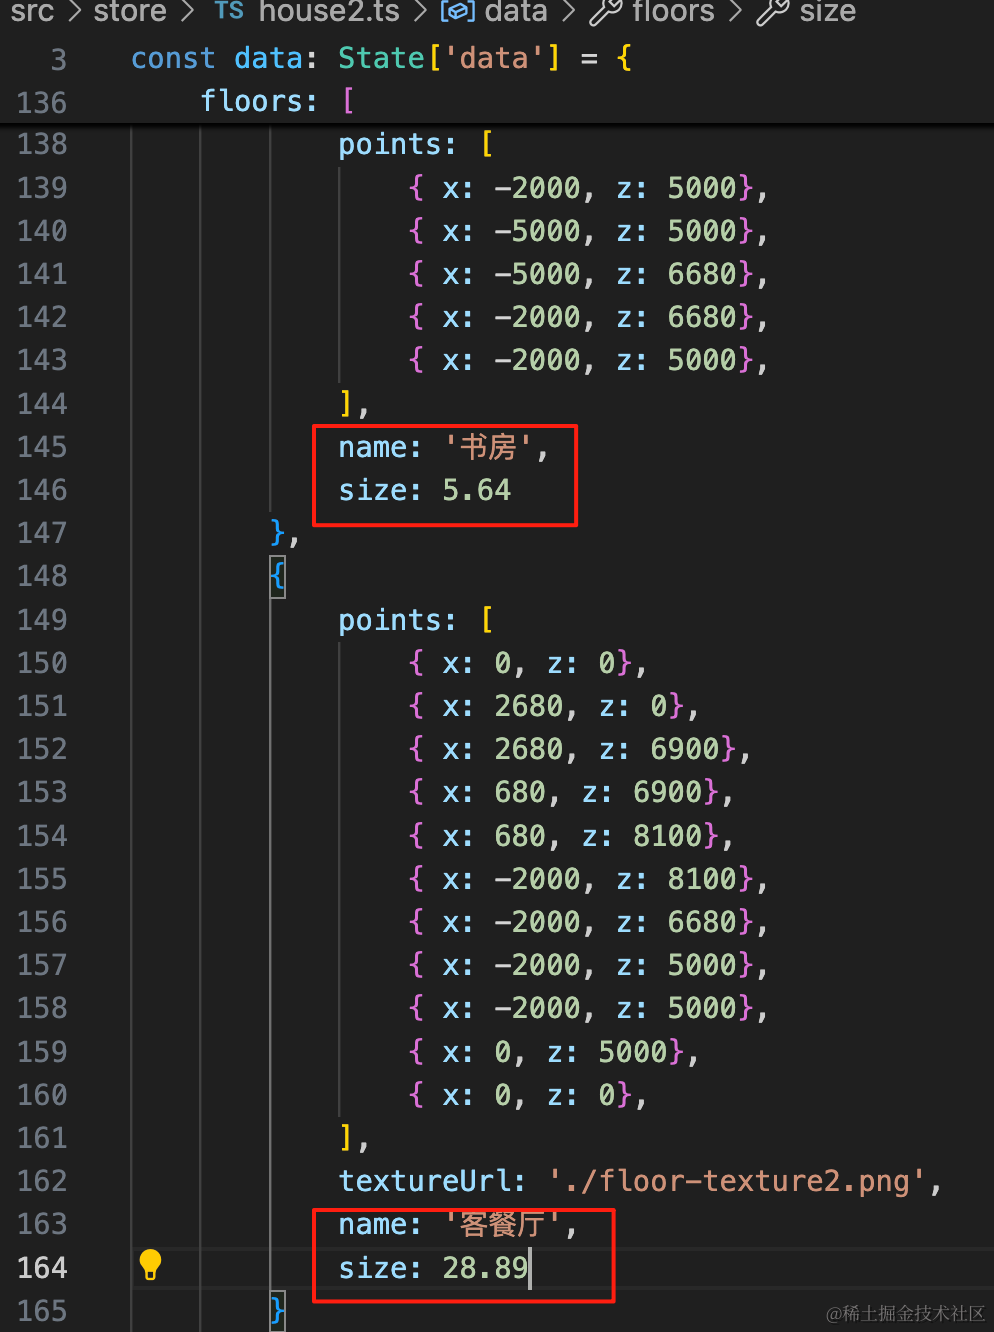
name: '书房',
size: 5.64name: '客餐厅',
size: 28.89如何绘制文字呢?
可以用 Sprite + Canvas 来画,但更方便的是直接用 three-spritetext 这个包。
安装下:
npm install --save three-spritetext然后 2D 视图绘制地板的时候加一下文字:

const text = new SpriteText(item.name + '\n' + item.size + 'm²', 200);
text.color = 'black';
floor.add(text);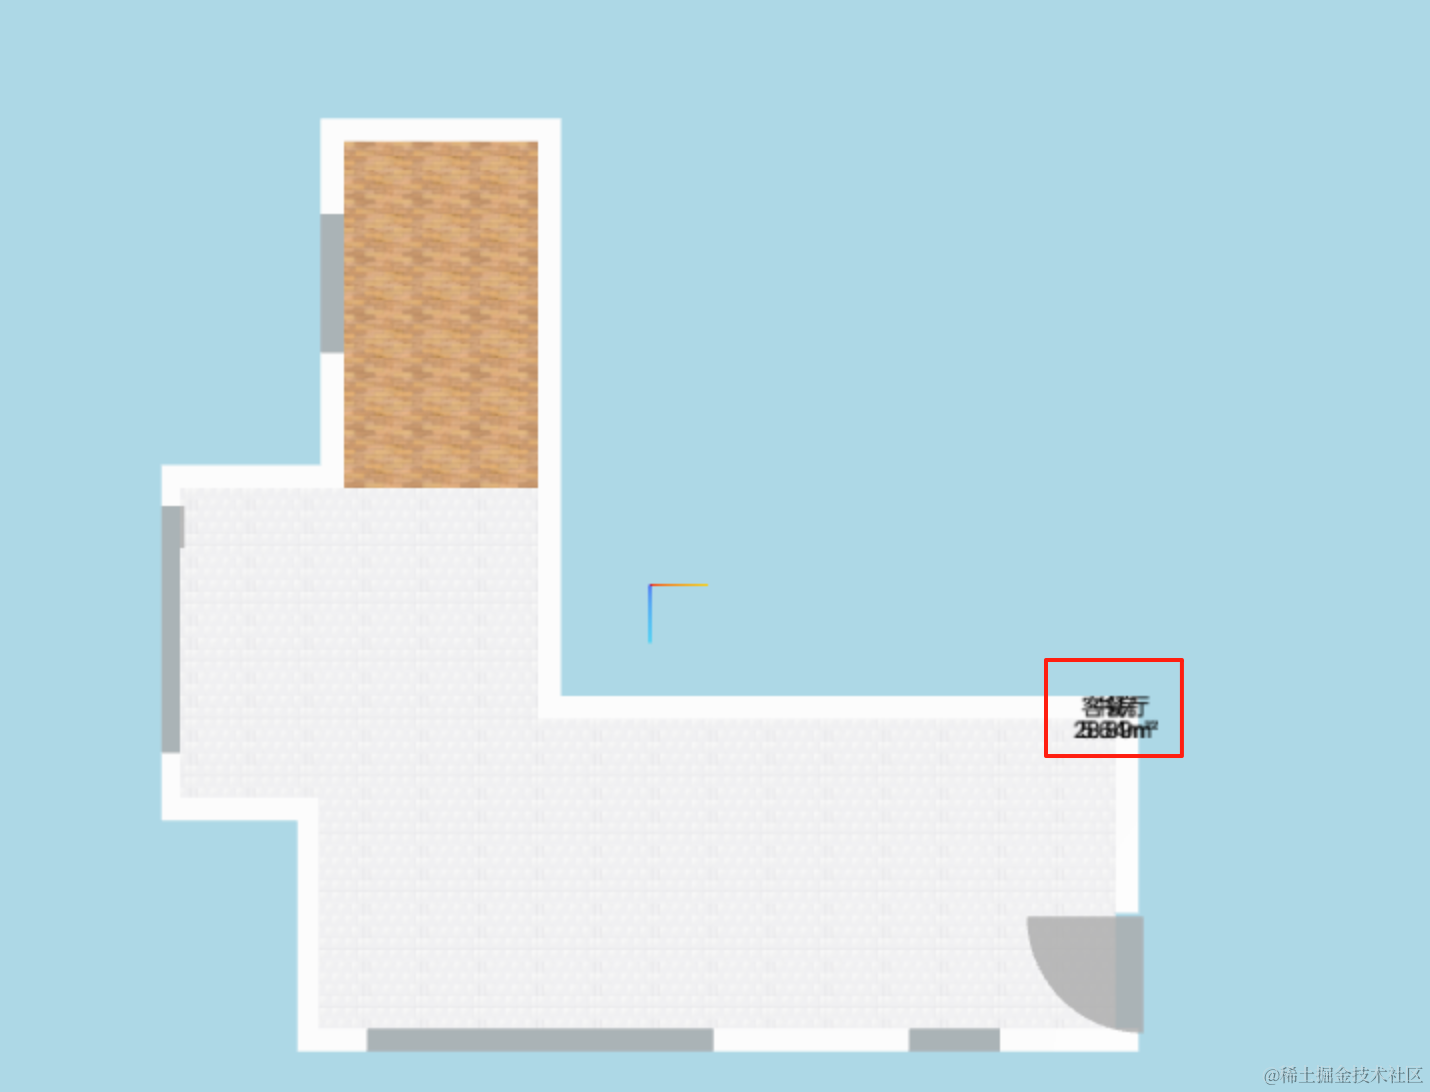
文字出来了,位置如何设置呢?
同样可以通过包围盒来计算中心位置:
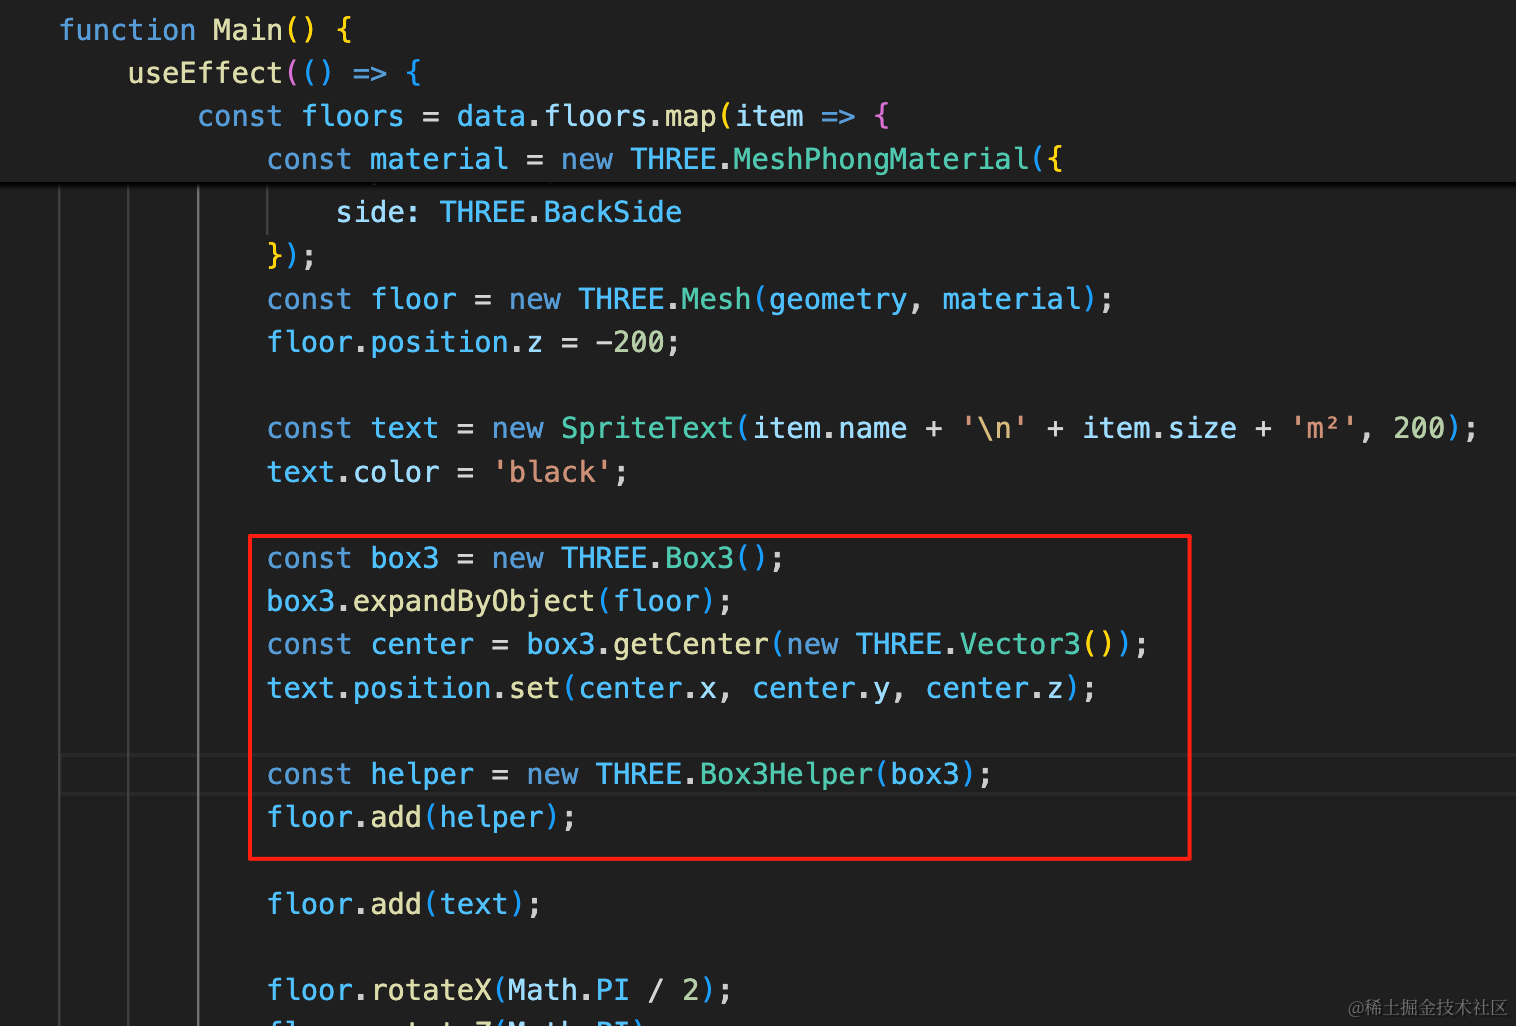
const box3 = new THREE.Box3();
box3.expandByObject(floor);
const center = box3.getCenter(new THREE.Vector3());
text.position.set(center.x, center.y, center.z);
const helper = new THREE.Box3Helper(box3);
floor.add(helper);用包围盒 Box3 计算中心位置,并且用 Box3Helper 把它可视化出来。
现在为止就计算出来了,并且包围盒也是对的。
接下来继续做尺寸标注:
这些尺寸就是墙的宽度,数据里已经有了,我们绘制墙的时候把它加上:
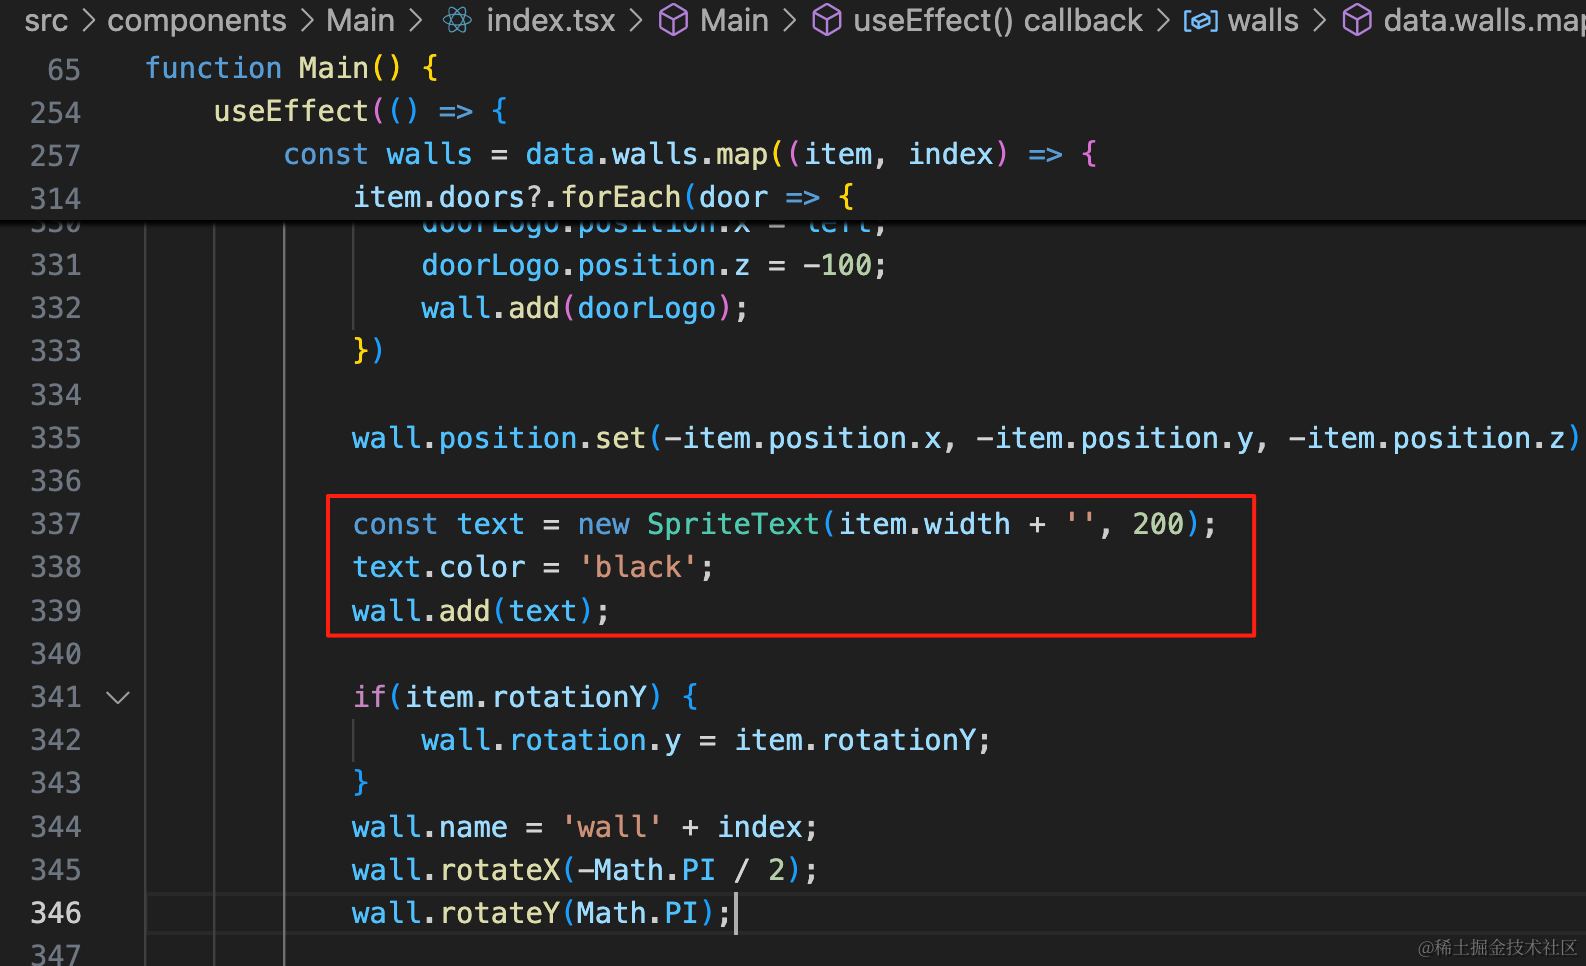
const text = new SpriteText(item.width + '', 200);
text.color = 'black';
wall.add(text);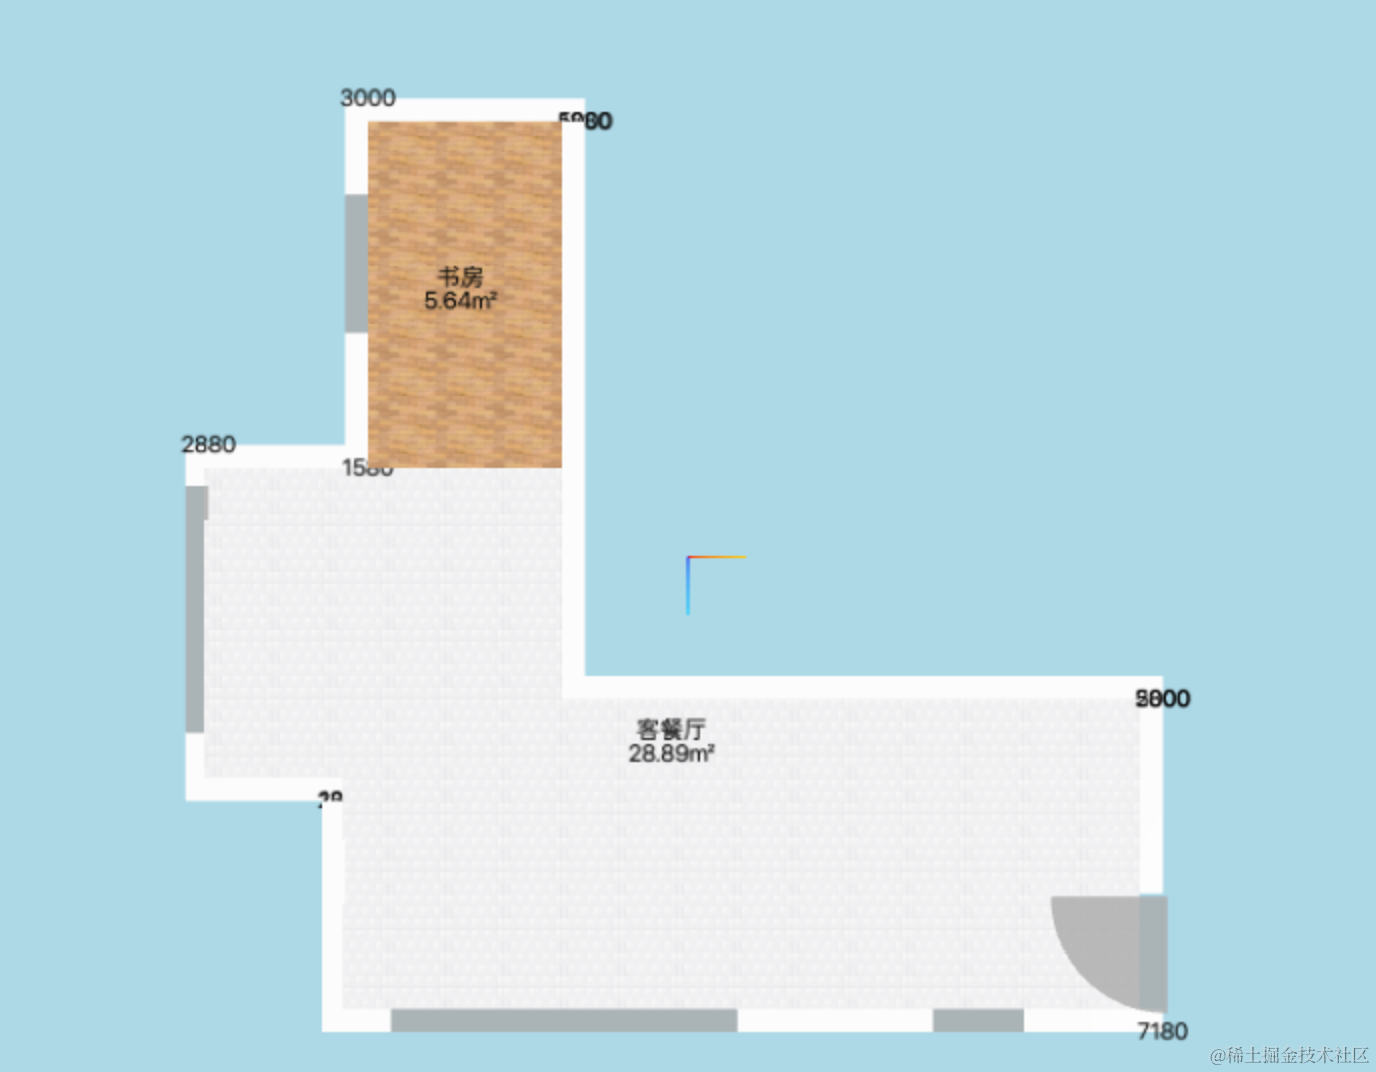
数字出来了,如何定位呢?
很明显,就是墙宽度的一半的位置。
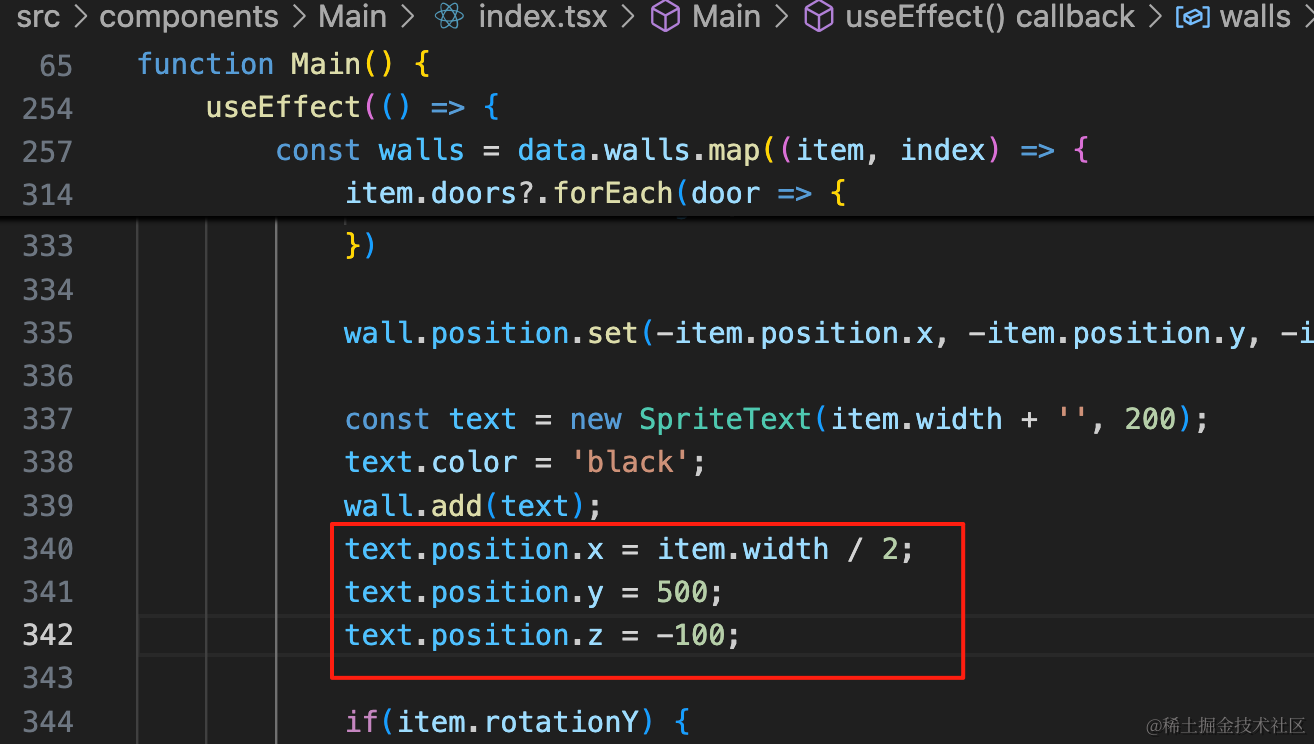
text.position.x = item.width / 2;
text.position.y = 500;
text.position.z = -100;定位到墙的中间,往上移动 100 像素,然后再离墙远一点。
这样,标注就做好了。
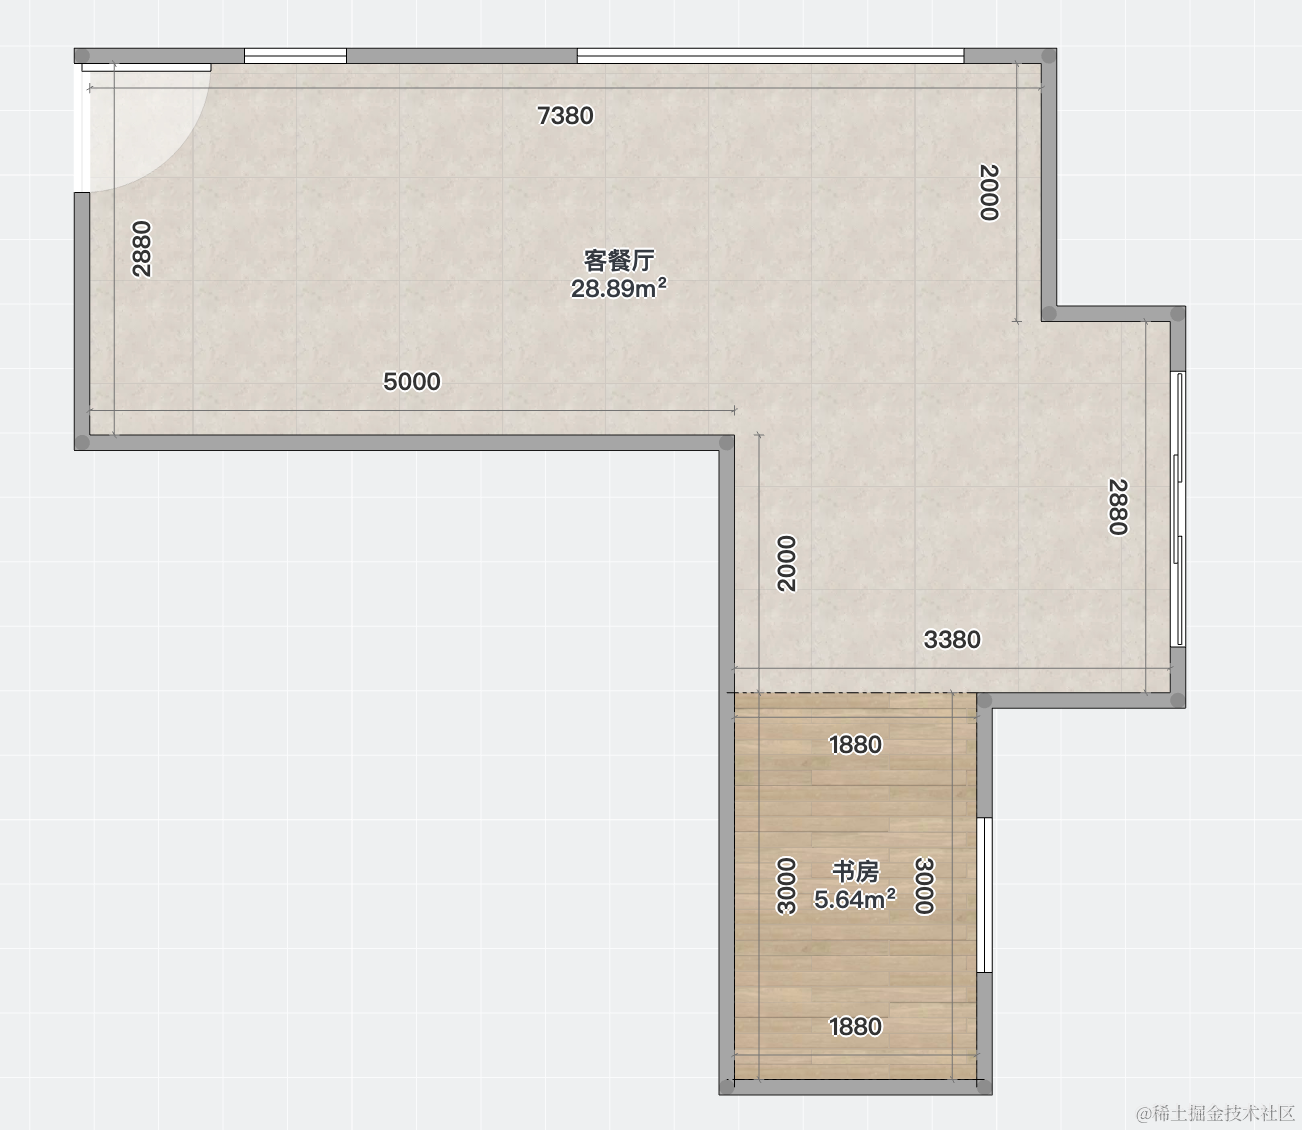
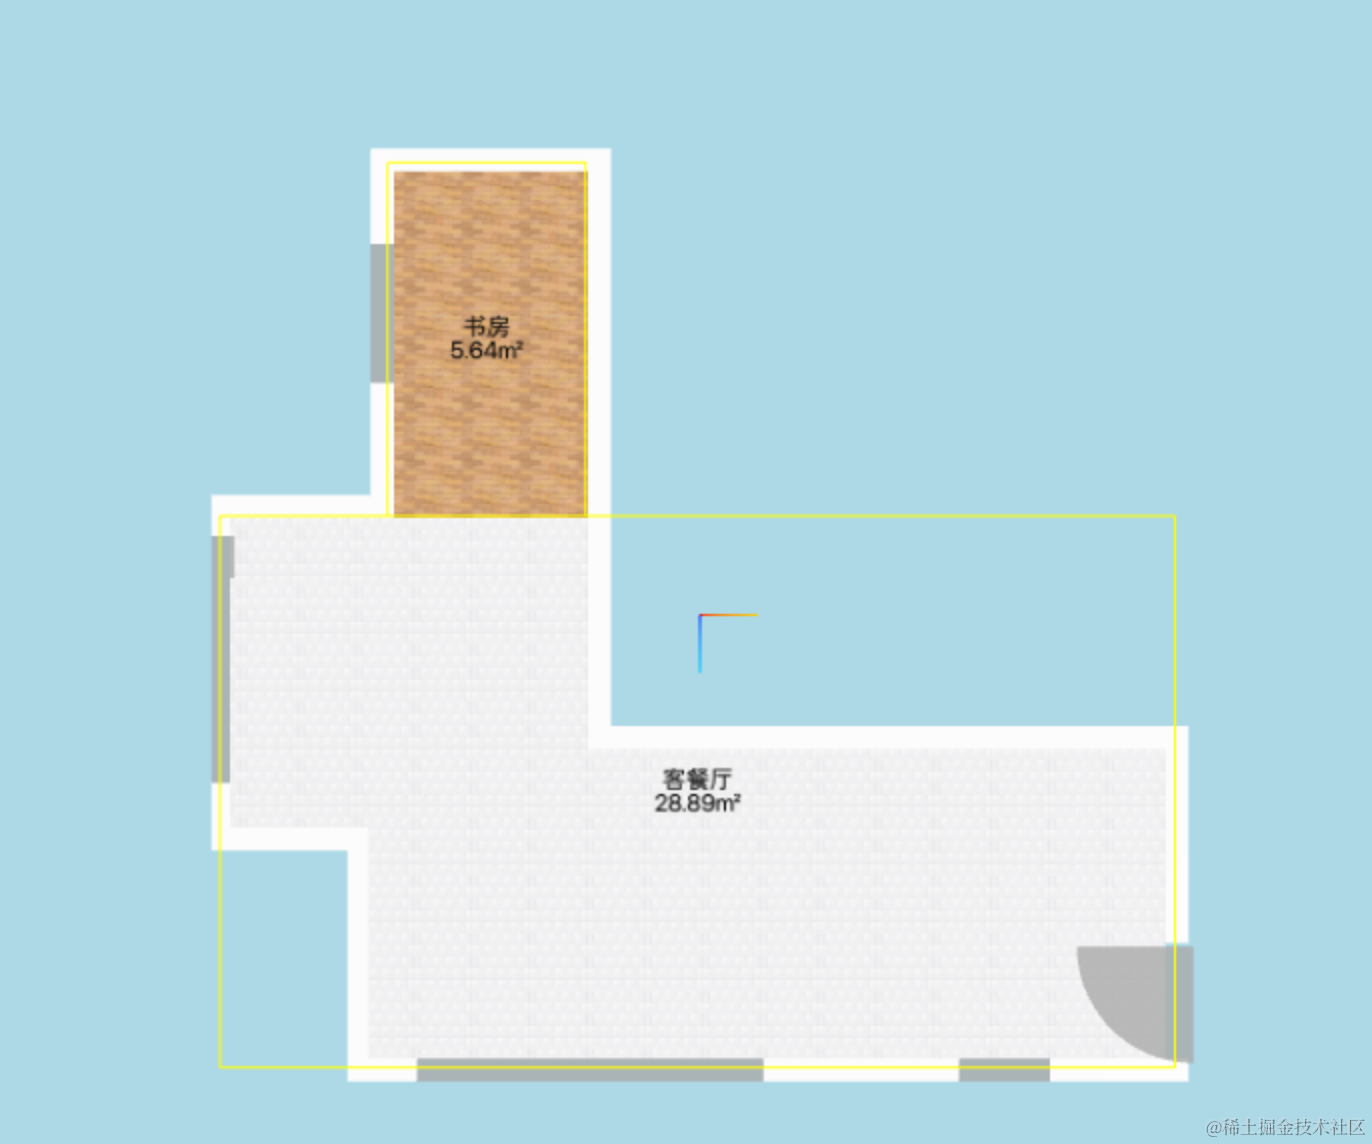
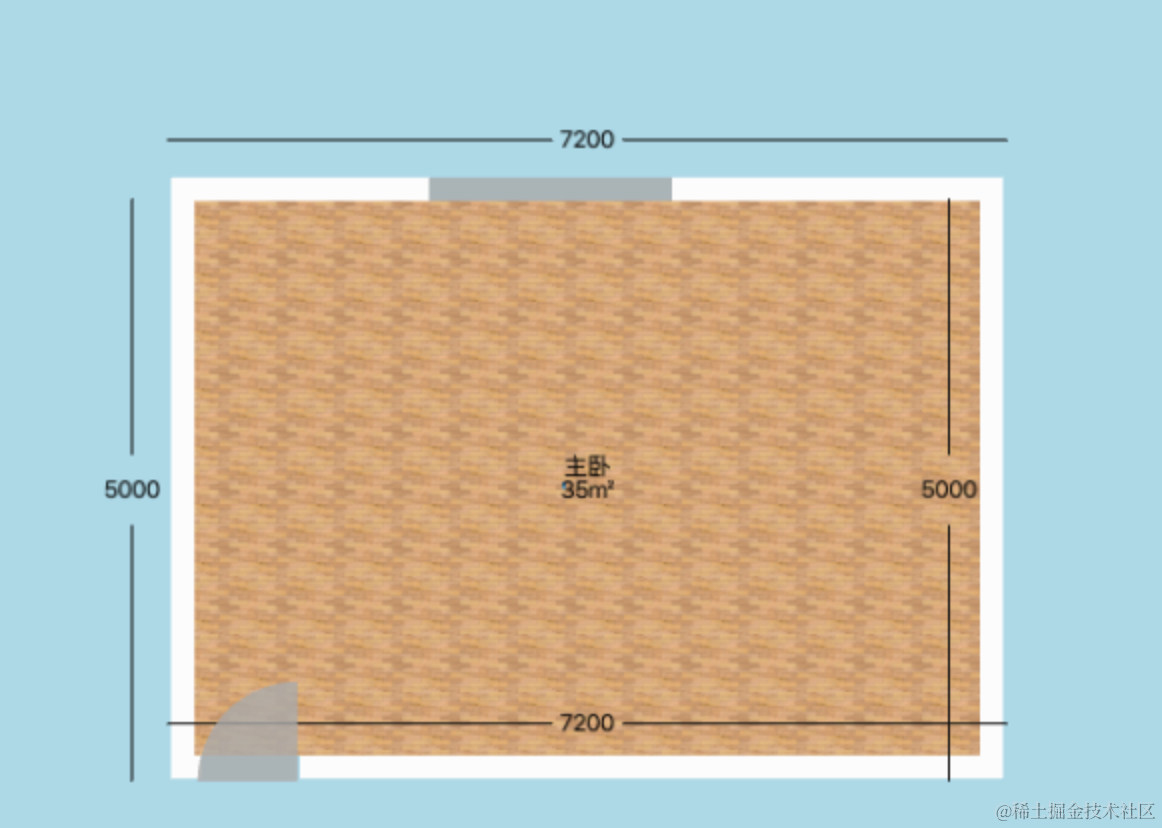
切换另一个户型看下:
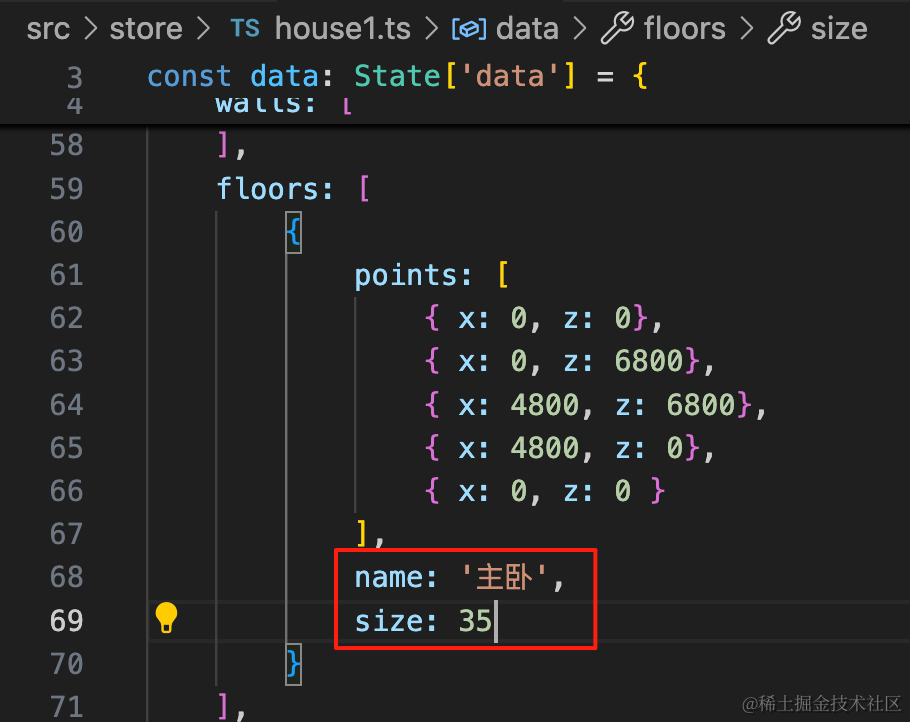
name: '主卧',
size: 35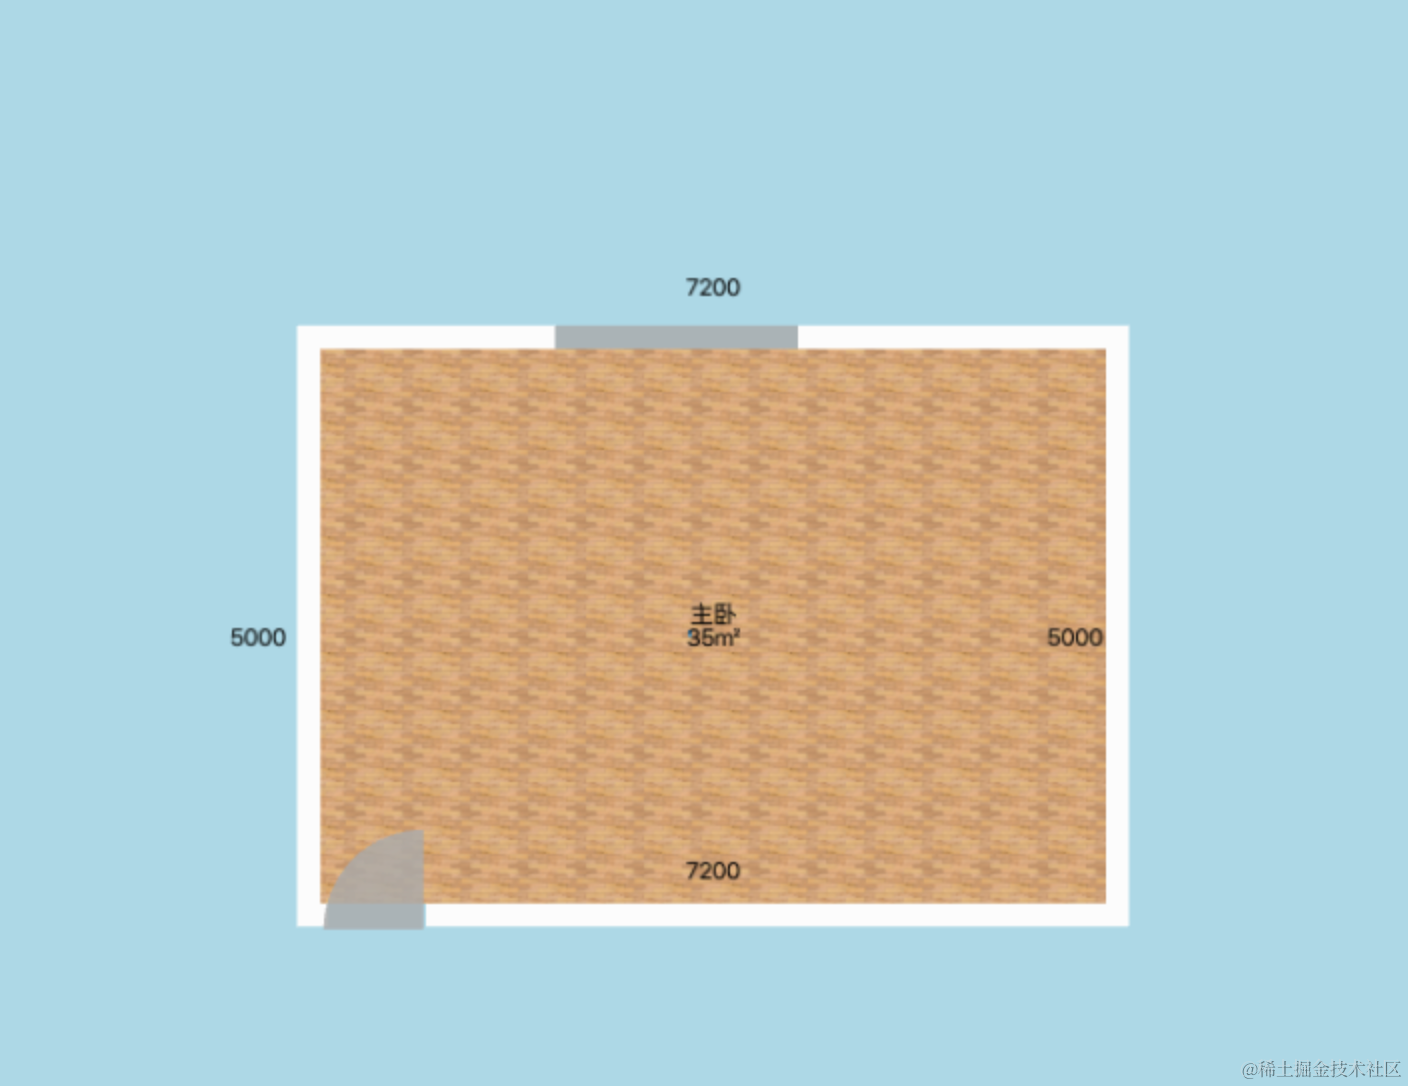
没啥问题。
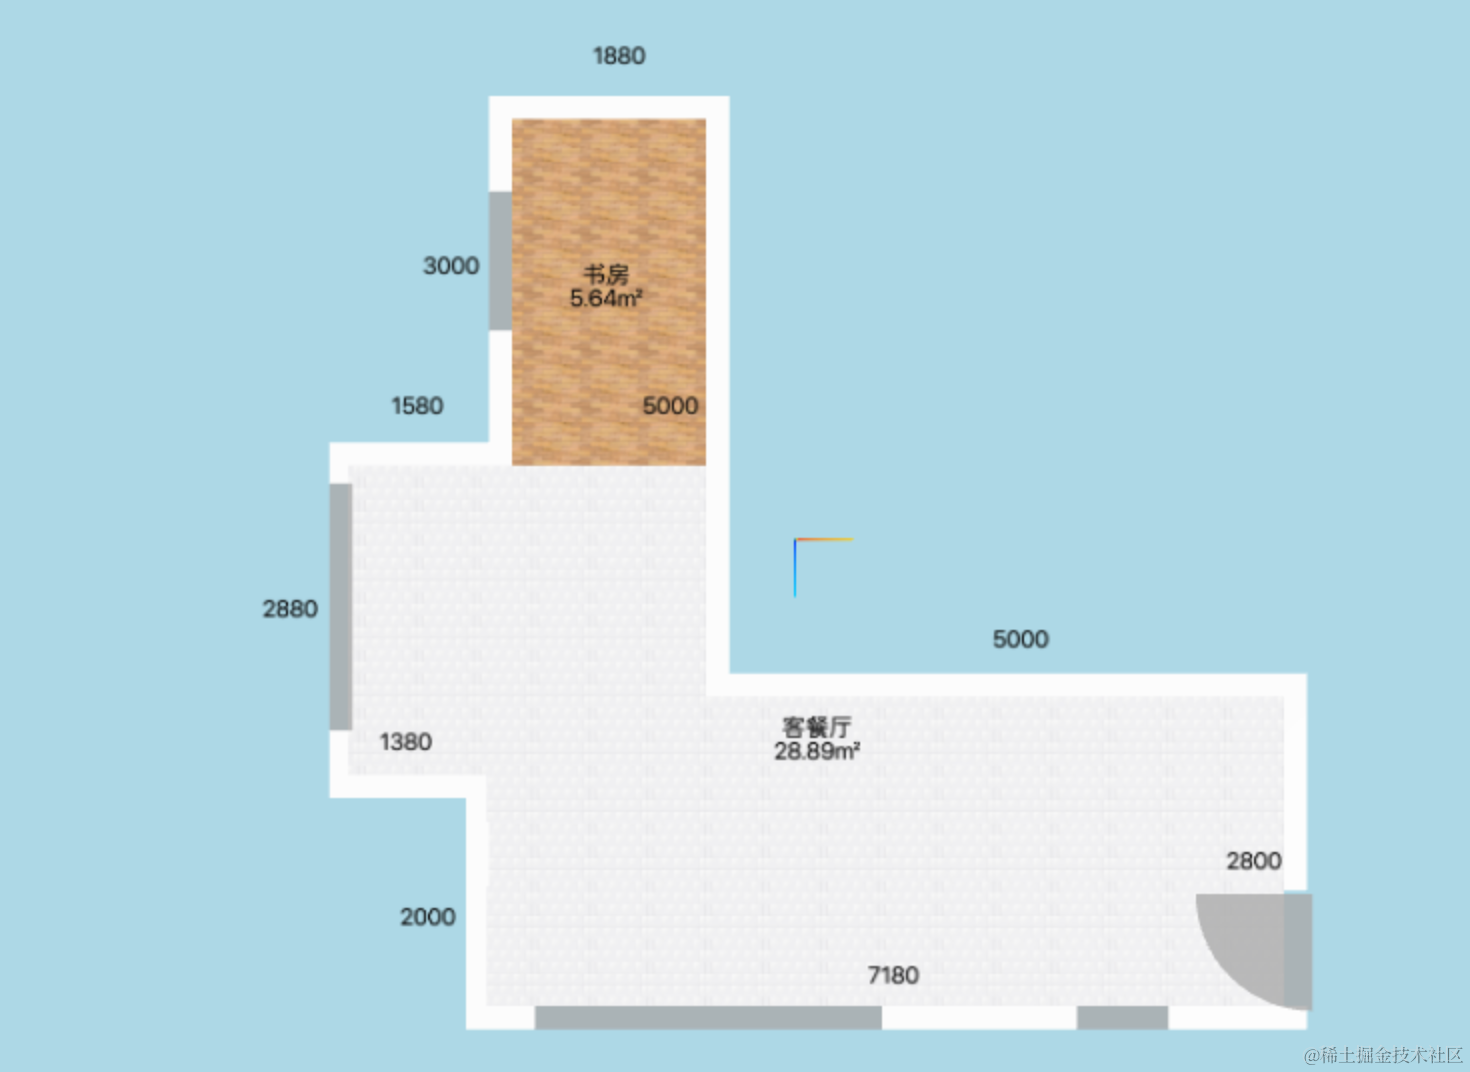
我们还可以加上一些线来表示尺寸标识的是哪:
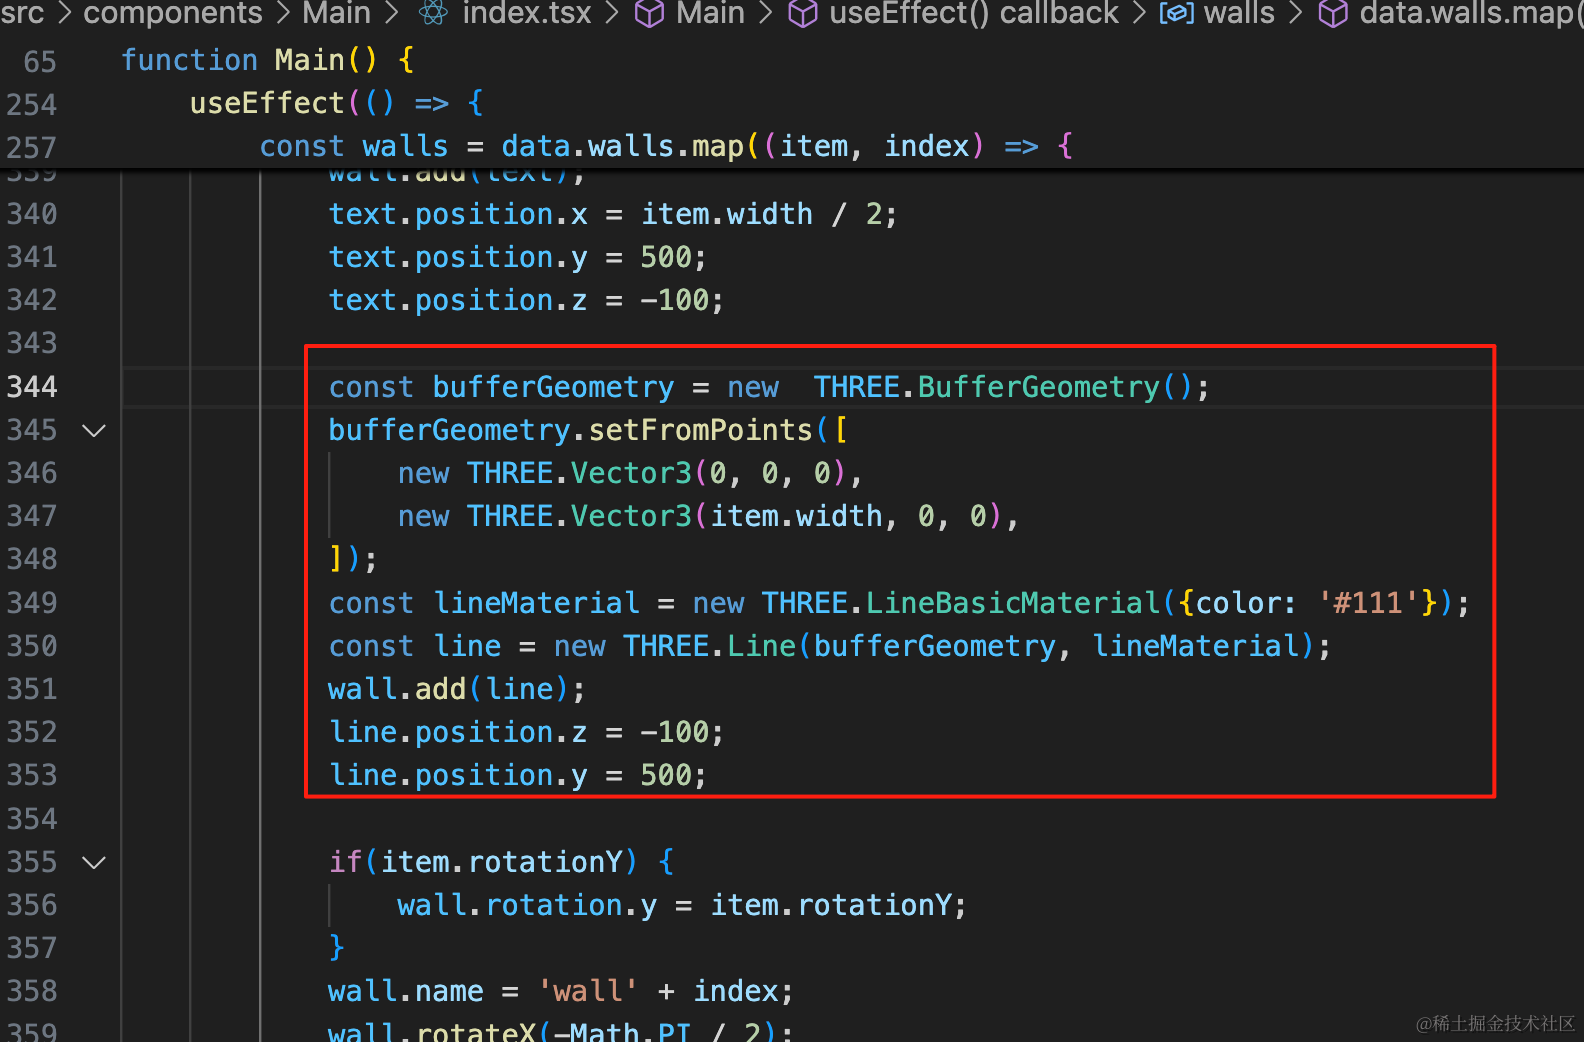
const bufferGeometry = new THREE.BufferGeometry();
bufferGeometry.setFromPoints([
new THREE.Vector3(0, 0, 0),
new THREE.Vector3(item.width, 0, 0),
]);
const lineMaterial = new THREE.LineBasicMaterial({color: '#111'});
const line = new THREE.Line(bufferGeometry, lineMaterial);
wall.add(line);
line.position.z = -100;
line.position.y = 500;用 Line 和 BufferGeometry 来画线,指定首尾两个点就可以了。
看下效果:
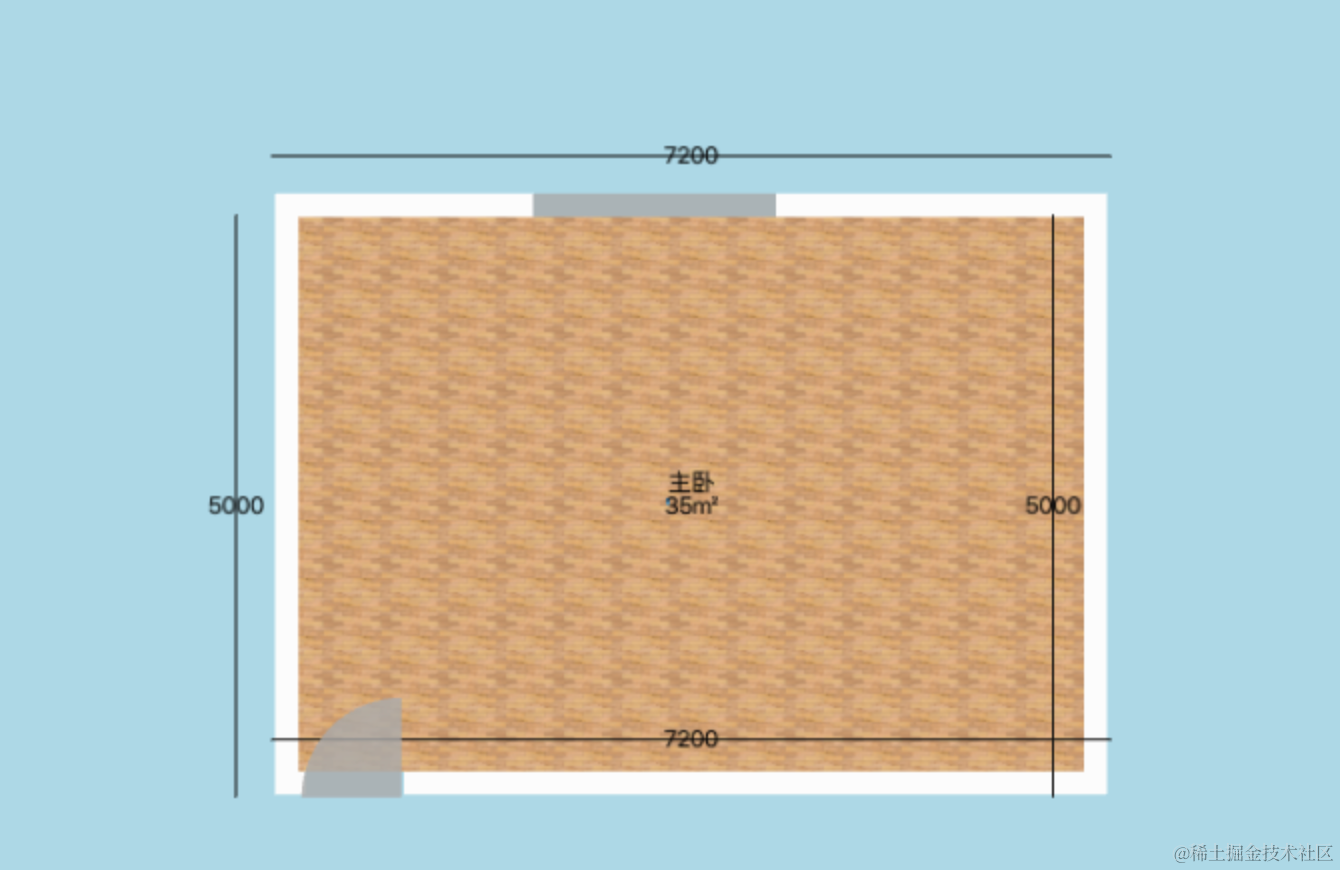
线是画对了,但我们不想让线穿过文字怎么办呢?
可以用线段 LineSegments:
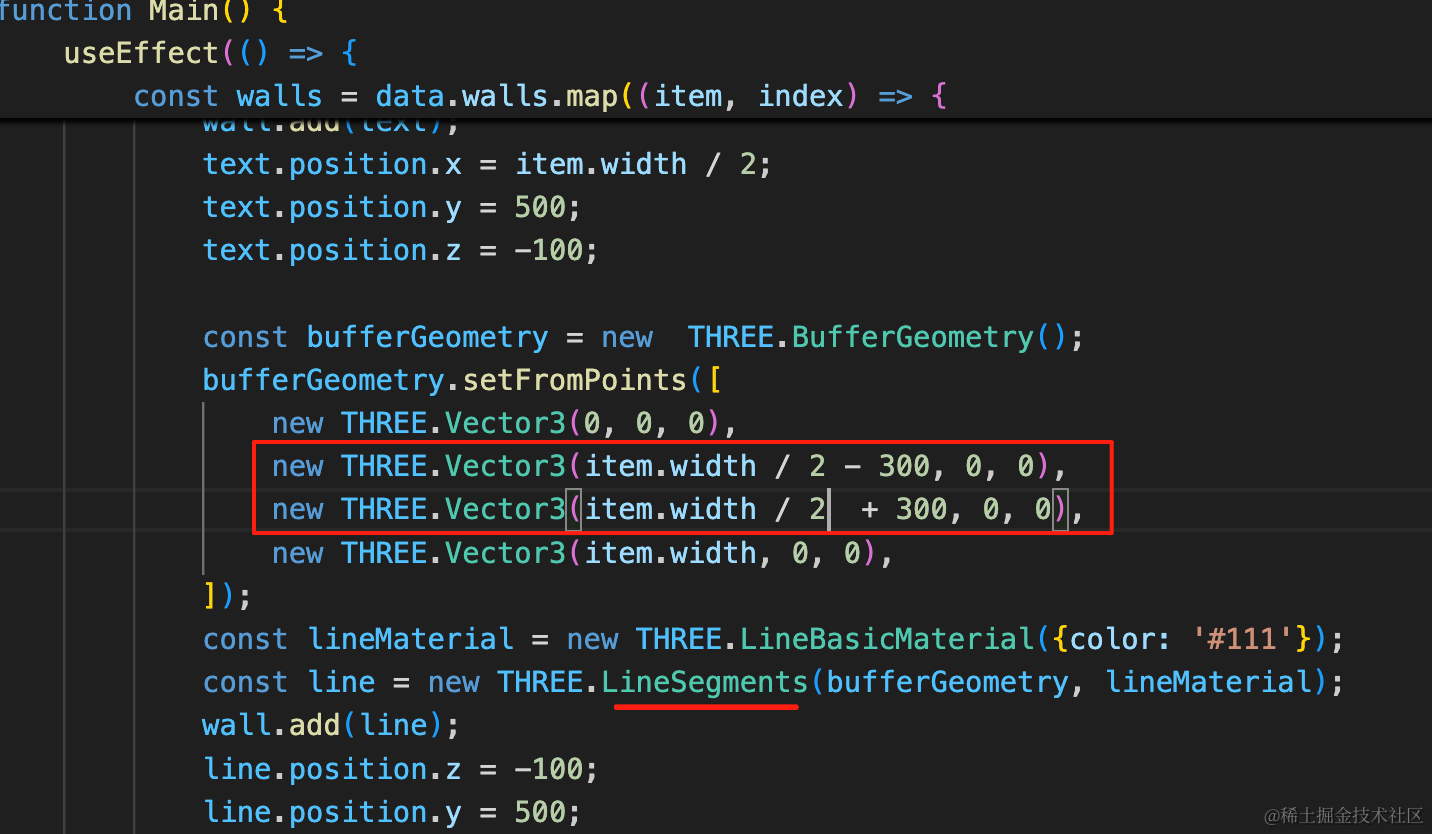
bufferGeometry.setFromPoints([
new THREE.Vector3(0, 0, 0),
new THREE.Vector3(item.width / 2 - 300, 0, 0),
new THREE.Vector3(item.width / 2 + 300, 0, 0),
new THREE.Vector3(item.width, 0, 0),
]);
const lineMaterial = new THREE.LineBasicMaterial({color: '#111'});
const line = new THREE.LineSegments(bufferGeometry, lineMaterial);LineSegments 是两两相连,我们中间加两个点。
这样就把文字的地方留出来了。
还可以在首尾加一条竖着的线:
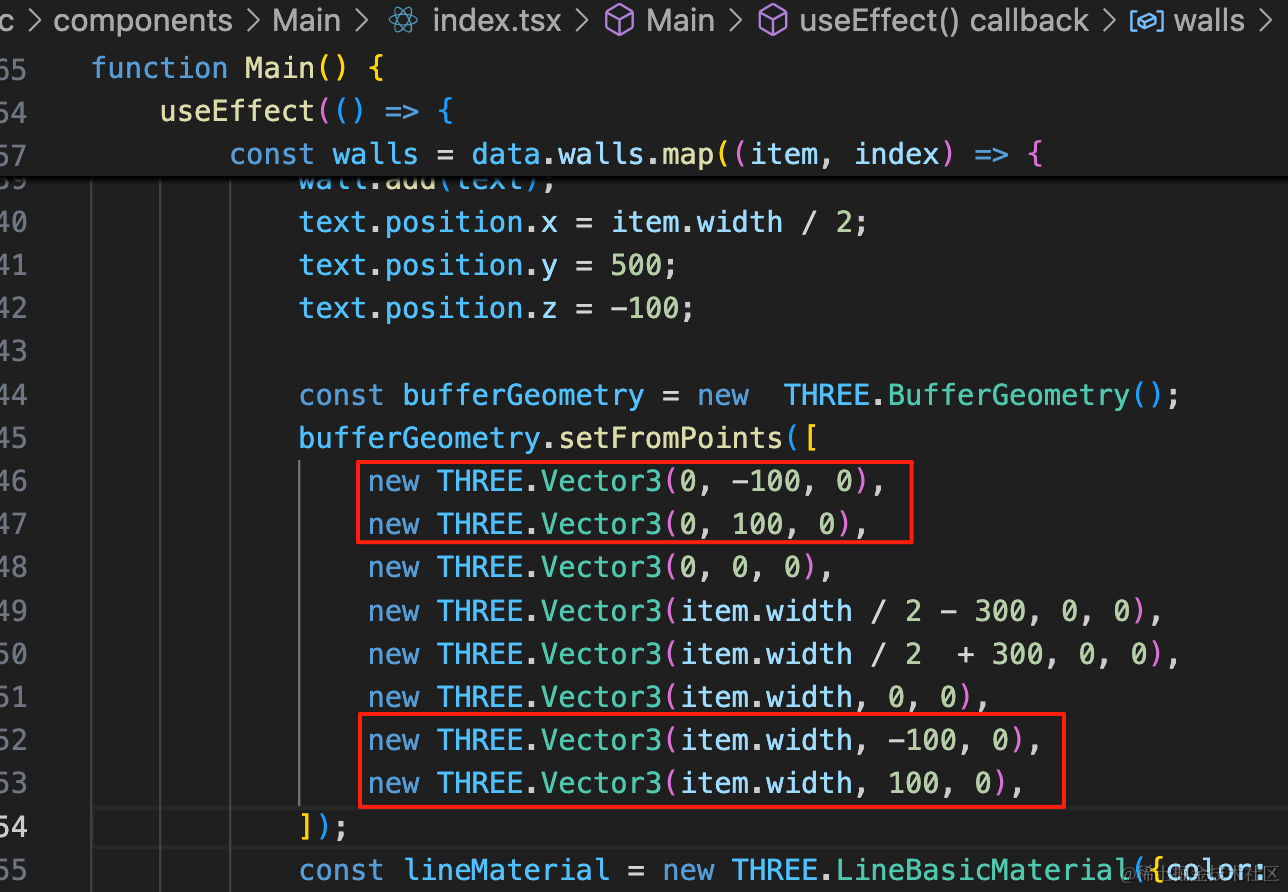
bufferGeometry.setFromPoints([
new THREE.Vector3(0, -100, 0),
new THREE.Vector3(0, 100, 0),
new THREE.Vector3(0, 0, 0),
new THREE.Vector3(item.width / 2 - 300, 0, 0),
new THREE.Vector3(item.width / 2 + 300, 0, 0),
new THREE.Vector3(item.width, 0, 0),
new THREE.Vector3(item.width, -100, 0),
new THREE.Vector3(item.width, 100, 0),
]);看下效果:
这样就好多了。
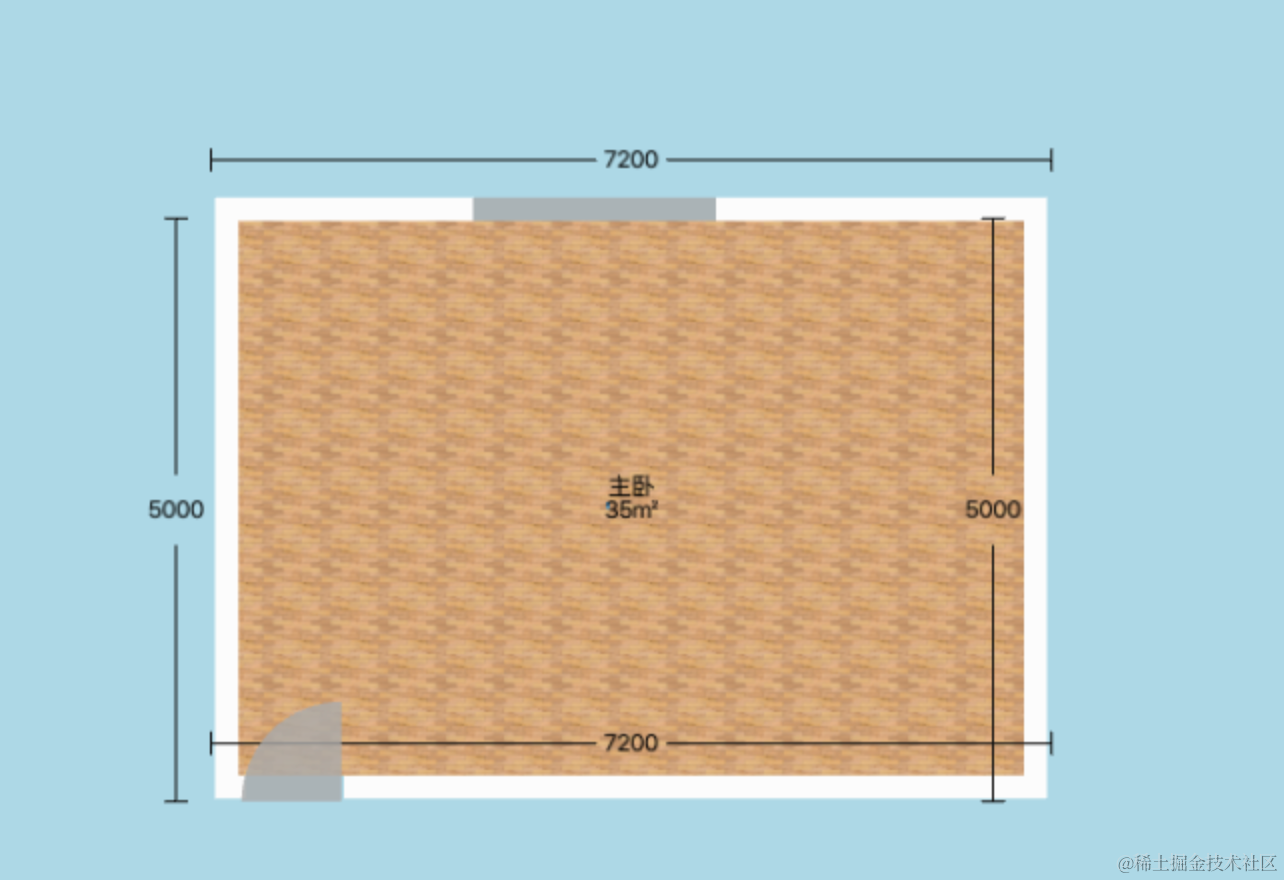
不过这俩标注在地板上了:
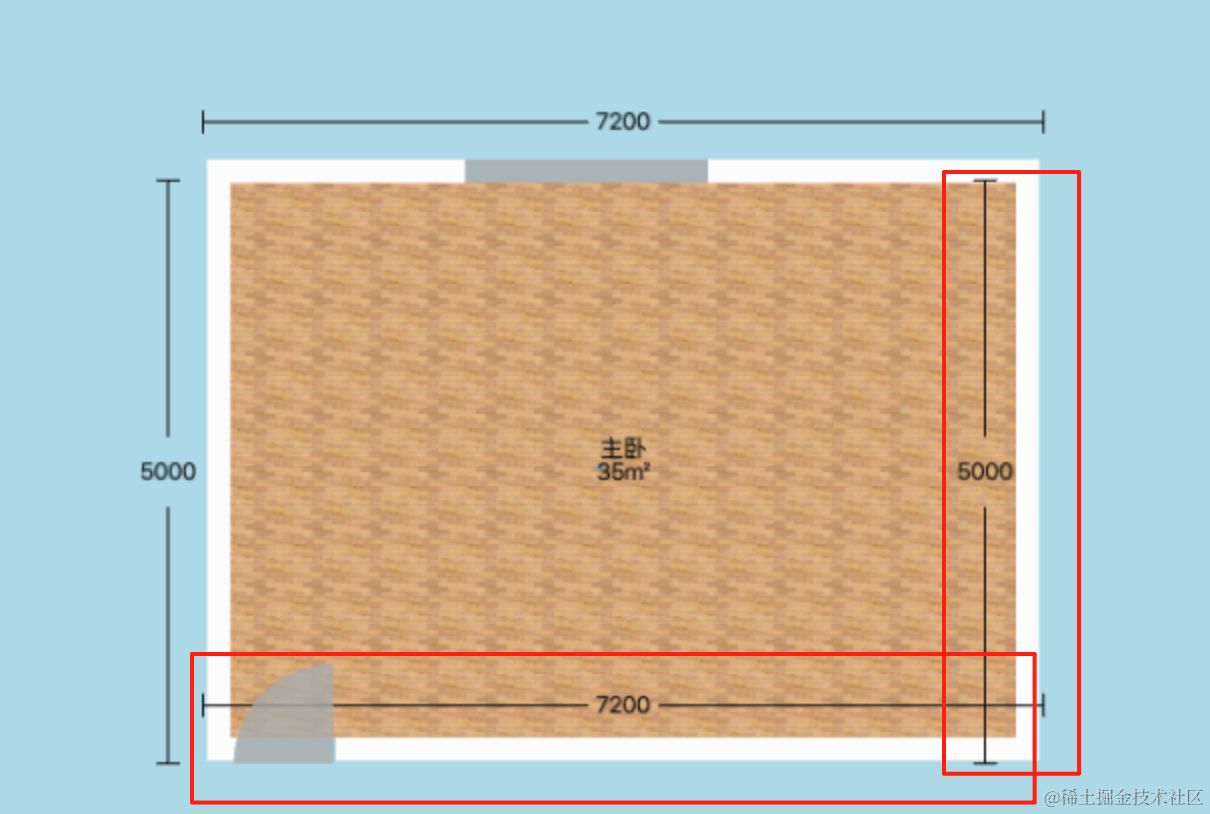
这个调整下墙的旋转角度就好了:
比如第一面墙:
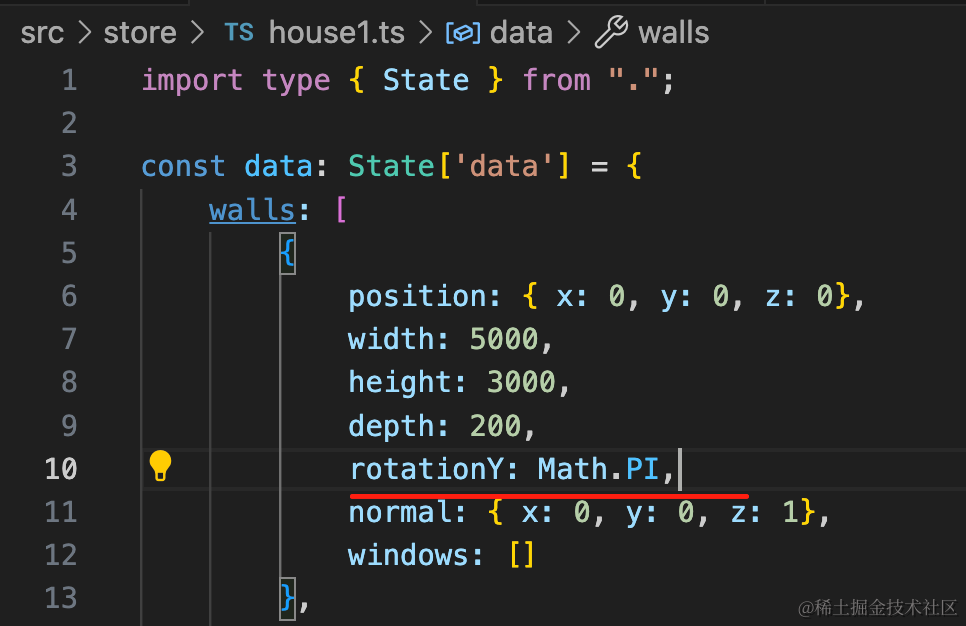
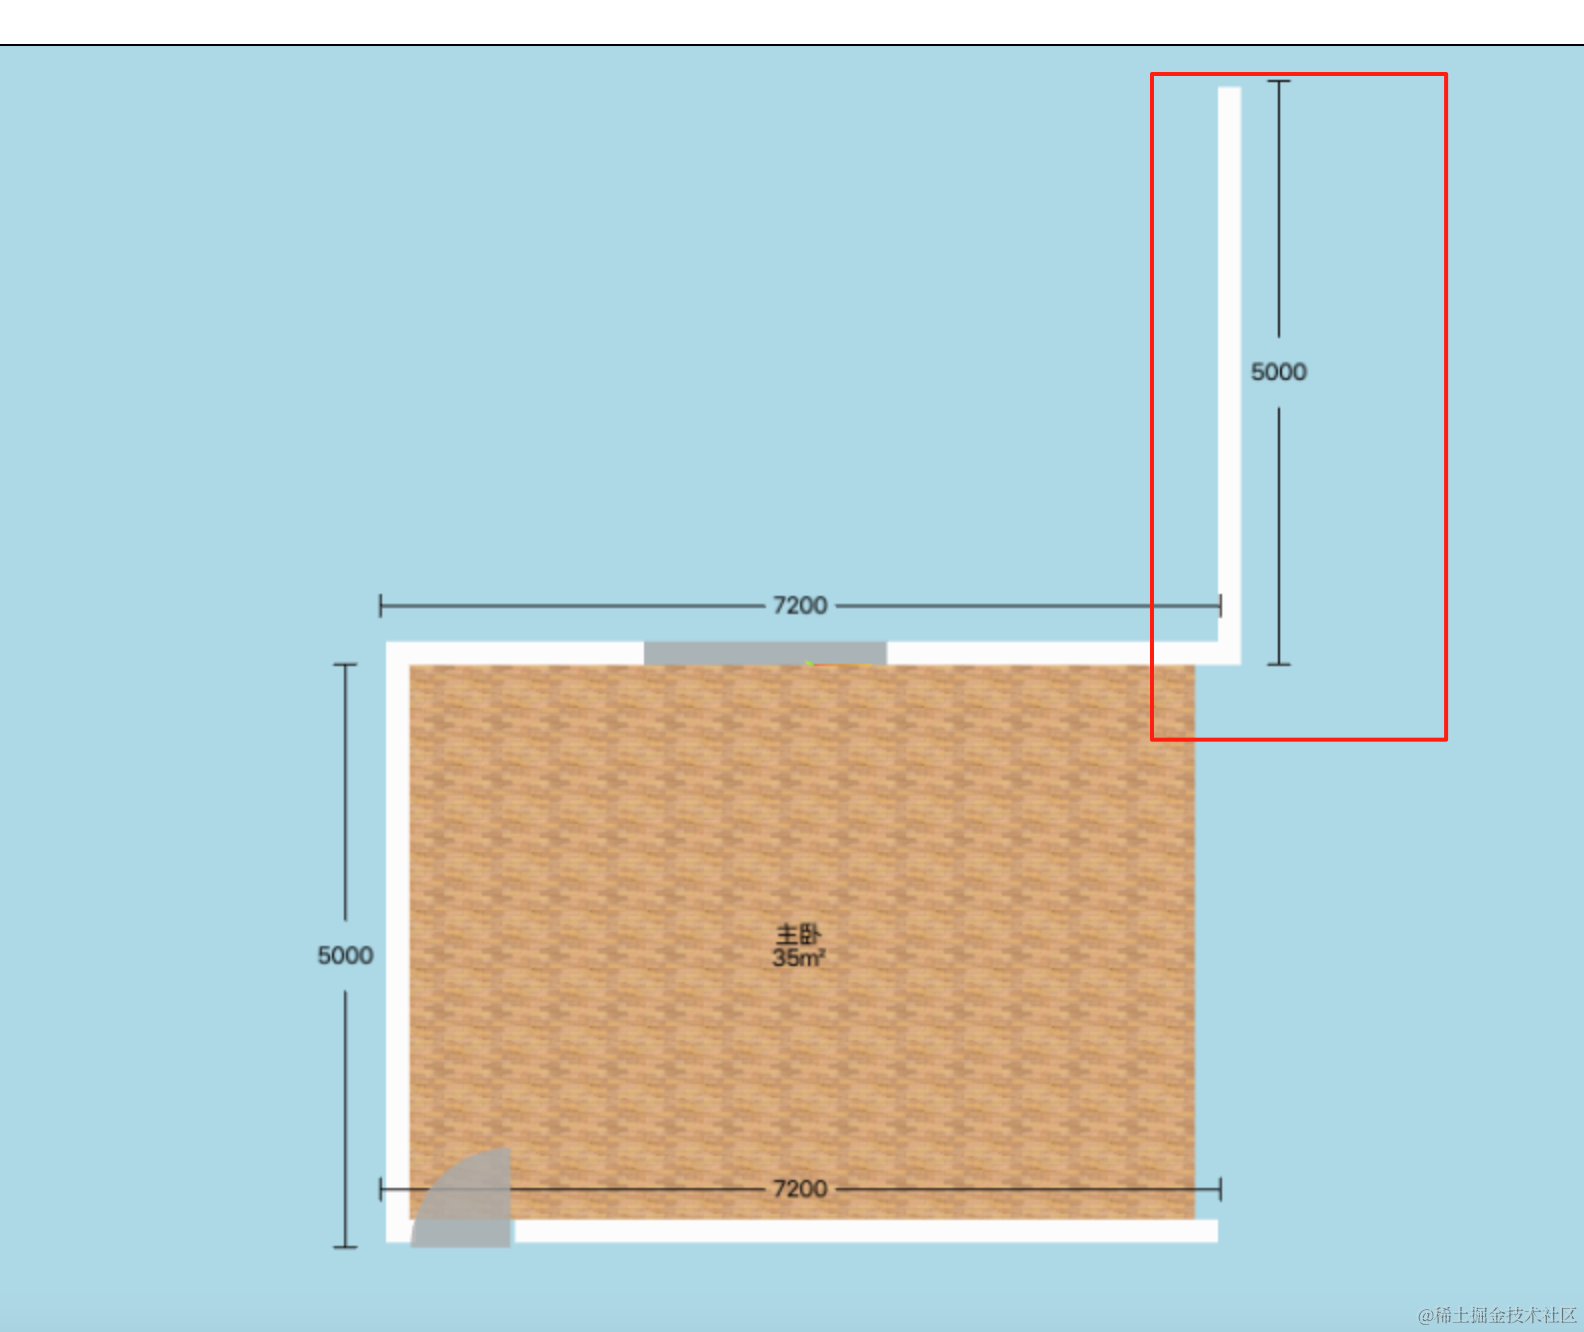
这样方向就对了。
不过位置得调一下:
import type { State } from ".";
const data: State['data'] = {
walls: [
{
position: { x: 5000, y: 0, z: 200},
width: 5000,
height:3000,
depth: 200,
rotationY: Math.PI,
normal: { x: 0, y: 0, z: 1},
windows: []
},
{
position: { x: 0, y: 0, z: 7000},
width: 5000,
height: 3000,
depth: 200,
normal: { x: 0, y: 0, z: -1},
windows: []
},
{
position: { x: 0, y: 0, z: 0},
width: 7200,
height: 3000,
depth: 200,
rotationY: -Math.PI / 2,
normal: { x: 1, y: 0, z: 0},
windows: [
{
leftBottomPosition: {
left: 2867,
bottom: 900
},
width: 2100,
height: 1620
}
]
},
{
position: { x: 4800, y: 0, z: 7000},
width: 7000,
height: 3000,
depth: 200,
rotationY: Math.PI / 2,
normal: { x: -1, y: 0, z: 0},
windows: [],
doors: [
{
leftBottomPosition: {
left: 6084,
bottom: 0
},
width: 856,
height: 2152
}
]
},
],
floors: [
{
points: [
{ x: 0, z: 0},
{ x: 0, z: 6800},
{ x: 4800, z: 6800},
{ x: 4800, z: 0},
{ x: 0, z: 0 }
],
name: '主卧',
size: 35
}
],
ceilings: [
{
points: [
{ x: 0, z: 0},
{ x: 0, z: 7000},
{ x: 5000, z: 7000},
{ x: 5000, z: 0},
{ x: 0, z: 0 }
],
height: 3000
}
]
};
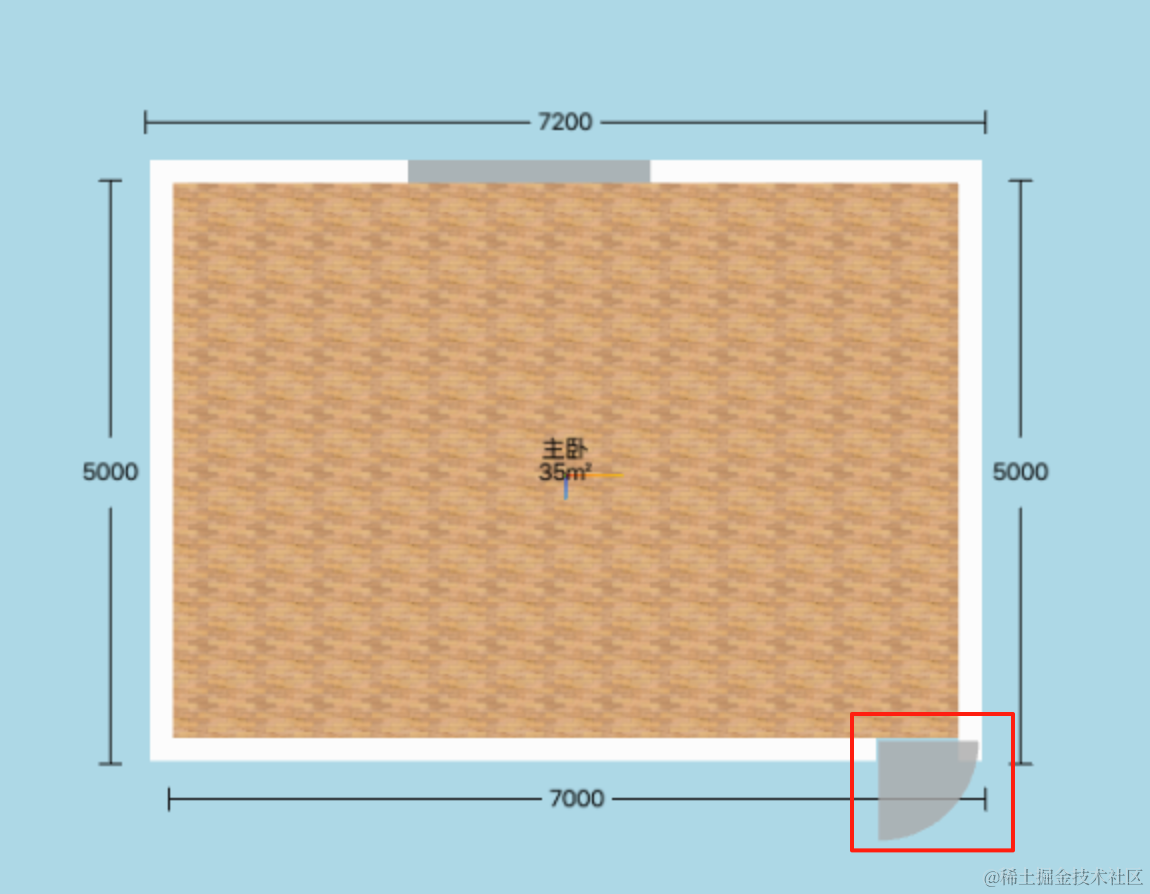
export default data;我们统一改了一下数据。
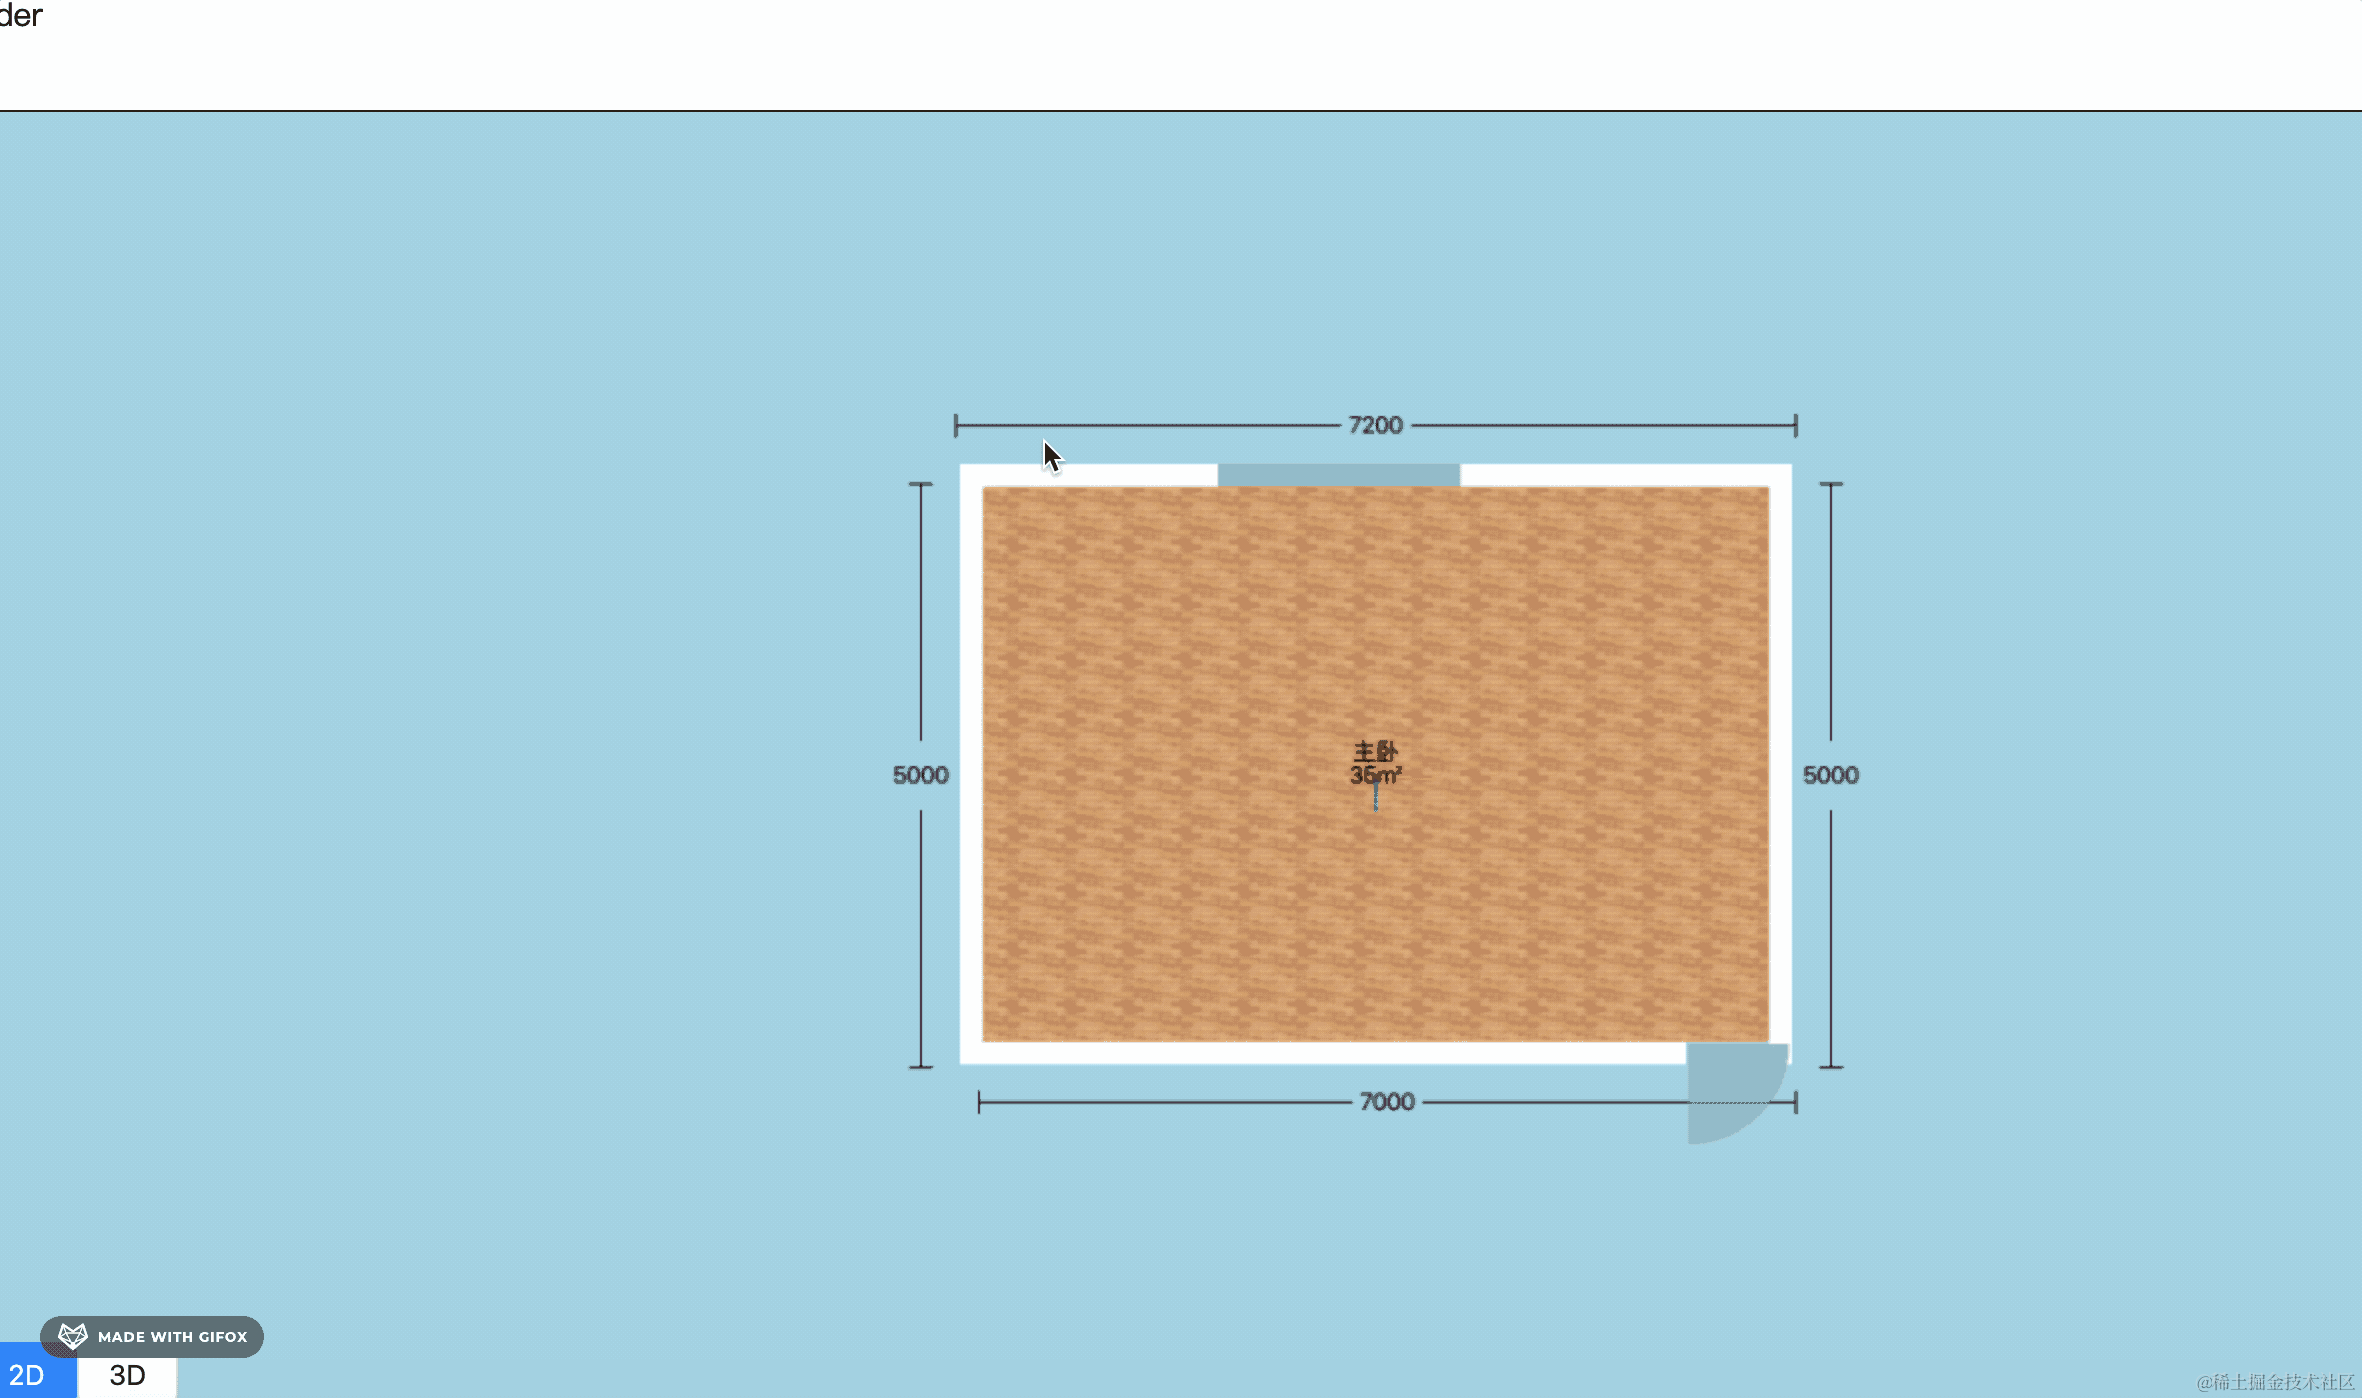
现在就对了。
不过这里反过来了,再旋转下:
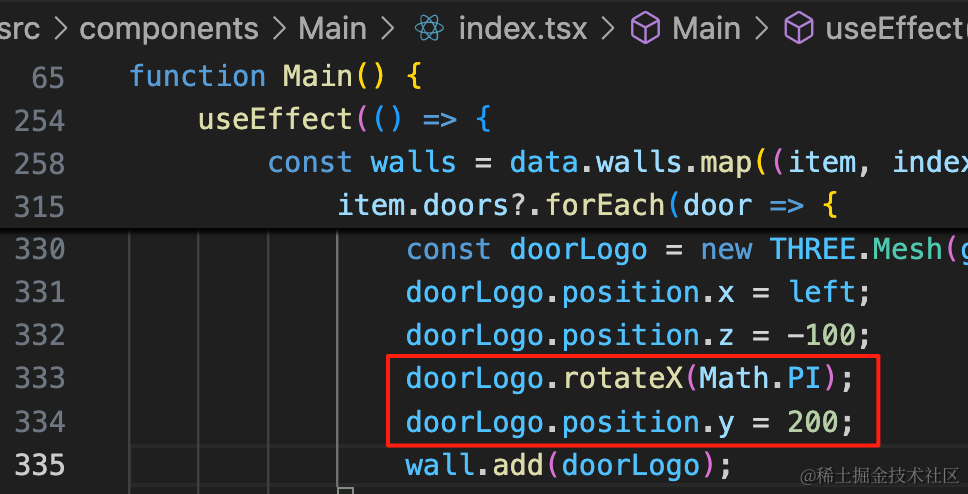
doorLogo.rotateX(Math.PI);
doorLogo.position.y = 200;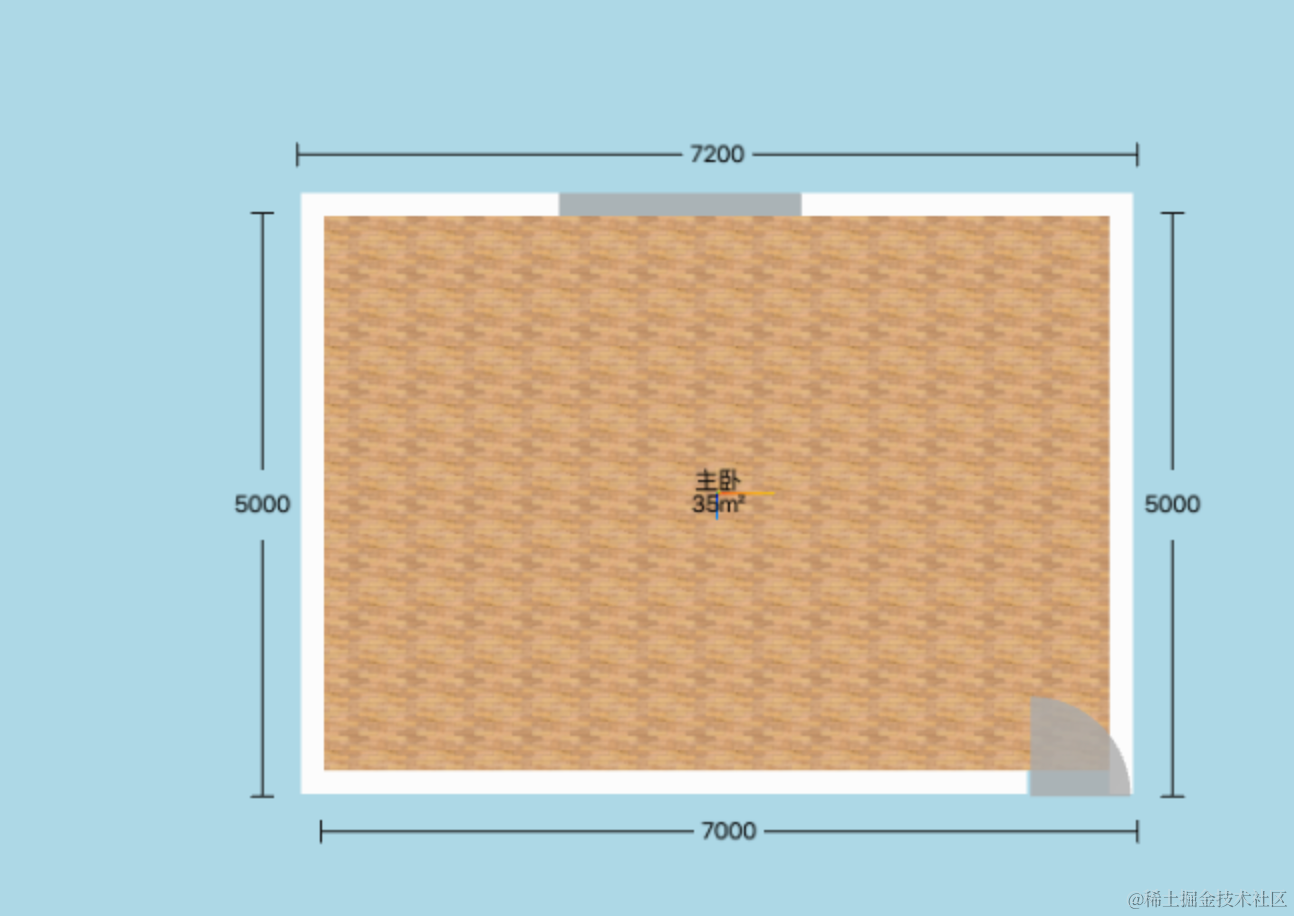
另一个户型的数据也得同样改一下:
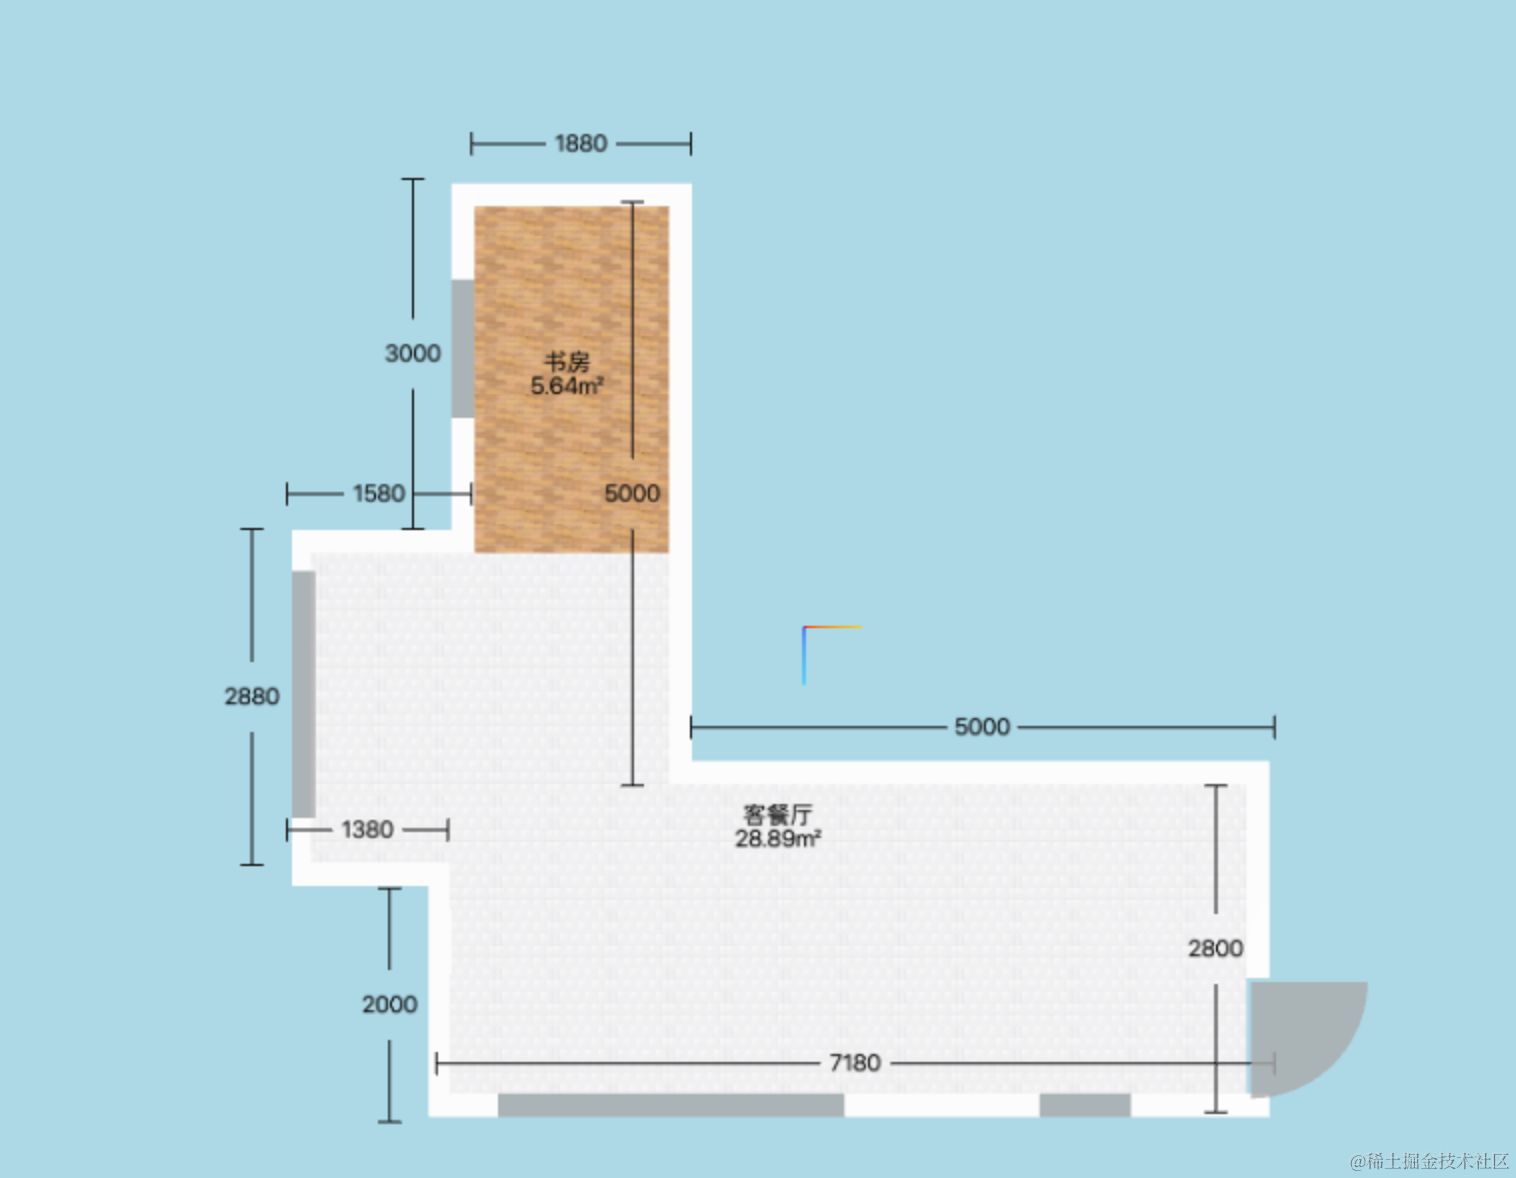
现在也是很多墙是反的。
调整好的数据是这样的:
import type { State } from ".";
const data: State['data'] = {
walls: [
{
position: { x: 2800, y: 0, z: 200},
width: 2800,
height: 3000,
depth: 200,
windows: [],
rotationY: Math.PI,
normal: { x: 0, y: 0, z: 1},
doors: [
{
leftBottomPosition: {
left: 1680,
bottom: 0
},
width: 1000,
height: 2000
}
]
},
{
position: { x: 0, y: 0, z: 0},
width: 5000,
height: 3000,
depth: 200,
normal: { x: 1, y: 0, z: 0},
rotationY: -Math.PI / 2,
windows: []
},
{
position: { x: 0, y: 0, z: 5200},
width: 5000,
height: 3000,
depth: 200,
rotationY: Math.PI,
normal: { x: 0, y: 0, z: 1},
windows: []
},
{
position: { x: -5000, y: 0, z: 5000},
width: 1880,
height: 3000,
depth: 200,
normal: { x: 1, y: 0, z: 0},
rotationY: -Math.PI / 2,
windows: []
},
{
position: { x: -5200, y: 0, z: 6880},
width: 3000,
height: 3000,
depth: 200,
normal: { x: 0, y: 0, z: -1},
windows: [
{
leftBottomPosition: {
left: 830,
bottom: 900
},
width: 1200,
height: 1400
},
]
},
{
position: { x: -2000, y: 0, z: 6880},
width: 1580,
height: 3000,
depth: 200,
rotationY: -Math.PI / 2,
normal: { x: 1, y: 0, z: 0},
windows: []
},
{
position: { x: -2200, y: 0, z: 8260},
width: 2880,
height: 3000,
depth: 200,
normal: { x: 0, y: 0, z: -1},
windows: [
{
leftBottomPosition: {
left: 355,
bottom: 0
},
width: 2140,
height: 2400
},
]
},
{
position: { x: 680, y: 0, z: 8480},
width: 1380,
height: 3000,
depth: 200,
rotationY: Math.PI / 2,
normal: { x: -1, y: 0, z: 0},
windows: []
},
{
position: { x: 880, y: 0, z: 7080},
width: 2000,
height: 3000,
depth: 200,
normal: { x: 0, y: 0, z: -1},
windows: []
},
{
position: { x: 2680, y: 0, z: 7080},
width: 7100,
height: 3000,
depth: 200,
rotationY: Math.PI / 2,
normal: { x: -1, y: 0, z: 0},
windows: [
{
leftBottomPosition: {
left: 1200,
bottom: 900
},
width: 790,
height: 1400
},
{
leftBottomPosition: {
left: 3680,
bottom: 900
},
width: 3000,
height: 1400
}
]
},
],
floors: [
{
points: [
{ x: -2000, z: 5000},
{ x: -5000, z: 5000},
{ x: -5000, z: 6680},
{ x: -2000, z: 6680},
{ x: -2000, z: 5000},
],
name: '书房',
size: 5.64
},
{
points: [
{ x: 0, z: 0},
{ x: 2680, z: 0},
{ x: 2680, z: 6900},
{ x: 680, z: 6900},
{ x: 680, z: 8050},
{ x: -2000, z: 8050},
{ x: -2000, z: 6680},
{ x: -2000, z: 5000},
{ x: -2000, z: 5000},
{ x: 0, z: 5000},
{ x: 0, z: 0},
],
textureUrl: './floor-texture2.png',
name: '客餐厅',
size: 28.89
}
],
ceilings: [
{
points: [
{ x: -2000, z: 5200},
{ x: -5000, z: 5200},
{ x: -5000, z: 7000},
{ x: -2000, z: 7000},
{ x: -2000, z: 5200},
],
height: 3000
},
{
points: [
{ x: 0, z: 0},
{ x: 2880, z: 0},
{ x: 2880, z: 7180},
{ x: 880, z: 7180},
{ x: 880, z: 8380},
{ x: -2000, z: 8380},
{ x: -2000, z: 6880},
{ x: -2000, z: 5000},
{ x: -2000, z: 5000},
{ x: 0, z: 5000},
{ x: 0, z: 0},
],
height: 3000
}
]
};
export default data;看下效果:
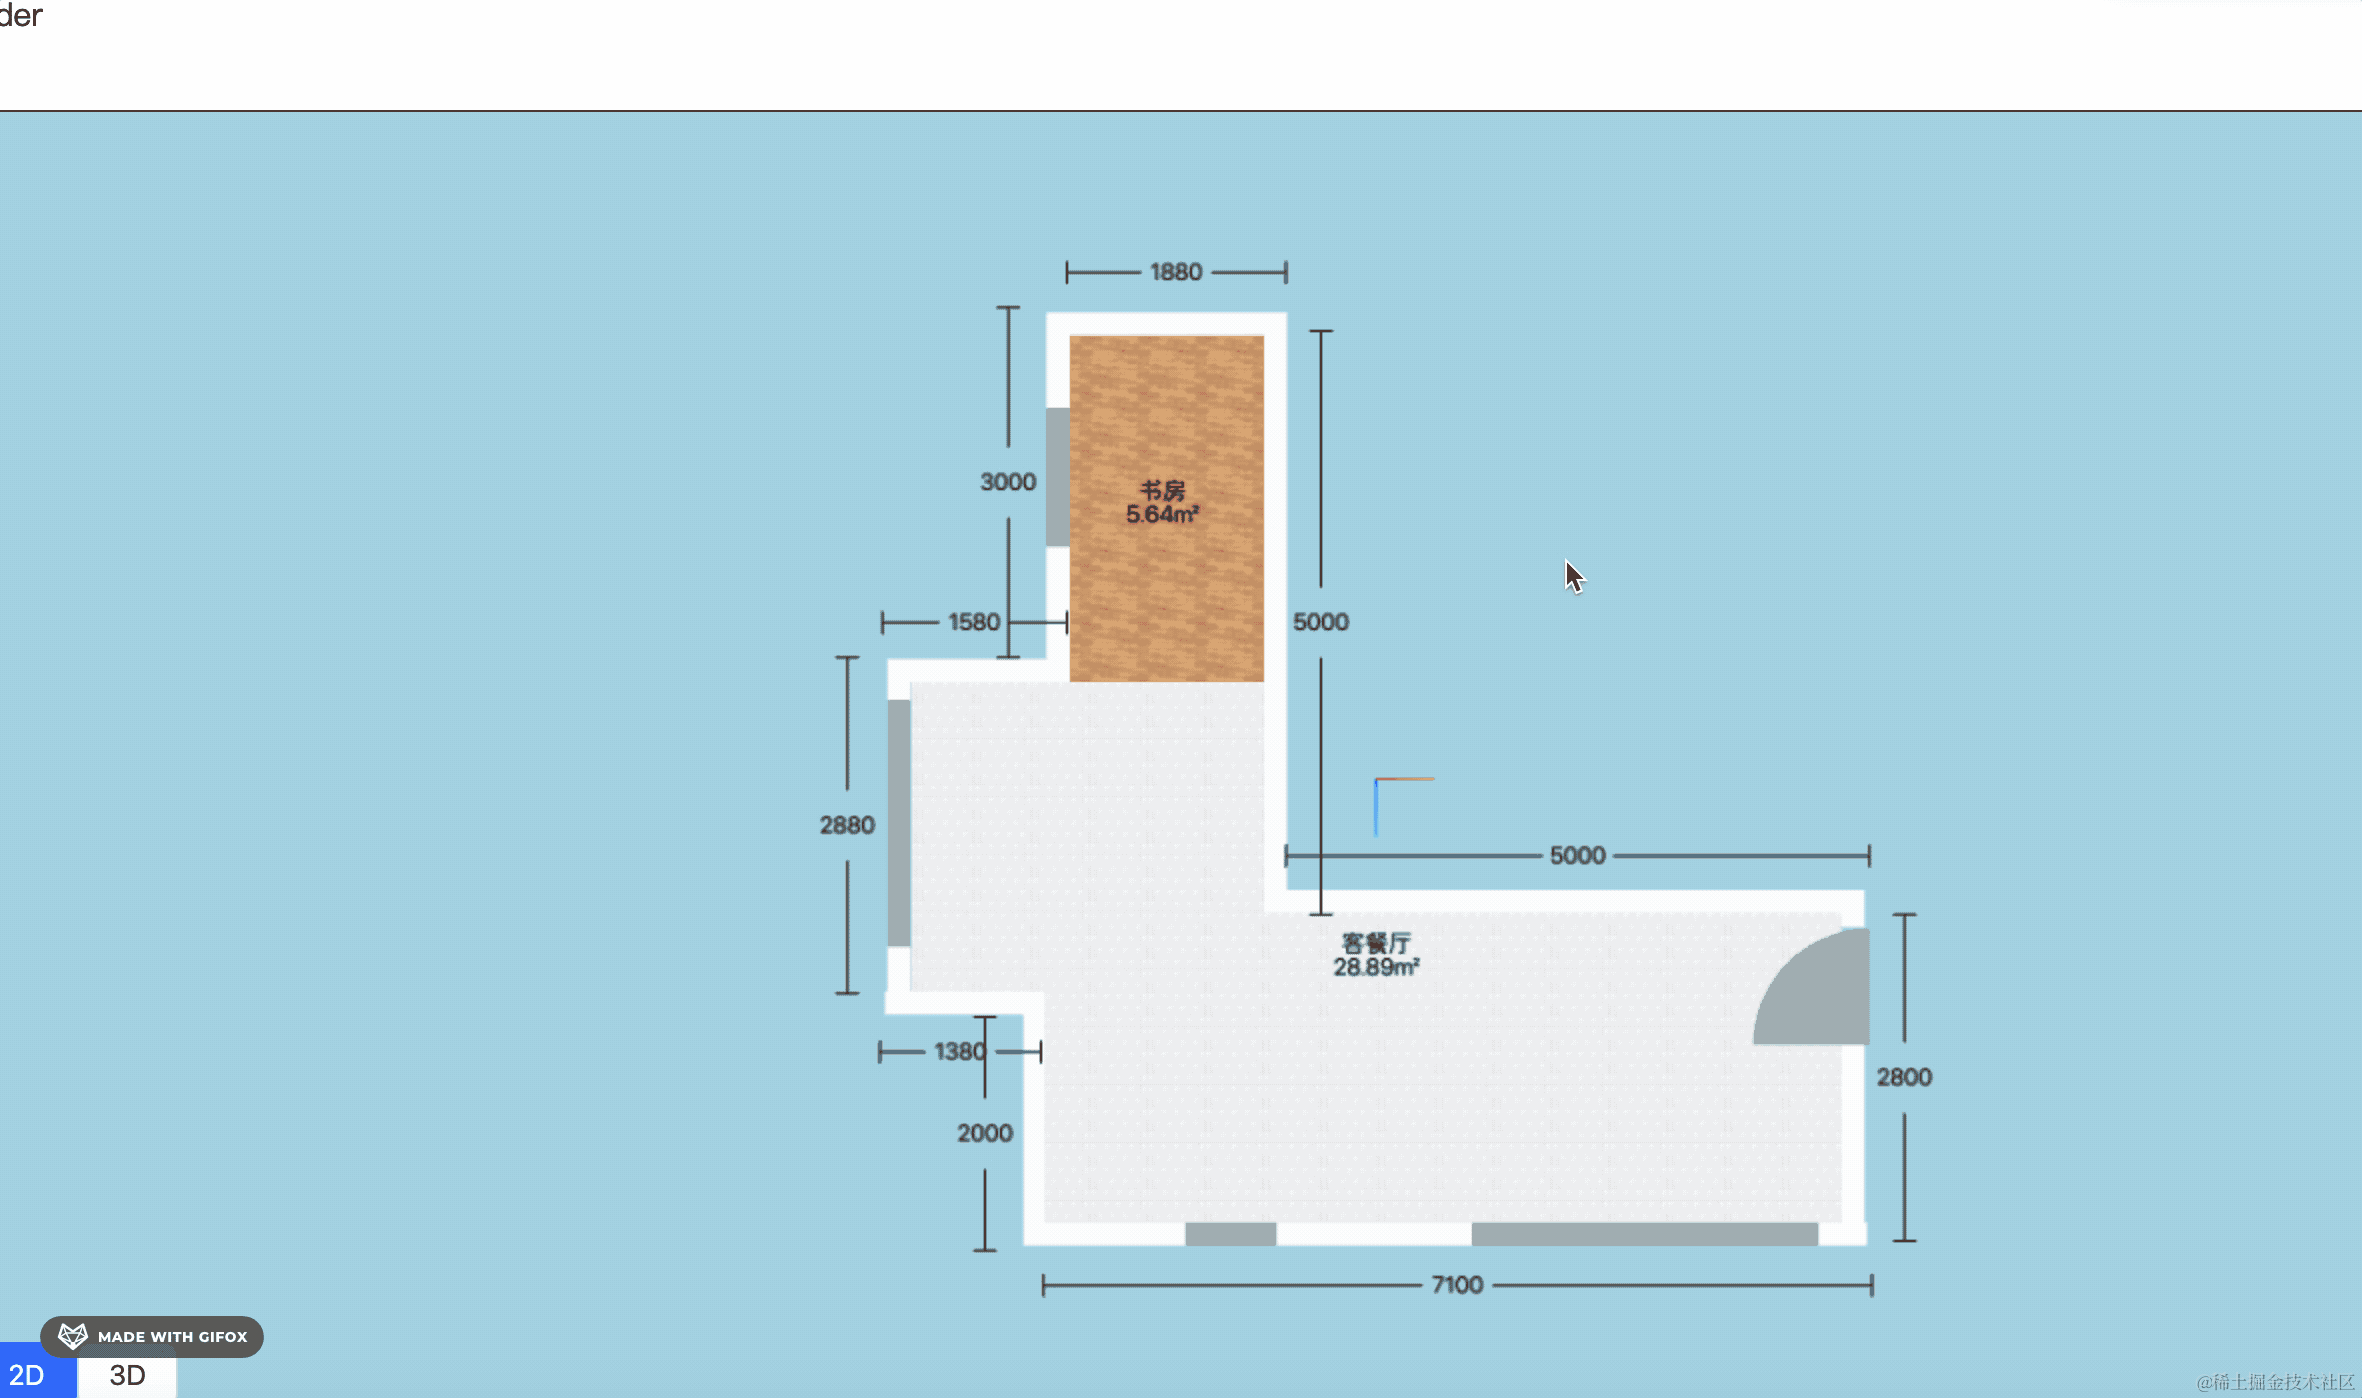
这样,尺寸标注功能就完成了。
案例代码上传了小册仓库
总结
这节我们加上了尺寸标注功能。
首先是房间的标注,我们把数据存在地板数据上,用包围盒计算地板的中心位置,然后用 SpriteText 加文字。
尺寸的标注是加在墙上,并且我们用线段 LineSegments 加了尺寸范围的标明。
不过有的墙是反着的,导致标注的位置也是反着,我们统一修改了下数据,把墙都翻转朝向外面了。
标注完成后,下节我们开始做户型切换、家具导入。