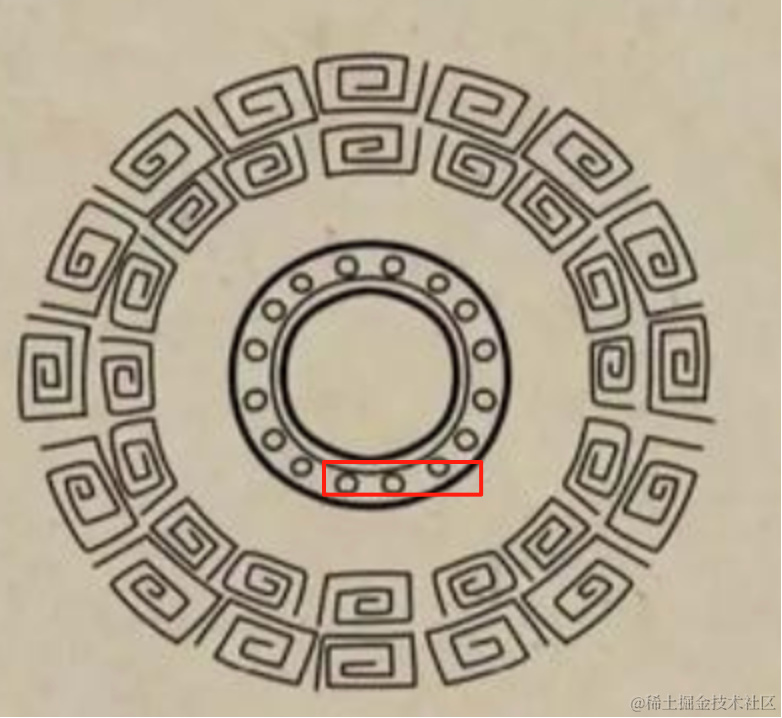
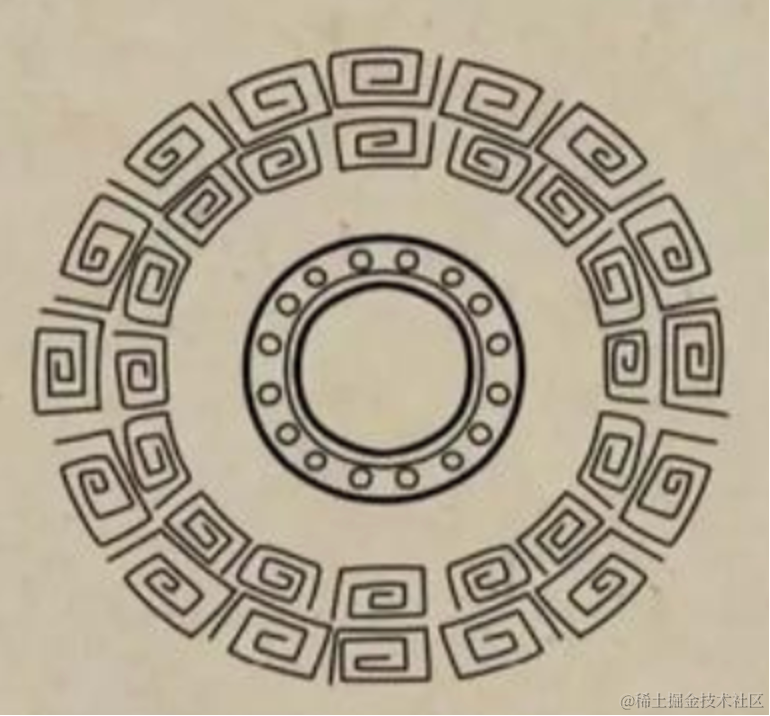
记得小学的时候考完试,离交卷还早,我就会在草稿纸上乱花一些花纹。
一圈一圈的,比如这样:
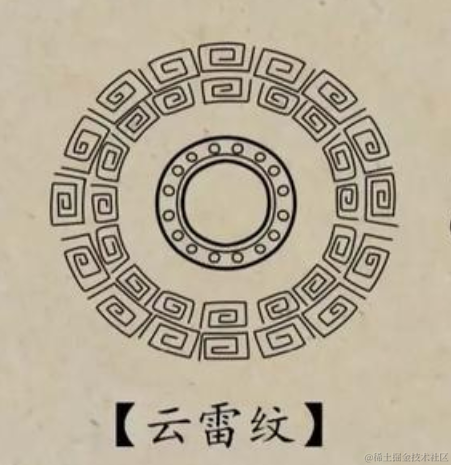
而在 3D 场景中,这种花纹也有很重要的装饰作用,比如一些大屏的背景装饰:

学完画曲线的 API 之后,我们就可以来画这些花纹了。
创建 vite 项目:
npx create-vite cloudscape-figure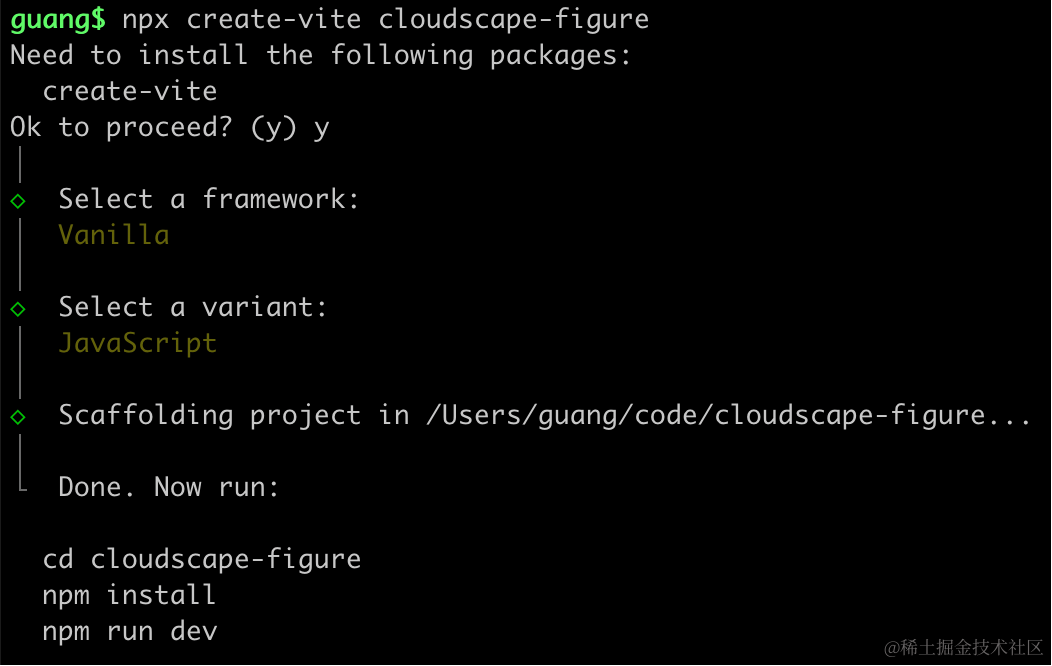
选择创建不用框架的 js 项目。
进入项目,安装依赖:
pnpm install
pnpm install --save three
pnpm install --save-dev @types/three
改下 src/main.js
import './style.css';
import * as THREE from 'three';
import {
    OrbitControls
} from 'three/addons/controls/OrbitControls.js';
import mesh from './mesh.js';

const scene = new THREE.Scene();

scene.add(mesh);

const light = new THREE.DirectionalLight(0xffffff);
light.position.set(500, 300, 600);
scene.add(light);

const light2 = new THREE.AmbientLight();
scene.add(light2);

const axesHelper = new THREE.AxesHelper(1000);
scene.add(axesHelper);

const width = window.innerWidth;
const height = window.innerHeight;

const camera = new THREE.PerspectiveCamera(60, width / height, 1, 10000);
camera.position.set(0, 200, 600);
camera.lookAt(0, 0, 0);

const renderer = new THREE.WebGLRenderer({
  antialias: true
});
renderer.setSize(width, height)

function render() {
    renderer.render(scene, camera);
    requestAnimationFrame(render);
}

render();

document.body.append(renderer.domElement);

const controls = new OrbitControls(camera, renderer.domElement);
创建 Scene、Light、Camera、Renderer
改下 style.css
body {
    margin: 0;
}
然后创建 mesh.js
import * as THREE from 'three';

const arc = new THREE.EllipseCurve(0, 0, 300 , 300, 0, Math.PI * 2);

const pointsArr = arc.getPoints(50);
const geometry = new THREE.BufferGeometry();
geometry.setFromPoints(pointsArr);

const material = new THREE.LineBasicMaterial({
    color: new THREE.Color('pink')
});

const line = new THREE.Line(geometry, material);

export default line;
这里用 BufferGeometry + Line 画了一条圆的曲线。
跑一下:
npm run dev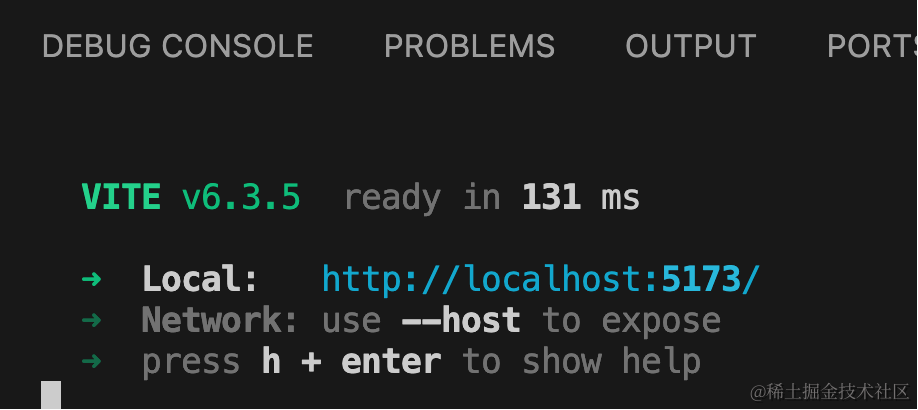
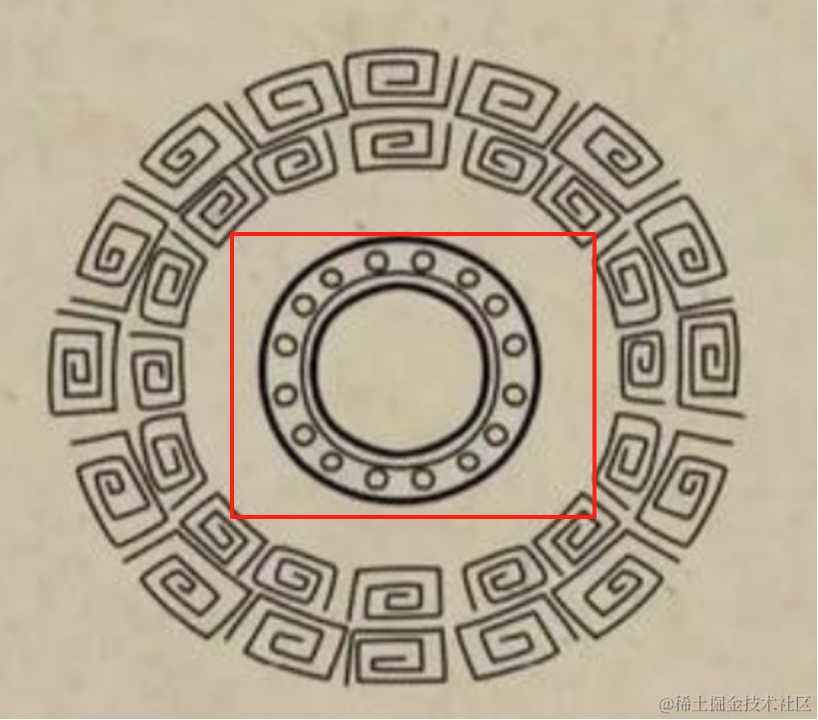
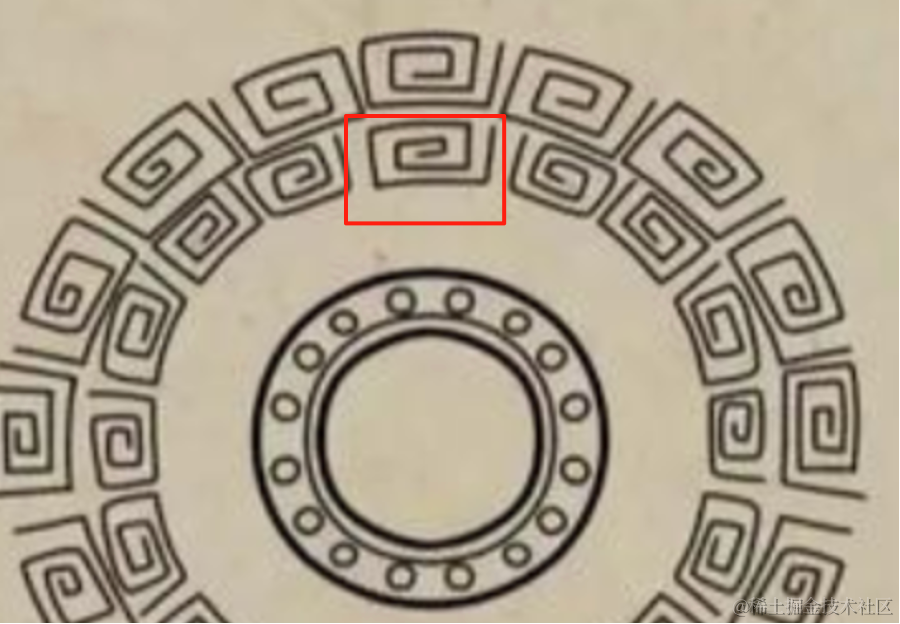
然后看下这个云雷纹:
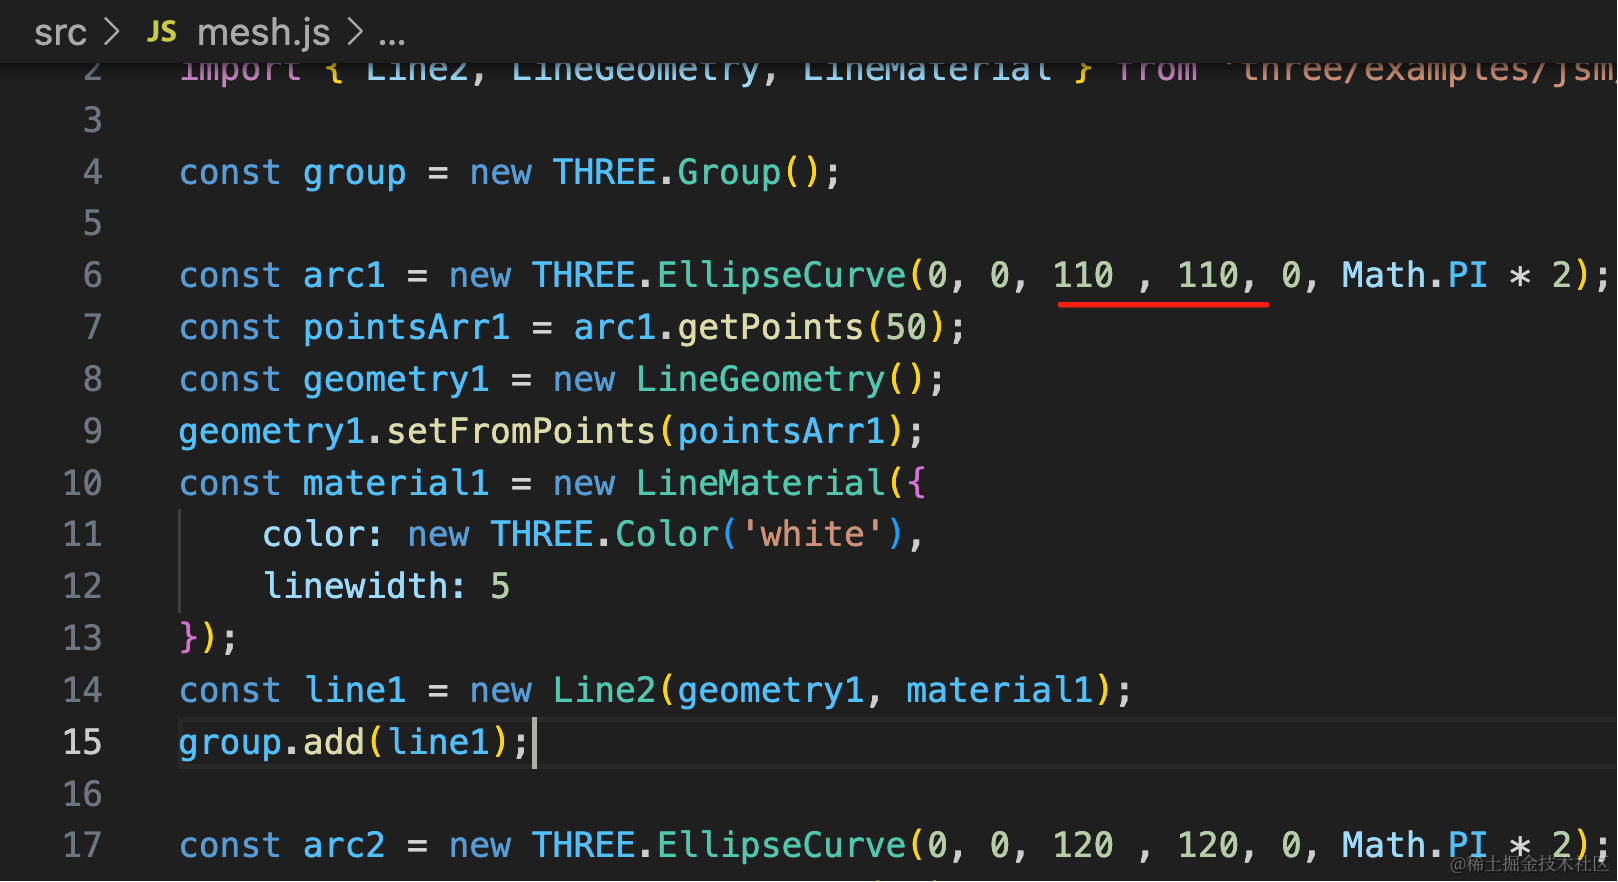
从里往外画,先是两个圆环:
import * as THREE from 'three';

const group = new THREE.Group();

const arc1 = new THREE.EllipseCurve(0, 0, 100 , 100, 0, Math.PI * 2);
const pointsArr1 = arc1.getPoints(50);
const geometry1 = new THREE.BufferGeometry();
geometry1.setFromPoints(pointsArr1);
const material1 = new THREE.LineBasicMaterial({
    color: new THREE.Color('white'),
    lineWidth: 5
});
const line1 = new THREE.Line(geometry1, material1);
group.add(line1);

const arc2 = new THREE.EllipseCurve(0, 0, 120 , 120, 0, Math.PI * 2);
const pointsArr2 = arc2.getPoints(50);
const geometry2 = new THREE.BufferGeometry();
geometry2.setFromPoints(pointsArr2);
const material2 = new THREE.LineBasicMaterial({
    color: new THREE.Color('white')
});
const line2 = new THREE.Line(geometry2, material2);
group.add(line2);

export default group;
同样的方式画两个圆,半径不一样。
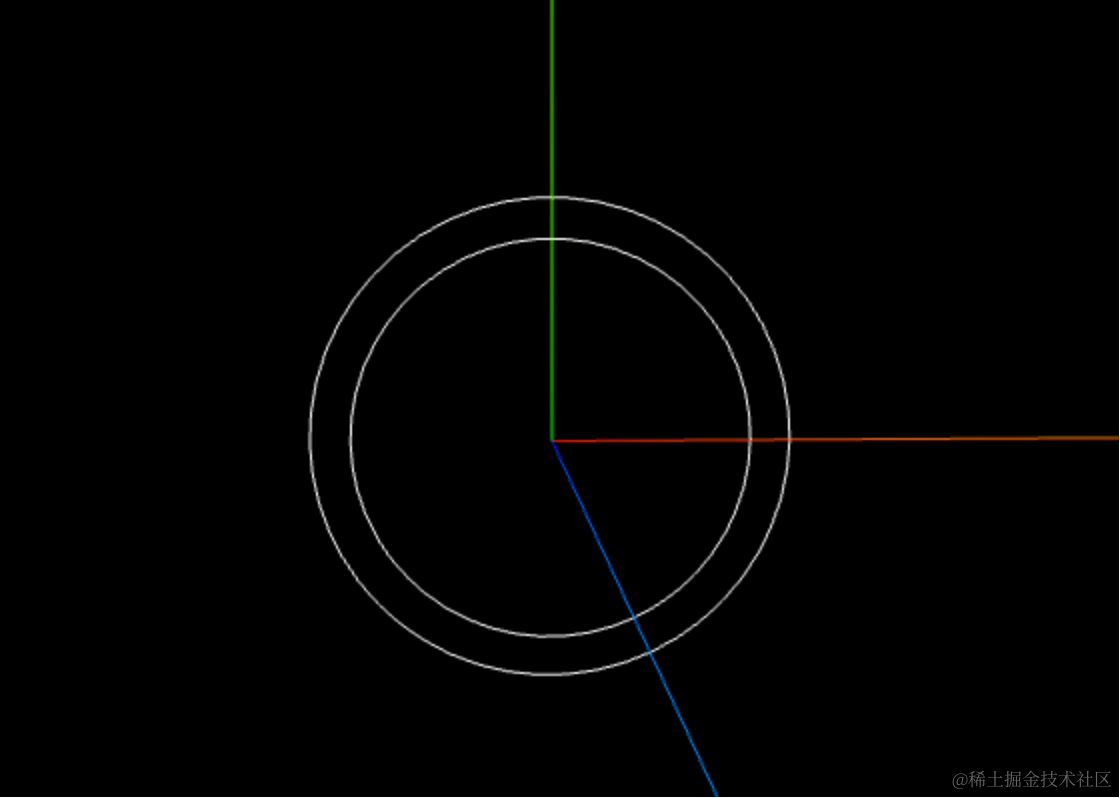
内圆线粗一些,但你会发现设置 lineWidth 不生效。
这是一个常见的问题。
需要换 API,换成这三个:
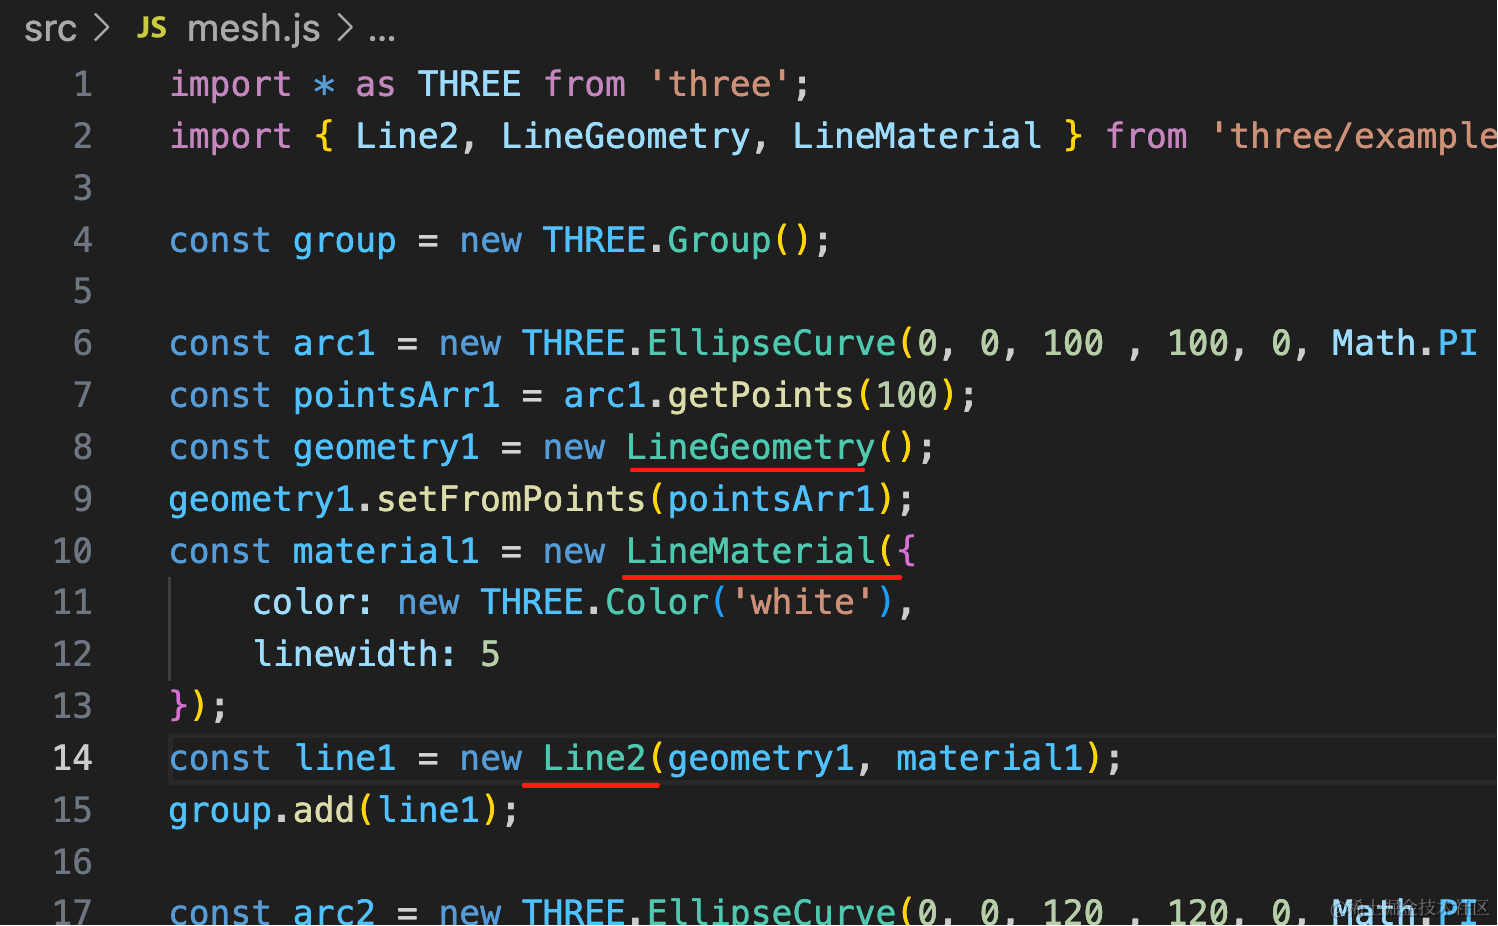
const geometry1 = new LineGeometry();
geometry1.setFromPoints(pointsArr1);
const material1 = new LineMaterial({
    color: new THREE.Color('white'),
    linewidth: 5
});
const line1 = new Line2(geometry1, material1);
group.add(line1);
用 LineGeometry、LineMaterial、Line2 代替原来的 BufferGeometry、LineBasicMaterial、Line 的 API
再看下:
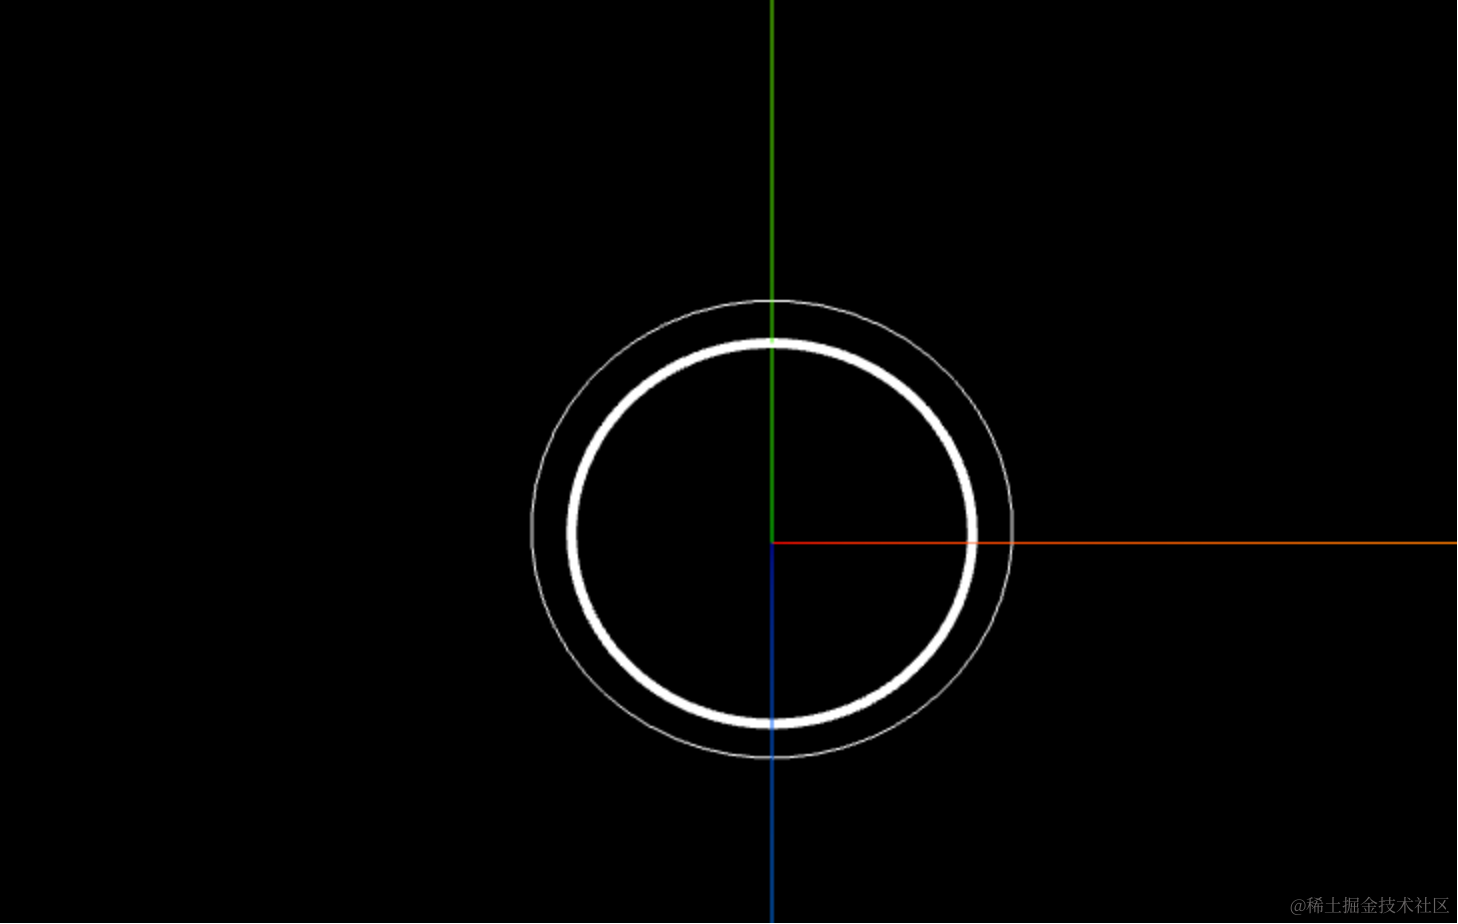
现在 lineWidth 就生效了。
继续来画:
再往外是一些圆。
我们再创建一个 group,里面单独画一些圆:
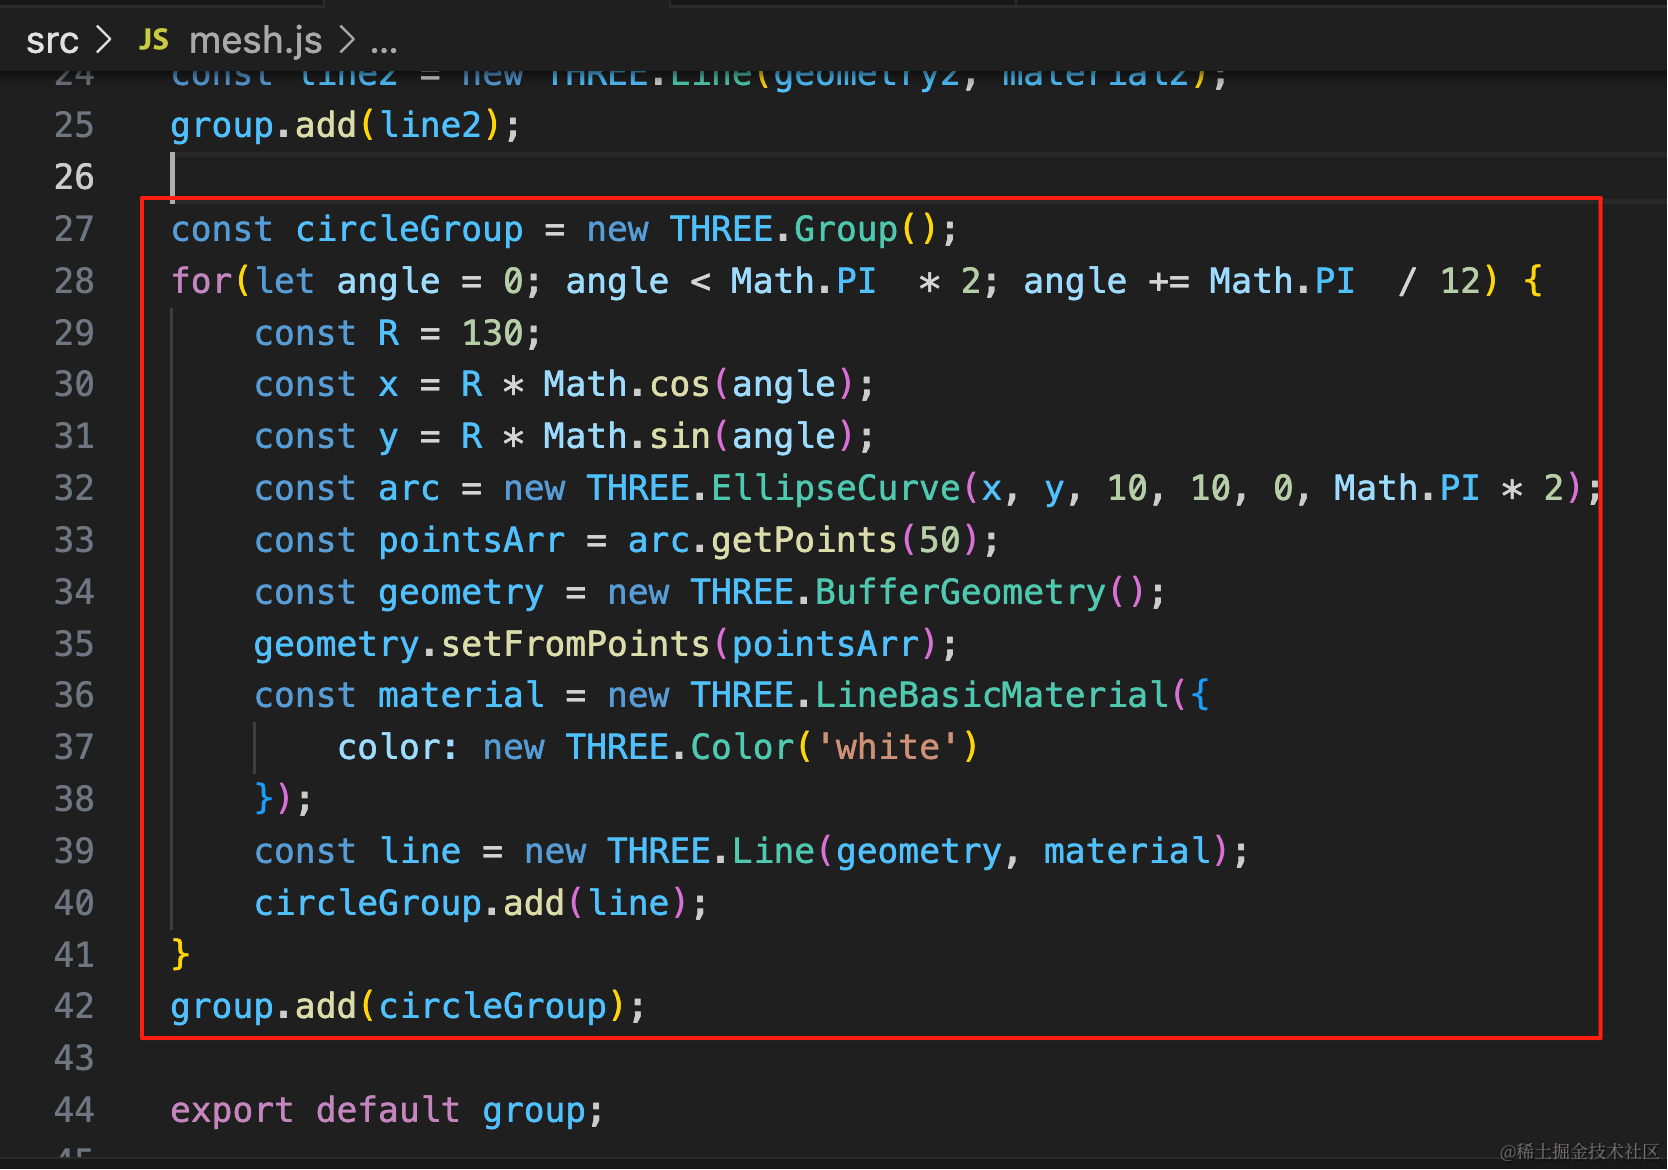
之前圆半径是 120,现在每个小圆半径 10,那就是从 130 的半径开始画。
角度从 0 到 2π,每个角度的位置用 R * Math.cos(angle) 和 R * Math.sin(angle) 确定圆心位置。
const circleGroup = new THREE.Group();
for(let angle = 0; angle < Math.PI * 2; angle += Math.PI / 12) {
const R = 130;
const x = R * Math.cos(angle);
const y = R * Math.sin(angle);
const arc = new THREE.EllipseCurve(x, y, 10, 10, 0, Math.PI * 2);
const pointsArr = arc.getPoints(50);
const geometry = new THREE.BufferGeometry();
geometry.setFromPoints(pointsArr);
const material = new THREE.LineBasicMaterial({
color: new THREE.Color('white')
});
const line = new THREE.Line(geometry, material);
circleGroup.add(line);
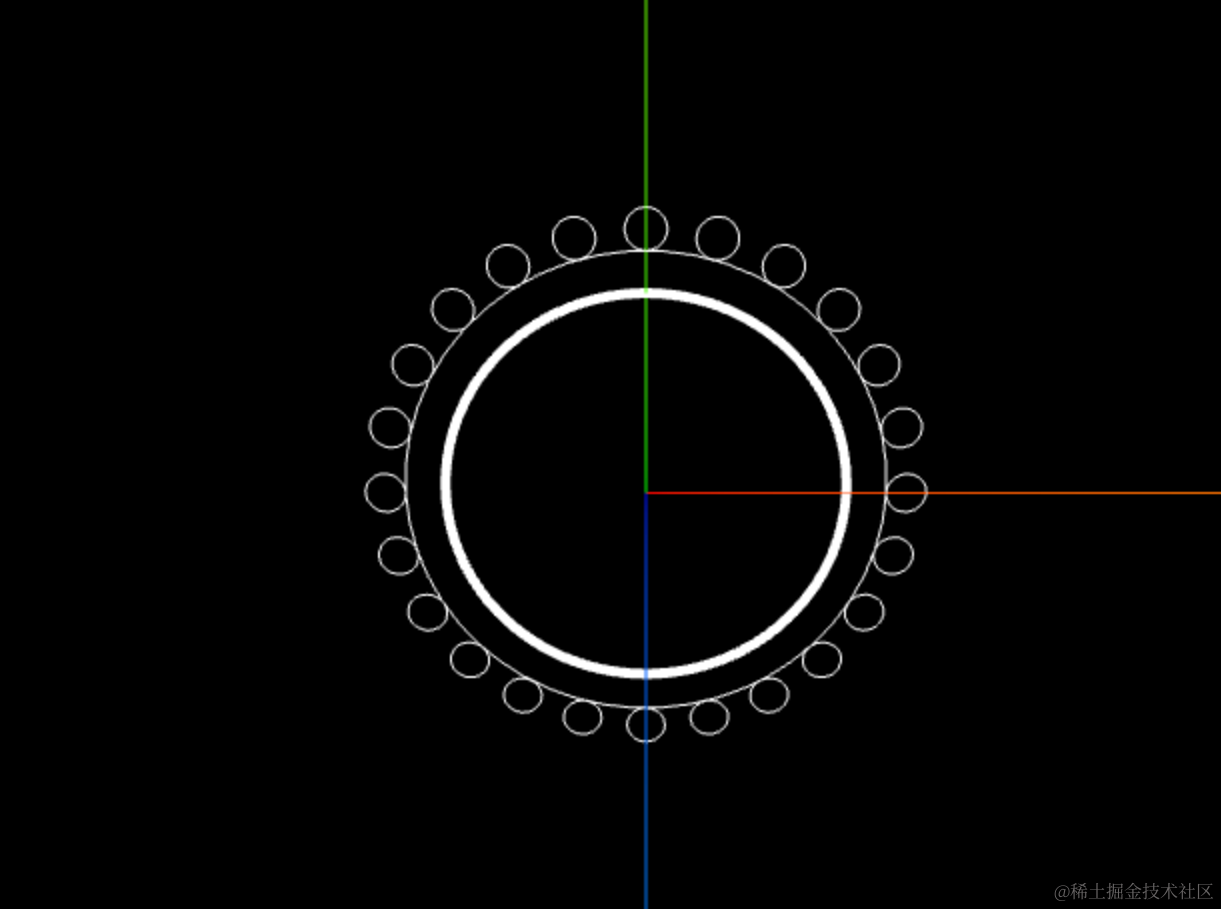
}
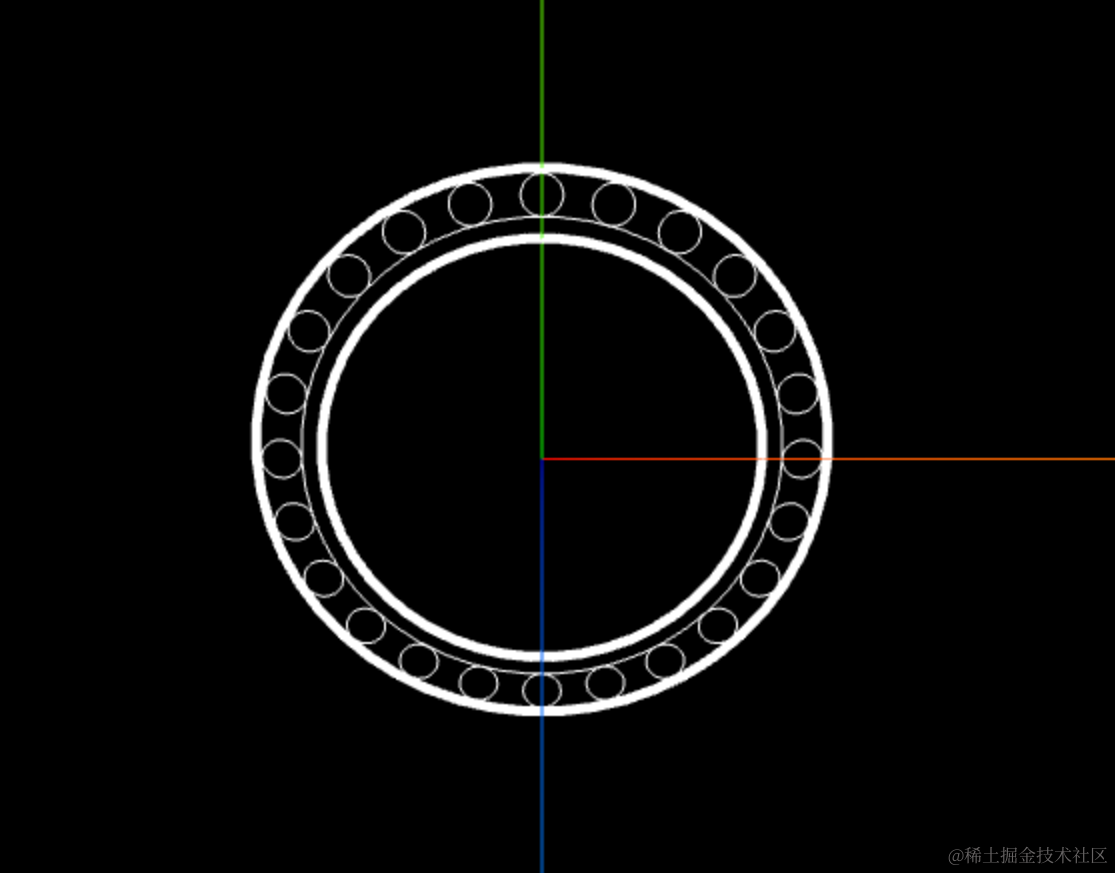
group.add(circleGroup);看下效果:
然后再画这一圈粗的:
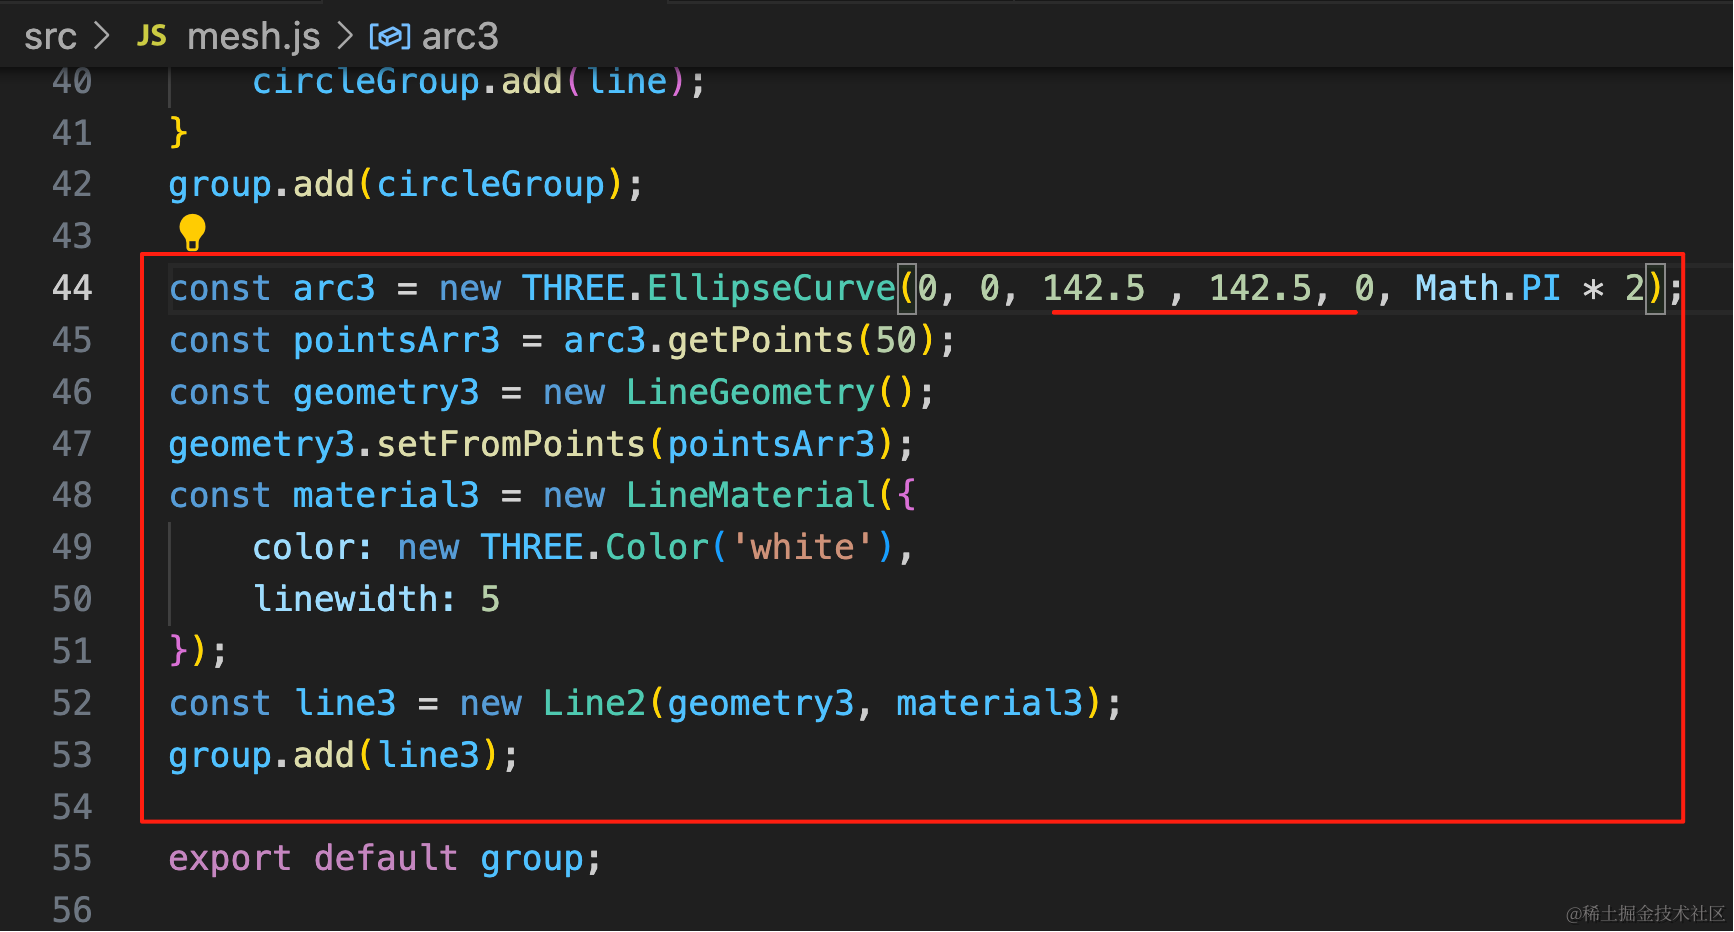
因为线宽 5,那半径就要额外加 2.5,不然线会和圆重叠
const arc3 = new THREE.EllipseCurve(0, 0, 142.5 , 142.5, 0, Math.PI * 2);
const pointsArr3 = arc3.getPoints(50);
const geometry3 = new LineGeometry();
geometry3.setFromPoints(pointsArr3);
const material3 = new LineMaterial({
    color: new THREE.Color('white'),
    linewidth: 5
});
const line3 = new Line2(geometry3, material3);
group.add(line3);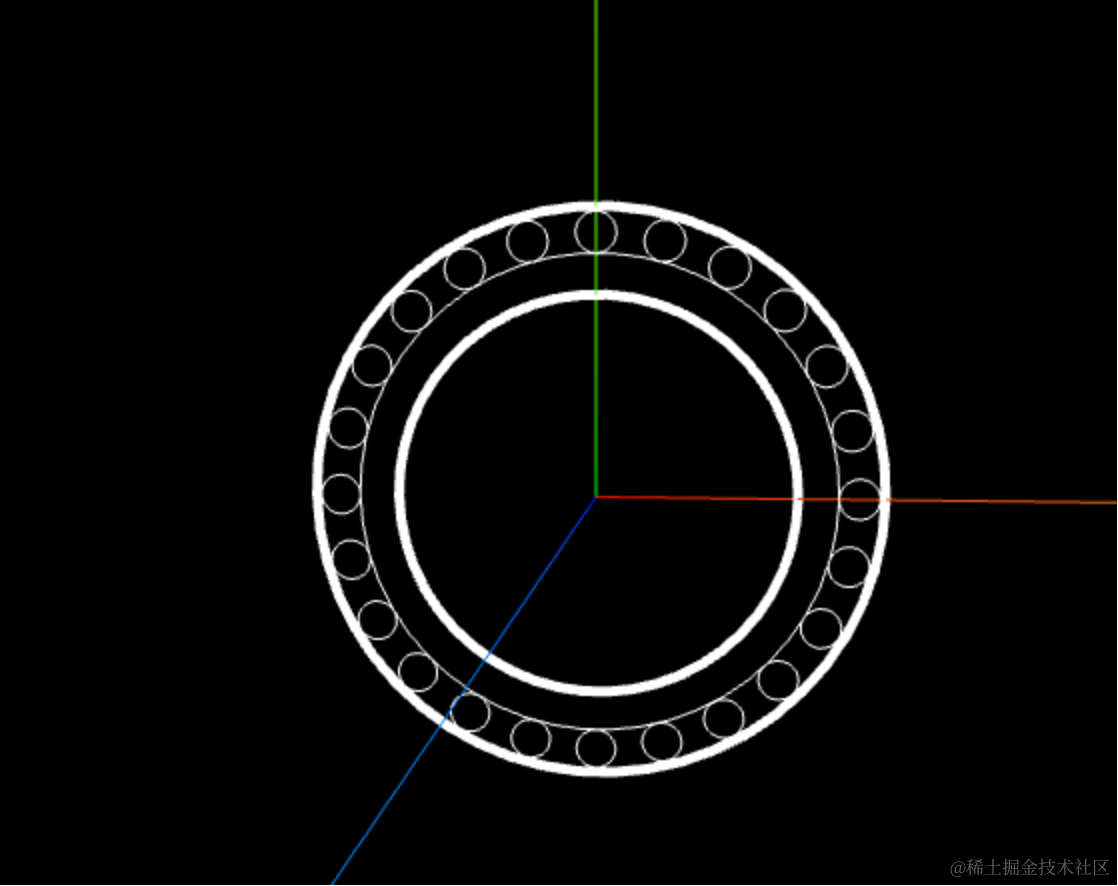
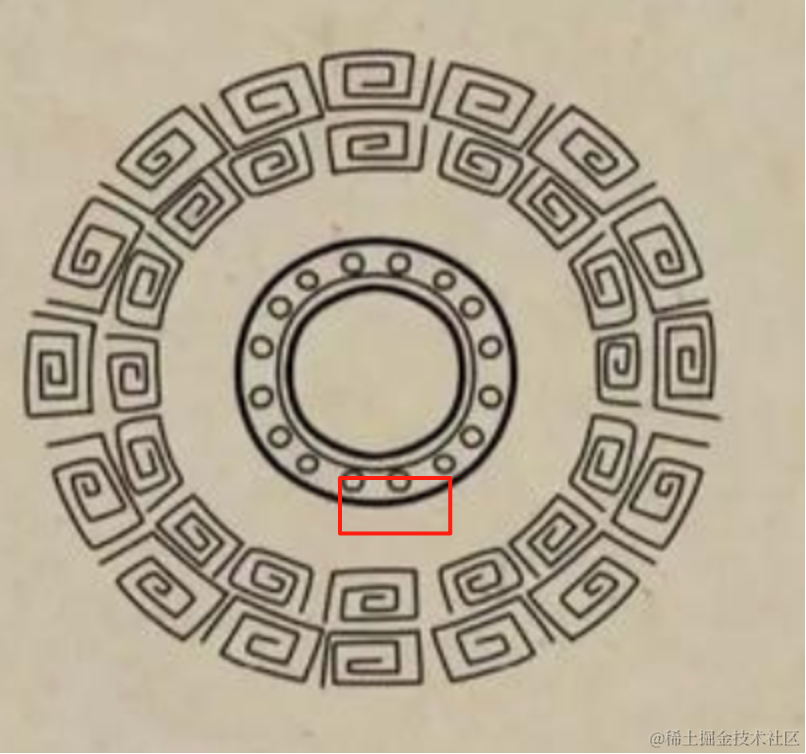
对比下:
内圈圆间距太大了,改下半径:
然后继续画外面的:
这个和那一圈圆差不多,也是用 group 添加多个单独的花纹。
每个花纹独立画
具体的花纹可以用 BufferGeometry + Line 来画,计算 11 个点的坐标就行。
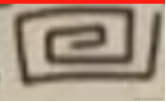
点不多,不用找规律,直接枚举就行:
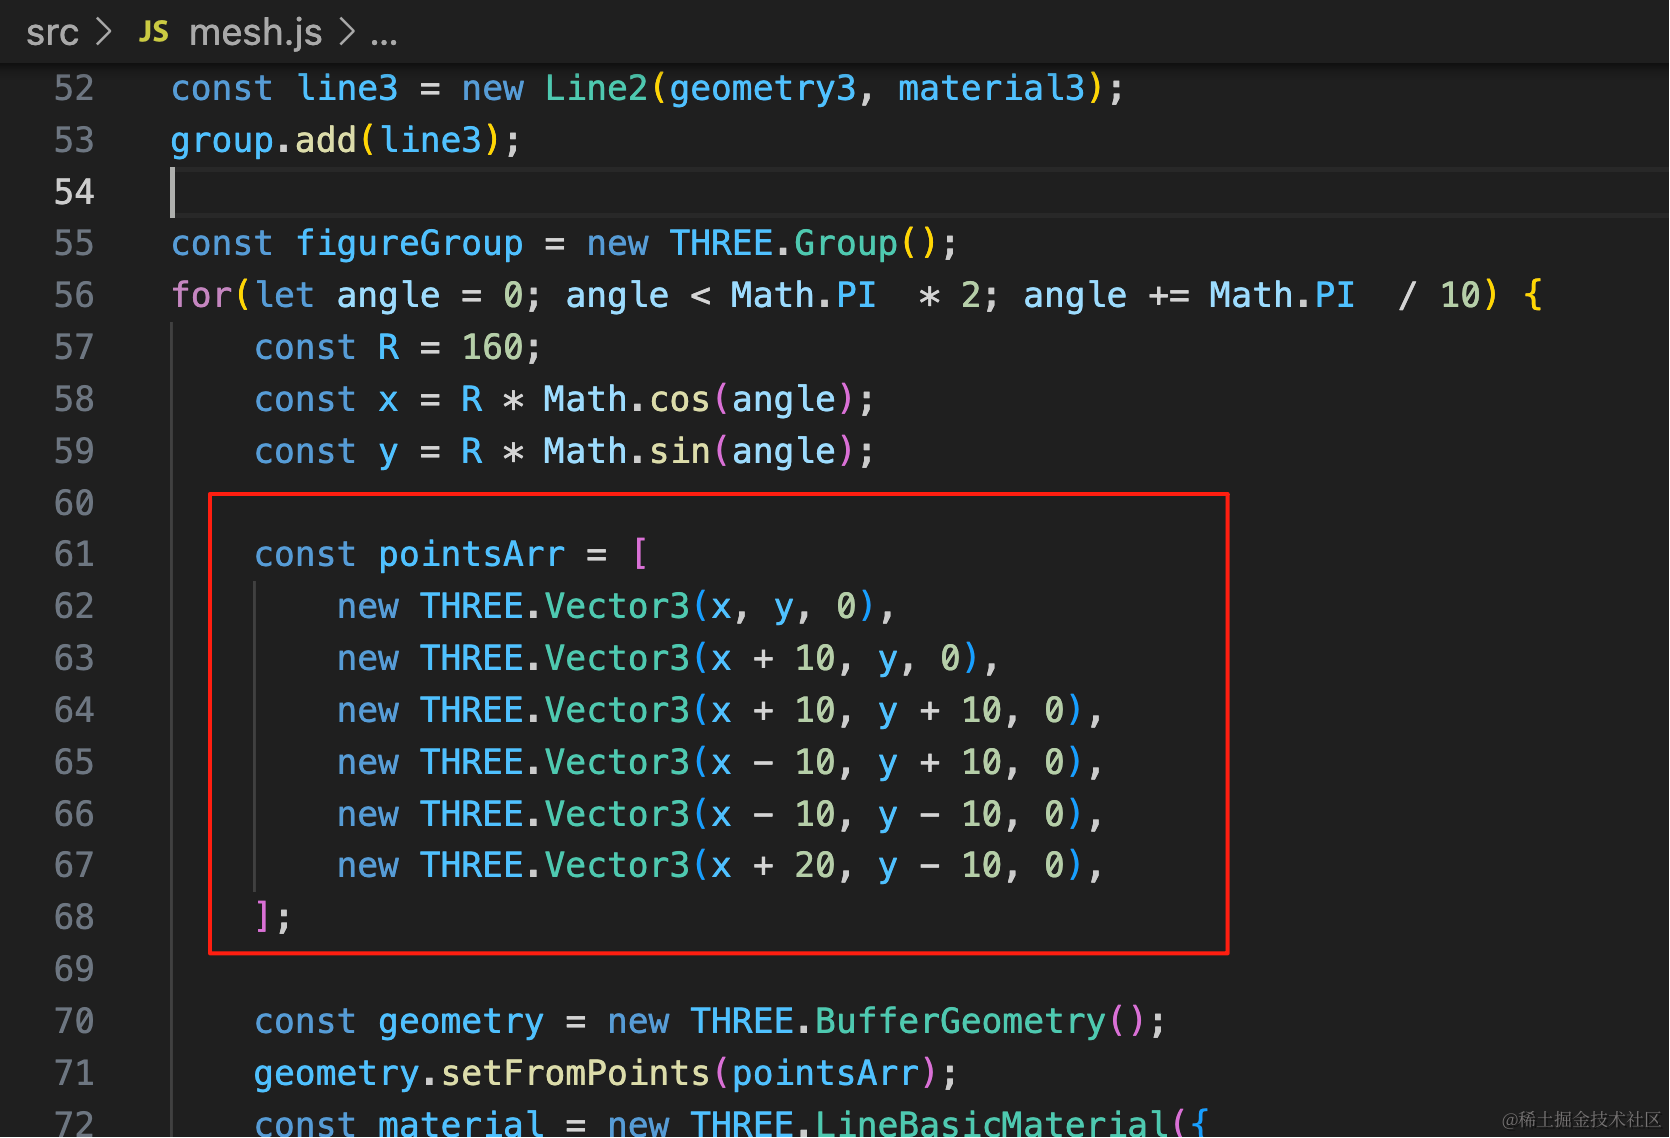
const figureGroup = new THREE.Group();
for(let angle = 0; angle < Math.PI  * 2; angle += Math.PI  / 10) {
    const R = 200;
    const x = R * Math.cos(angle);
    const y = R * Math.sin(angle);

    const pointsArr = [
        new THREE.Vector3(0, 0, 0),
        new THREE.Vector3(10, 0, 0),
        new THREE.Vector3(10, 10, 0),
        new THREE.Vector3(-10, 10, 0),
        new THREE.Vector3(-10, -10, 0),
        new THREE.Vector3(20, -10, 0),
        new THREE.Vector3(20, 20, 0),
        new THREE.Vector3(-20, 20, 0),
        new THREE.Vector3(-20, -20, 0),
        new THREE.Vector3(20, -20, 0)
    ];

    const geometry = new THREE.BufferGeometry();
    geometry.setFromPoints(pointsArr);
    const material = new THREE.LineBasicMaterial({
        color: new THREE.Color('white')
    });
    const line = new THREE.Line(geometry, material);

    line.position.set(x, y, 0);
    line.rotation.z = angle;

    figureGroup.add(line);
}
group.add(figureGroup);
在原点把 11 个点画出来,然后设置这个形状的 position 和 scale
看下效果:
 对比下:
对比下:
没啥问题,然后再画最后一圈就好了:
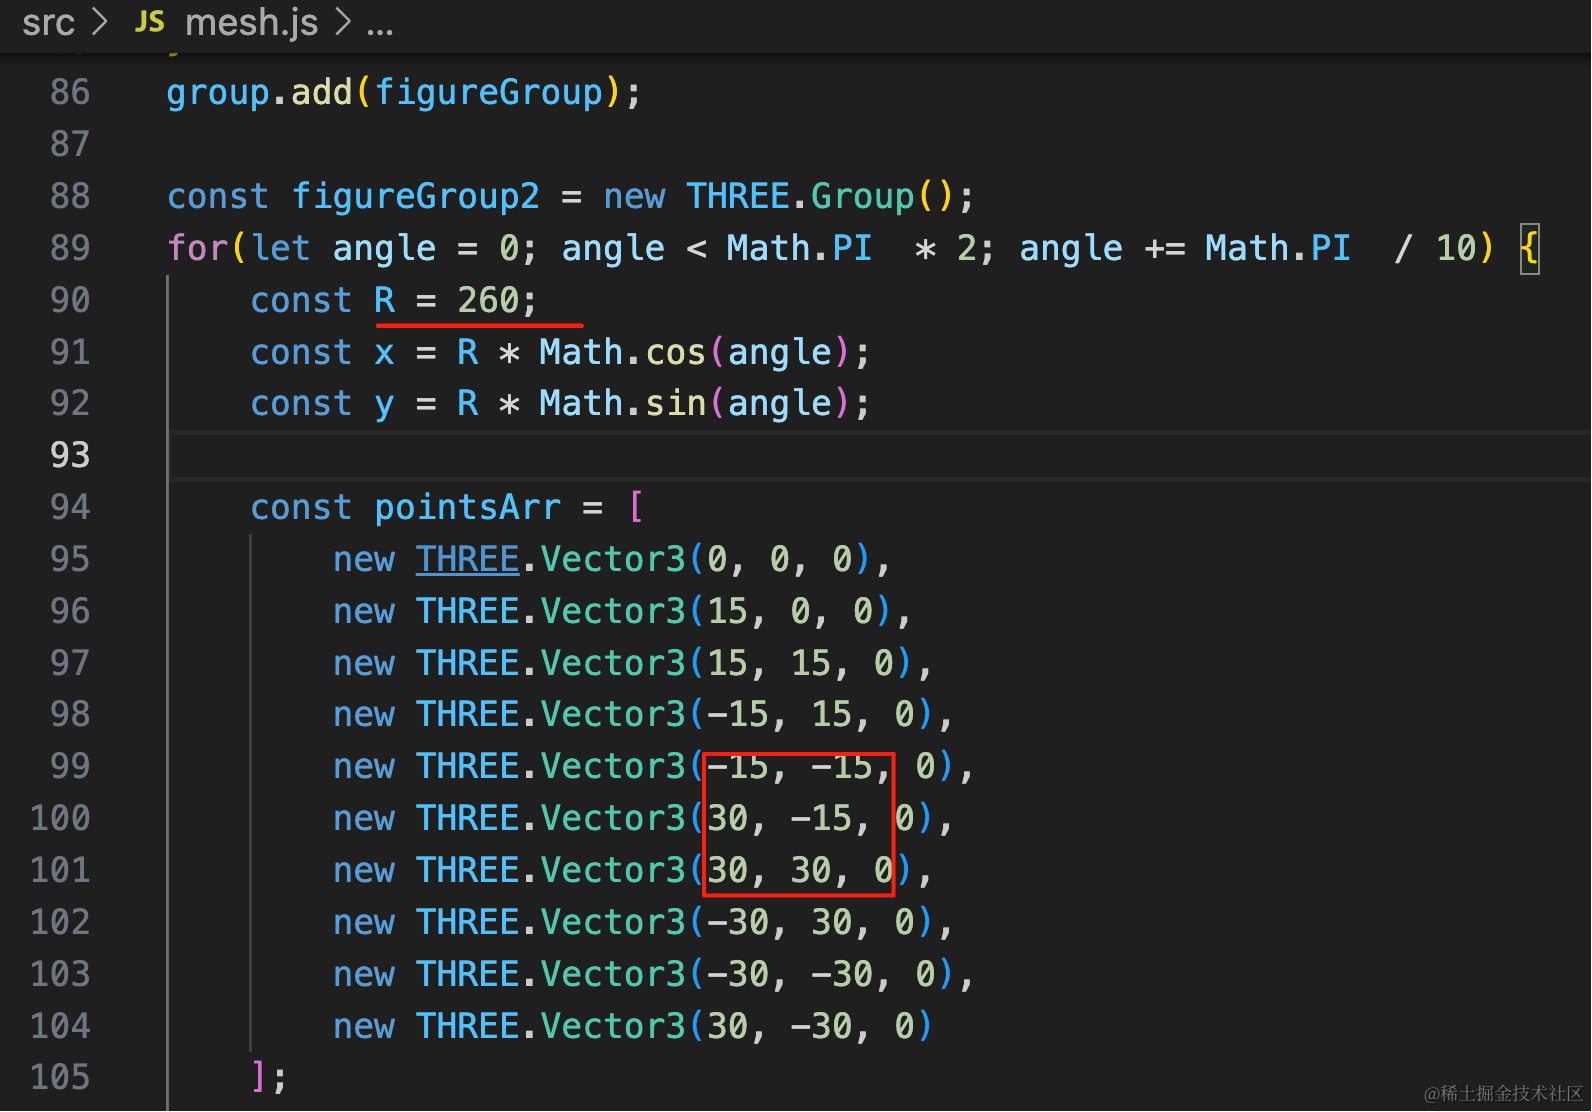
这一圈花纹大小大一些
const figureGroup2 = new THREE.Group();
for(let angle = 0; angle < Math.PI  * 2; angle += Math.PI  / 10) {
    const R = 260;
    const x = R * Math.cos(angle);
    const y = R * Math.sin(angle);

    const pointsArr = [
        new THREE.Vector3(0, 0, 0),
        new THREE.Vector3(15, 0, 0),
        new THREE.Vector3(15, 15, 0),
        new THREE.Vector3(-15, 15, 0),
        new THREE.Vector3(-15, -15, 0),
        new THREE.Vector3(30, -15, 0),
        new THREE.Vector3(30, 30, 0),
        new THREE.Vector3(-30, 30, 0),
        new THREE.Vector3(-30, -30, 0),
        new THREE.Vector3(30, -30, 0)
    ];

    const geometry = new THREE.BufferGeometry();
    geometry.setFromPoints(pointsArr);
    const material = new THREE.LineBasicMaterial({
        color: new THREE.Color('white')
    });
    const line = new THREE.Line(geometry, material);

    line.position.set(x, y, 0);
    line.rotation.z = angle;

    figureGroup2.add(line);
}
group.add(figureGroup2);
看下画好的花纹:
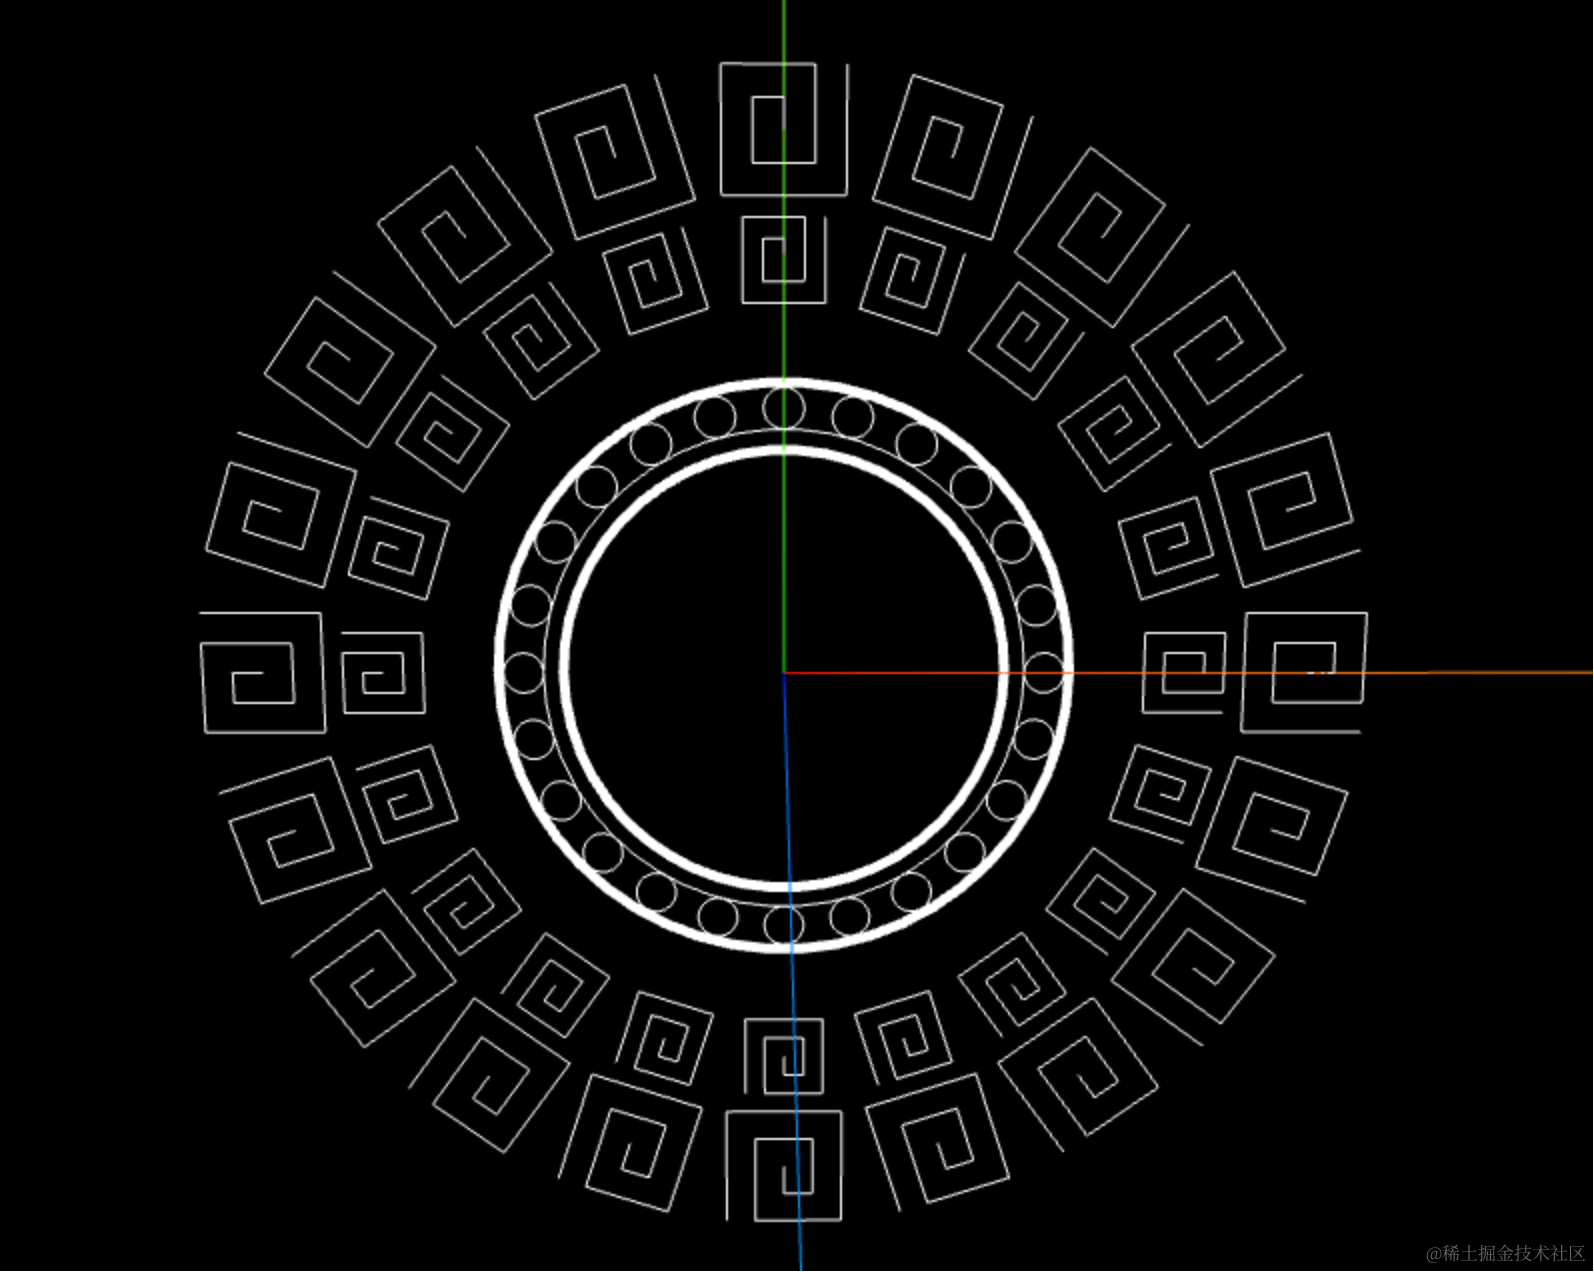
我们可以让它转起来,每一圈转速不同,一正一反的转:
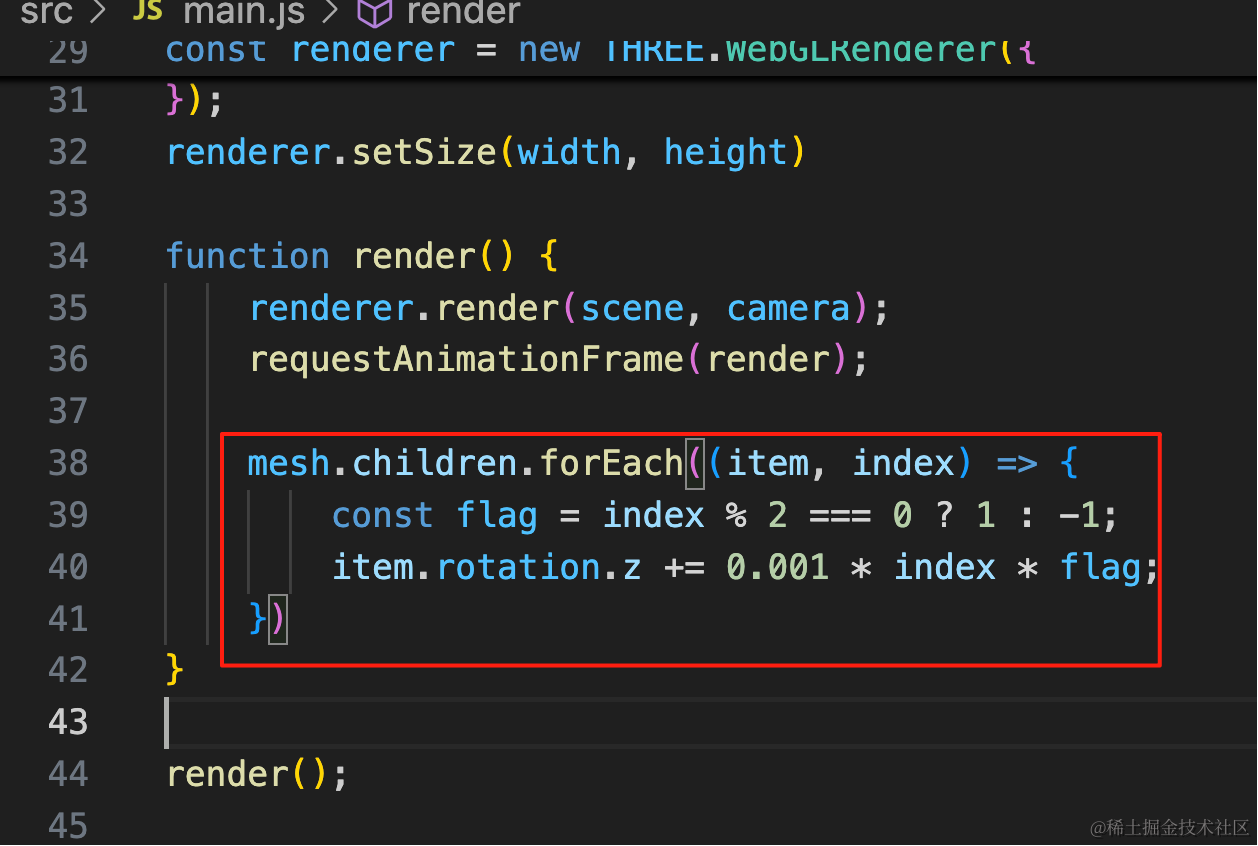
mesh.children.forEach((item, index) => {
    const flag = index % 2 === 0 ? 1 : -1;
    item.rotation.z += 0.001 * index * flag;
})
看下整体效果:
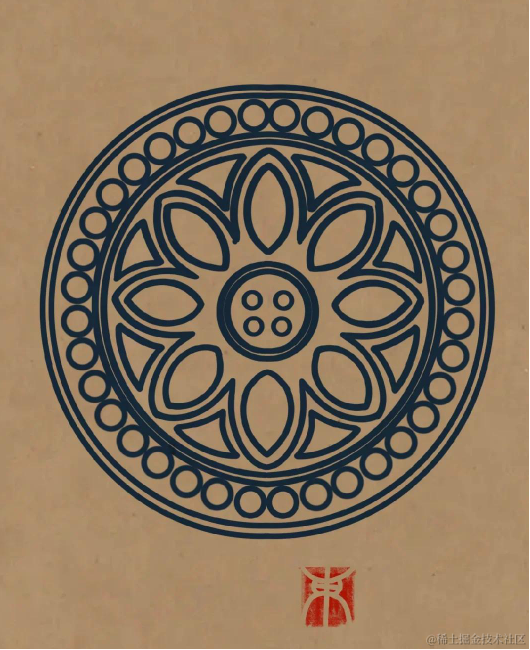
等后面学完模型后,用它来作为佛打坐的底盘就很不错:

案例代码上传了小册仓库。
总结
这节我们画了一个云雷纹,练习了下曲线 Curve 的 API,并且学了 lineWidth 不生效的解决方案。
lineWidth 不生效需要换成 LineGeometry、LineMaterial、Line2 的 API
然后我们一圈圈的画了曲线图案,主要是 BufferGeometry 自定义顶点 + Line 来画。
也有的是 Curve 然后取点设置到 BufferGeometry
总之,只要确定了一些点,用线模型连接画出来就行。