上节实现了框选效果:
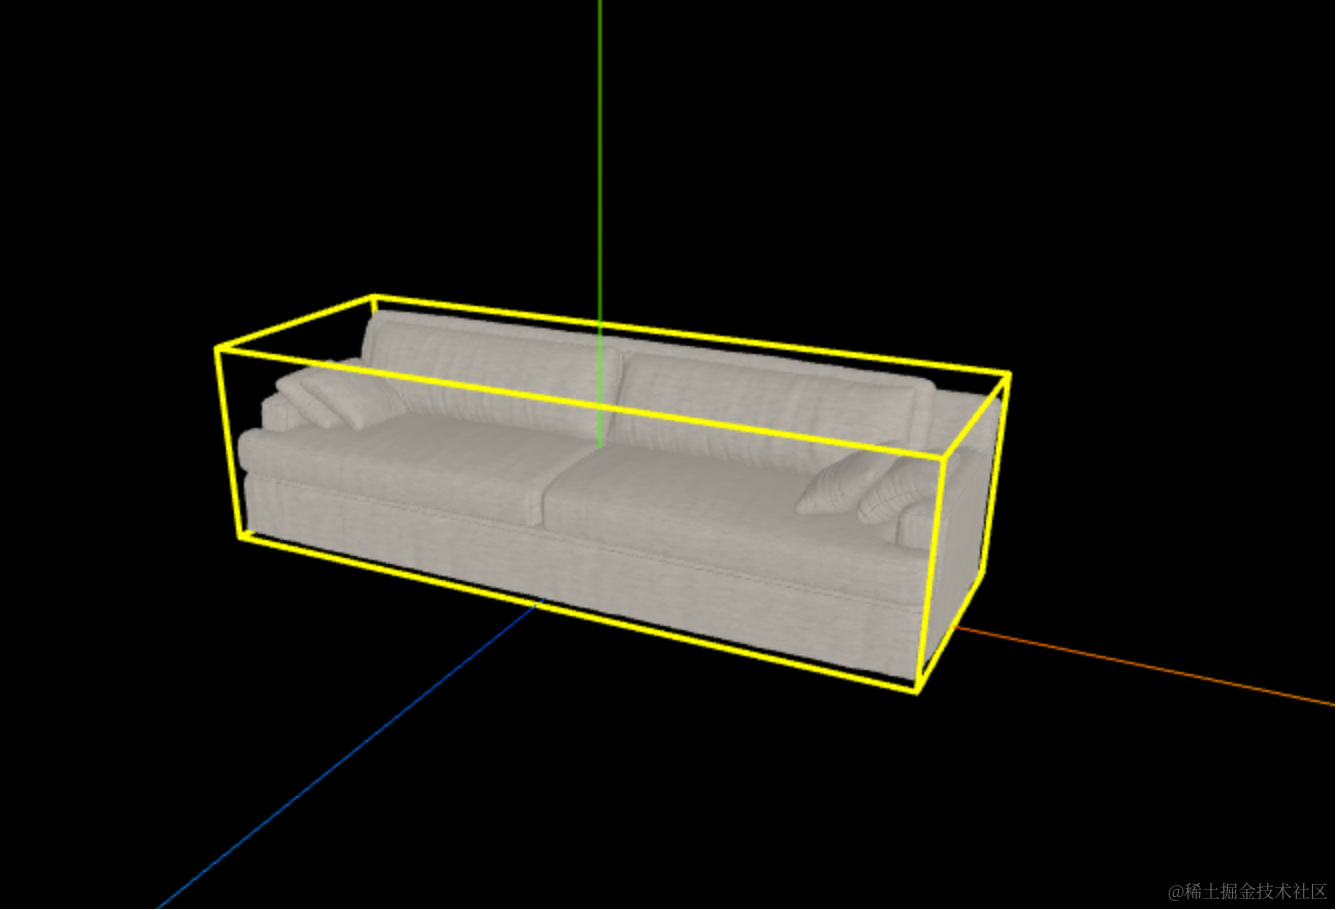
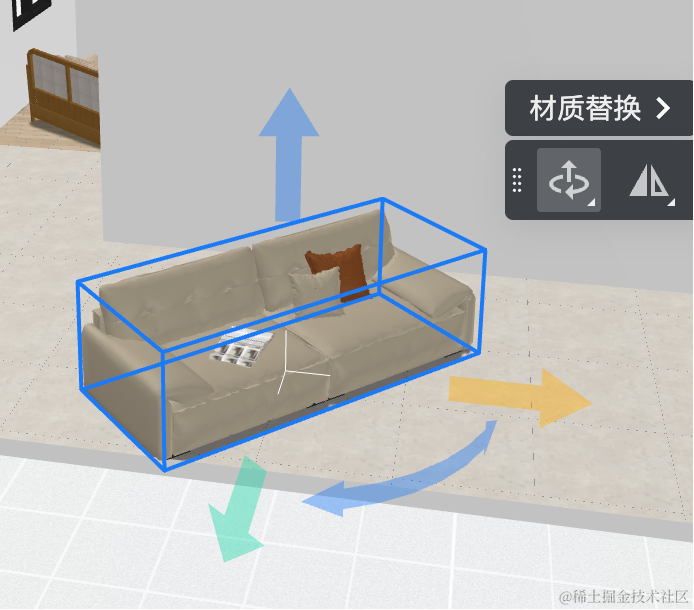
这节来画这些箭头:
用 Shape + ShapeGeometry 来画。
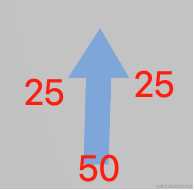
先画上面这个
尺寸是这样:
宽度下面是 50,上面是 100,左右两个箭头的突出是 25
高度下面是 150,上面是 50
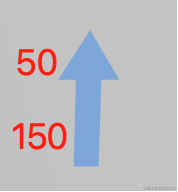
根据这个来画 Path
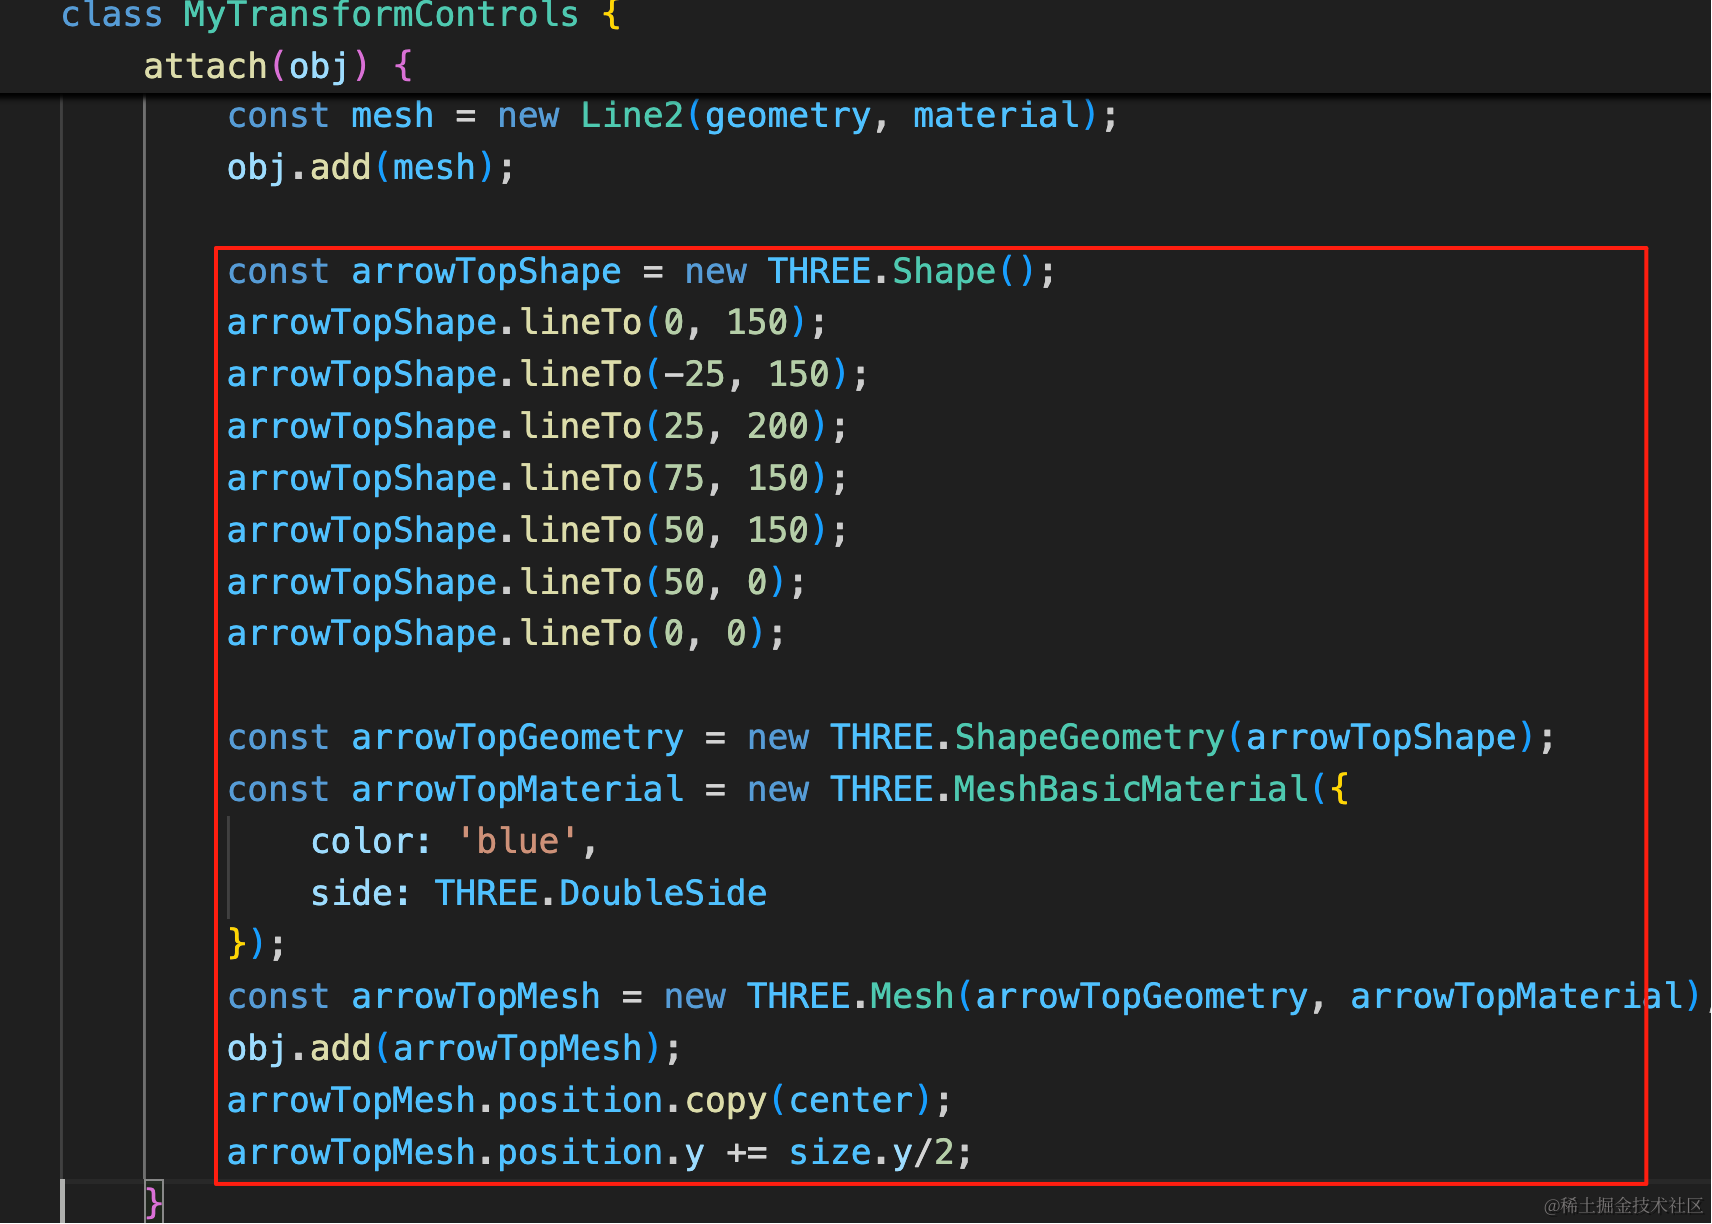
const arrowTopShape = new THREE.Shape();
arrowTopShape.lineTo(0, 150);
arrowTopShape.lineTo(-25, 150);
arrowTopShape.lineTo(25, 200);
arrowTopShape.lineTo(75, 150);
arrowTopShape.lineTo(50, 150);
arrowTopShape.lineTo(50, 0);
arrowTopShape.lineTo(0, 0);
const arrowTopGeometry = new THREE.ShapeGeometry(arrowTopShape);
const arrowTopMaterial = new THREE.MeshBasicMaterial({
color: 'blue',
side: THREE.DoubleSide
});
const arrowTopMesh = new THREE.Mesh(arrowTopGeometry, arrowTopMaterial);
obj.add(arrowTopMesh);
arrowTopMesh.position.copy(center);
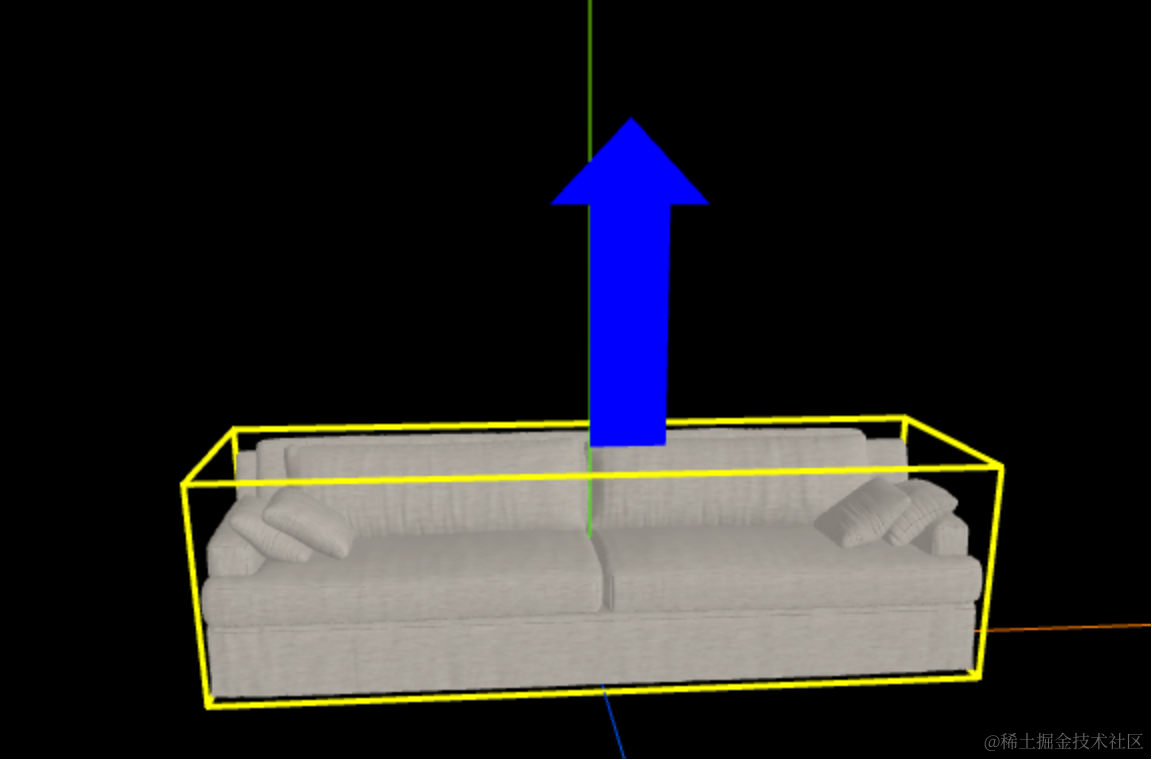
arrowTopMesh.position.y += size.y/2;先把它移到 box3.center 位置,然后网上移动 box3.size.y
这样正好在 obj 上面:
然后要左移 25,这样箭头才居中(这与我们画的时候的坐标有关,如果你直接把箭头画在中间就不用移动了)
arrowTopMesh.position.x -= 25;
同样的方式写下另外两个方向的:
const arrowLeftGeometry = new THREE.ShapeGeometry(arrowTopShape);
const arrowLeftMaterial = new THREE.MeshBasicMaterial({
    color: 'green',
    side: THREE.DoubleSide
});
const arrowLeftMesh = new THREE.Mesh(arrowLeftGeometry, arrowLeftMaterial);
obj.add(arrowLeftMesh);
arrowLeftMesh.position.copy(center);
arrowLeftMesh.position.x += size.x/2;
arrowLeftMesh.rotateZ(-Math.PI / 2);
arrowLeftMesh.position.y += 25;

const arrowFrontGeometry = new THREE.ShapeGeometry(arrowTopShape);
const arrowFrontMaterial = new THREE.MeshBasicMaterial({
    color: 'red',
    side: THREE.DoubleSide
});
const arrowFrontMesh = new THREE.Mesh(arrowFrontGeometry, arrowFrontMaterial);
obj.add(arrowFrontMesh);
arrowFrontMesh.position.copy(center);
arrowFrontMesh.position.z += size.z/2;
arrowFrontMesh.rotateX(Math.PI / 2);
arrowFrontMesh.position.x -= 25;
Shape 就不用再画了,调整下旋转角度就行。
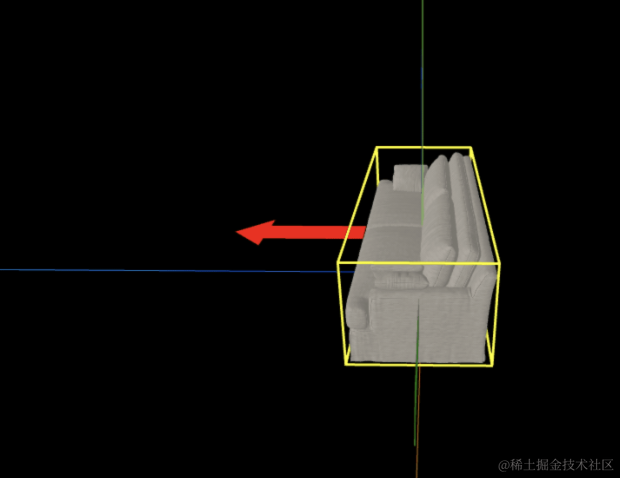
画是画出来了,但现在有个问题:
酷家乐这个随着摄像机位置的调整,箭头会展示在不同的方向,这样刚好能看到。
我们这个旋转到侧面之后就看不到箭头了。
所以我们要跟随摄像机位置的调整来改变这三个箭头的位置。
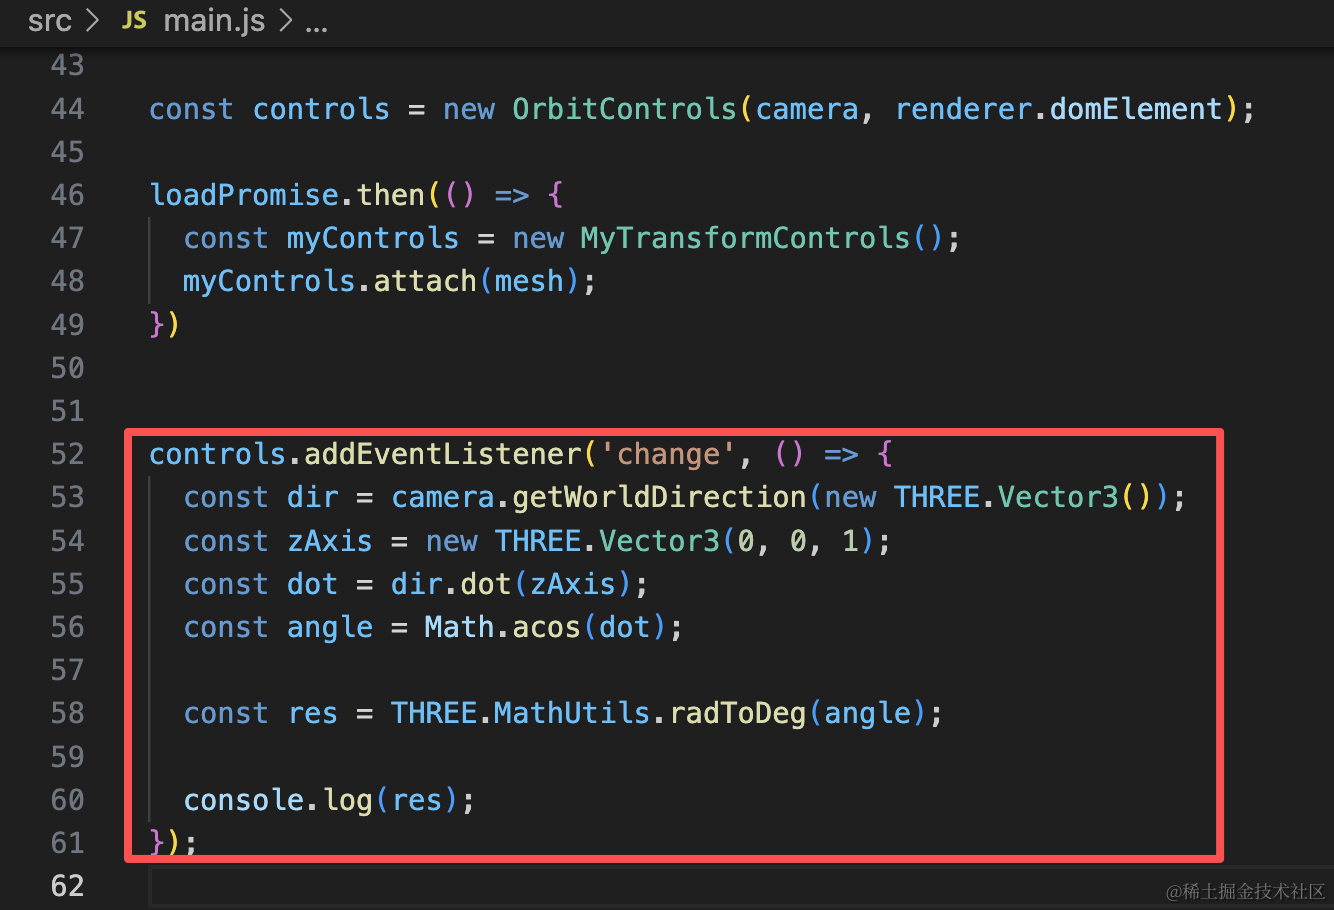
那如何判断相机方向和坐标轴的夹角呢?
同样是用前面学的向量点积:
比如我们判断相机视线方向和 z 轴正半轴的夹角:
就可以这样写:
controls.addEventListener('change', () => {
  const dir = camera.getWorldDirection(new THREE.Vector3());
  const zAxis = new THREE.Vector3(0, 0, 1);
  const dot = dir.dot(zAxis);
  const angle = Math.acos(dot);

  const res = THREE.MathUtils.radToDeg(angle);

  console.log(res);
});
先拿到相机方向,和 z 轴的向量做点积。
之后 acos 求出弧度值再转角度就好了。
试下效果:
随着相机方向的改变,可以看到夹角在 0 到 180 度之间变化
那我们是不是就可以在角度小于 90 度的时候,红色箭头在正半轴,否则在负半轴呢?
酷家乐这个就是这样:
我们也实现下:
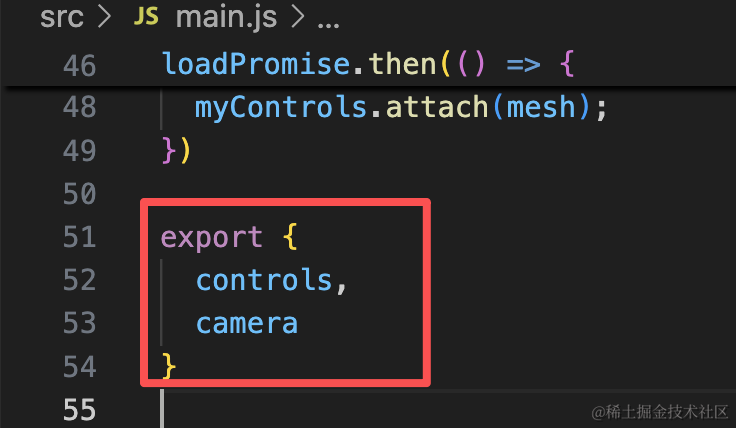
export {
  controls,
  camera
}
首先,把这俩对象导出。
然后在控制器里加上这段逻辑:
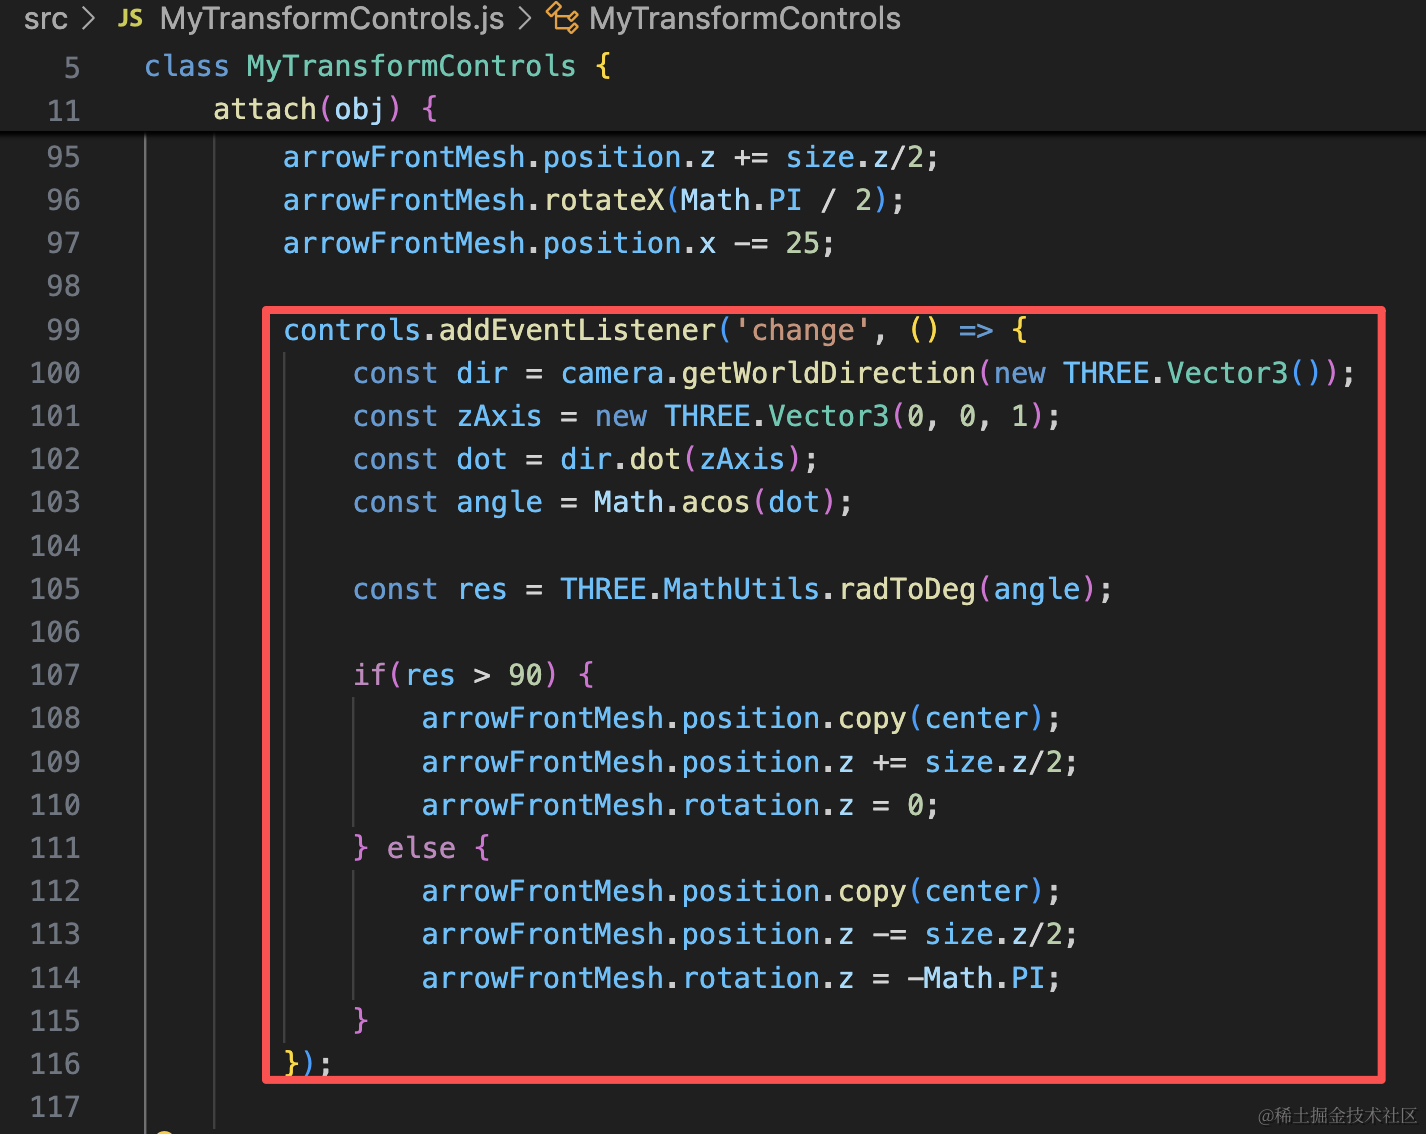
就是根据旋转角度,设置箭头的不同的方向、位置。
controls.addEventListener('change', () => {
    const dir = camera.getWorldDirection(new THREE.Vector3());
    const zAxis = new THREE.Vector3(0, 0, 1);
    const dot = dir.dot(zAxis);
    const angle = Math.acos(dot);

    const res = THREE.MathUtils.radToDeg(angle);

    if(res > 90) {
        arrowFrontMesh.position.copy(center);
        arrowFrontMesh.position.z += size.z/2;
        arrowFrontMesh.rotation.z = 0;
    } else {
        arrowFrontMesh.position.copy(center);
        arrowFrontMesh.position.z -= size.z/2;
        arrowFrontMesh.rotation.z = -Math.PI;
    }
});
试一下:
完美!
蓝色箭头就不用变了,把绿色箭头的也实现一下:
它是判断和 x 轴正方向的夹角:
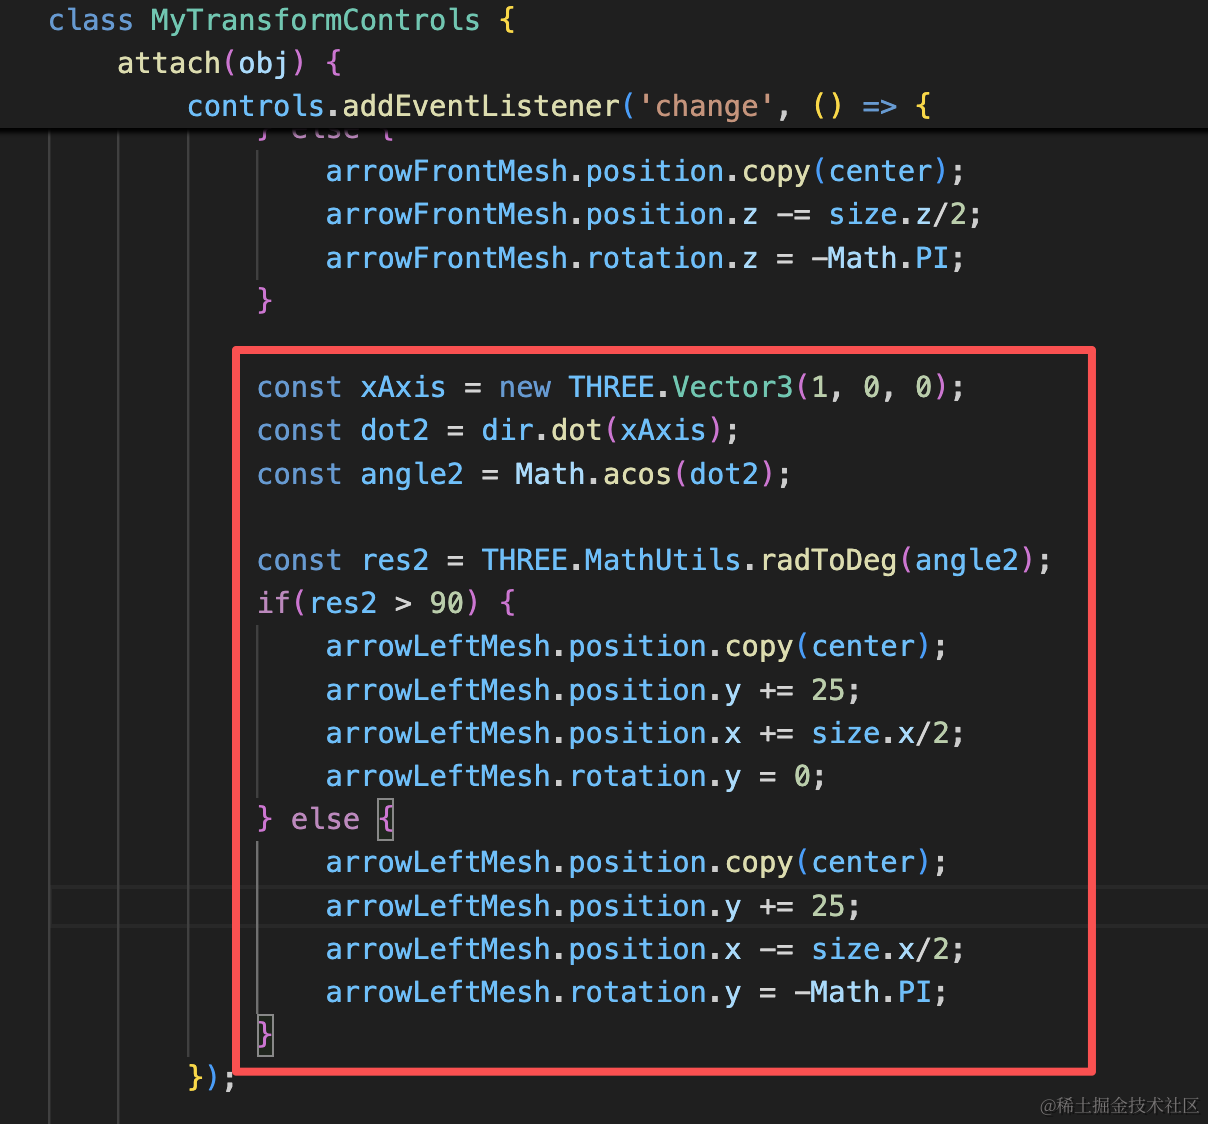
const xAxis = new THREE.Vector3(1, 0, 0);
const dot2 = dir.dot(xAxis);
const angle2 = Math.acos(dot2);

const res2 = THREE.MathUtils.radToDeg(angle2);
if(res2 > 90) {
    arrowLeftMesh.position.copy(center);
    arrowLeftMesh.position.y += 25;
    arrowLeftMesh.position.x += size.x/2;
    arrowLeftMesh.rotation.y = 0;
} else {
    arrowLeftMesh.position.copy(center);
    arrowLeftMesh.position.y += 25;
    arrowLeftMesh.position.x -= size.x/2;
    arrowLeftMesh.rotation.y = -Math.PI;
}
实现思路一样。
对比下酷家乐的:
和我们的:
交互是一样的。
案例代码上传了小册仓库
总结
这节我们把控制器的箭头绘制了出来。
绘制箭头用 Shape + ShapeGeometry。
绘制出来之后要跟随相机角度移动。
我们计算相机方向和坐标轴的点积,求出夹角。
然后根据角度是否大于 90 度来修改箭头的位置、方向。
这样就实现了酷家乐同款控制器的外观效果,下节我们来做交互。