学完如何实现镜子效果之后,我们来做一个实战:练舞房。
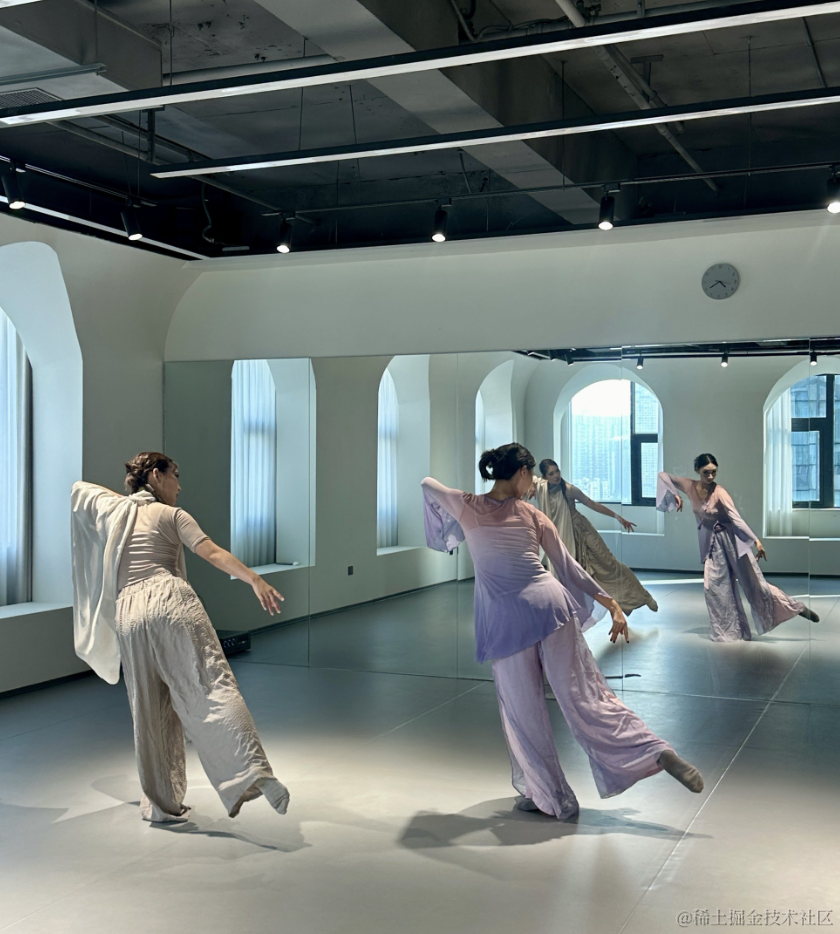
练舞房里都有镜子,可以从中看到跳舞的样子。
这个很适合作为练习镜子的实战。
我们来写一下:
npx create-vite dancing-mirror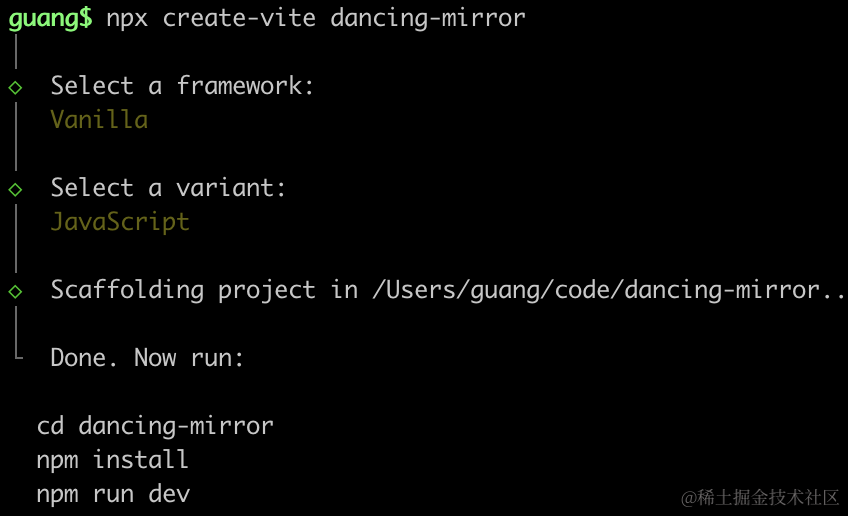
进入项目,安装依赖:
npm install
npm install --save three
npm install --save-dev @types/three
改下 src/main.js
import './style.css';
import * as THREE from 'three';
import {
    OrbitControls
} from 'three/addons/controls/OrbitControls.js';
import mesh from './mesh.js';

const scene = new THREE.Scene();
scene.add(mesh);

const directionLight = new THREE.DirectionalLight(0xffffff);
directionLight.position.set(500, 400, 300);
scene.add(directionLight);

const ambientLight = new THREE.AmbientLight();
scene.add(ambientLight);

const width = window.innerWidth;
const height = window.innerHeight;

const helper = new THREE.AxesHelper(500);
// scene.add(helper);

const camera = new THREE.PerspectiveCamera(60, width / height, 0.1, 10000);
camera.position.set(300, 700, 300);
camera.lookAt(0, 0, 0);

const renderer = new THREE.WebGLRenderer({
  antialias: true
});
renderer.setSize(width, height)

function render(time) {
    renderer.render(scene, camera);
    requestAnimationFrame(render);
}

render();

document.body.append(renderer.domElement);

const controls = new OrbitControls(camera, renderer.domElement);

window.onresize = function () {
  const width = window.innerWidth;
  const height = window.innerHeight;

  renderer.setSize(width,height);

  camera.aspect = width / height;
  camera.updateProjectionMatrix();
};
创建 Scene、Light、Camera、Renderer。
改下 style.css
body {
  margin: 0;
}
创建 mesh.js
import * as THREE from 'three';
const group = new THREE.Group();
function createGround() {
const geometry = new THREE.PlaneGeometry(3000, 3000);
const material = new THREE.MeshPhongMaterial({
color: 'orange'
})
const mesh = new THREE.Mesh(geometry, material);
mesh.rotateX(-Math.PI / 2);
return mesh;
}
group.add(createGround());
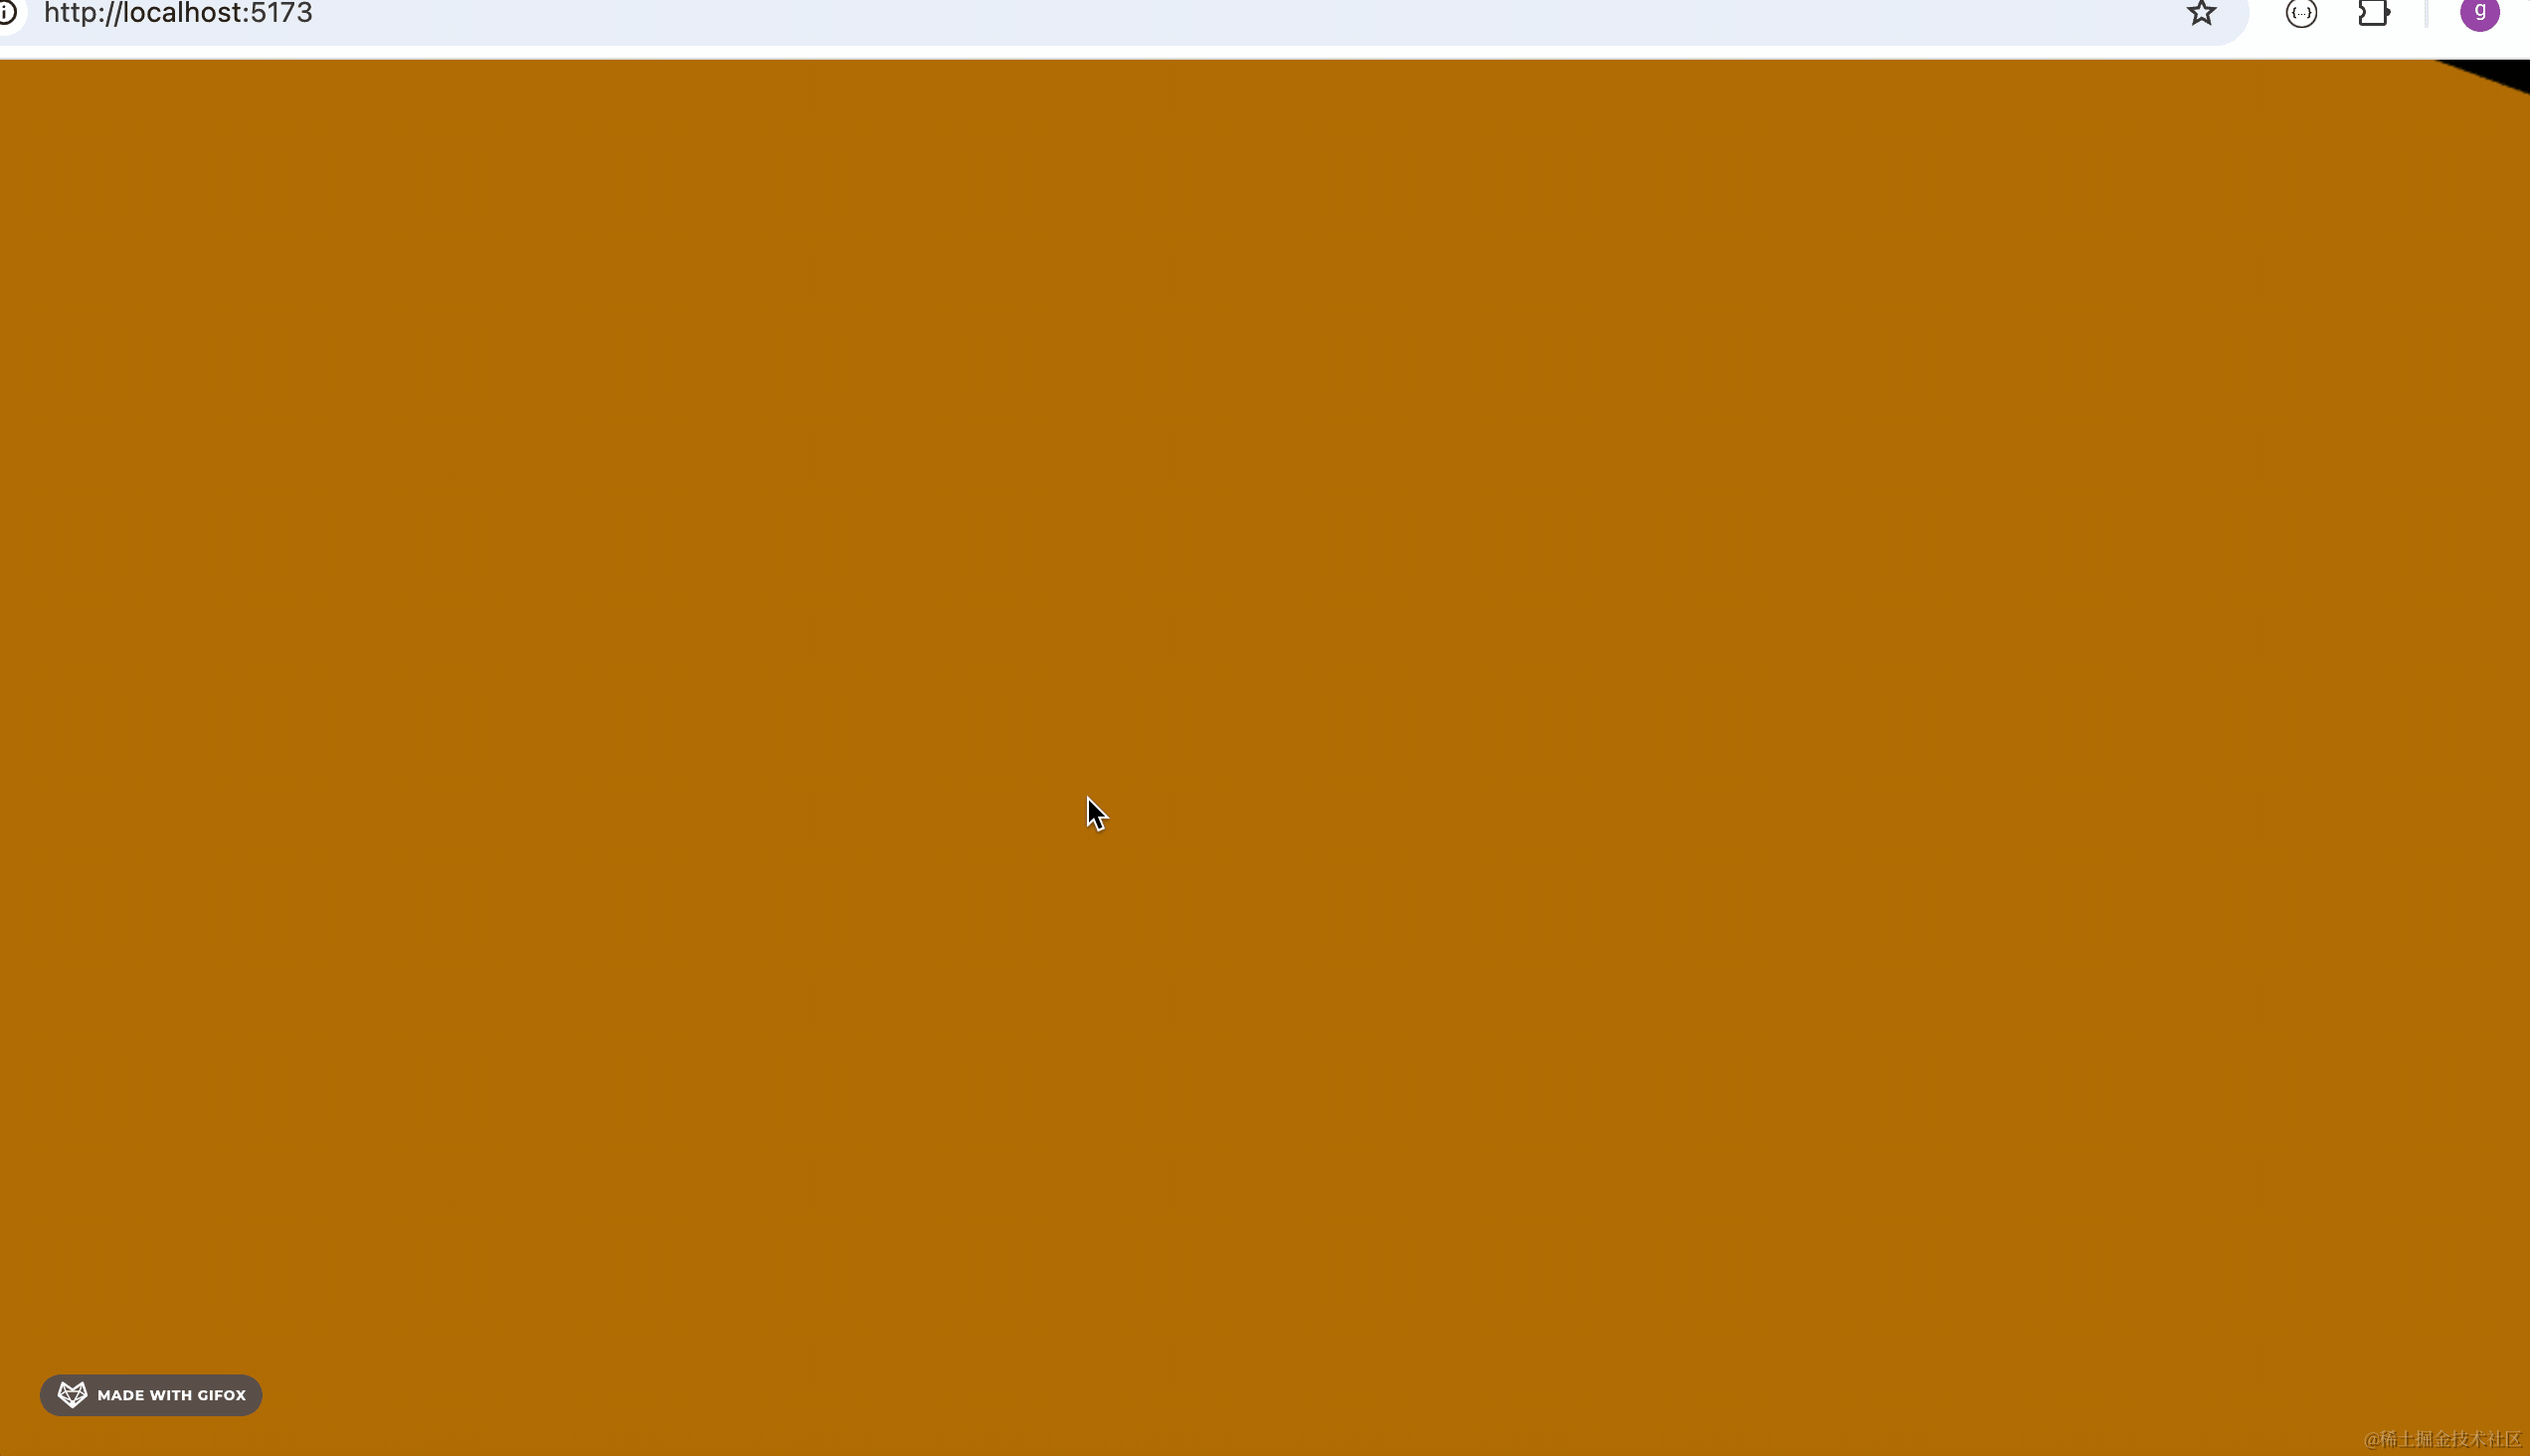
export default group;创建了一个 3000 * 3000 的平面。
跑下看下效果:
npm run dev
然后创建 4 面镜子:
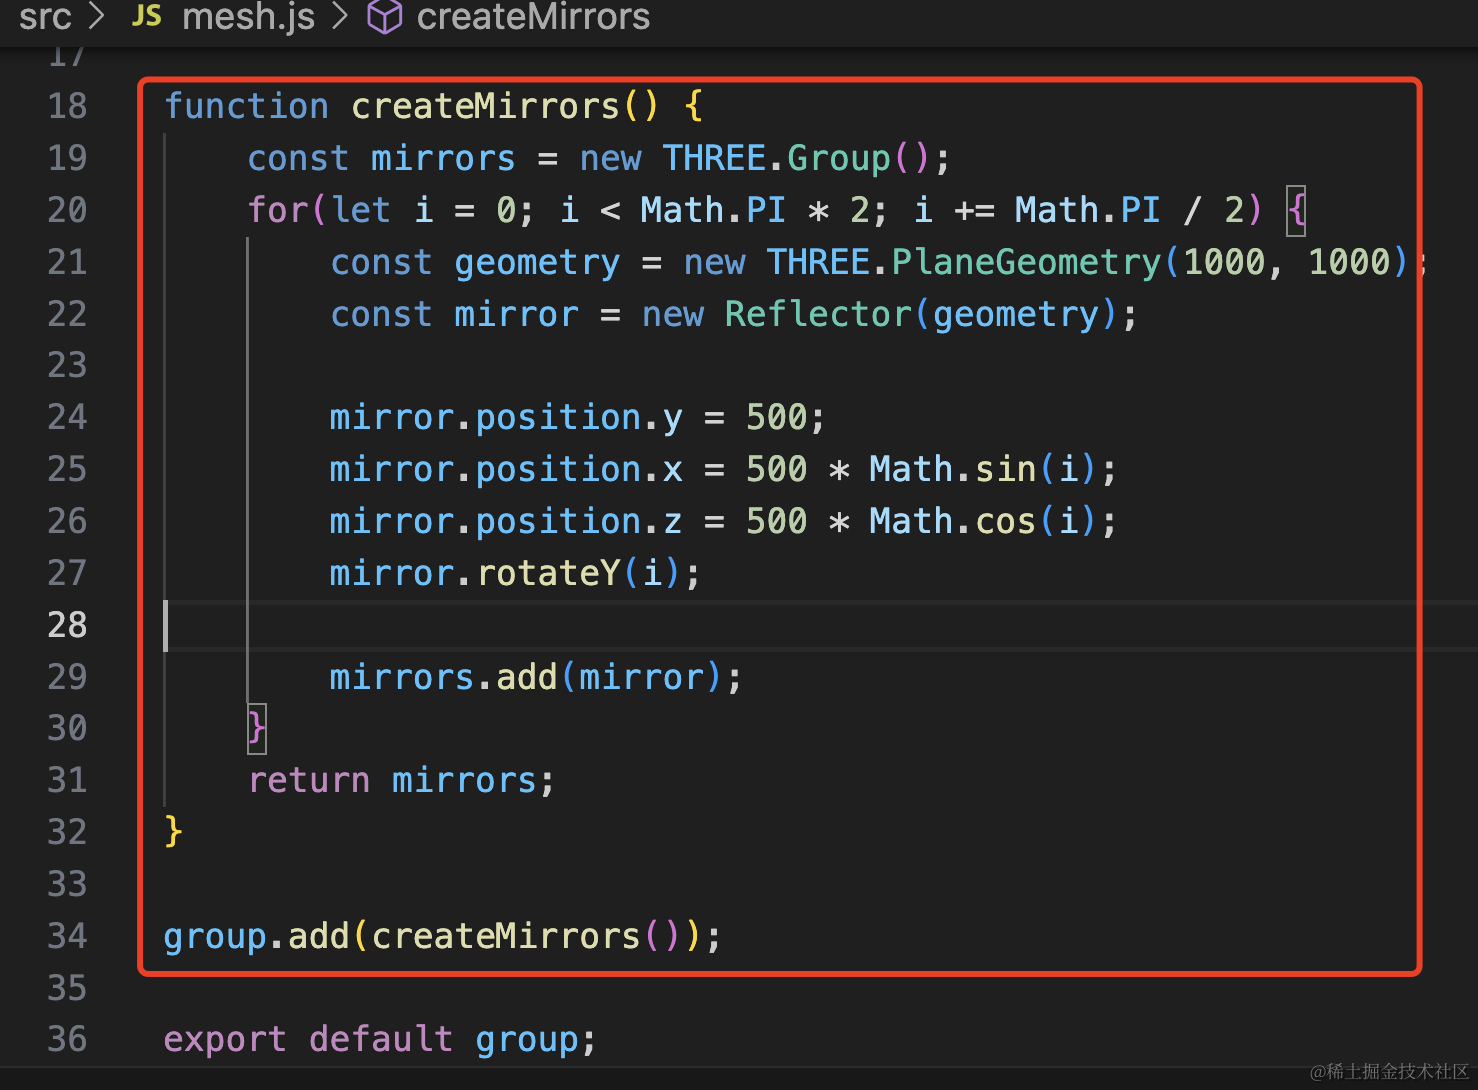
function createMirrors() {
    const mirrors = new THREE.Group();
    for(let i = 0; i < Math.PI * 2; i += Math.PI / 2) {
        const geometry = new THREE.PlaneGeometry(1000, 1000);
        const mirror = new Reflector(geometry);

        mirror.position.y = 500;
        mirror.position.x = 500 * Math.sin(i);
        mirror.position.z = 500 * Math.cos(i);
        mirror.rotateY(i);

        mirrors.add(mirror);
    }
    return mirrors;
}

group.add(createMirrors());
这里角度是从 0 到 360 度也就是 0 到 Math.PI * 2,每 90 度也就是 Math.PI / 2 放一面镜子。
y 是一样的,往上移动高度的一半。
x、z 通过半径 * 旋转角度的 cos、sin 来算。
然后绕 y 轴旋转一下。
看下效果:

镜子有了,但是是朝外的方向。
让它反过去也就是 rotateY(- Math.PI)
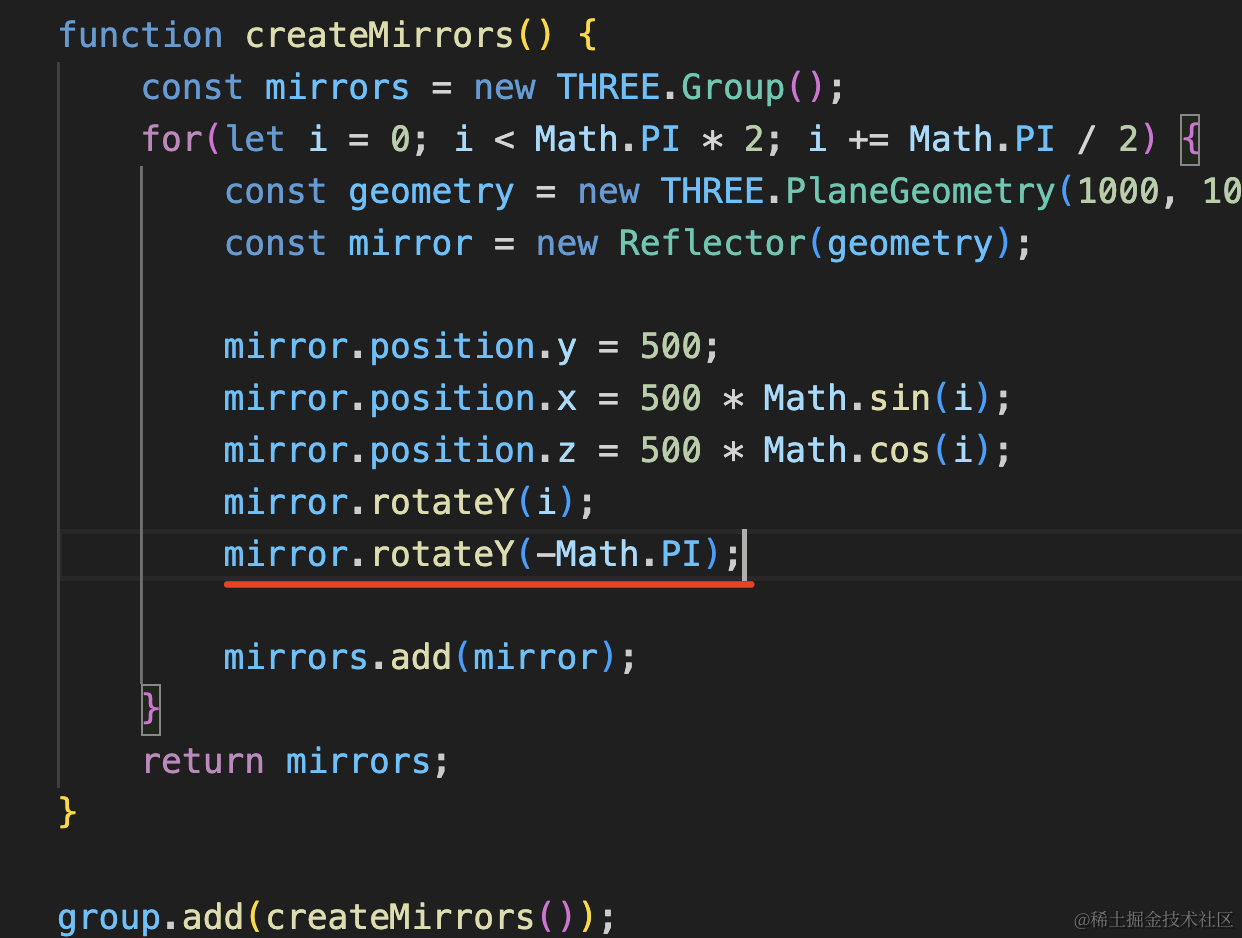
mirror.rotateY(-Math.PI);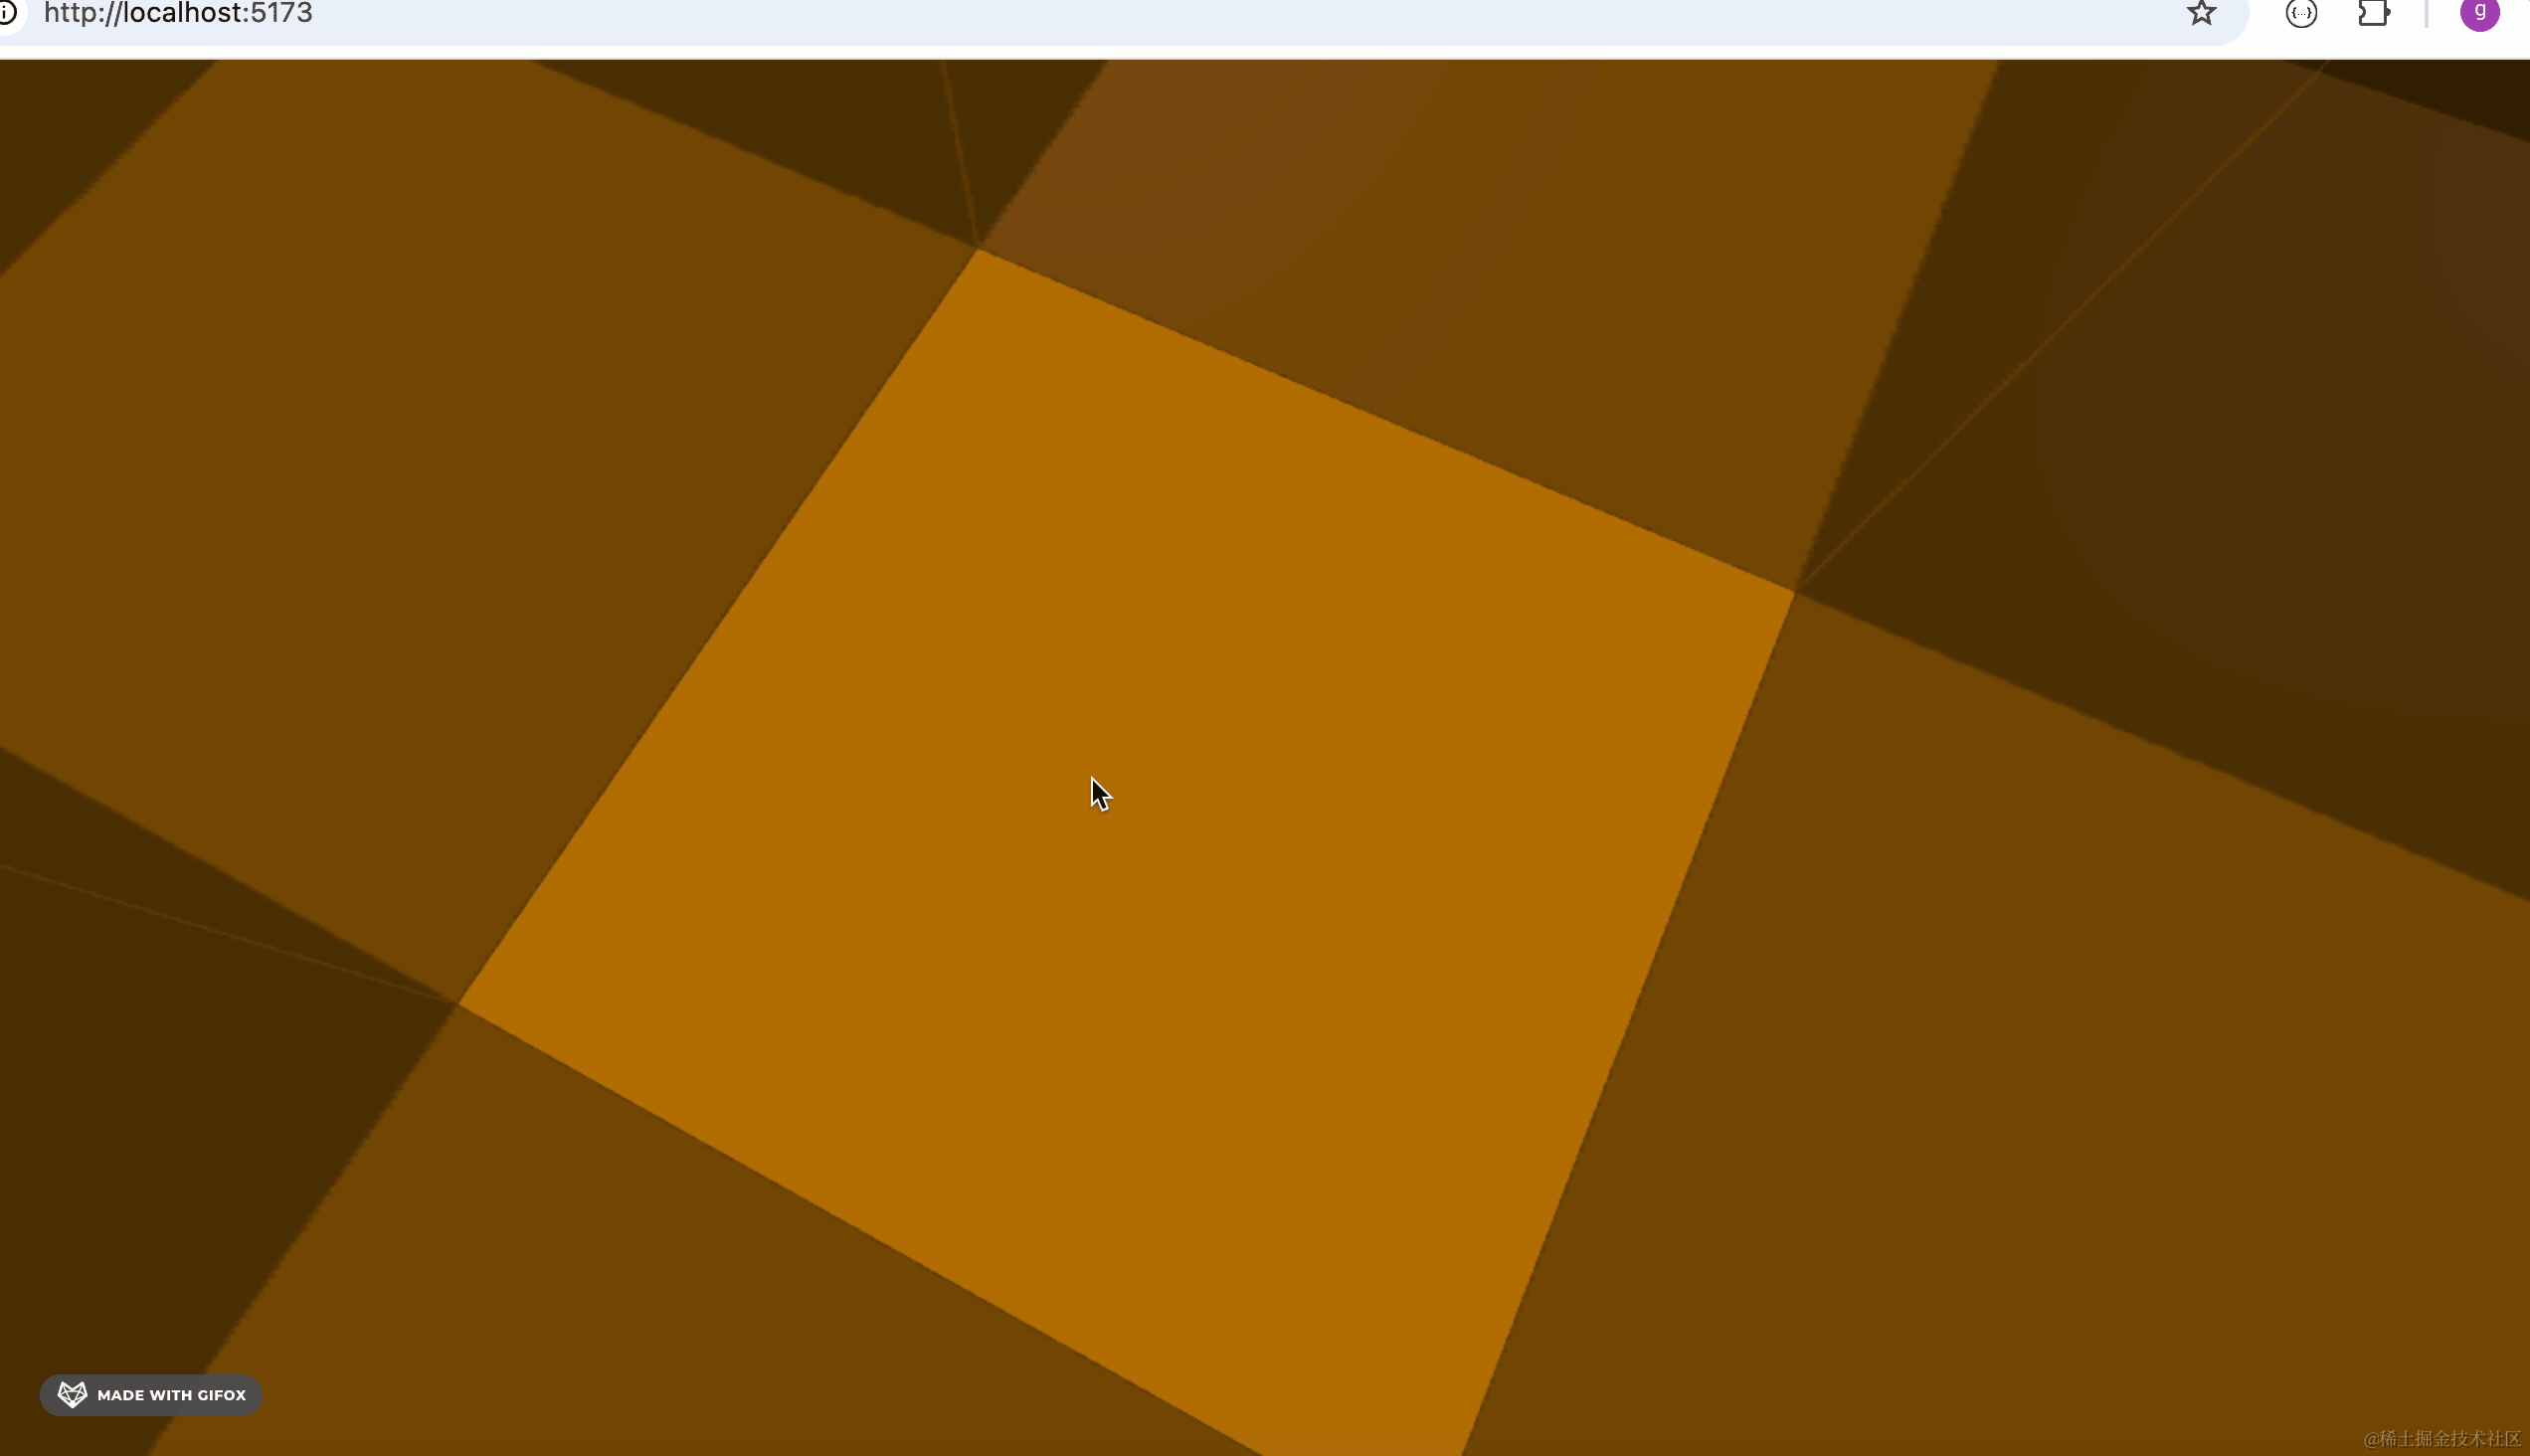
现在,四面镜子就放好了。
然后我们加载之前那个人物模型:
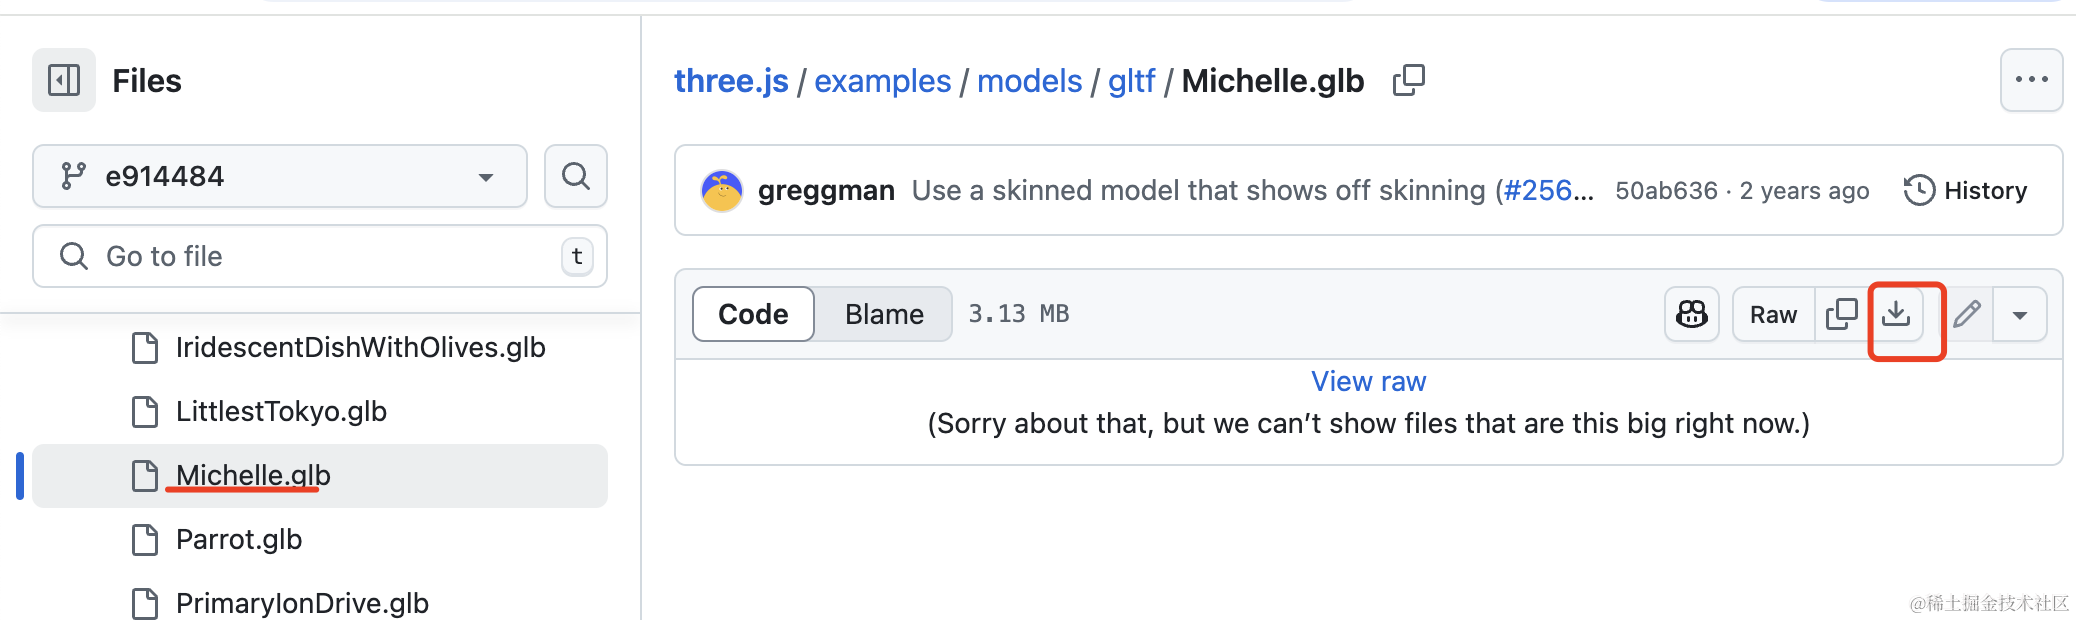
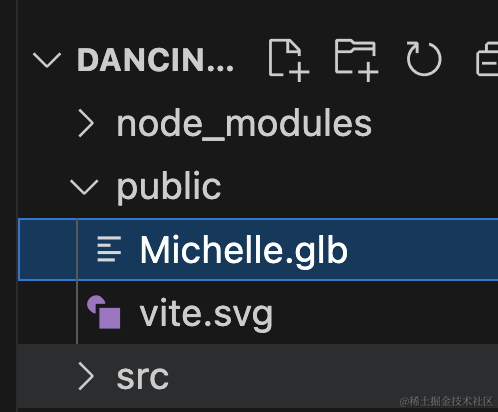
下载下来放到 public 目录下:
代码里加载下:
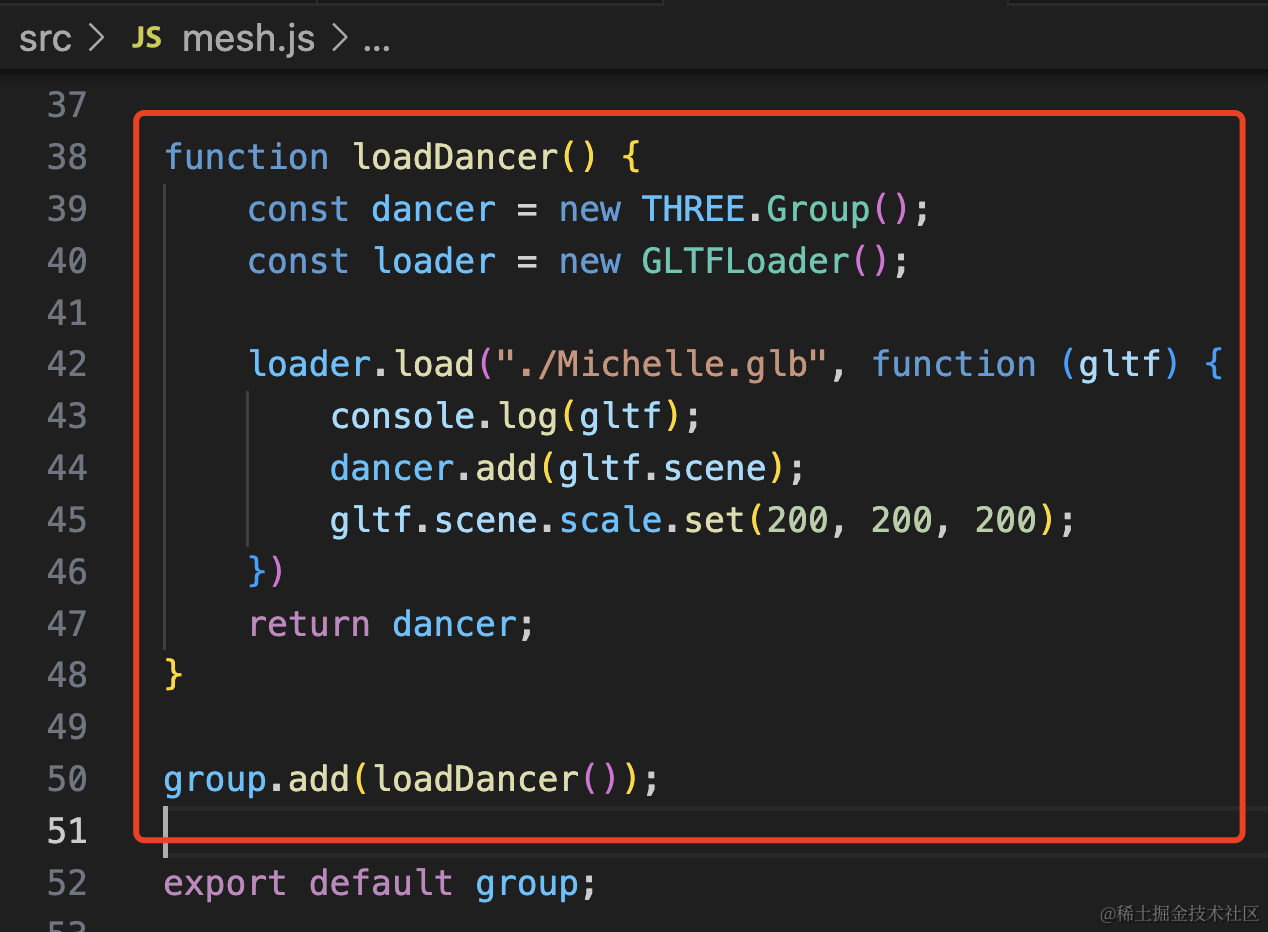
function loadDancer() {
const dancer = new THREE.Group();
const loader = new GLTFLoader();
loader.load("./Michelle.glb", function (gltf) {
console.log(gltf);
dancer.add(gltf.scene);
gltf.scene.scale.set(200, 200, 200);
})
return dancer;
}
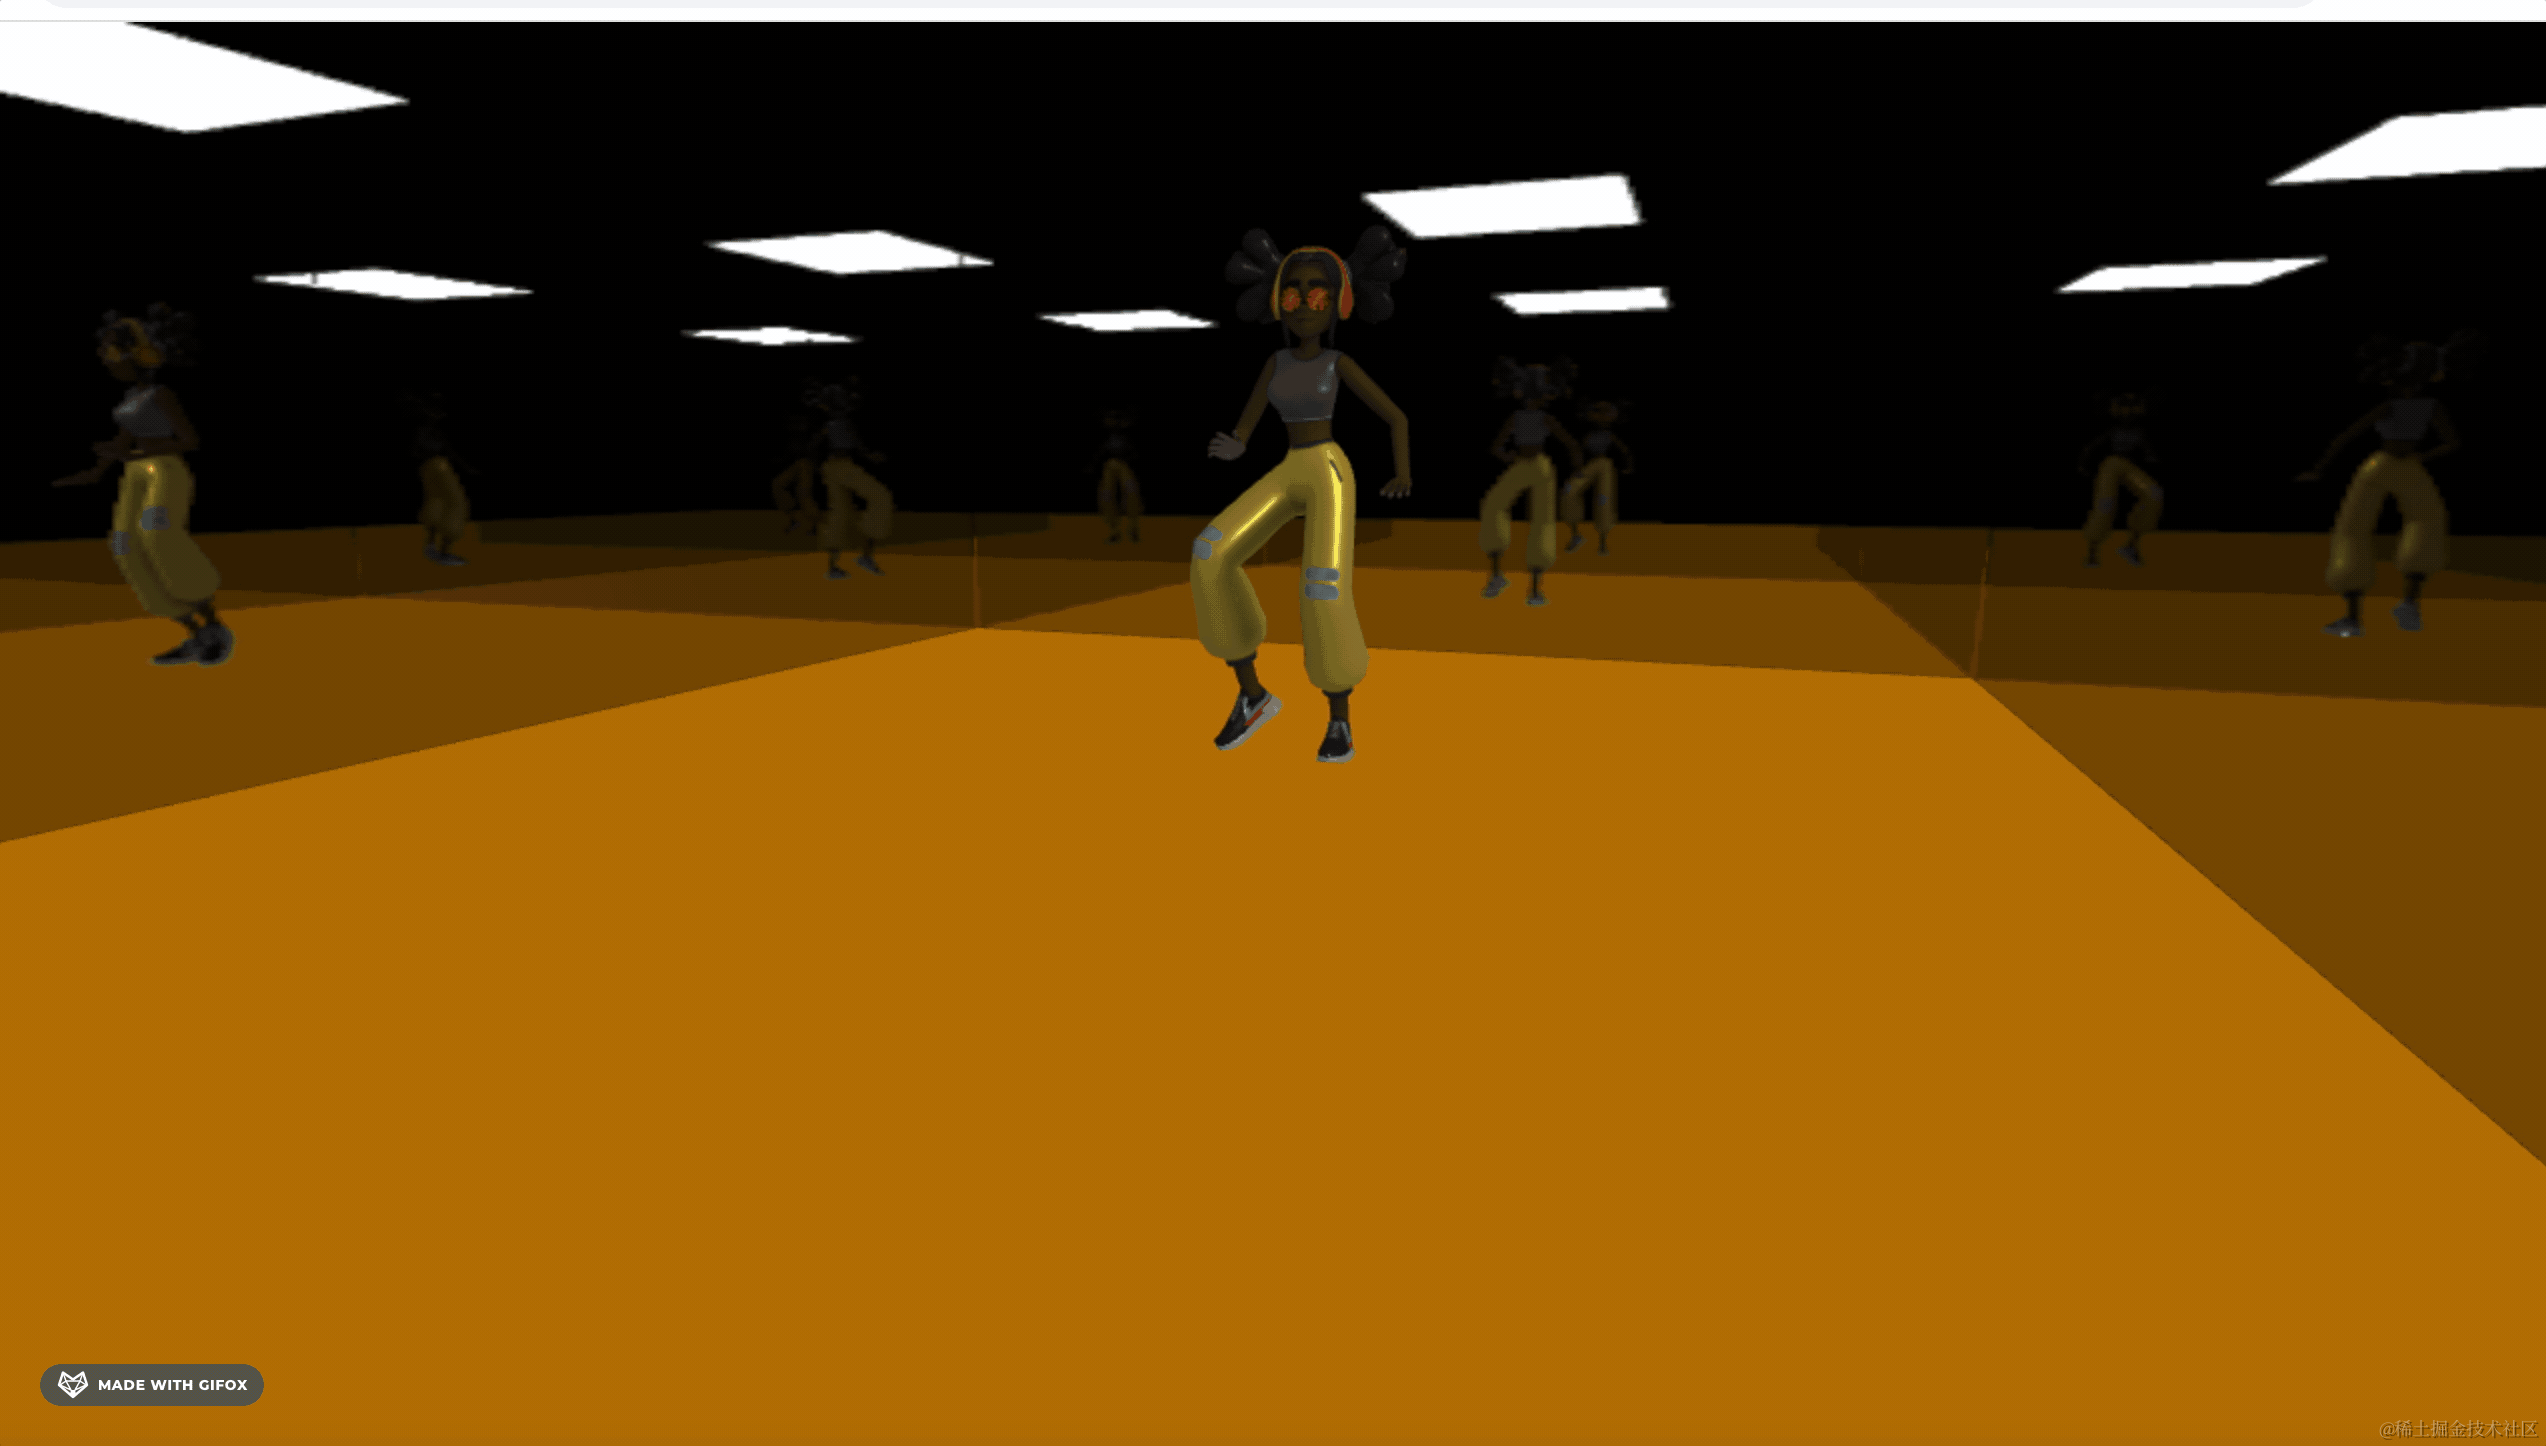
group.add(loadDancer());看下效果:
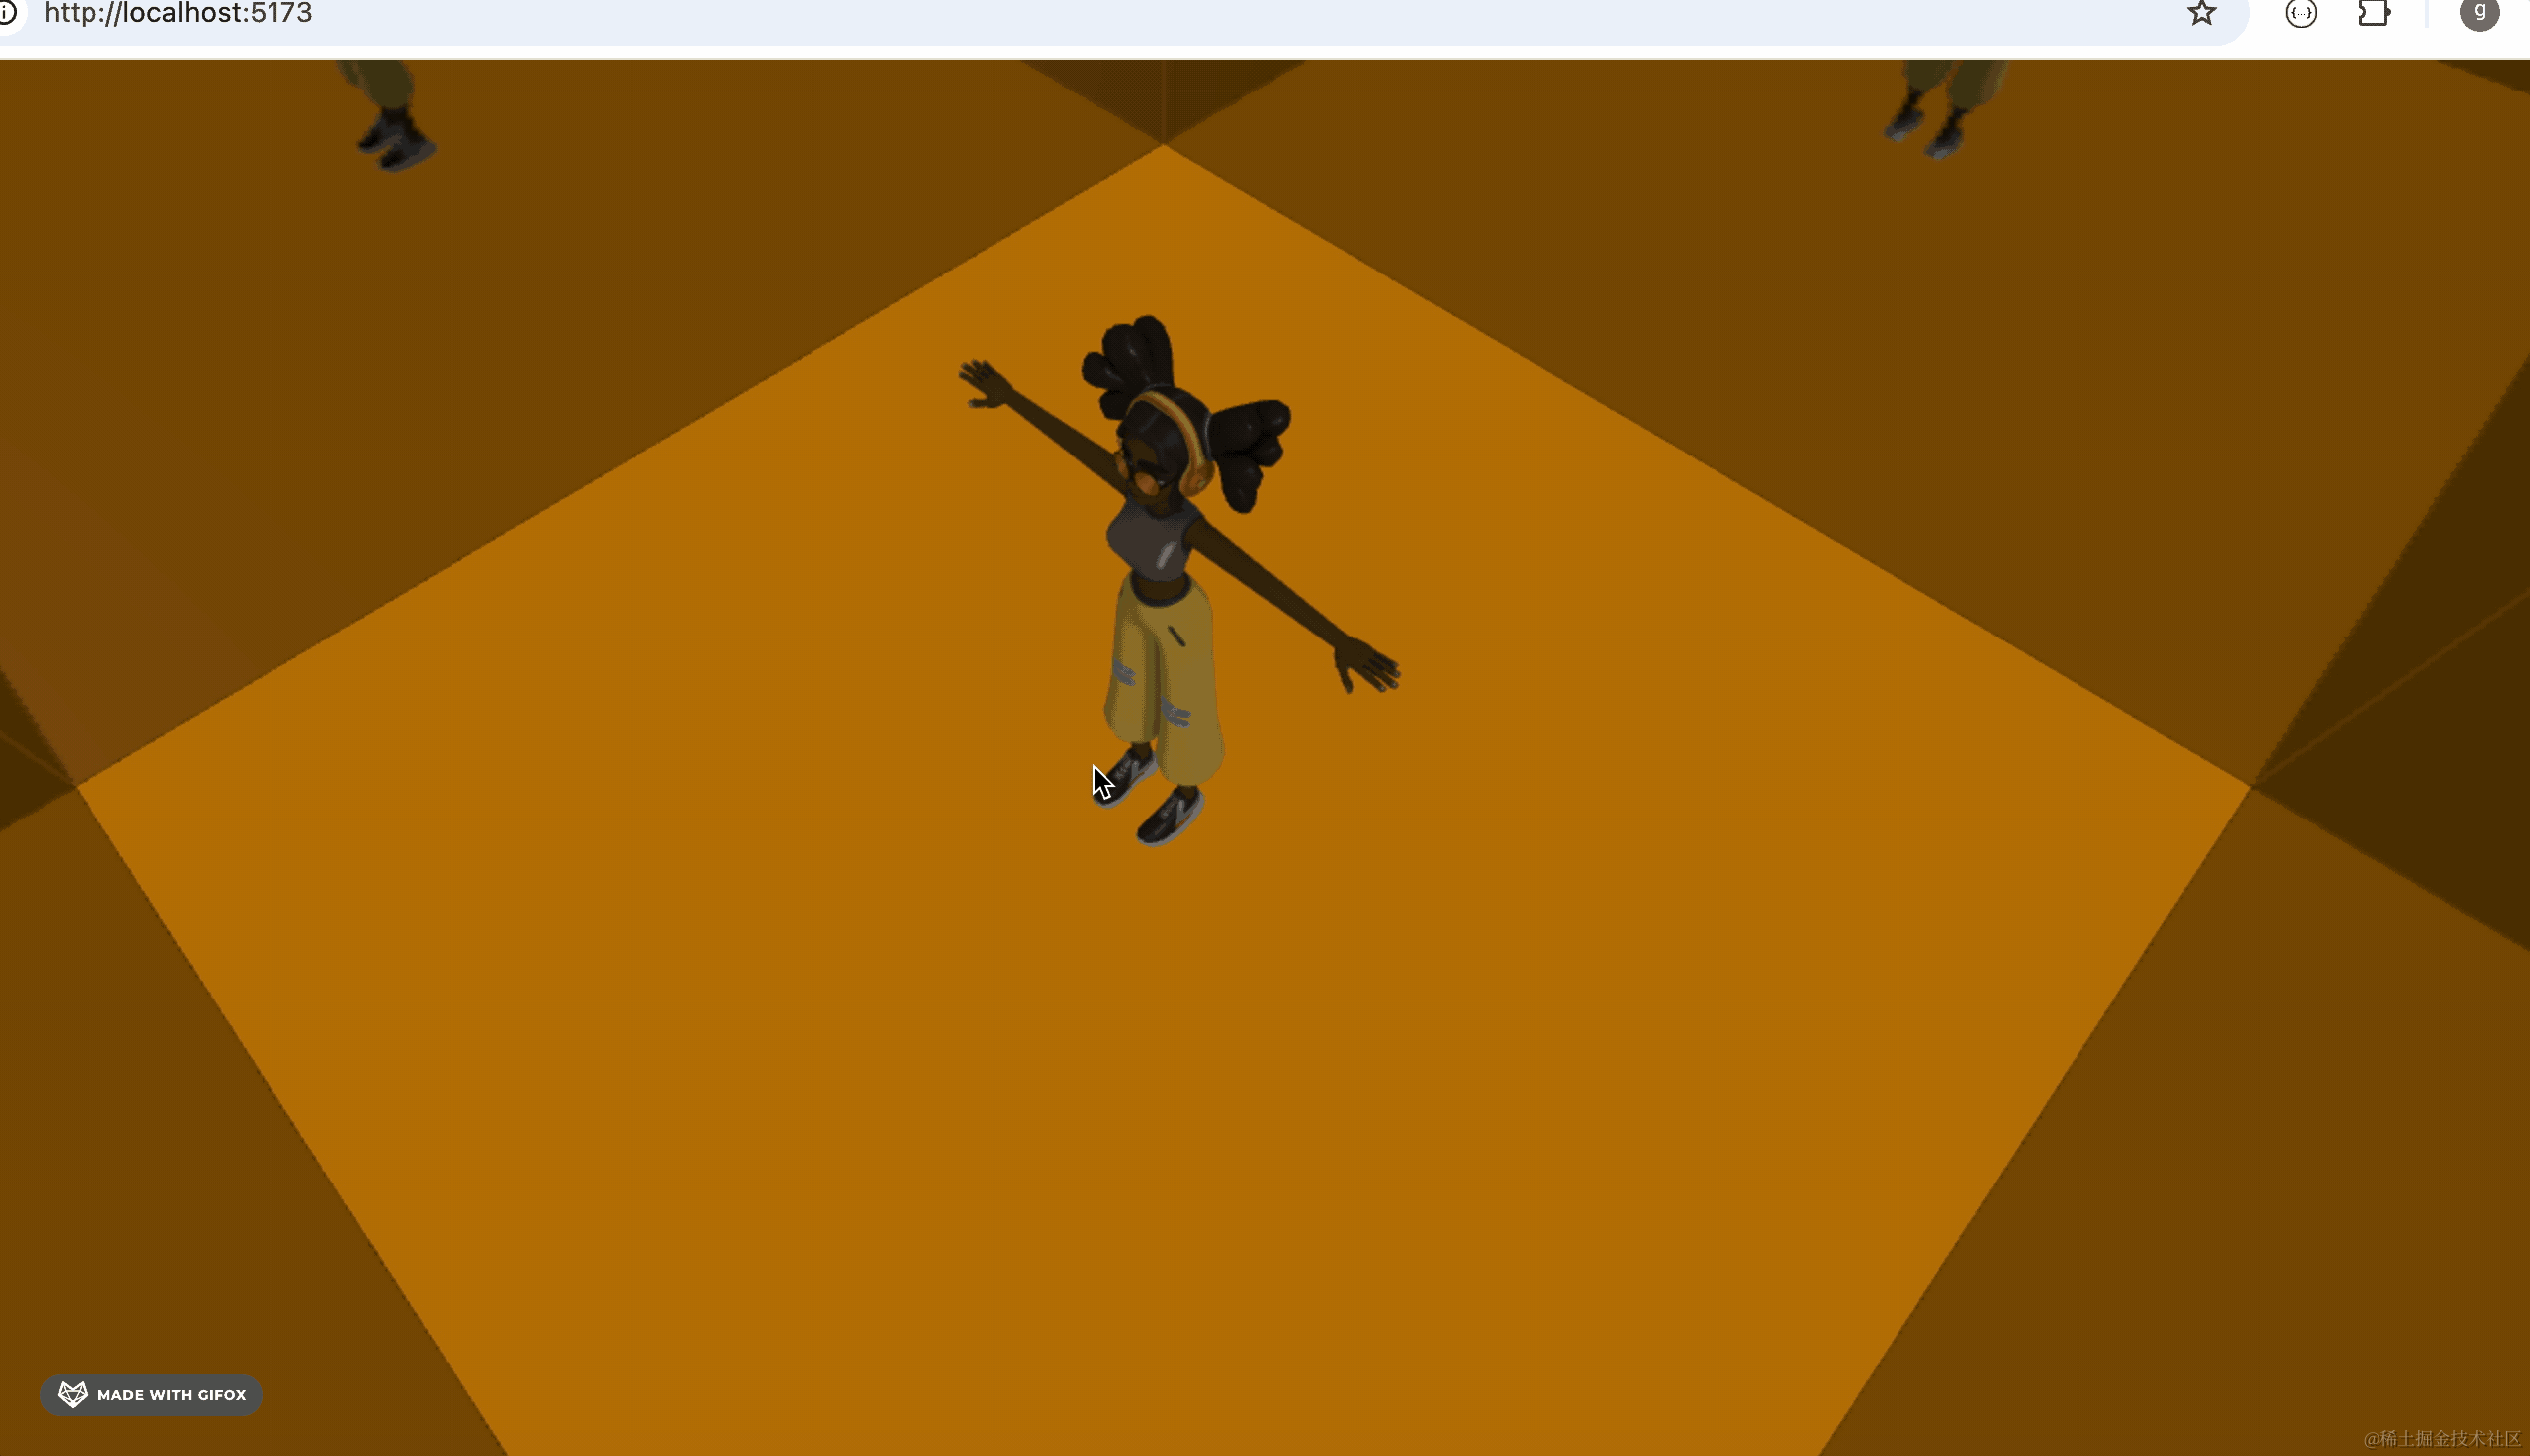
这样,舞者就有了,镜子中可以看到舞者的身影。
然后我们用 AnimationMixer 播放下她跳舞的动画:
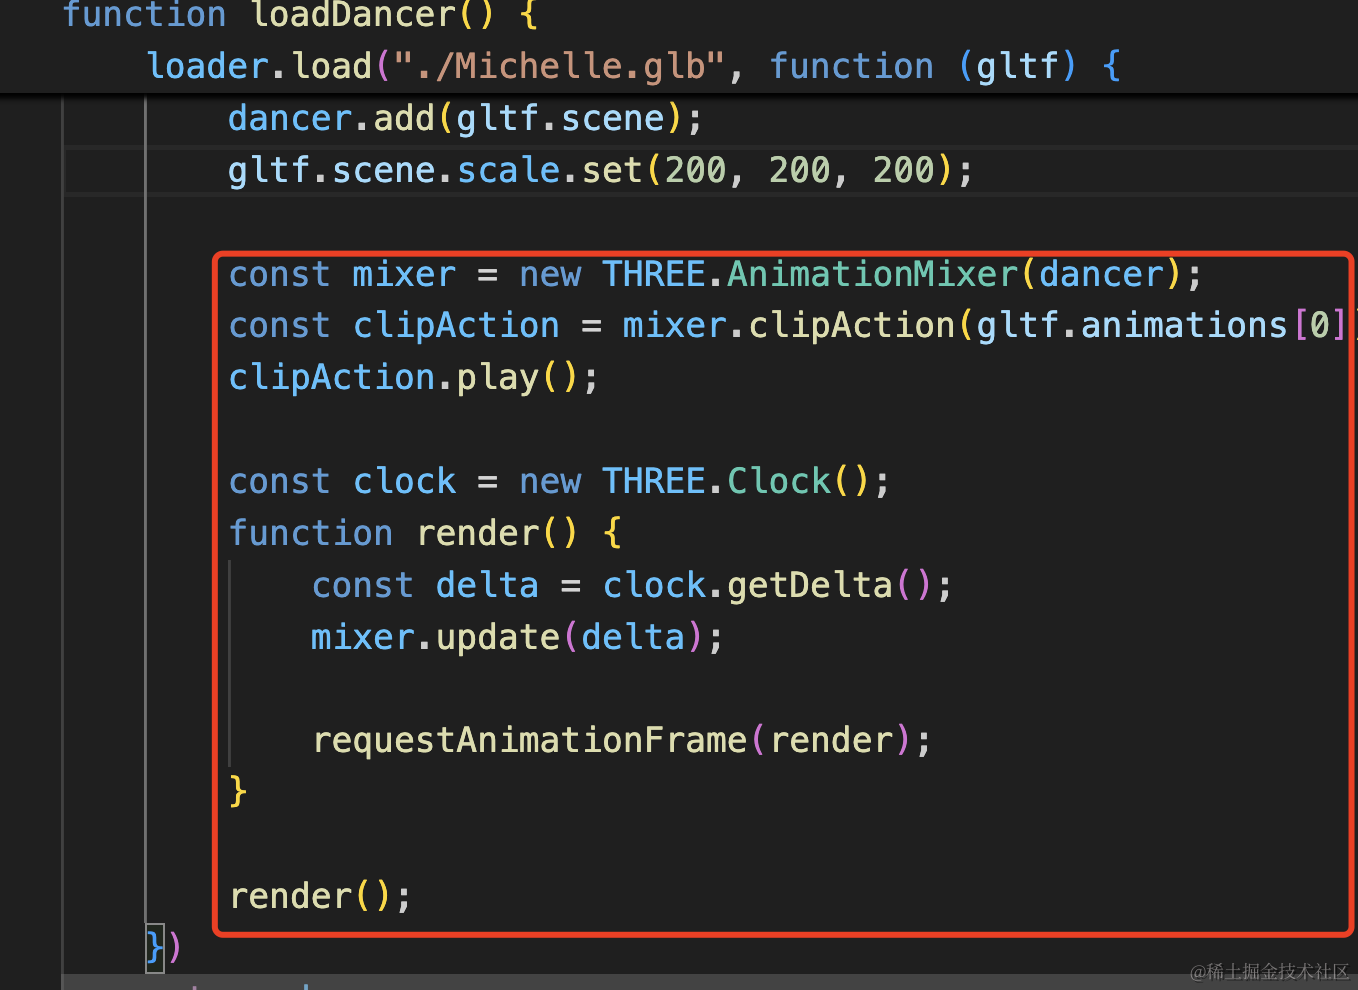
const mixer = new THREE.AnimationMixer(dancer);
const clipAction = mixer.clipAction(gltf.animations[0]);
clipAction.play();

const clock = new THREE.Clock();
function render() {
    const delta = clock.getDelta();
    mixer.update(delta);

    requestAnimationFrame(render);
}

render();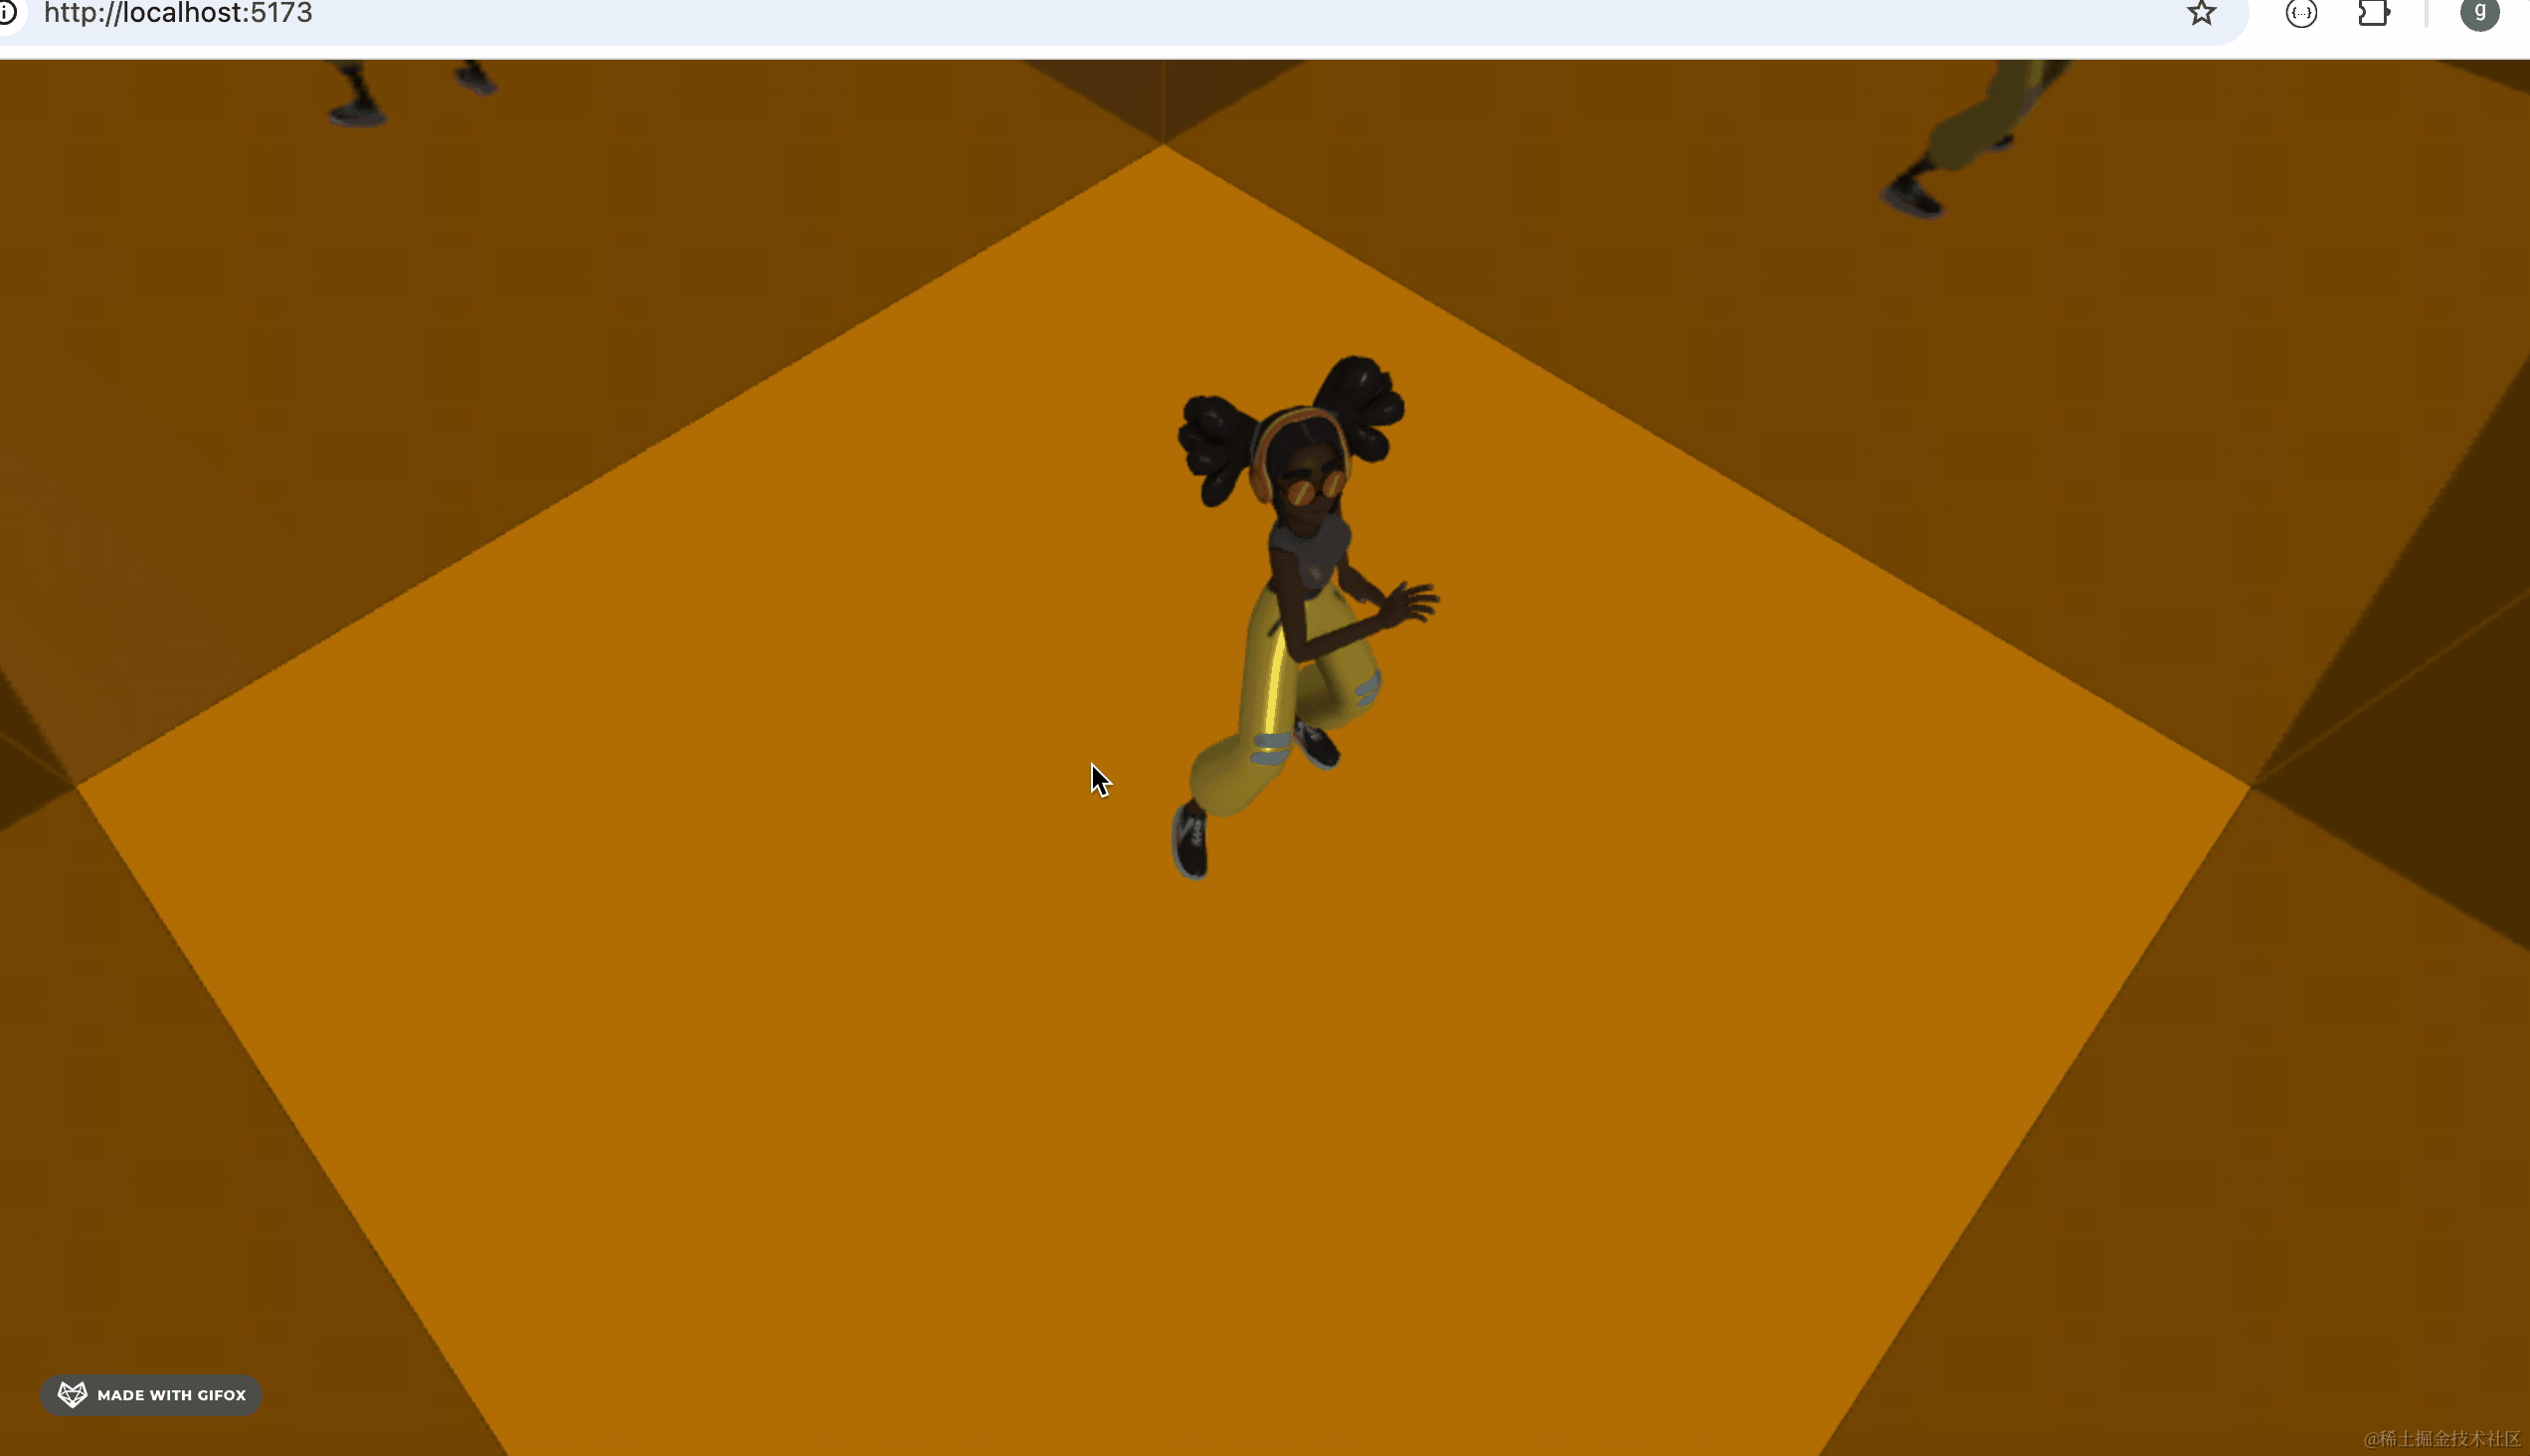
接下来让相机自己绕舞者旋转,用 tween.js 做动画:
安装下:
npm install --save @tweenjs/tween.js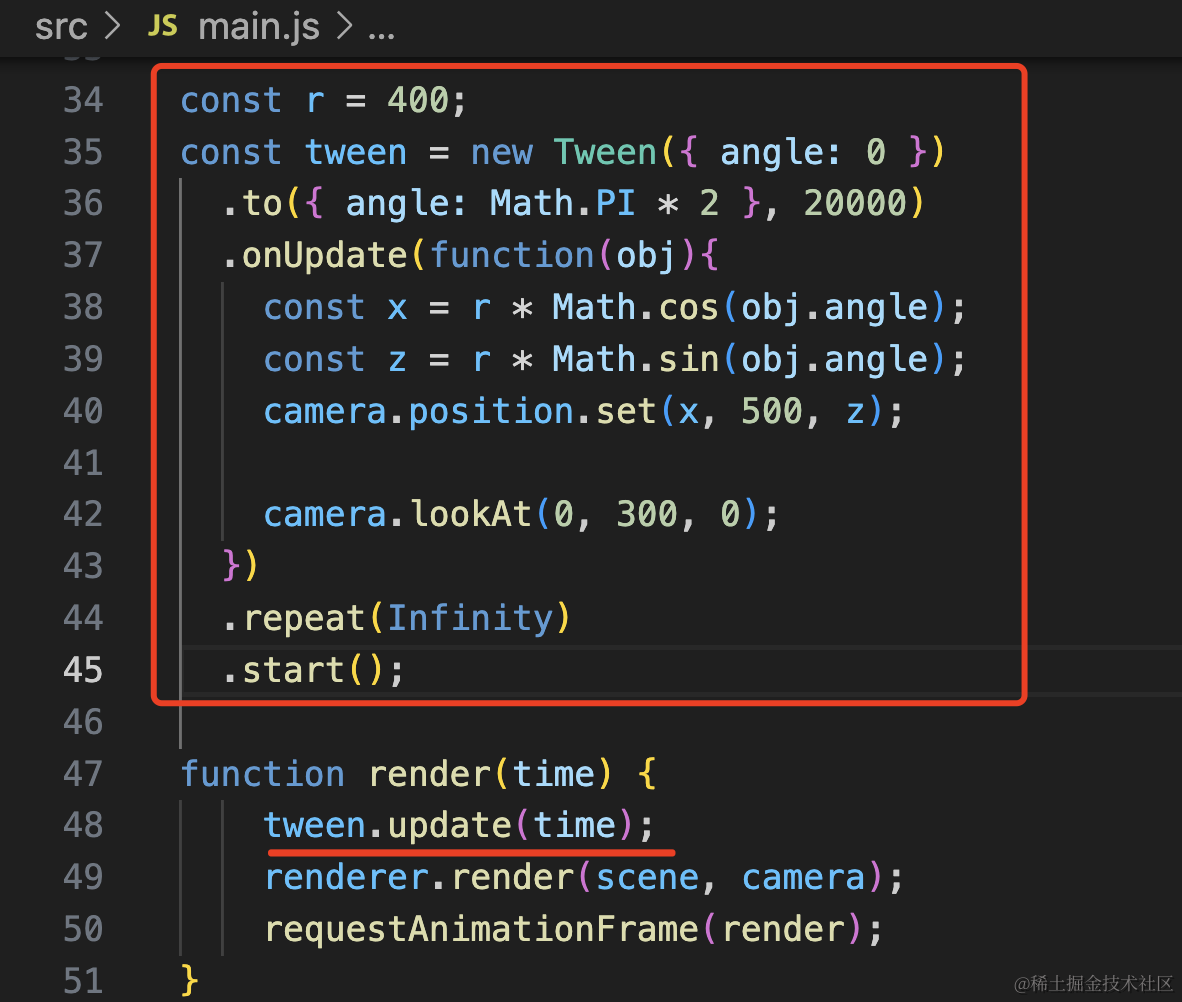
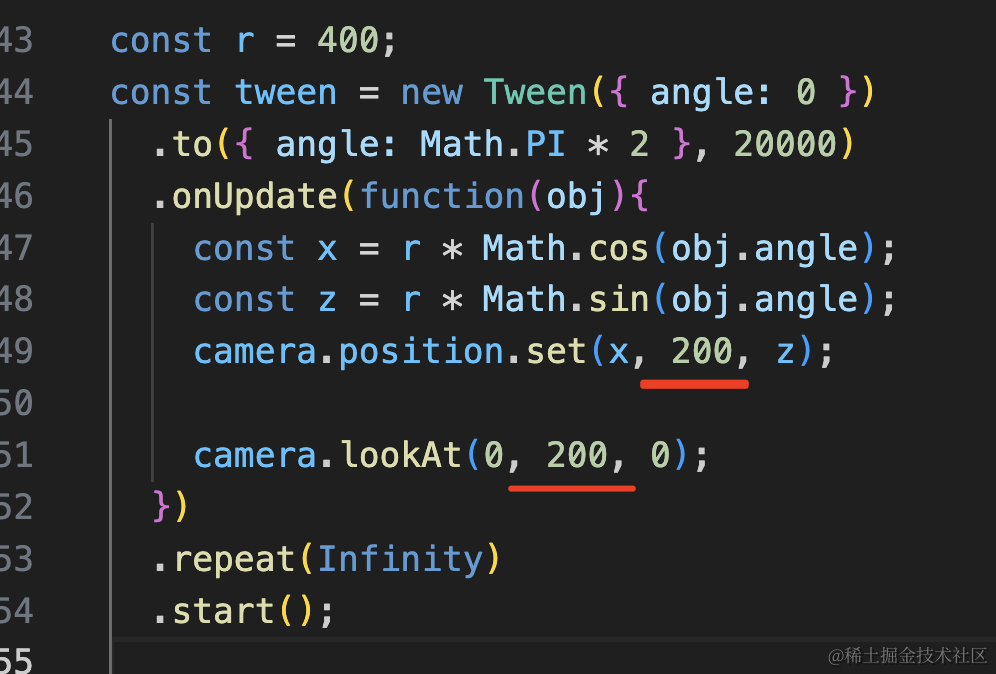
const r = 400;
const tween = new Tween({ angle: 0 })
.to({ angle: Math.PI * 2 }, 20000)
.onUpdate(function(obj){
const x = r * Math.cos(obj.angle);
const z = r * Math.sin(obj.angle);
camera.position.set(x, 500, z);
camera.lookAt(0, 300, 0);
})
.repeat(Infinity)
.start();
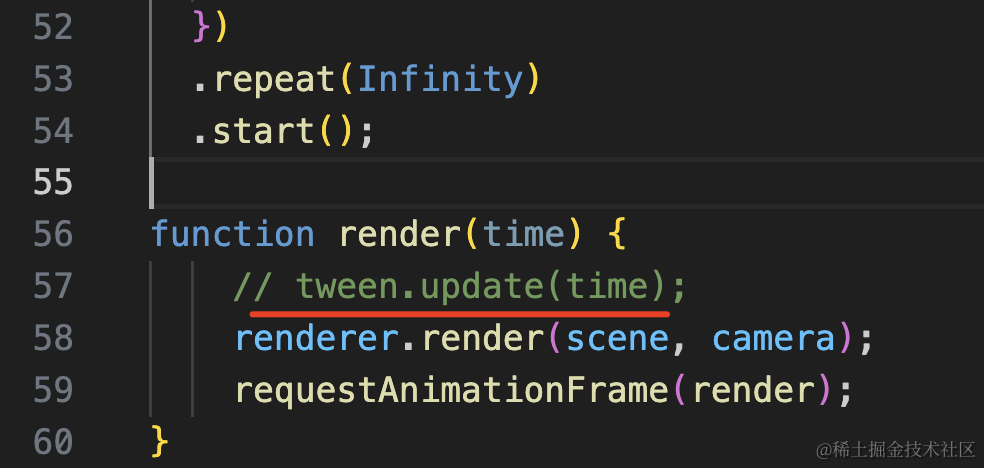
function render(time) {
tween.update(time);
renderer.render(scene, camera);
requestAnimationFrame(render);
}这里相机做圆周运动,半径 400,角度从 0 到 Math.PI * 2,每 20 秒转一圈,无限循环。
x、z 根据 cos、sin 算出来,y 是固定的 500 看向 0,300,0 的位置。
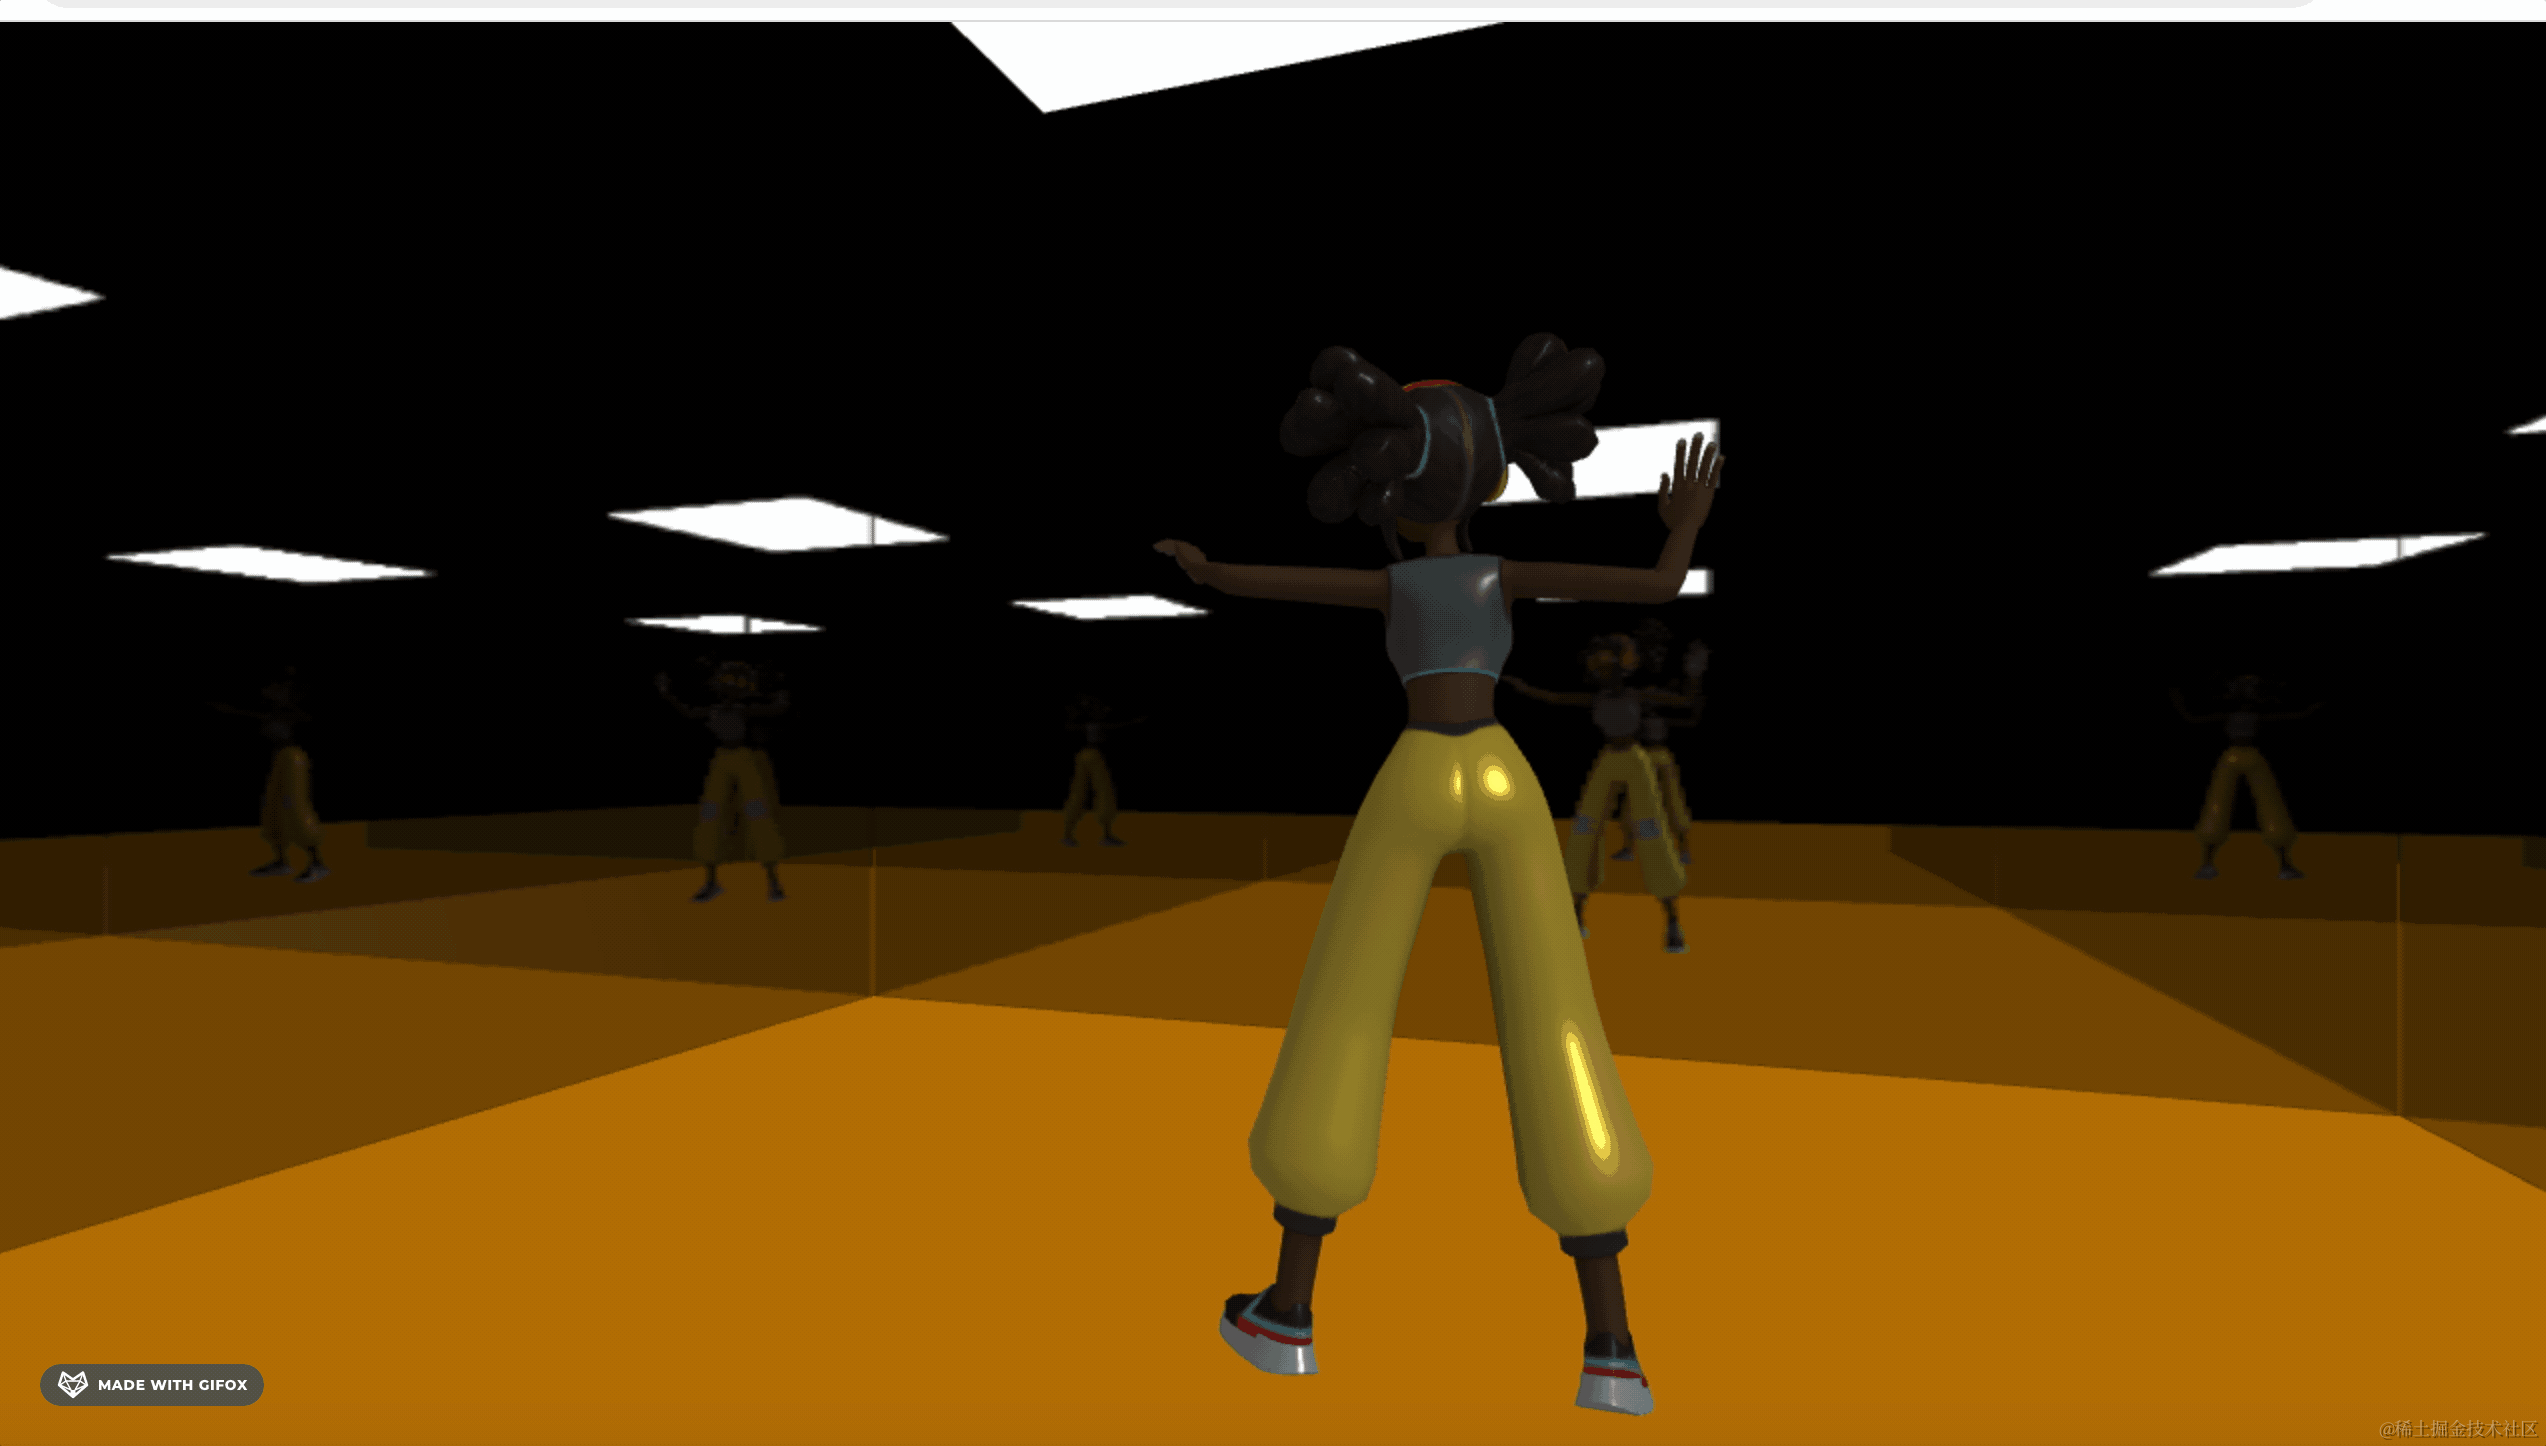
看下效果:
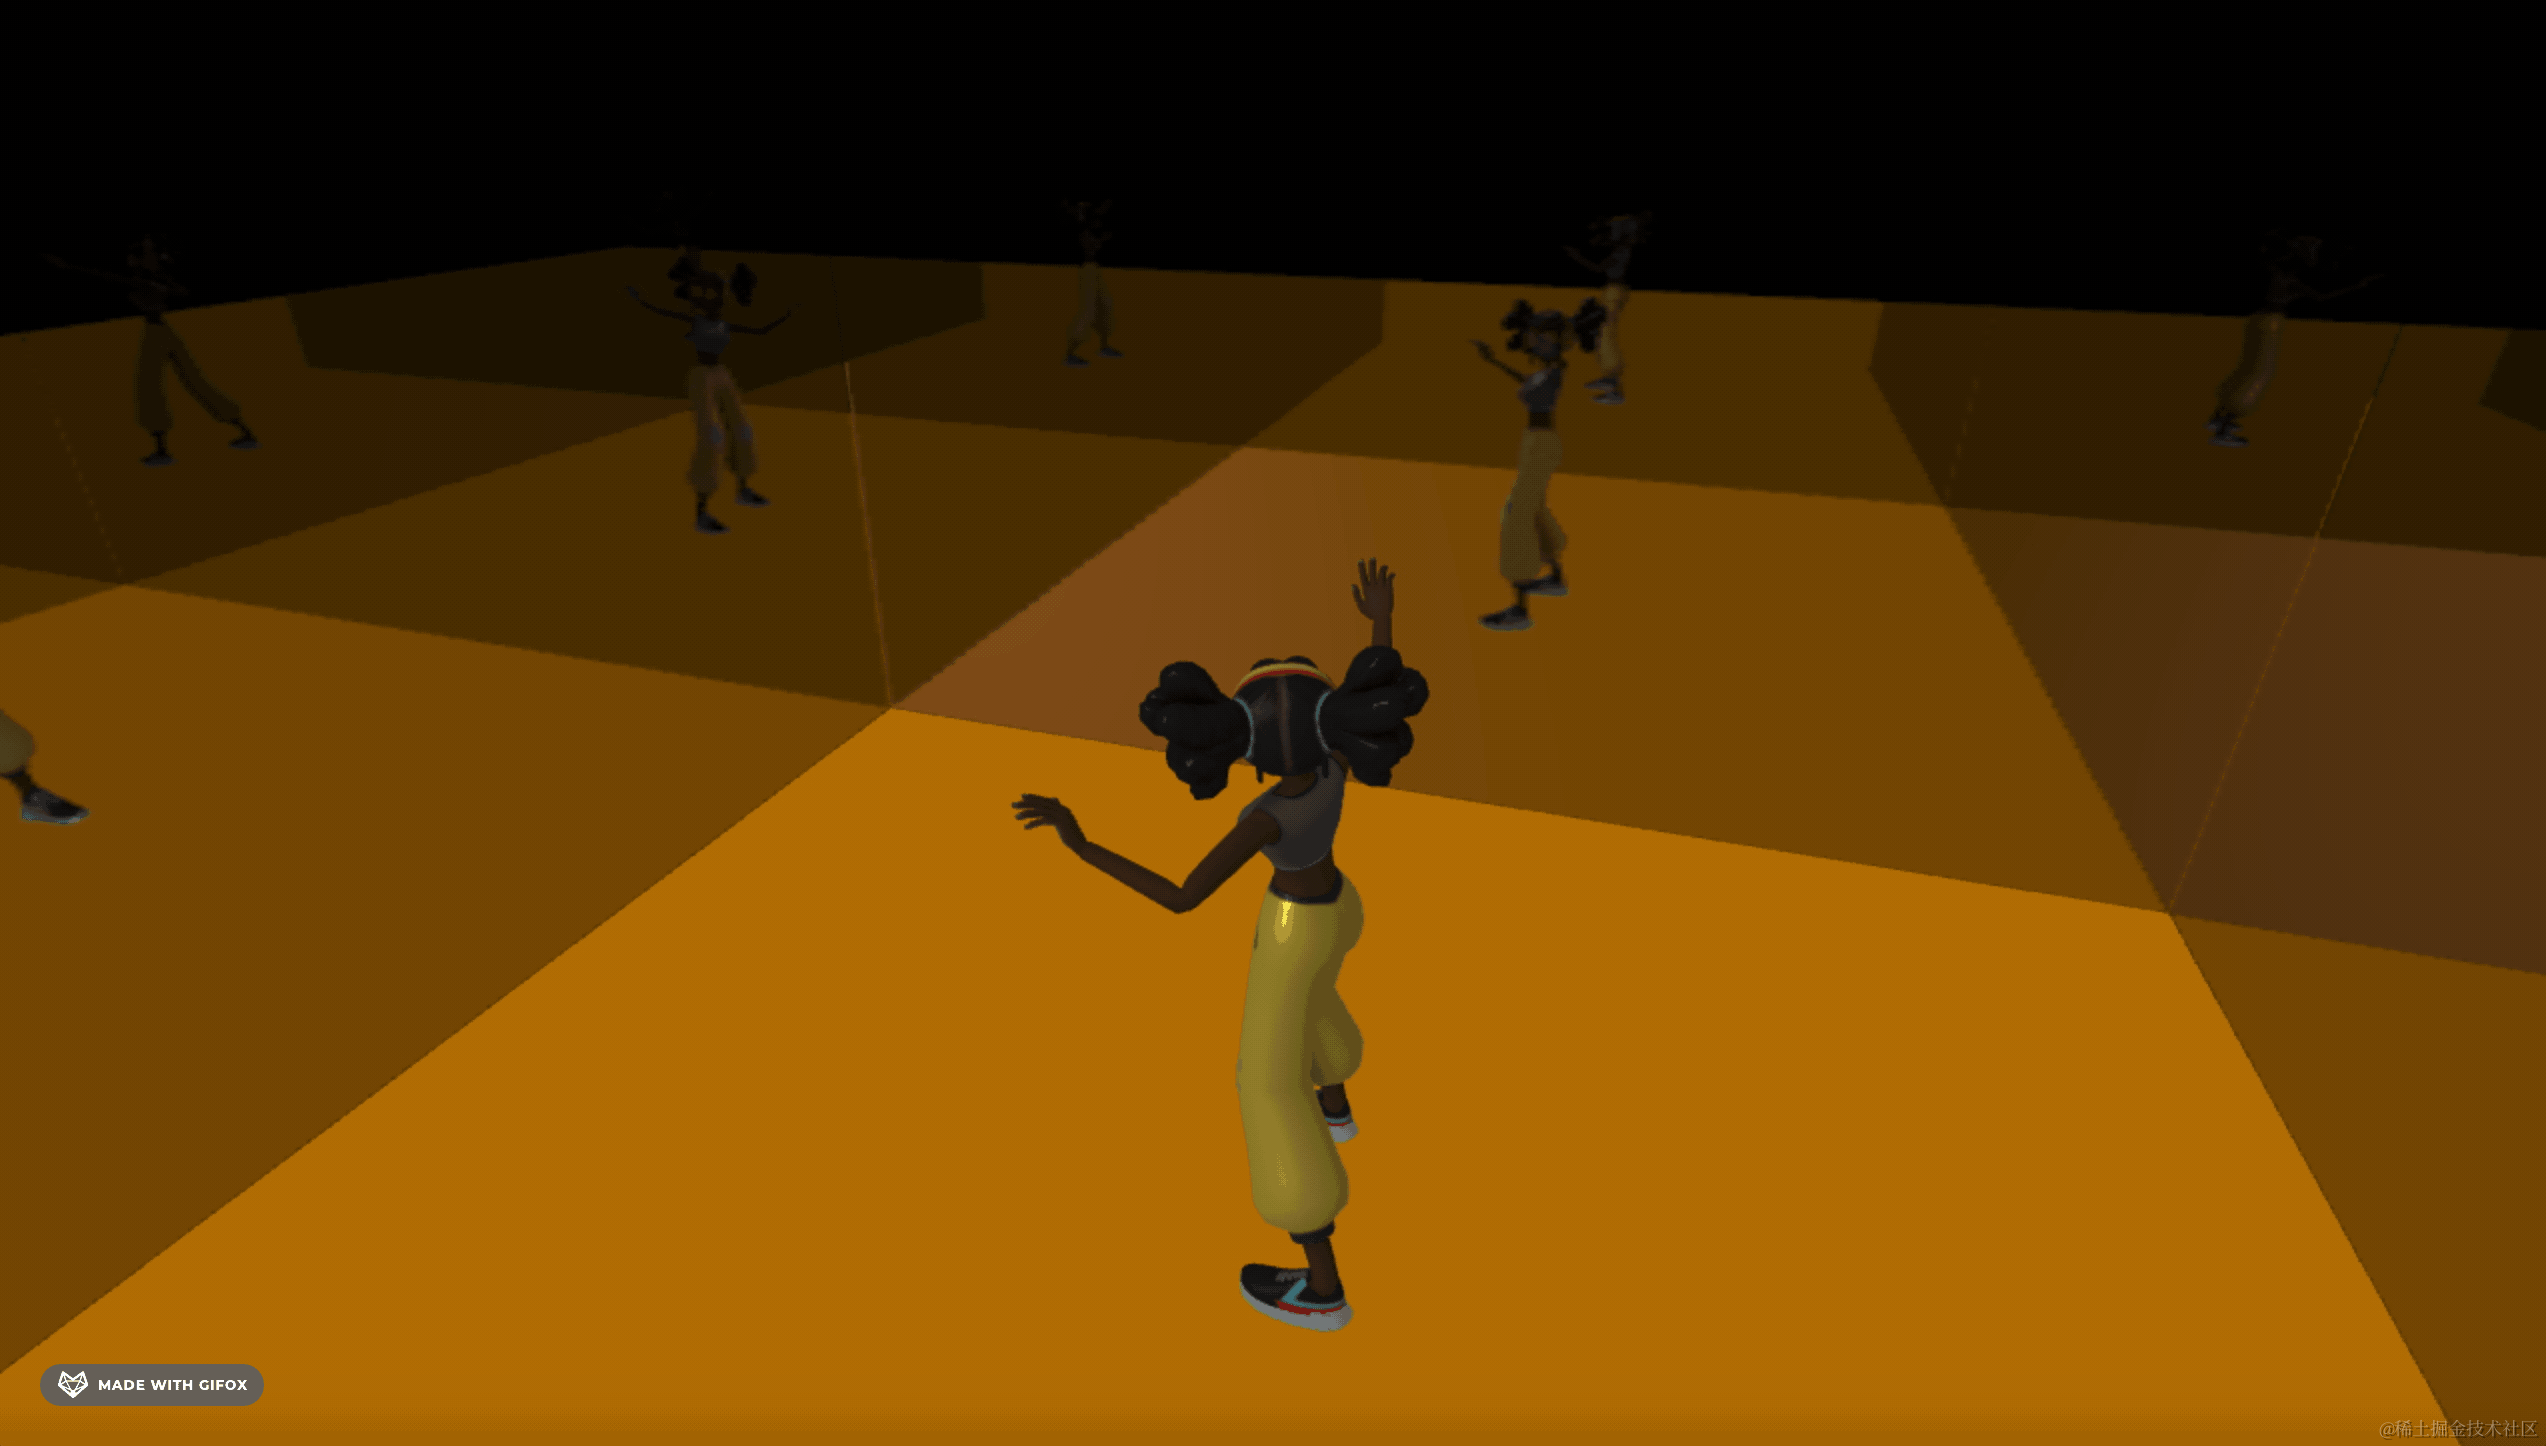
这样,练舞房的感觉就有了。
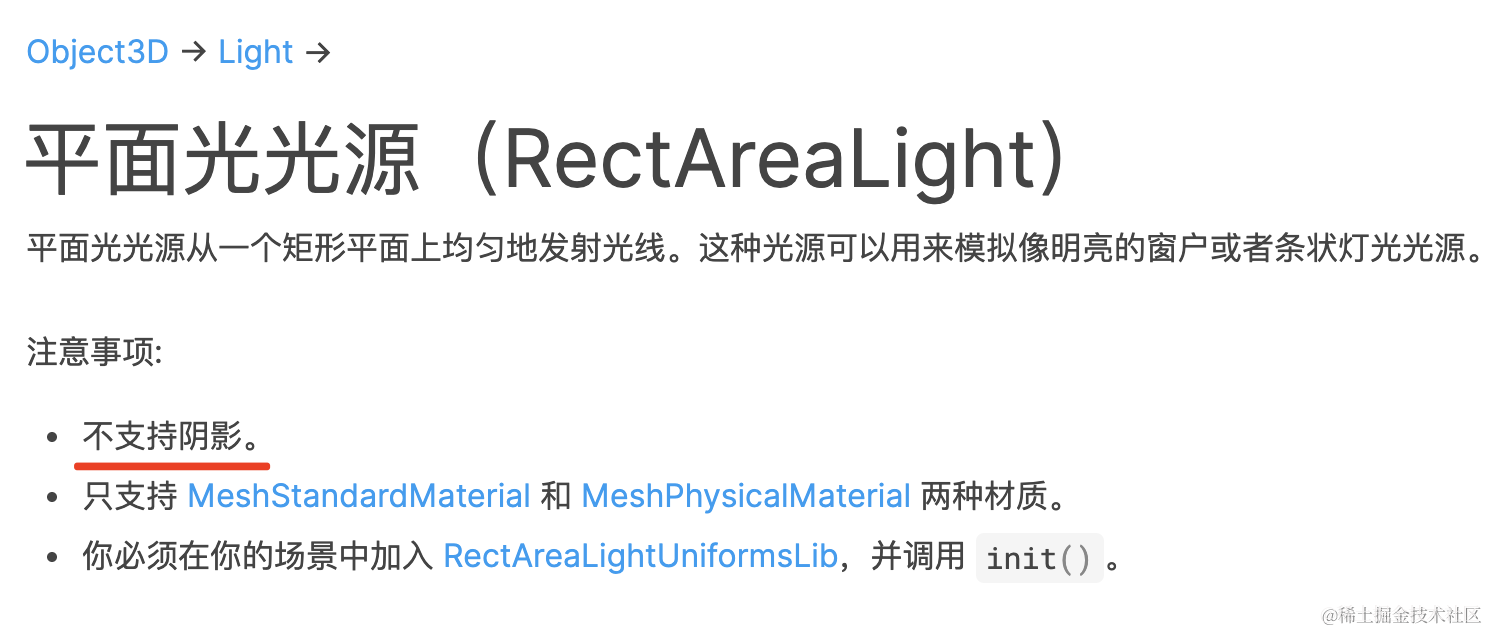
最后我们调一下灯光,用一下平面光:
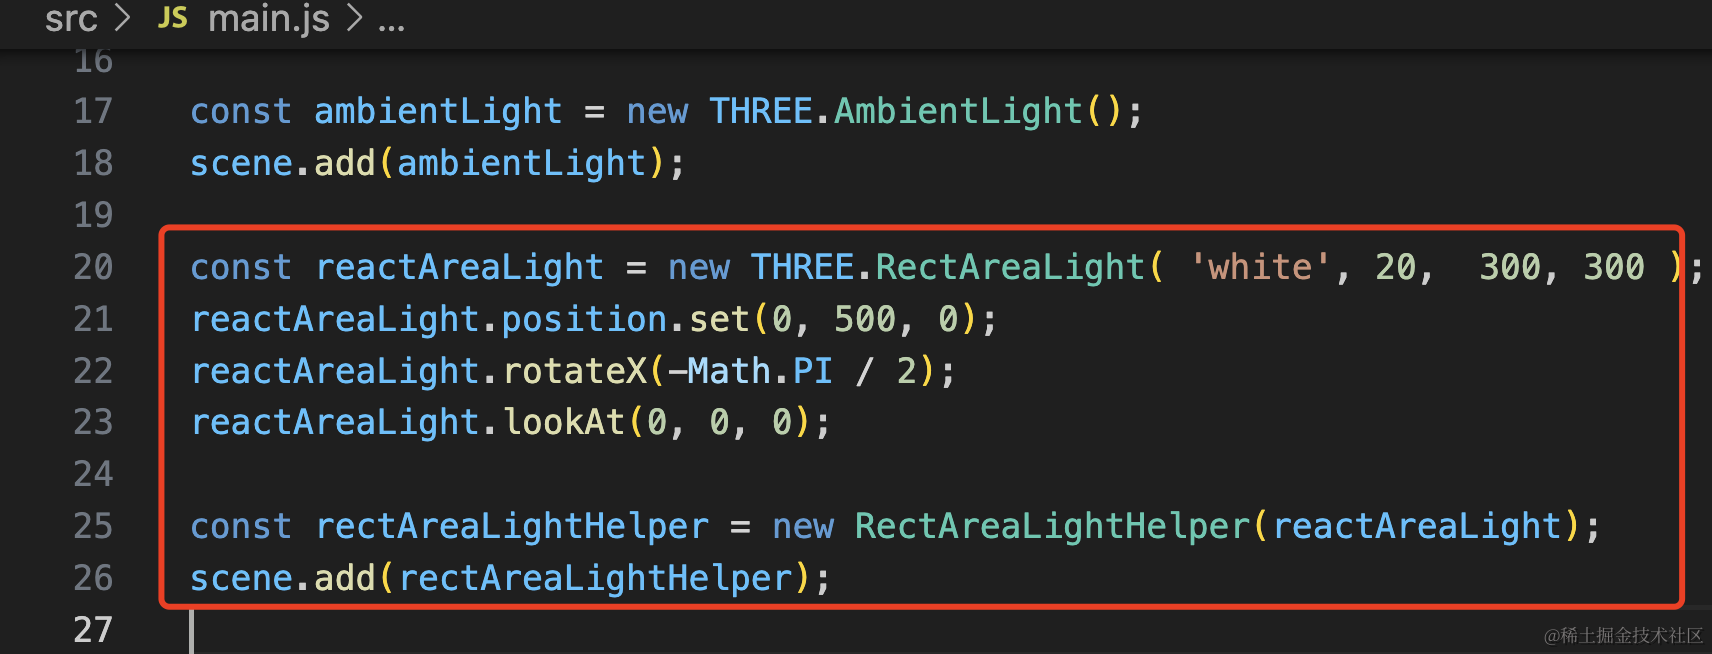
const reactAreaLight = new THREE.RectAreaLight( 'white', 20,  300, 300 );
reactAreaLight.position.set(0, 500, 0);
reactAreaLight.rotateX(-Math.PI / 2);
reactAreaLight.lookAt(0, 0, 0);

const rectAreaLightHelper = new RectAreaLightHelper(reactAreaLight);
scene.add(rectAreaLightHelper);
平面光就是灯管的效果。
先把相机动画停掉,我们看下灯的位置:
灯管在天花板的位置。
这个角度还不错,我们改一下动画的相机的 y:
平视即可。
平面光不支持产生阴影,我们用平行光产生阴影:
首先在地面开启接收阴影:
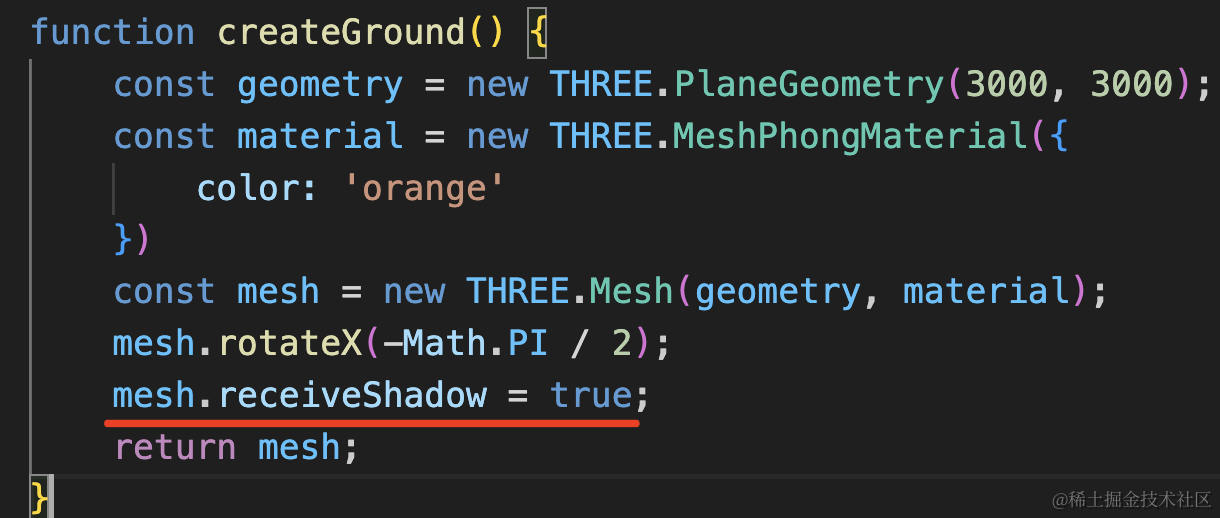
mesh.receiveShadow = true;然后舞者开启投射阴影:
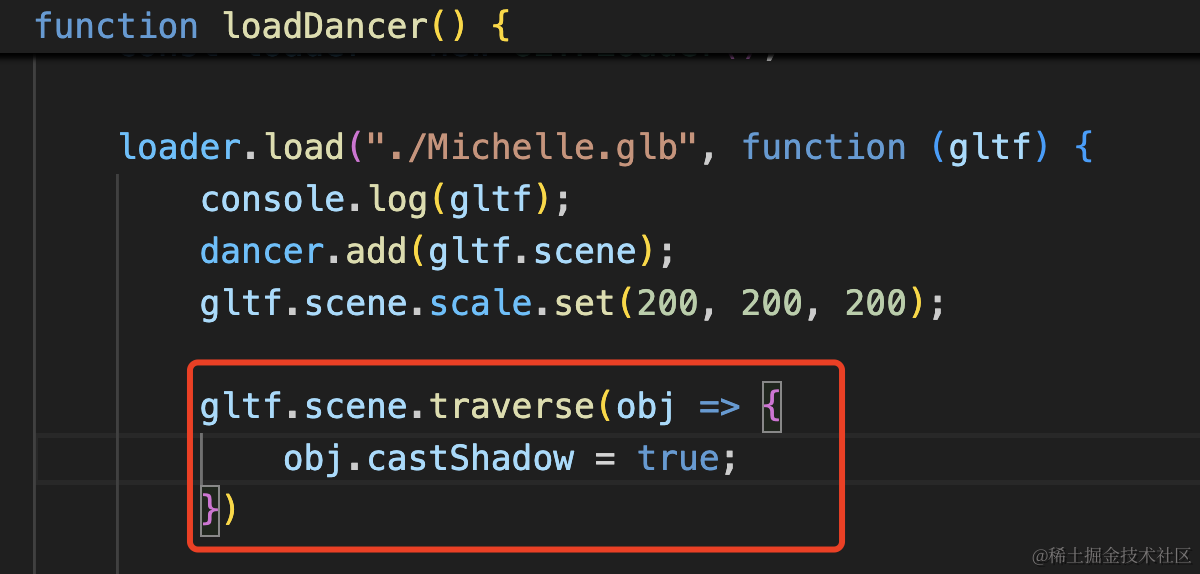
gltf.scene.traverse(obj => {
    obj.castShadow = true;
})
开启渲染器的阴影开关:
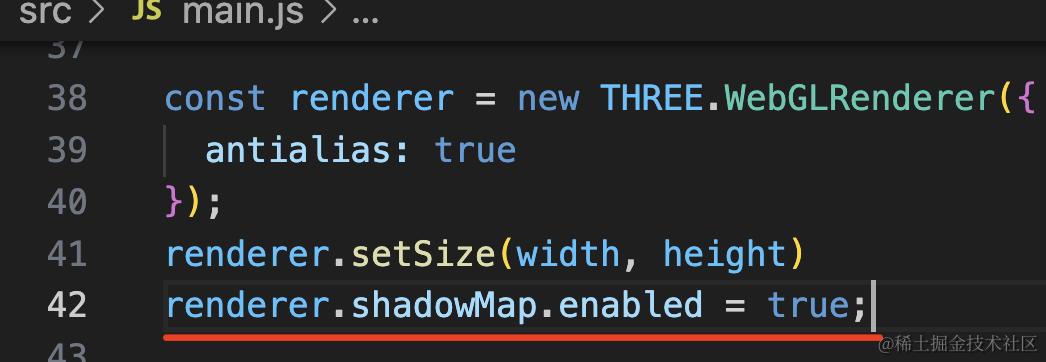
renderer.shadowMap.enabled = true;最后设置下平行光的阴影相机:
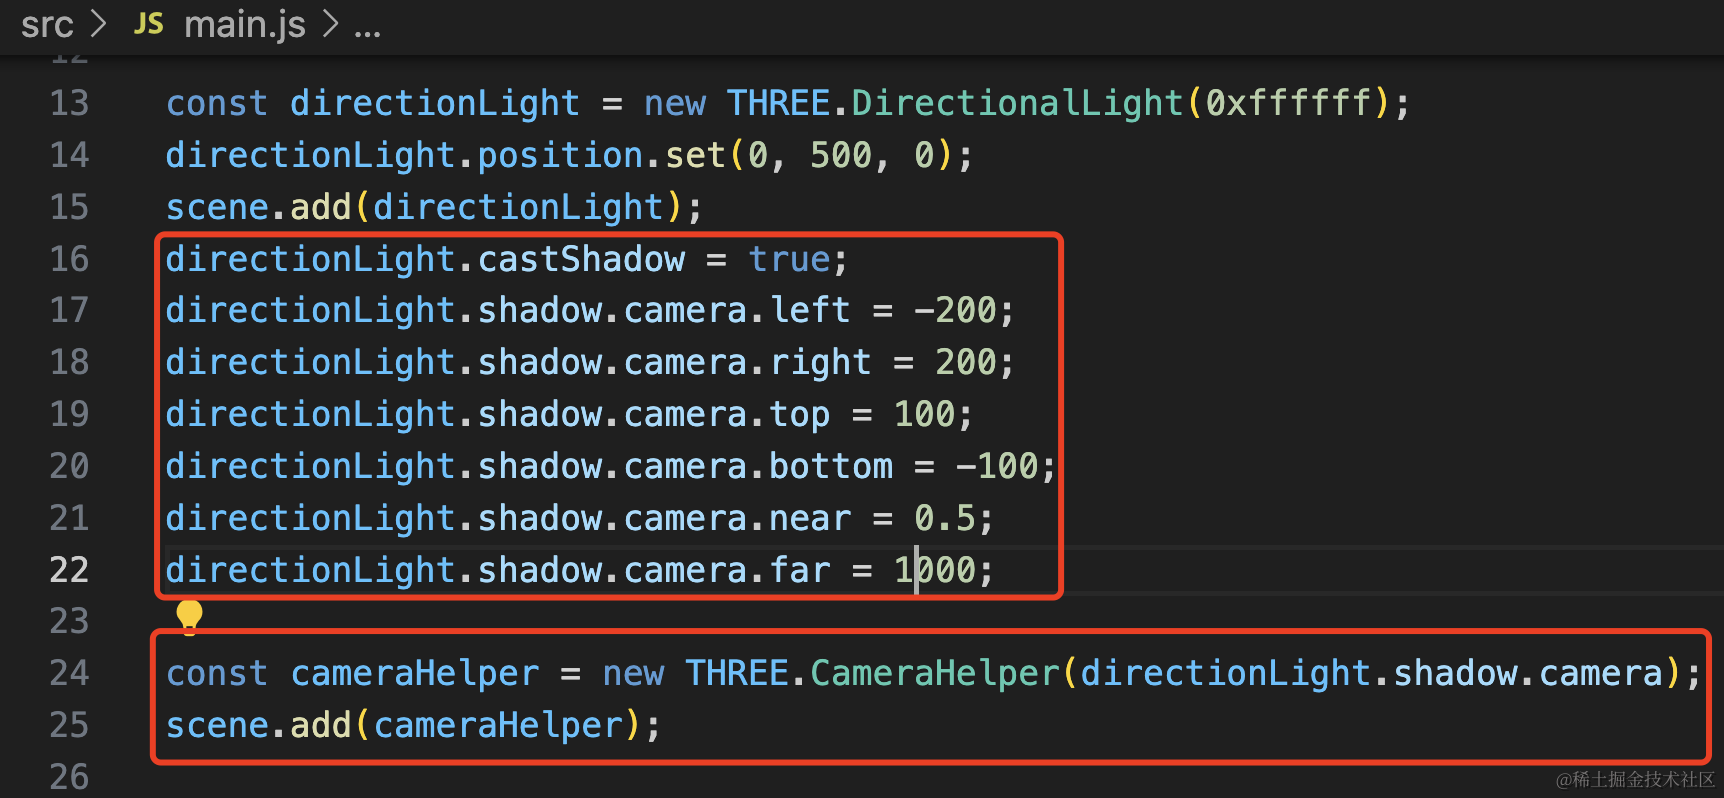
const directionLight = new THREE.DirectionalLight(0xffffff);
directionLight.position.set(0, 500, 0);
scene.add(directionLight);
directionLight.castShadow = true;
directionLight.shadow.camera.left = -200;
directionLight.shadow.camera.right = 200;
directionLight.shadow.camera.top = 100;
directionLight.shadow.camera.bottom = -100;
directionLight.shadow.camera.near = 0.5;
directionLight.shadow.camera.far = 1000;

const cameraHelper = new THREE.CameraHelper(directionLight.shadow.camera);
scene.add(cameraHelper);
把平行光放在矩形平面光一样的位置。
设置阴影相机,用 CameraHelper 可视化一下:
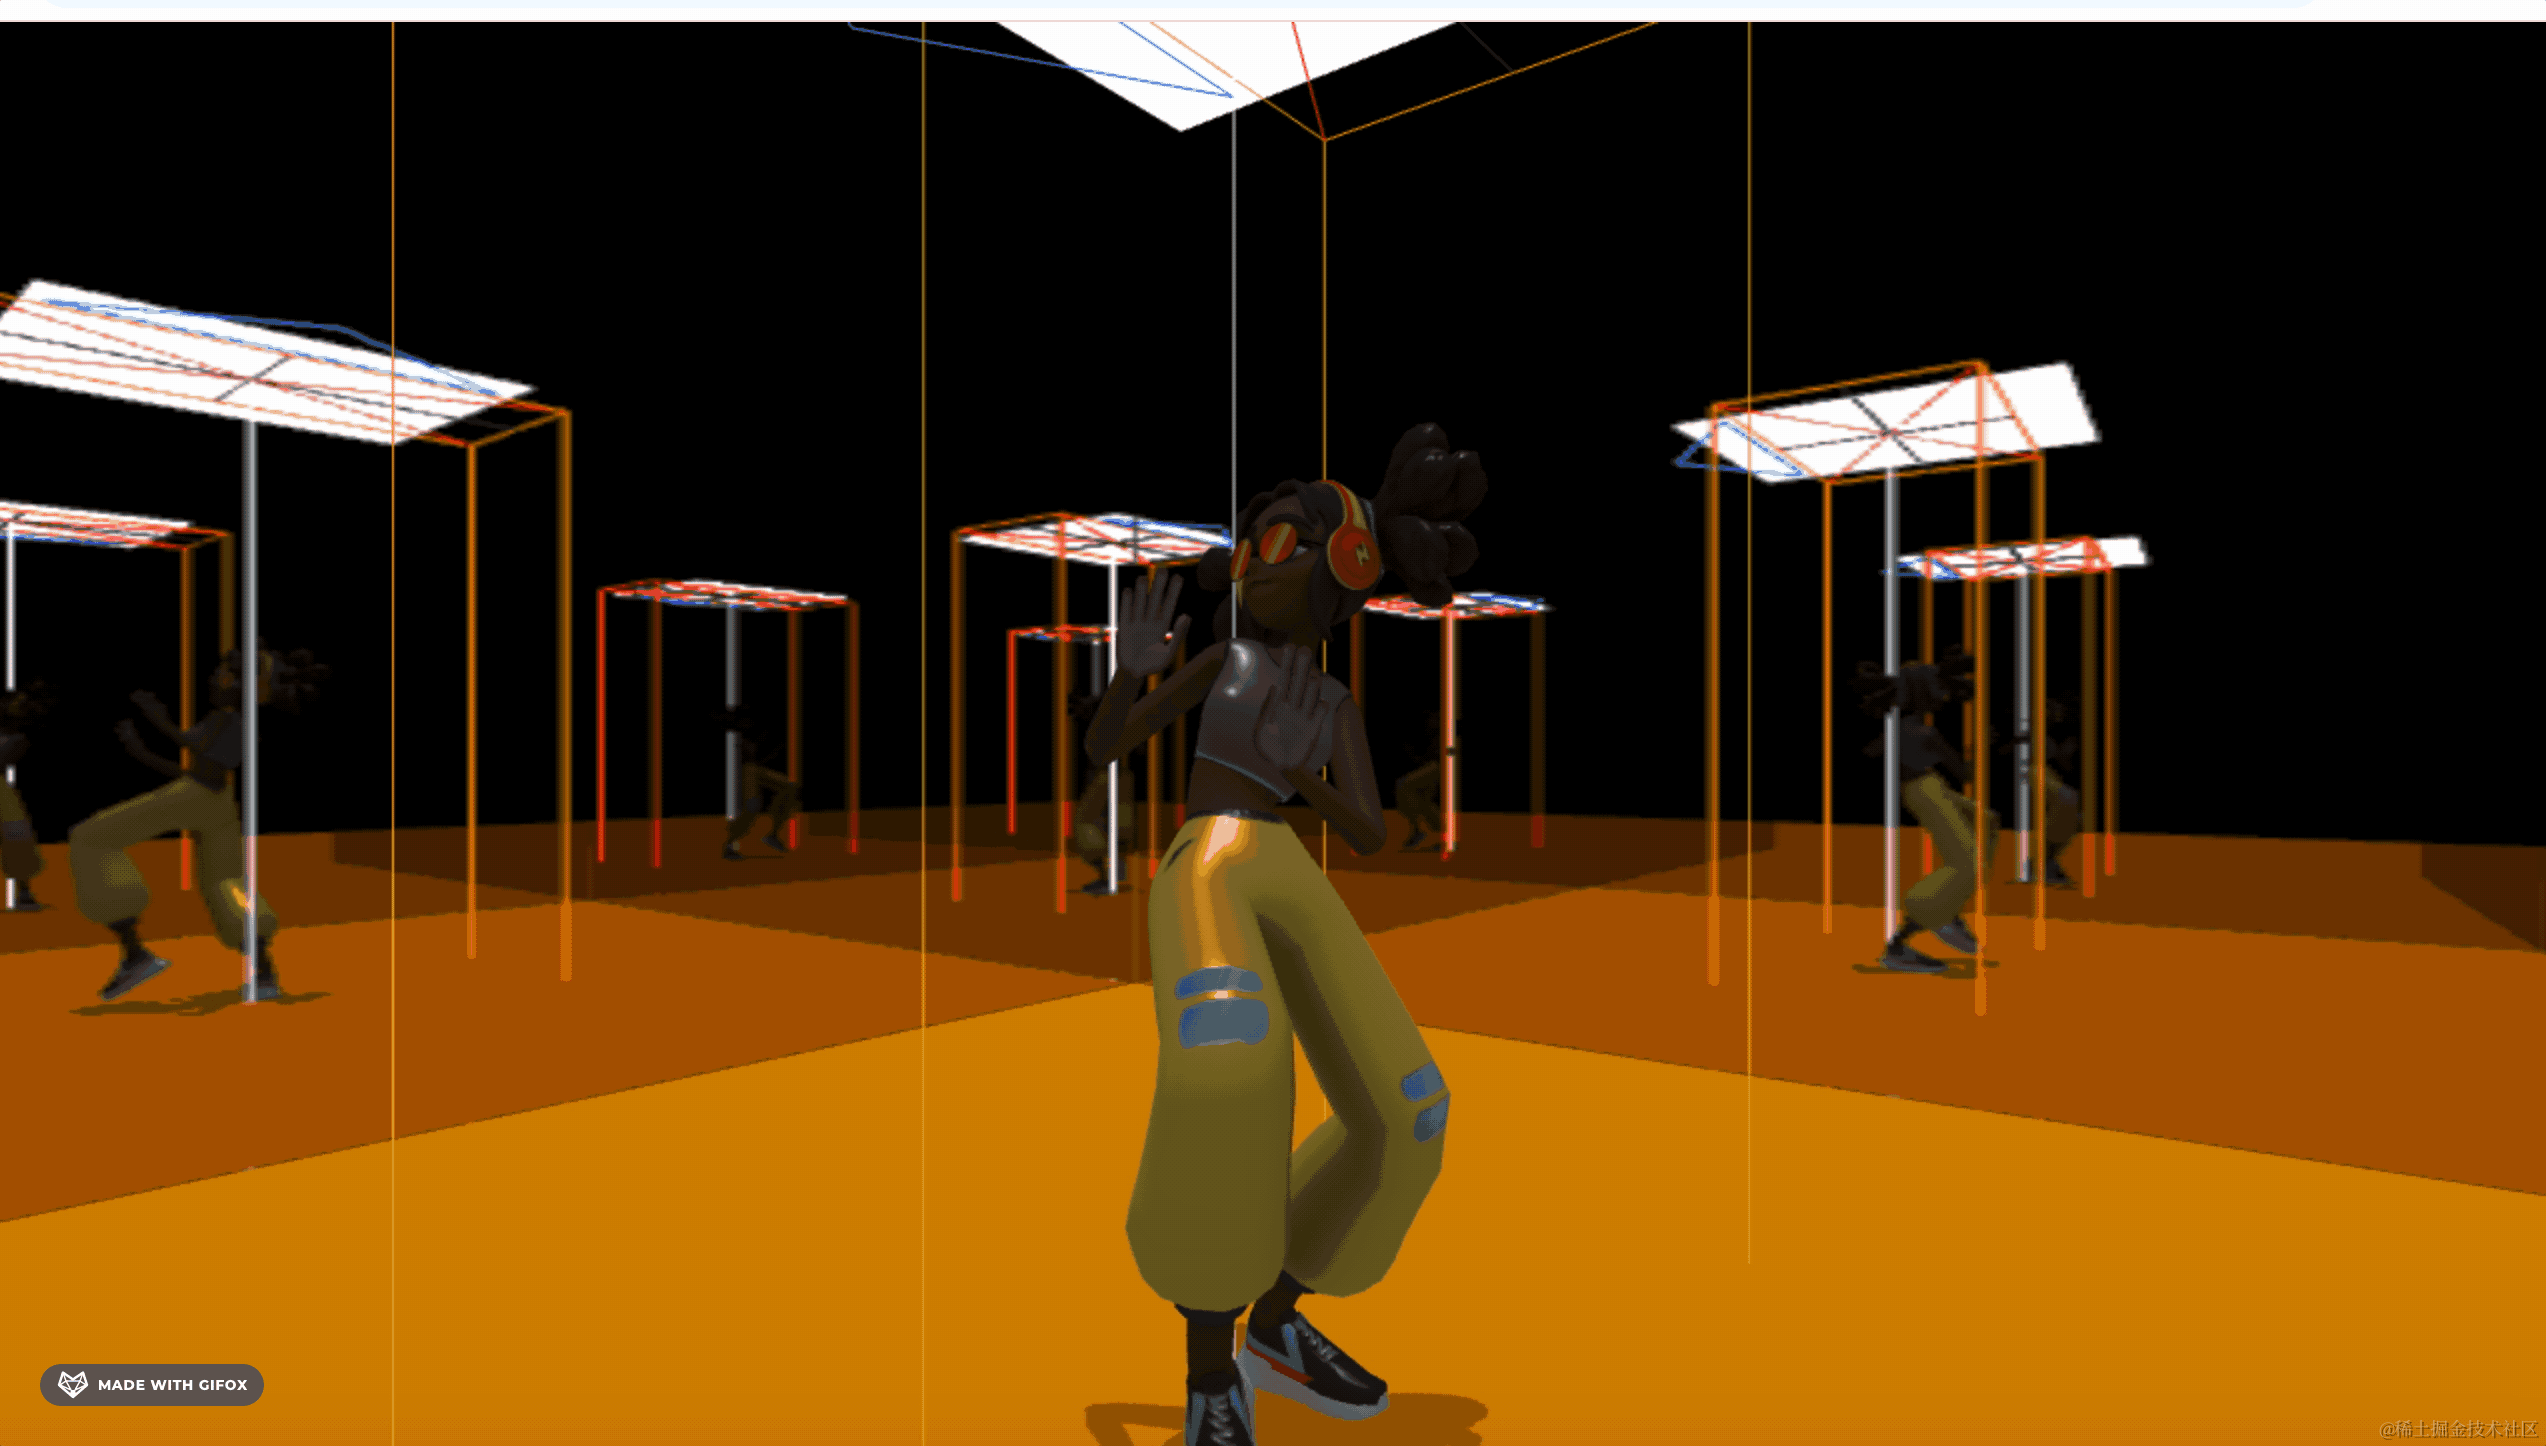
这样,阴影就做好了。
去掉 CameraHelper,看下最终效果:

案例代码上传了小册仓库。
总结
这节我们实现了练舞房的效果。
用 Reflector 创建了 4 面镜子,然后加载 gltf 人物模型,用 AnimationMixer 播放了跳舞的骨骼动画。
用 Tween.js 做了圆周的相机动画。
之后添加了矩形平面光,用它的 ReactAreaLightHelper 来做灯管效果。
最后添加了平行光的阴影。
这样,一个综合的小实战就完成了。以后用到镜子都可以用 Reflector 来做。