前面学了音频相关的 API,这节我们来做一个实战:3D 版音乐播放器。
你可能每天都在用音乐播放器:
学了 Three.js,我们可以做一个 3D 版的。
首先,播放、暂停、进度条都是 3D 的按钮,用 RayCaster 来实现点击、进度调整。
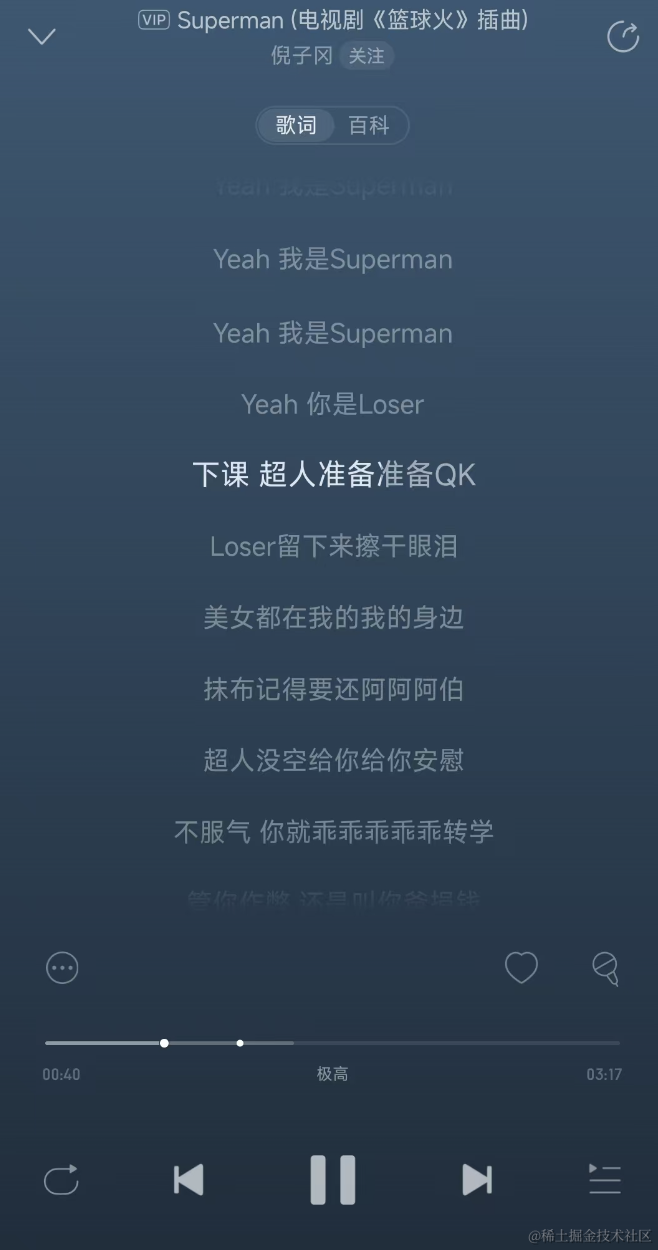
然后用 AudioAnalyser 做一个频谱可视化,这次我们做环状的,一共 21 圈,高度随音乐起伏,有那种喷泉的感觉。
最后做 3D 的歌词轮播,纵深方向来做歌词的列表,播放的时候把前面的歌词逐渐往后移动。
这样,一个 3D 的音频播放器就完成了。
思路理清了,接下来来写代码吧:
npx create-vite 3d-music-player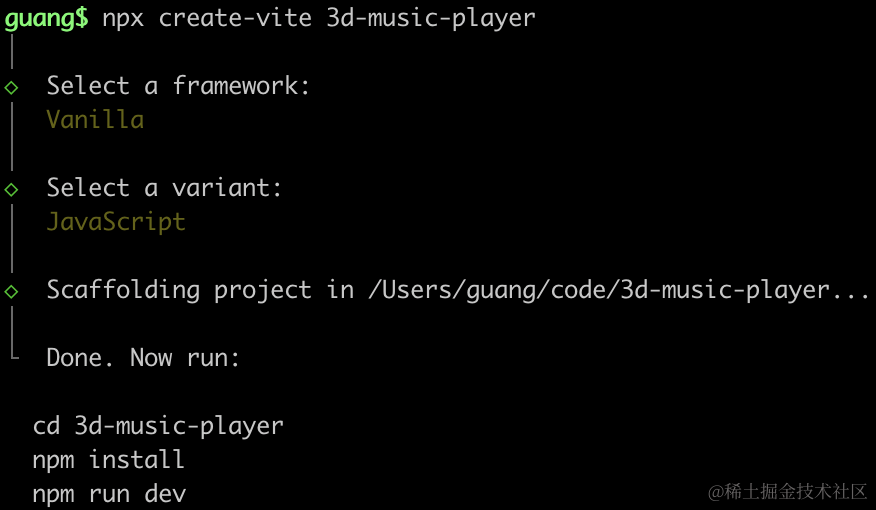
进入项目,安装依赖:
npm install
npm install --save three
npm install --save-dev @types/three
改下 src/main.js
import './style.css';
import * as THREE from 'three';
import {
OrbitControls
} from 'three/addons/controls/OrbitControls.js';
import player from './player';
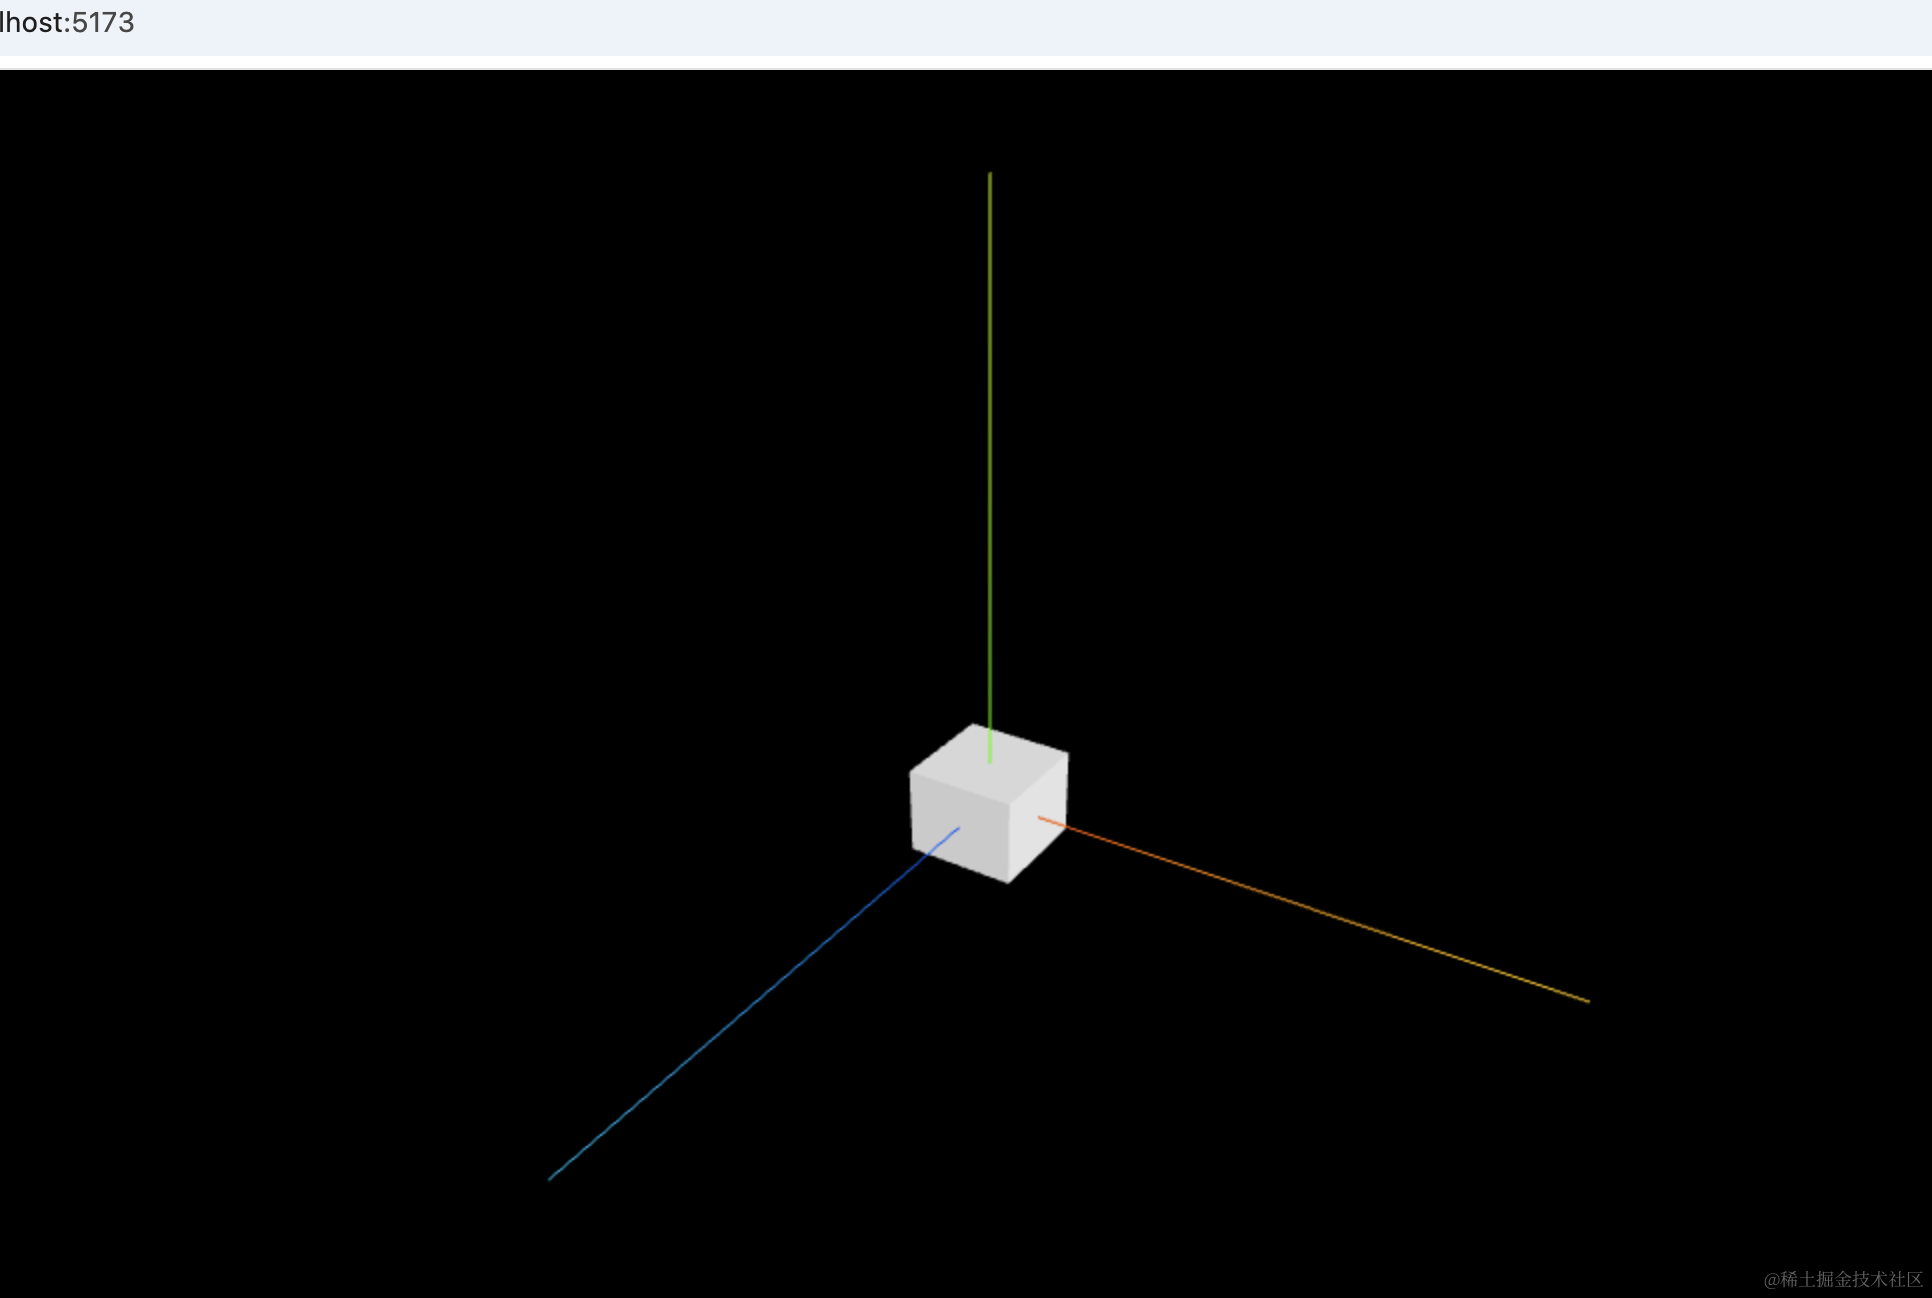
const scene = new THREE.Scene();
scene.add(player);
const directionLight = new THREE.DirectionalLight(0xffffff, 2);
directionLight.position.set(500, 400, 300);
scene.add(directionLight);
const ambientLight = new THREE.AmbientLight();
scene.add(ambientLight);
const width = window.innerWidth;
const height = window.innerHeight;
const helper = new THREE.AxesHelper(500);
scene.add(helper);
const camera = new THREE.PerspectiveCamera(60, width / height, 0.1, 10000);
camera.position.set(500, 600, 800);
camera.lookAt(0, 0, 0);
const renderer = new THREE.WebGLRenderer({
antialias: true
});
renderer.setSize(width, height)
function render() {
renderer.render(scene, camera);
requestAnimationFrame(render);
}
render();
document.body.append(renderer.domElement);
const controls = new OrbitControls(camera, renderer.domElement);创建 Scene、Light、Camera、Renderer。
改下 style.css
body {
  margin: 0;
}
然后创建 player.js
import * as THREE from 'three';
const player = new THREE.Group();
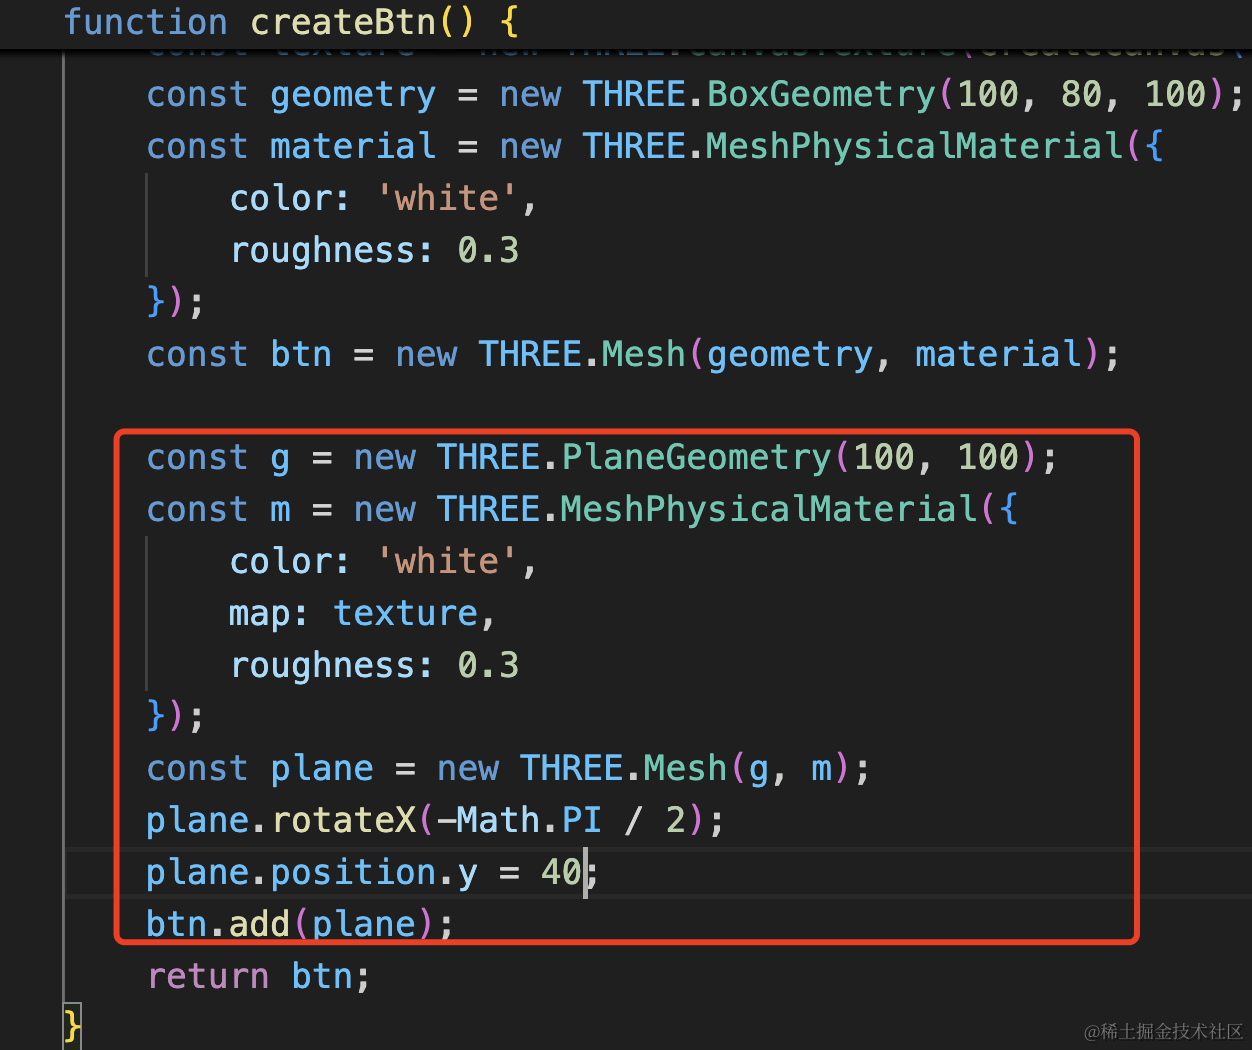
function createBtn() {
const geometry = new THREE.BoxGeometry(100, 80, 100);
const material = new THREE.MeshPhysicalMaterial({
color: 'white',
roughness: 0.3
});
const btn = new THREE.Mesh(geometry, material);
return btn;
}
const playBtn = createBtn();
player.add(playBtn);
export default player;画一个播放按钮。
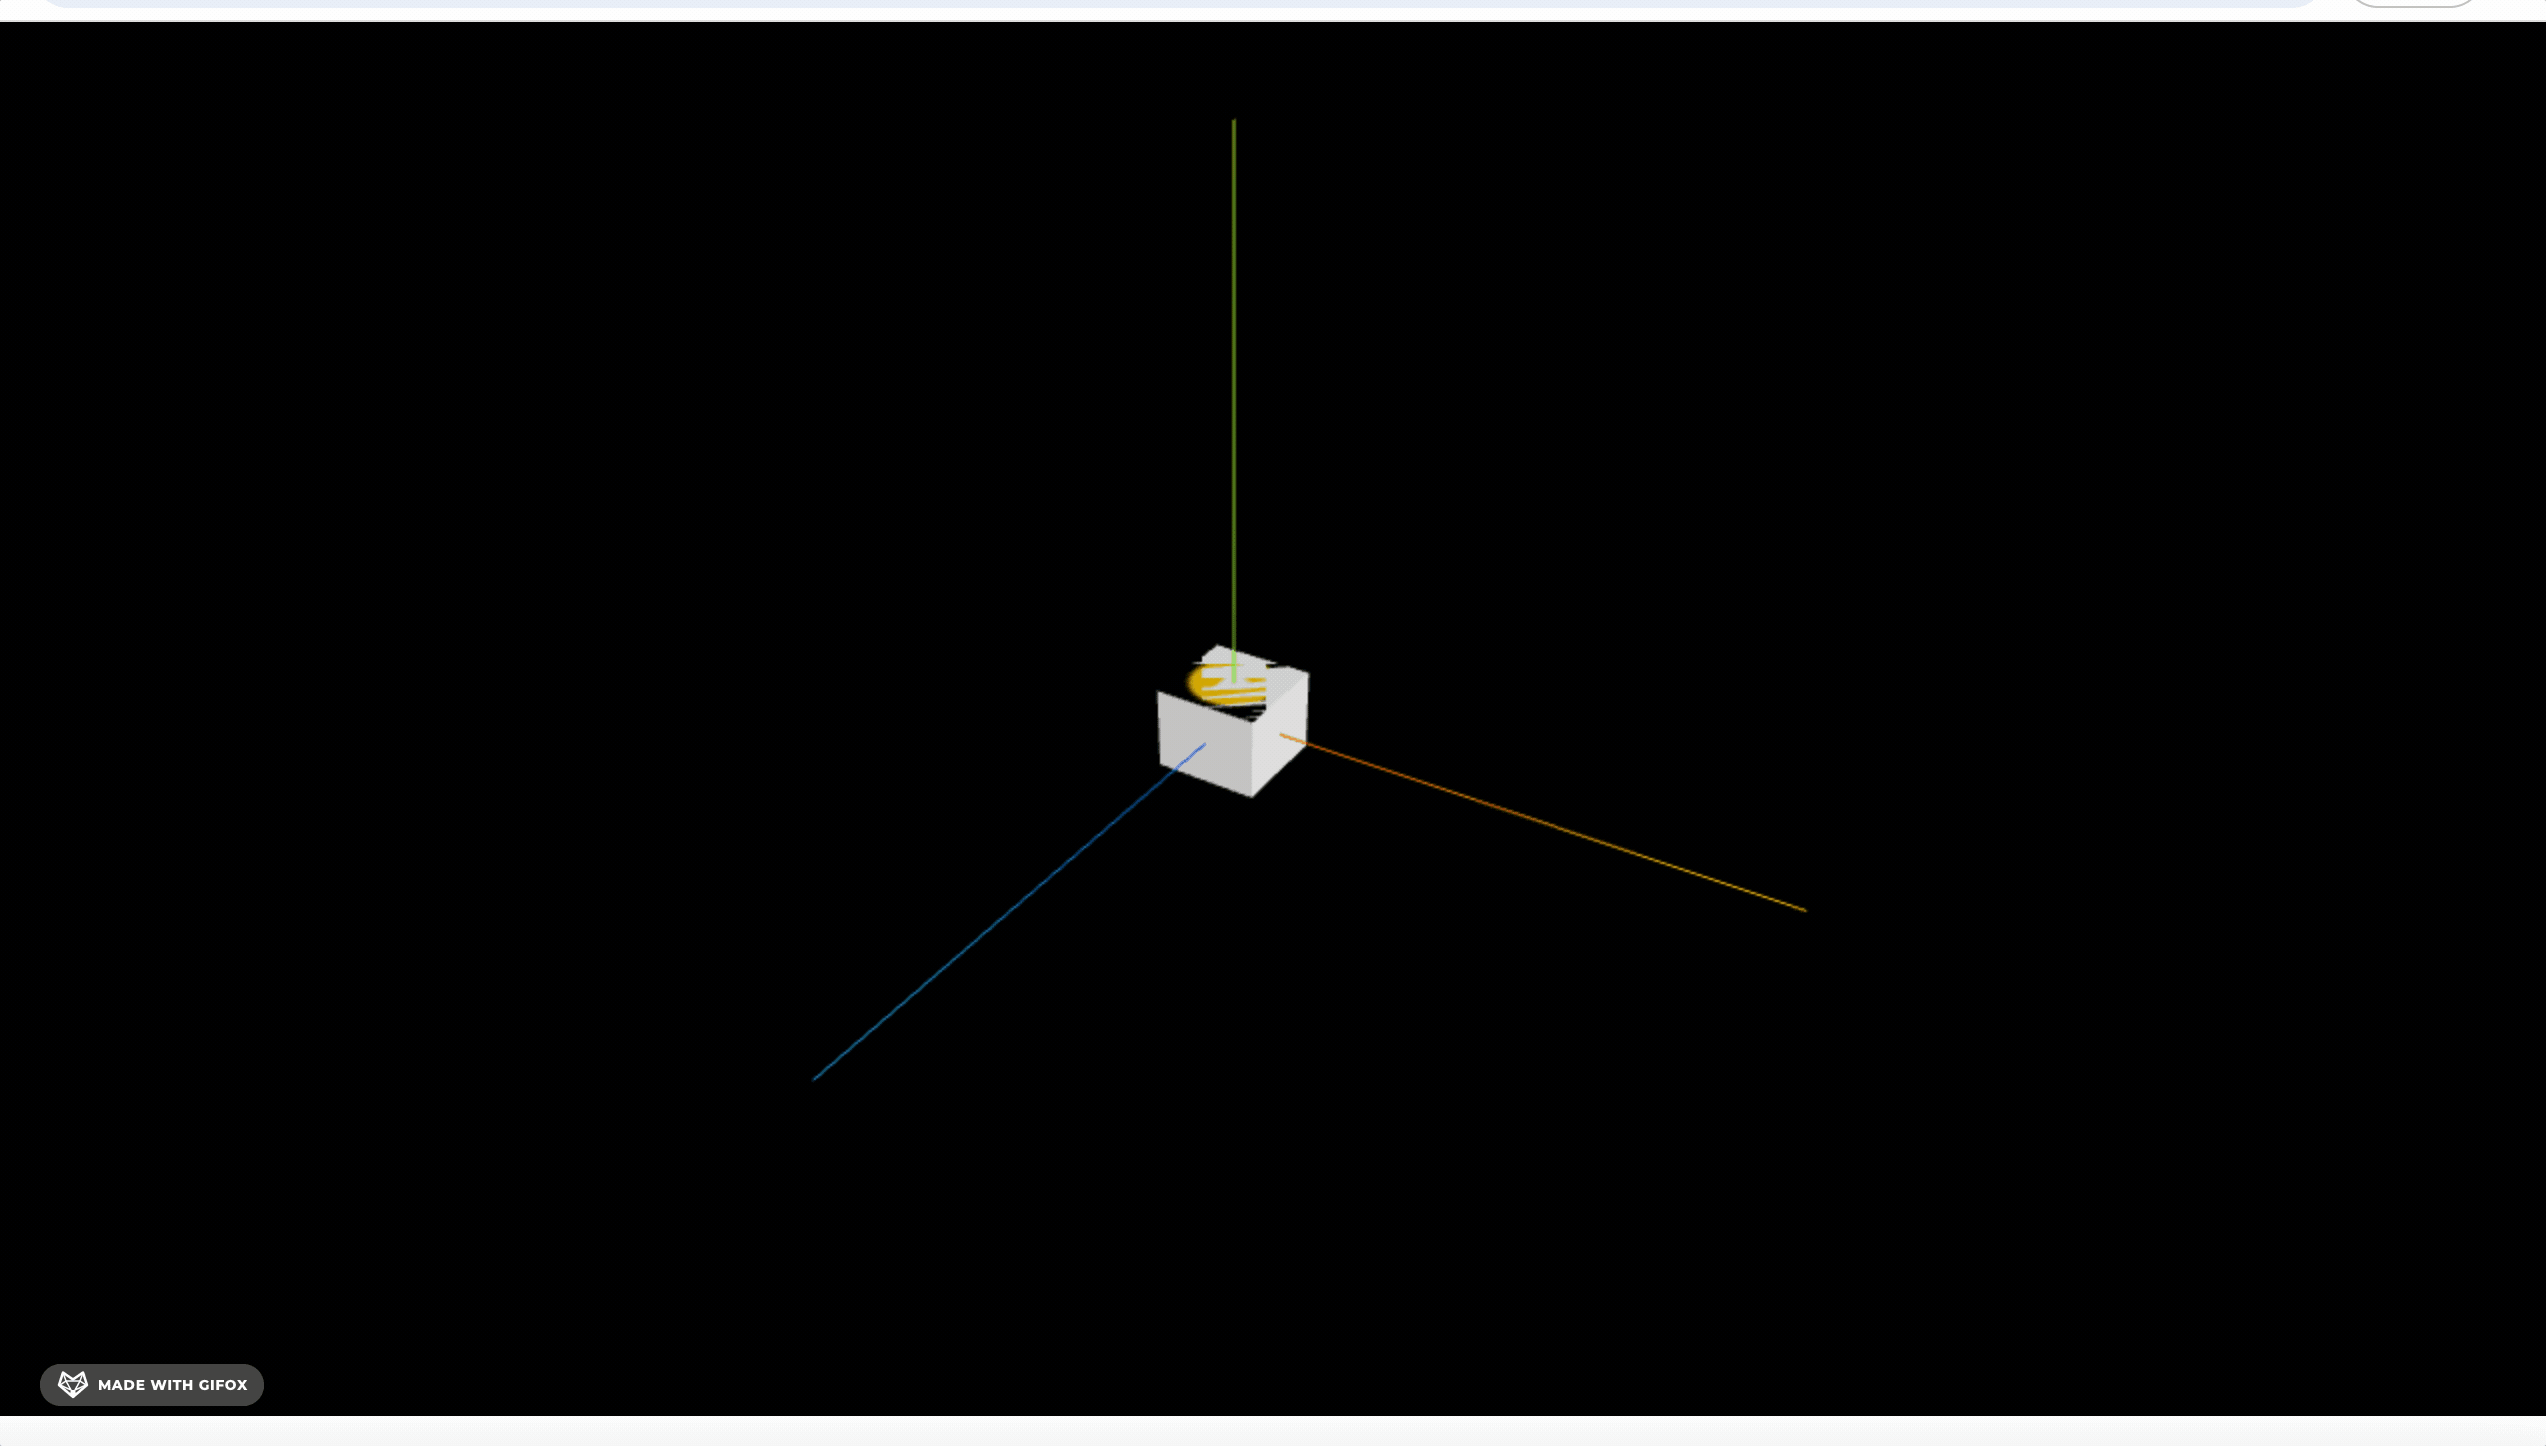
先跑下:
npm run dev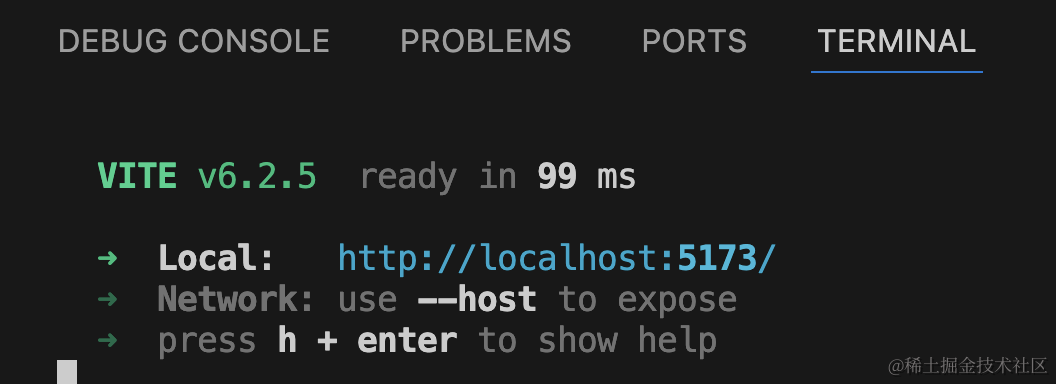
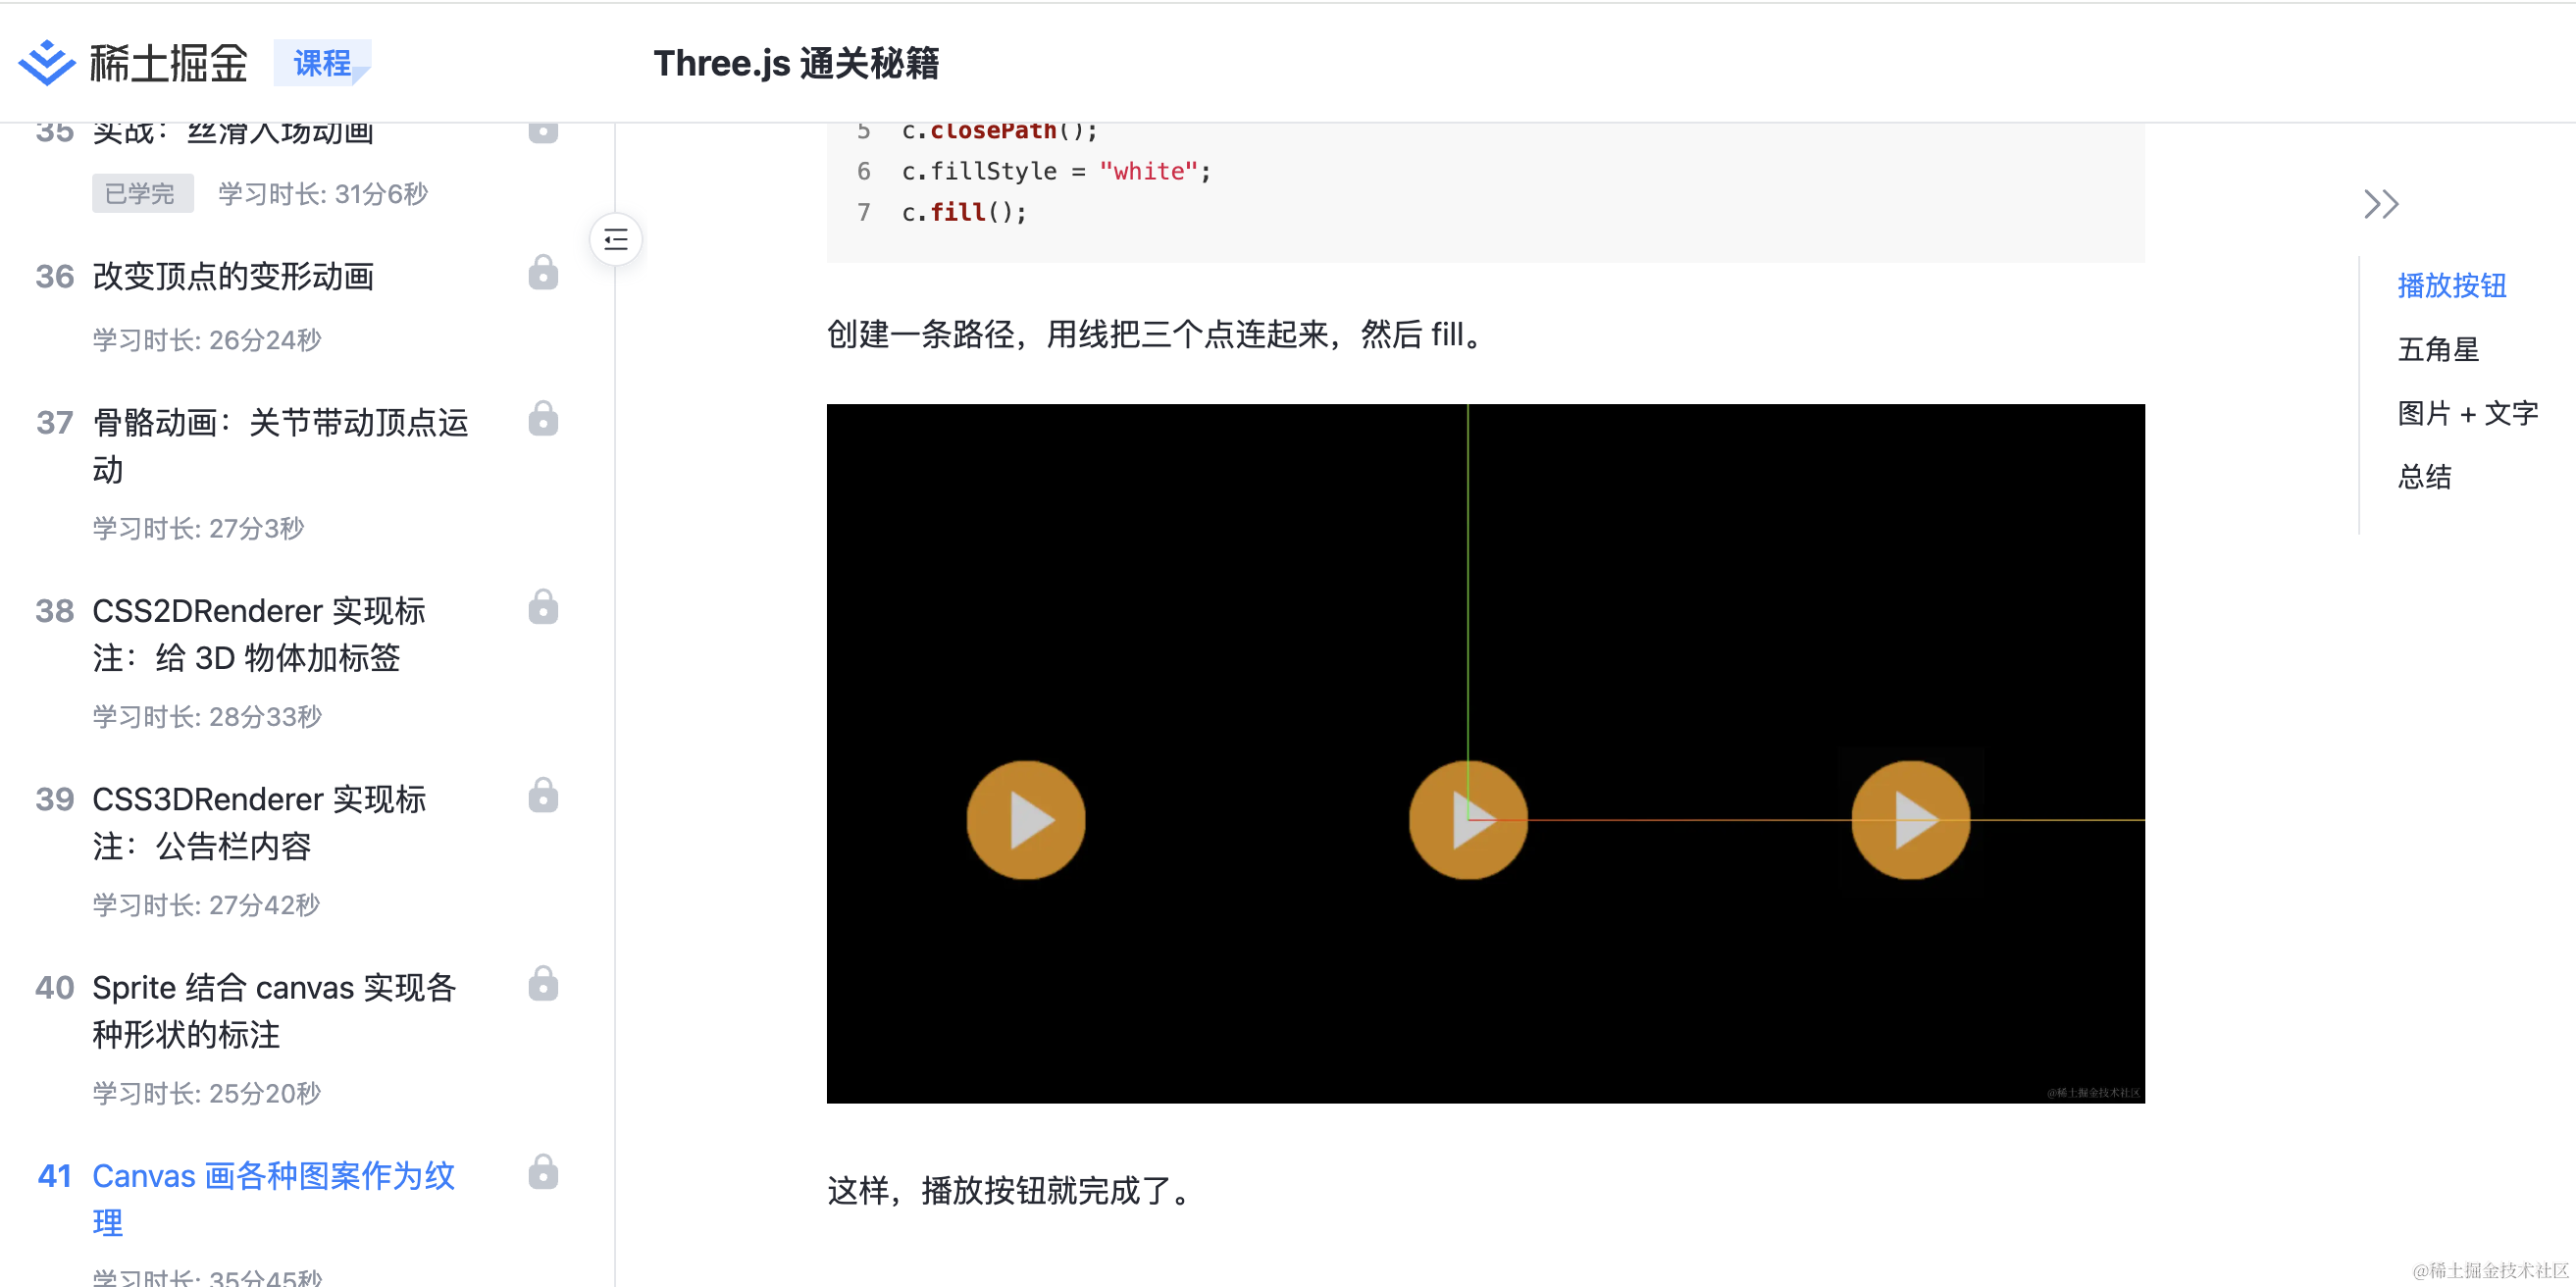
上面有一个播放的图标。
我们可以用 canvas 来画这种图案,作为纹理。
之前我们在 canvas 那节画过一个播放按钮,拿过来作为纹理:
function createCanvas() {
const dpr = window.devicePixelRatio;
const canvas = document.createElement("canvas");
const w = canvas.width = 100 * dpr;
const h = canvas.height = 100 * dpr;
const c = canvas.getContext('2d');
c.translate(w / 2, h / 2);
c.arc(0, 0, 40 * dpr, 0, Math.PI * 2);
c.fillStyle = "orange";
c.fill();
c.beginPath();
c.moveTo(-10 * dpr, -20 * dpr);
c.lineTo(-10 * dpr, 20 * dpr);
c.lineTo(20 * dpr, 0);
c.closePath();
c.fillStyle = "white";
c.fill();
return canvas;
}
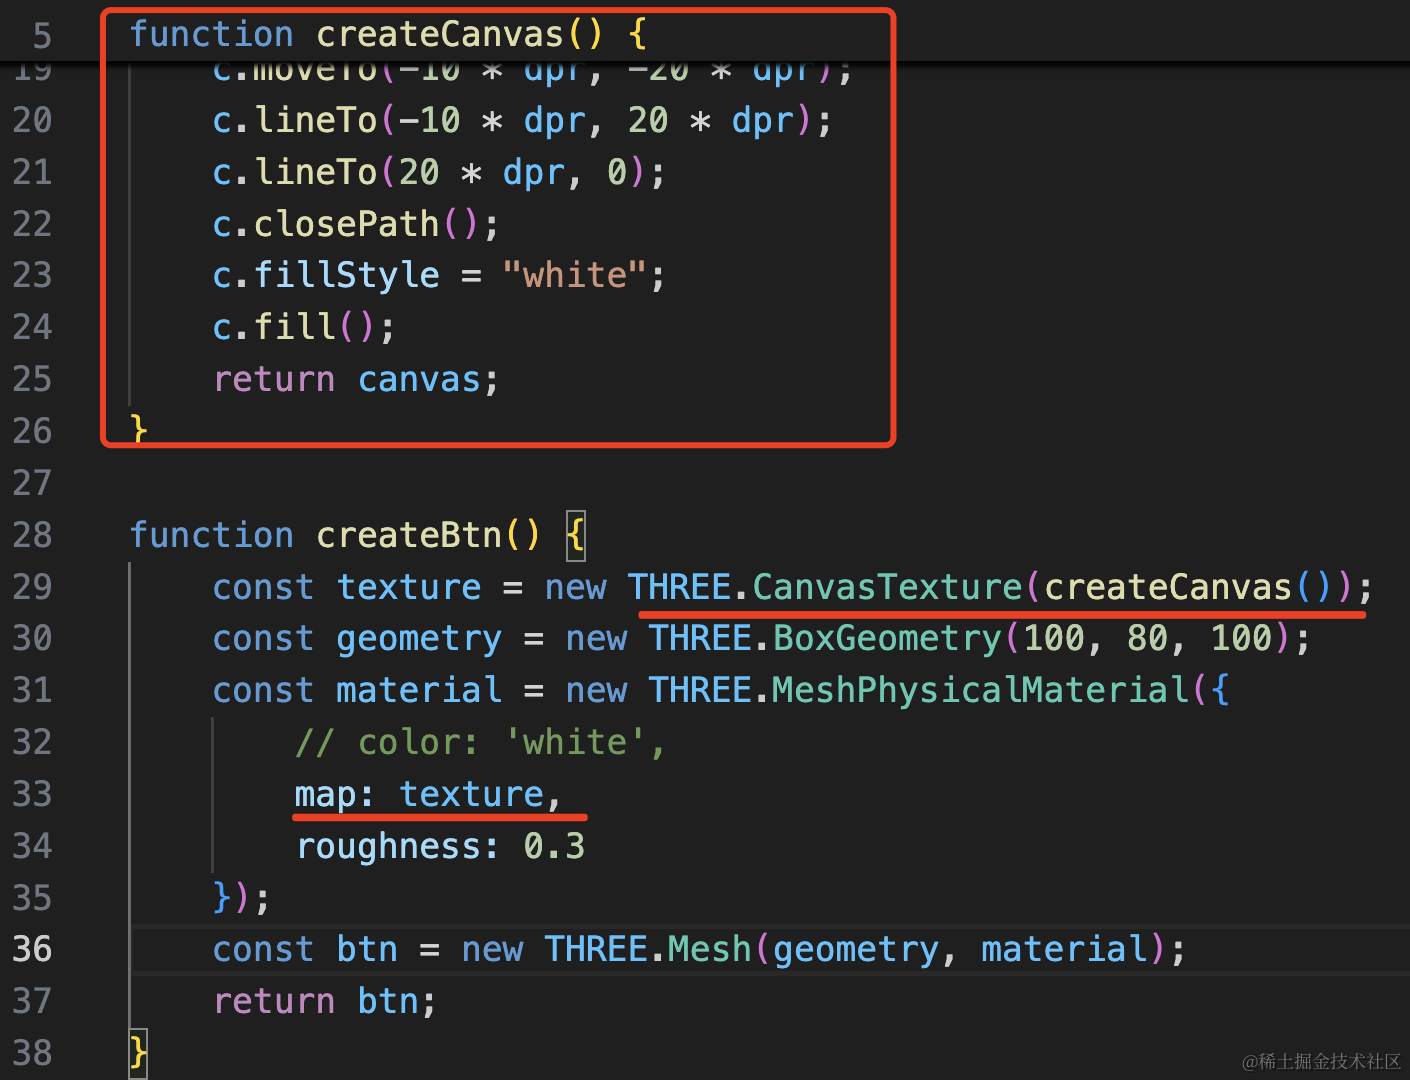
function createBtn() {
const texture = new THREE.CanvasTexture(createCanvas());
const geometry = new THREE.BoxGeometry(100, 80, 100);
const material = new THREE.MeshPhysicalMaterial({
// color: 'white',
map: texture,
roughness: 0.3
});
const btn = new THREE.Mesh(geometry, material);
return btn;
}
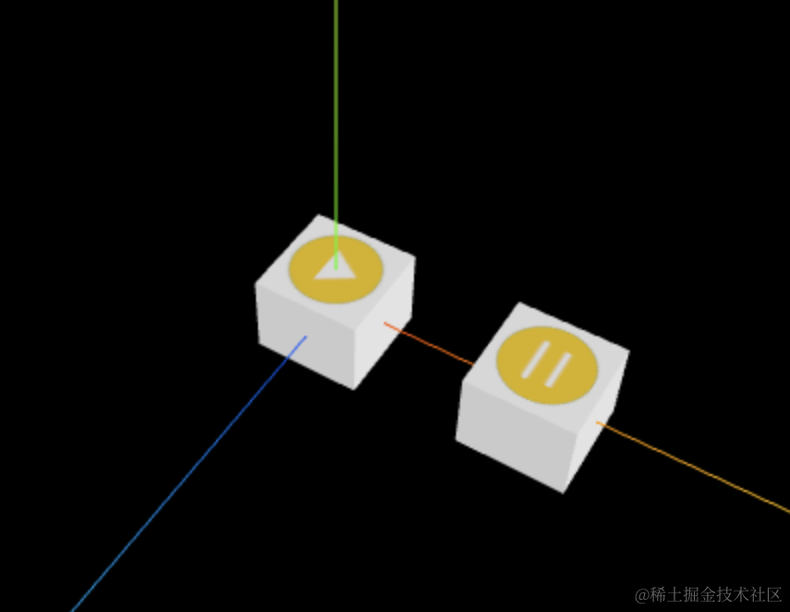
我们只想一个面展示这个播放图标,所以在上面加一个 PlaneGeometry
const g = new THREE.PlaneGeometry(100, 100);
const m = new THREE.MeshPhysicalMaterial({
    color: 'white',
    map: texture,
    roughness: 0.3
});
const plane = new THREE.Mesh(g, m);
plane.rotateX(-Math.PI / 2);
plane.position.y = 40;
btn.add(plane);
position.y 设置为高度 80 的一半。
这样因为平面和立方体的上表面重合了,会有深度冲突问题,也就是闪烁,所以我们把 position.y 改为 41,让它们错开。
而且背景也让它透明:

这样就好了:

然后再做一个暂停按钮:
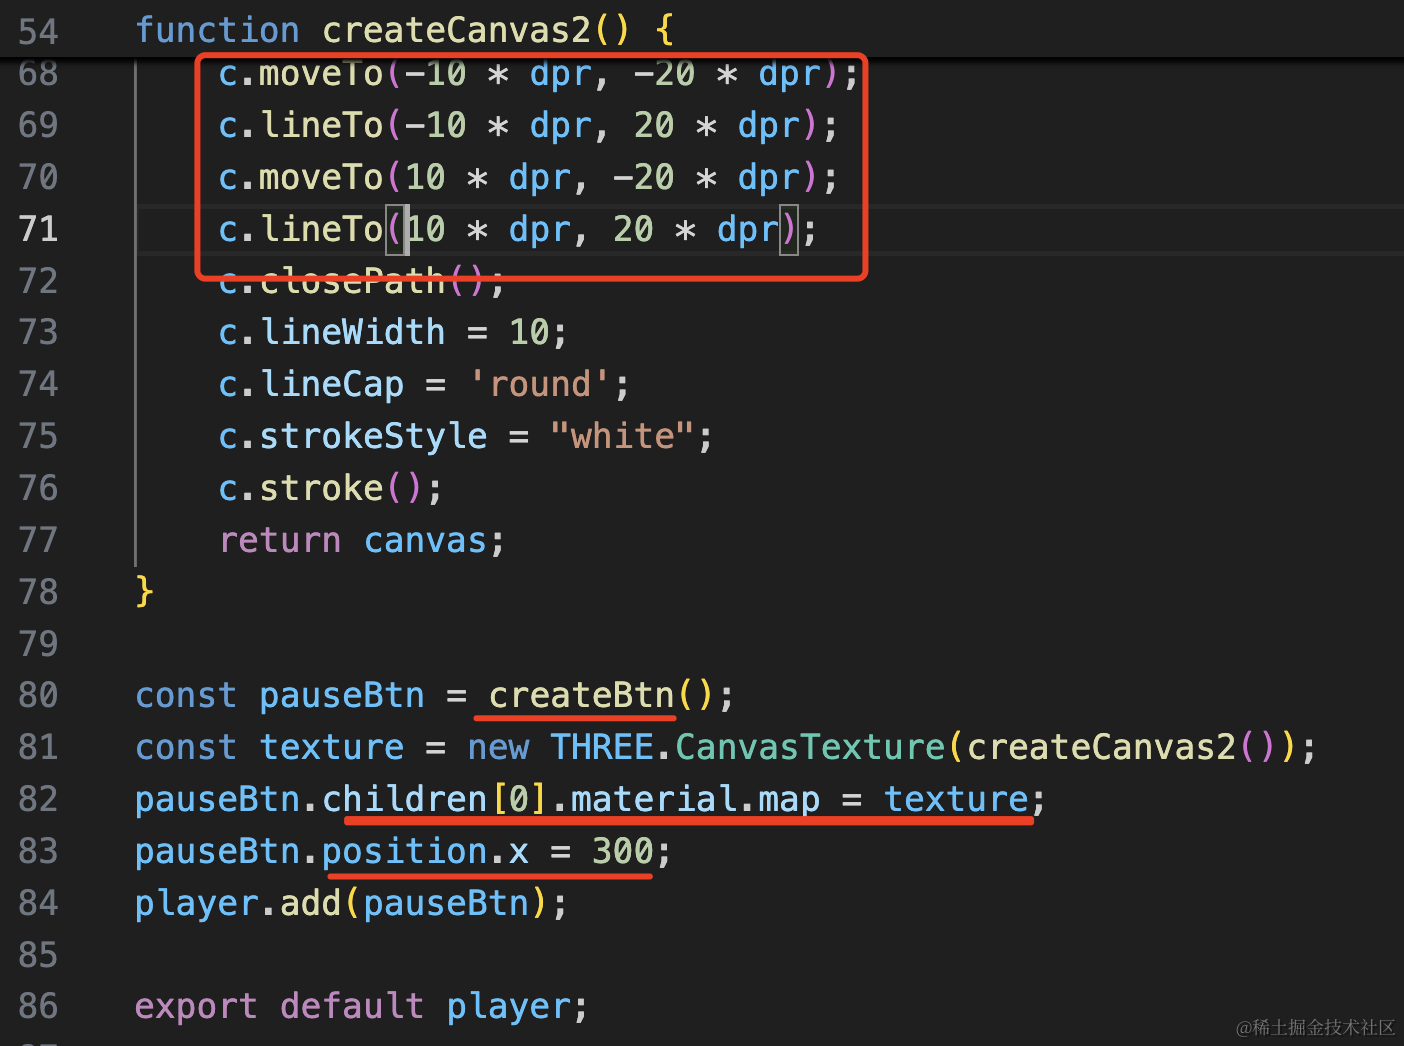
function createCanvas2() {
    const dpr = window.devicePixelRatio;
    const canvas = document.createElement("canvas");
    const w = canvas.width = 100 * dpr;
    const h = canvas.height = 100 * dpr;

    const c = canvas.getContext('2d');
    c.translate(w / 2, h / 2);

    c.arc(0, 0, 40 * dpr, 0, Math.PI * 2);
    c.fillStyle = "orange";
    c.fill();

    c.beginPath();
    c.moveTo(-10 * dpr, -20 * dpr);
    c.lineTo(-10 * dpr, 20 * dpr);
    c.moveTo(10 * dpr, -20 * dpr);
    c.lineTo(10 * dpr, 20 * dpr);
    c.closePath();
    c.lineWidth = 10;
    c.lineCap = 'round';
    c.strokeStyle = "white";
    c.stroke();
    return canvas;
}

const pauseBtn = createBtn();
const texture = new THREE.CanvasTexture(createCanvas2());
pauseBtn.children[0].material.map = texture;
pauseBtn.position.x = 200;
player.add(pauseBtn);
调用之前的 createBtn 方法创建一个按钮,替换下它的 PlaneGeometry 的材质的颜色贴图。
这里 canvas 改成画两条线,设置 lineWith 为 10 和 lineCap 为圆角。
我们给这两个 btn 加一个 name:

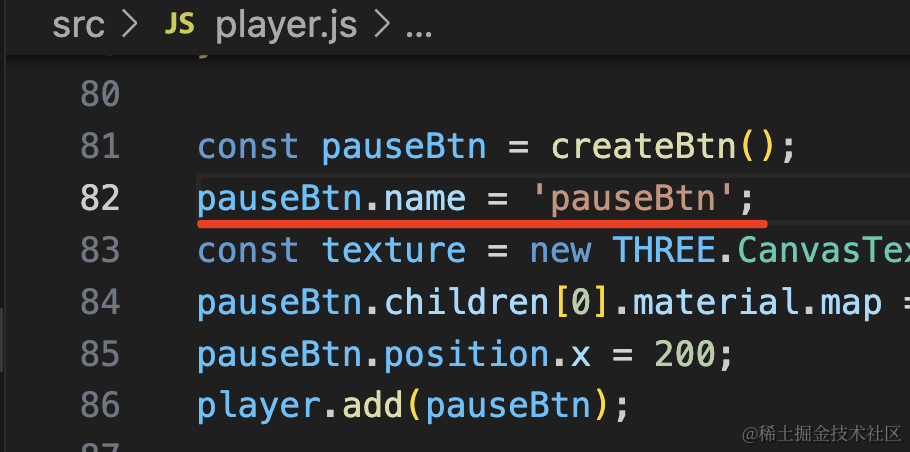
playBtn.name = 'playBtn';pauseBtn.name = 'pauseBtn';并且设置下 target 属性,这样点到上面的平面也可以通过 target 拿到按钮对象:

plane.target = btn;
btn.target = btn;
然后加一下点击的处理:
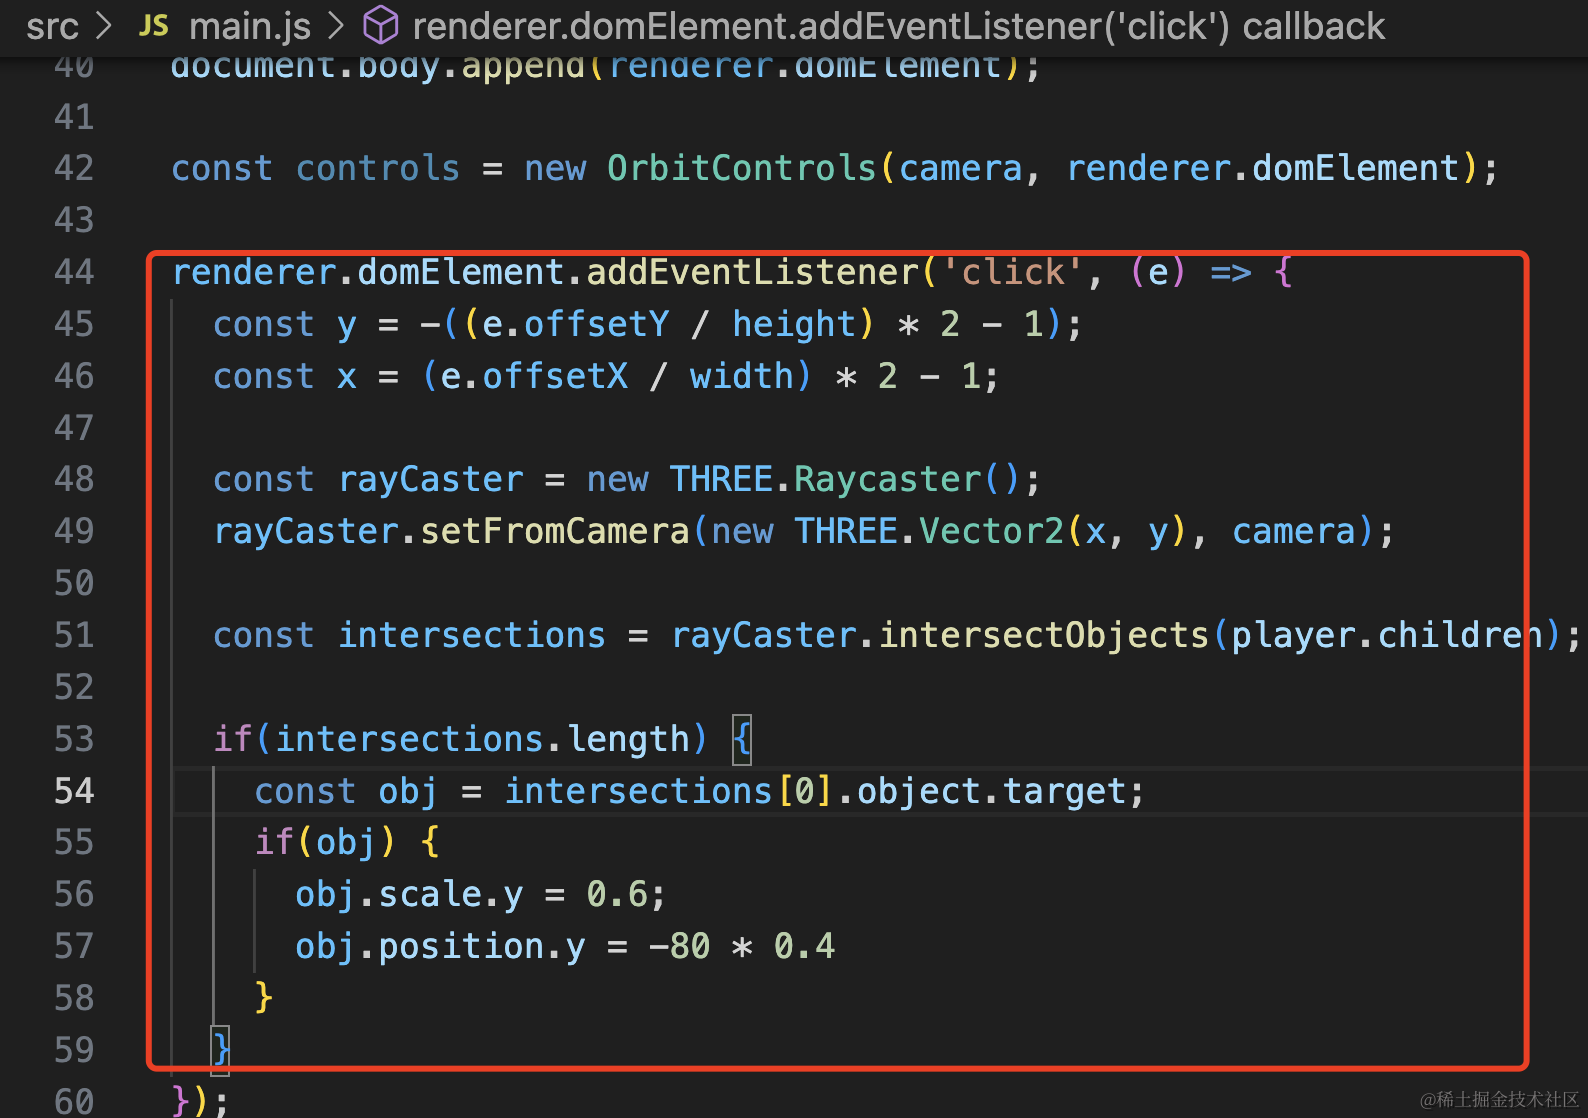
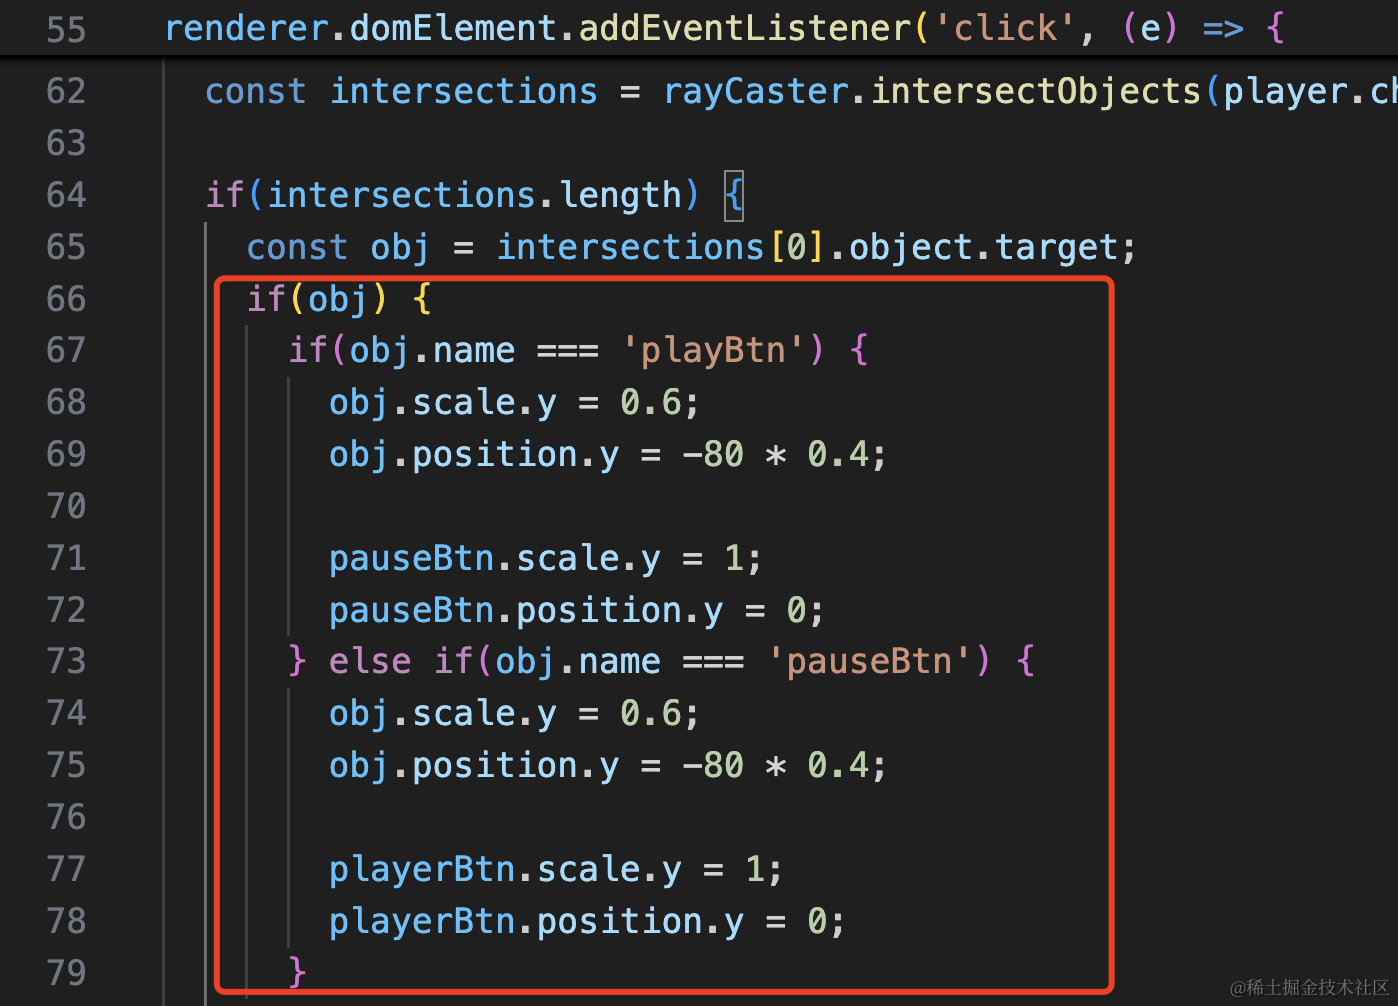
用 RayCaster 来判断点击事件,点中的物体拿到 target 属性。
让按钮 scale 0.6,有个按下的感觉,高度还剩 0.6,那 positon.y 就要向下移动 0.4 的高度。
renderer.domElement.addEventListener('click', (e) => {
const y = -((e.offsetY / height) * 2 - 1);
const x = (e.offsetX / width) * 2 - 1;
const rayCaster = new THREE.Raycaster();
rayCaster.setFromCamera(new THREE.Vector2(x, y), camera);
const intersections = rayCaster.intersectObjects(player.children);
if(intersections.length) {
const obj = intersections[0].object.target;
if(obj) {
obj.scale.y = 0.6;
obj.position.y = -80 * 0.4
}
}
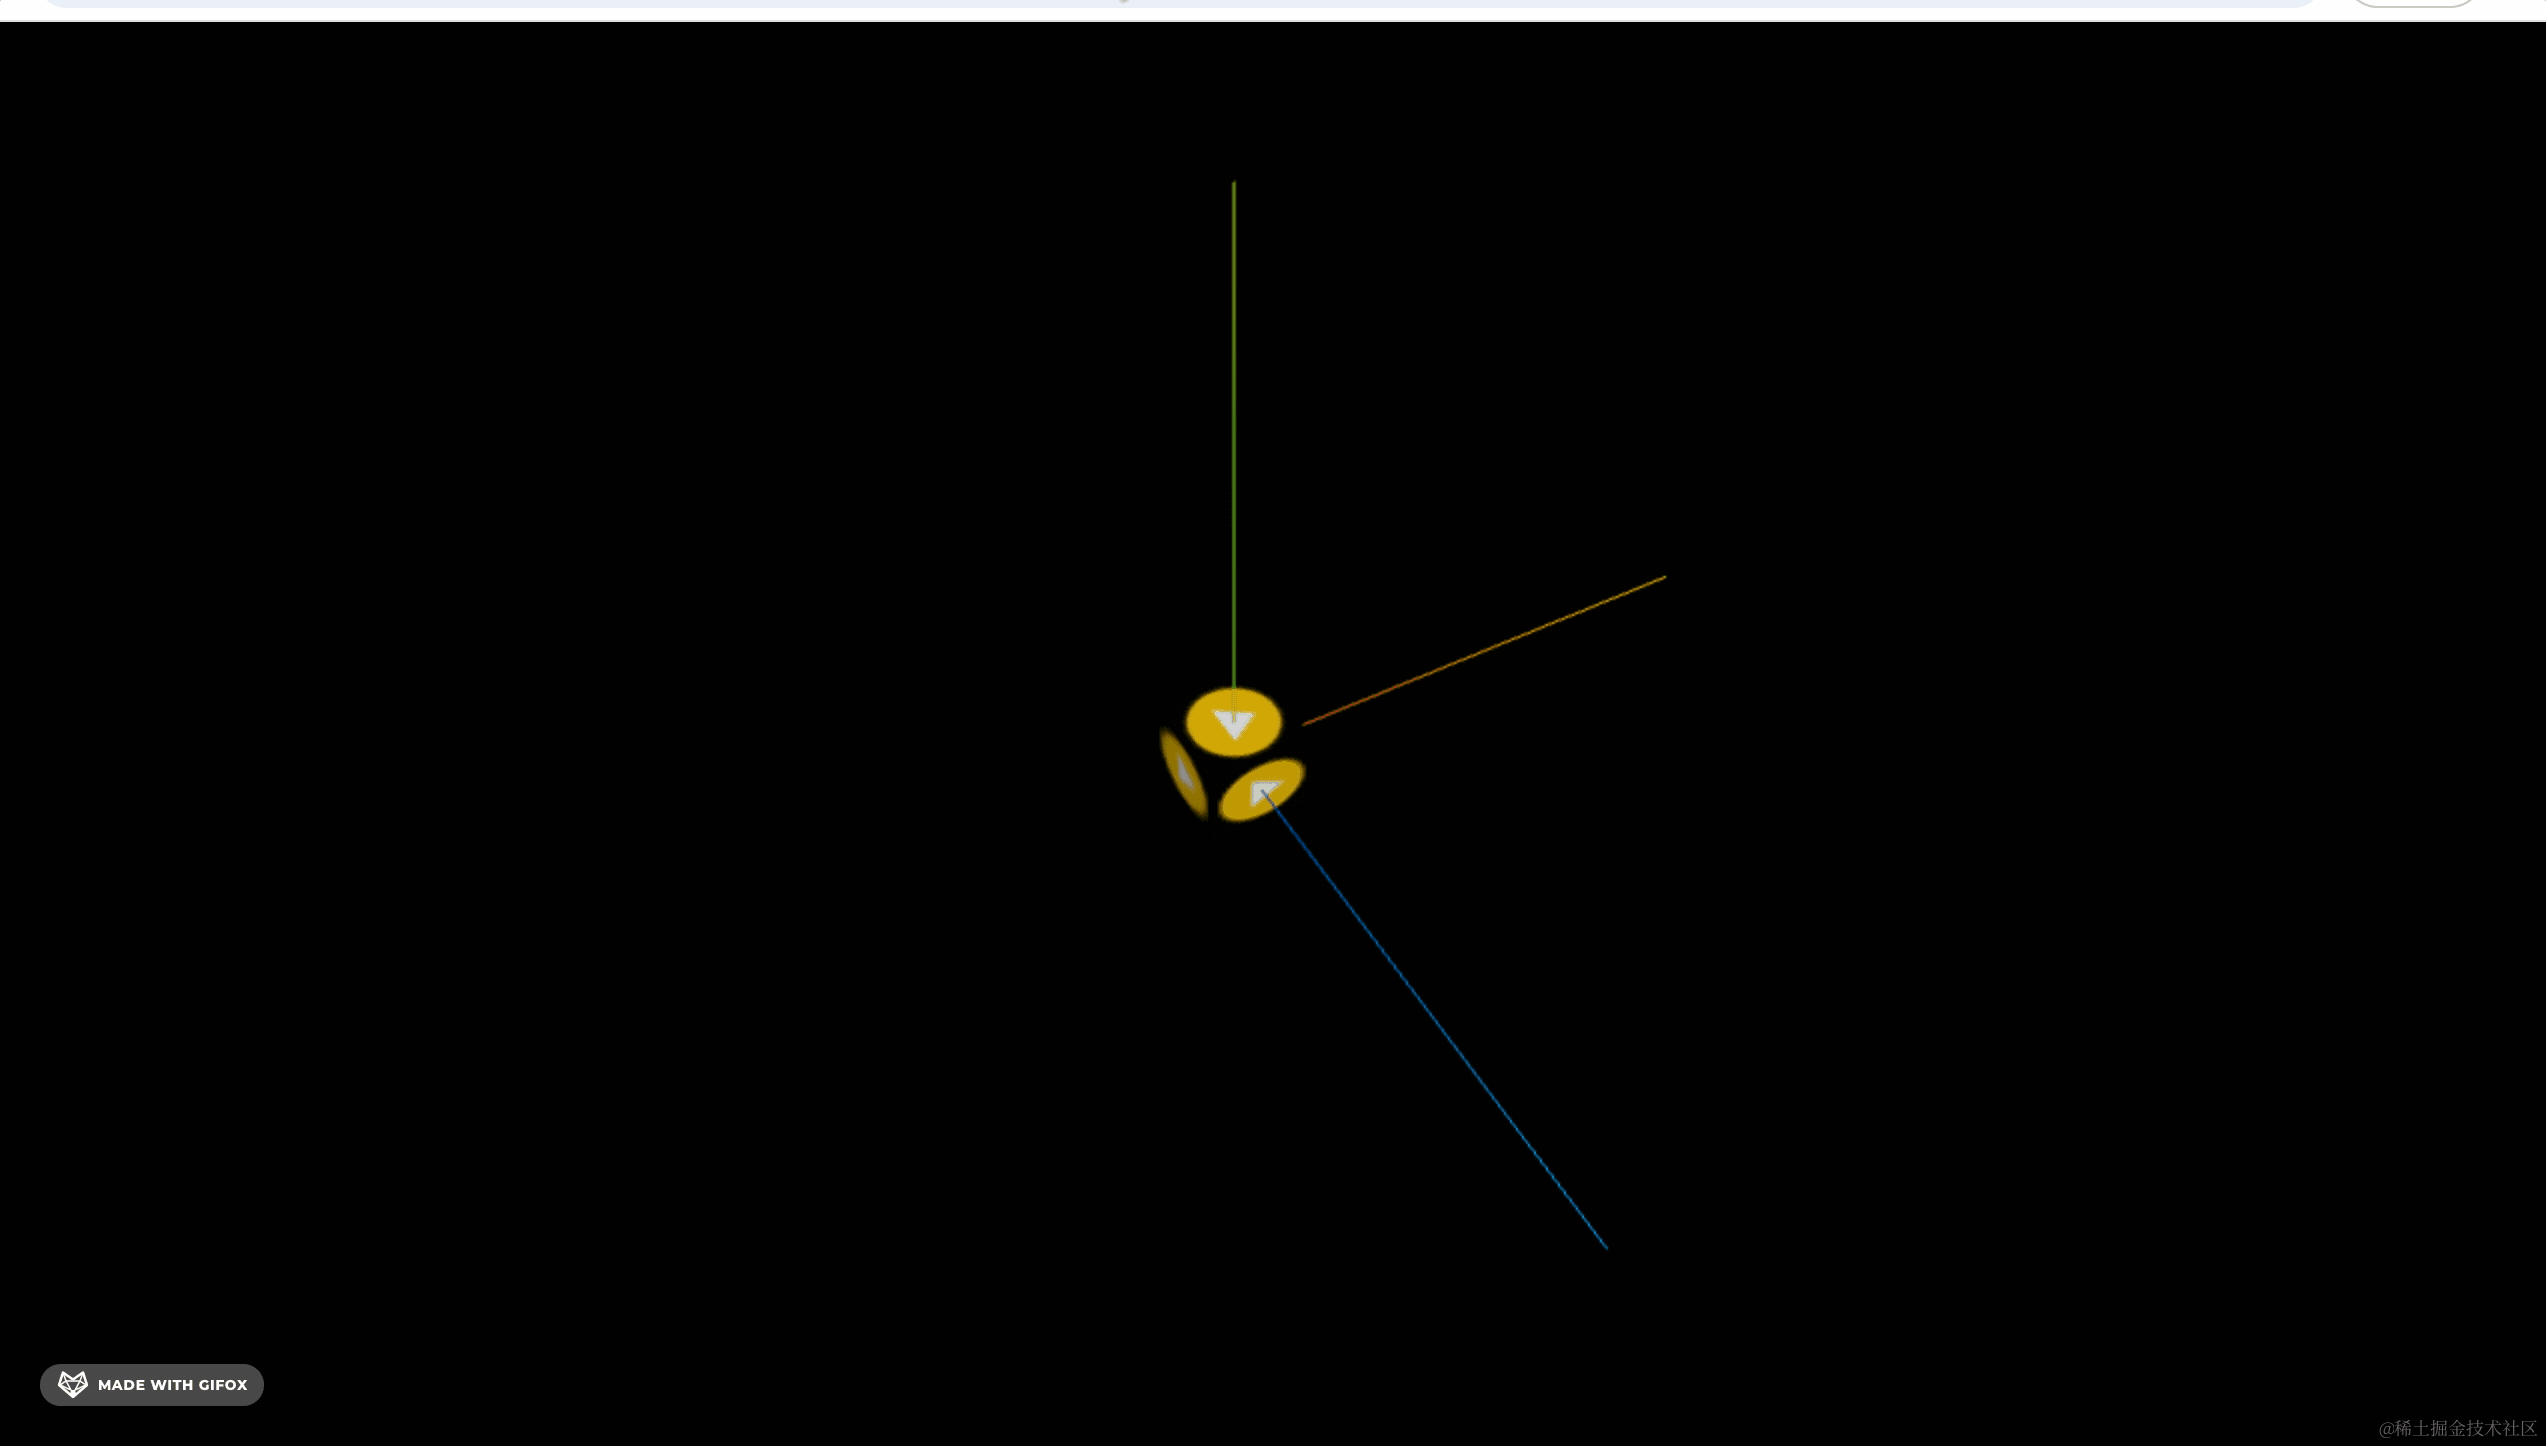
});看下效果:

然后我们加载一下音乐
把这个音频下载下来:
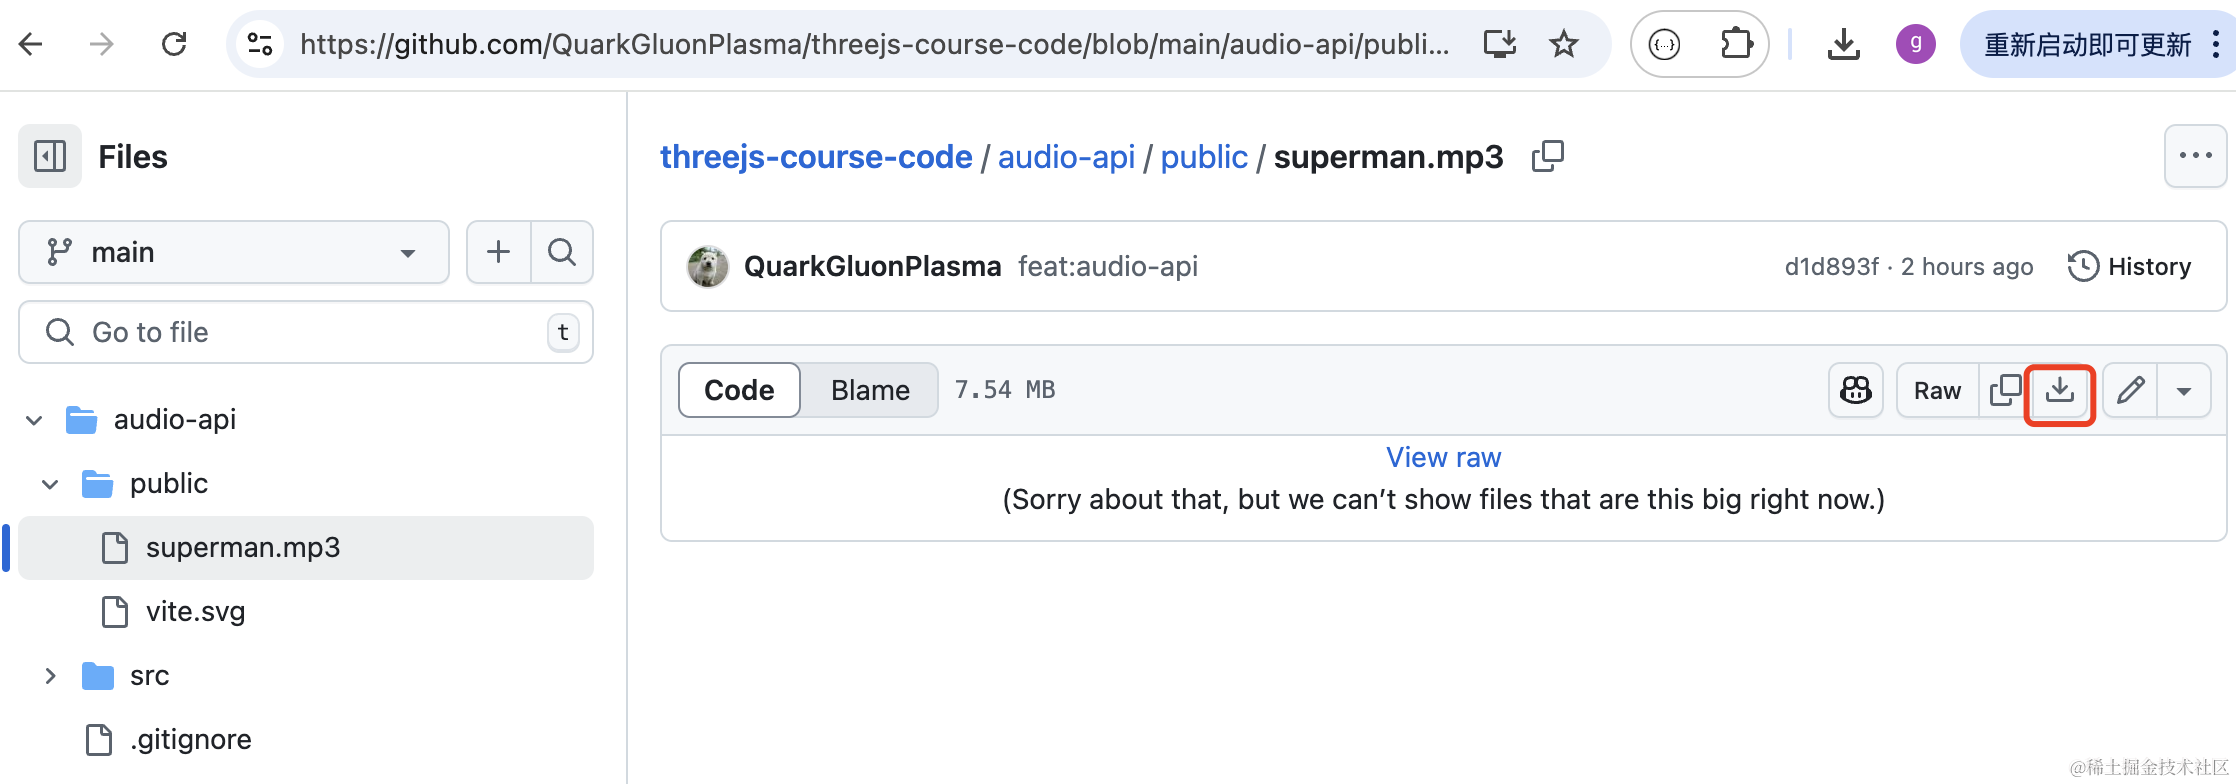
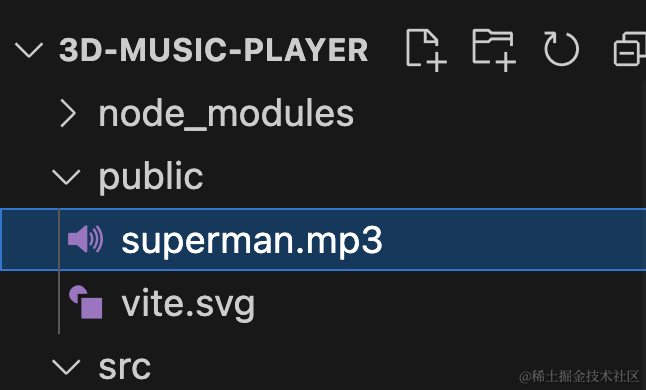
放到 public 目录下:
代码里加载一下:
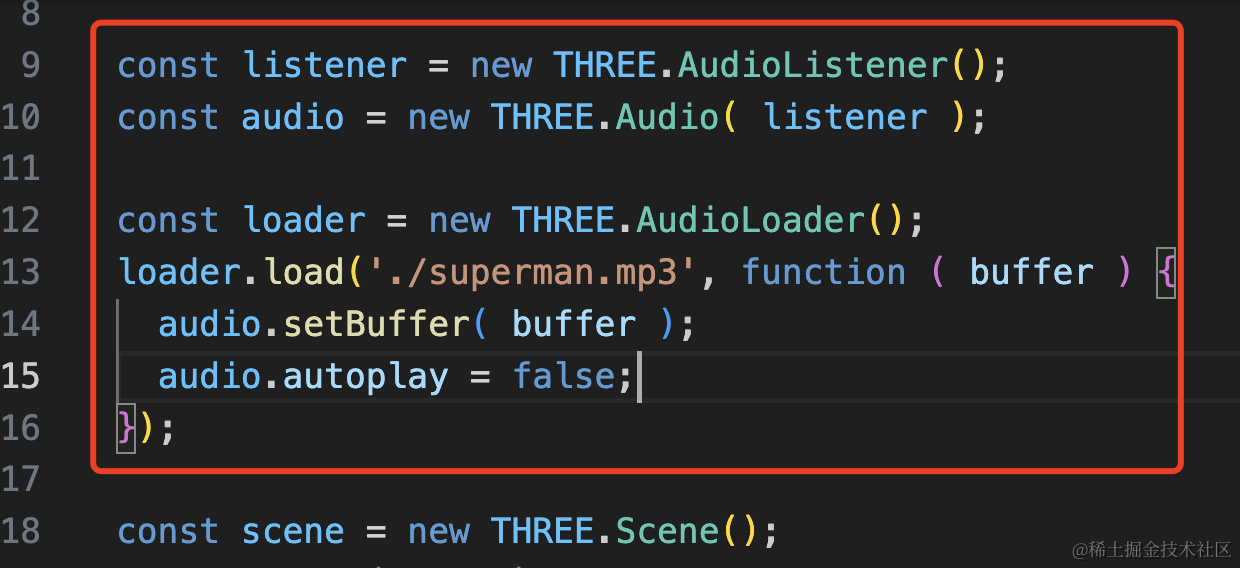
const listener = new THREE.AudioListener();
const audio = new THREE.Audio( listener );

const loader = new THREE.AudioLoader();
loader.load('./superman.mp3', function ( buffer ) {
  audio.setBuffer( buffer );
  audio.autoplay = false;
});
设置 autoplay 为 false,不然会自动播放。
然后点击按钮的时候,让另一个按钮弹起:
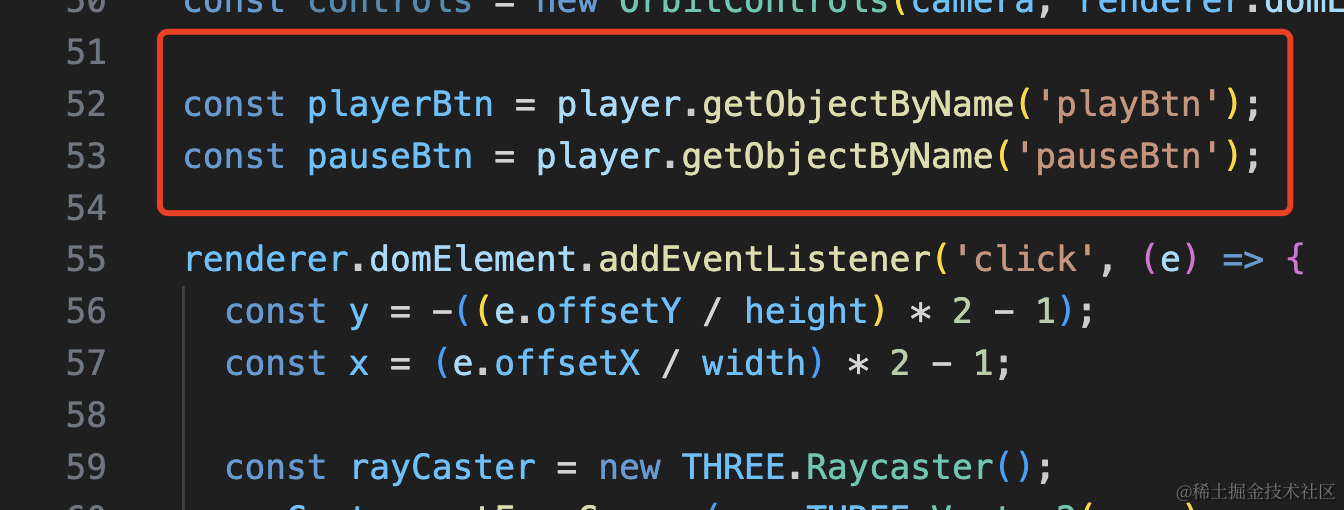
const playerBtn = player.getObjectByName('playBtn');
const pauseBtn = player.getObjectByName('pauseBtn');if(obj) {
if(obj.name === 'playBtn') {
obj.scale.y = 0.6;
obj.position.y = -80 * 0.4;
pauseBtn.scale.y = 1;
pauseBtn.position.y = 0;
} else if(obj.name === 'pauseBtn') {
obj.scale.y = 0.6;
obj.position.y = -80 * 0.4;
playerBtn.scale.y = 1;
playerBtn.position.y = 0;
}
}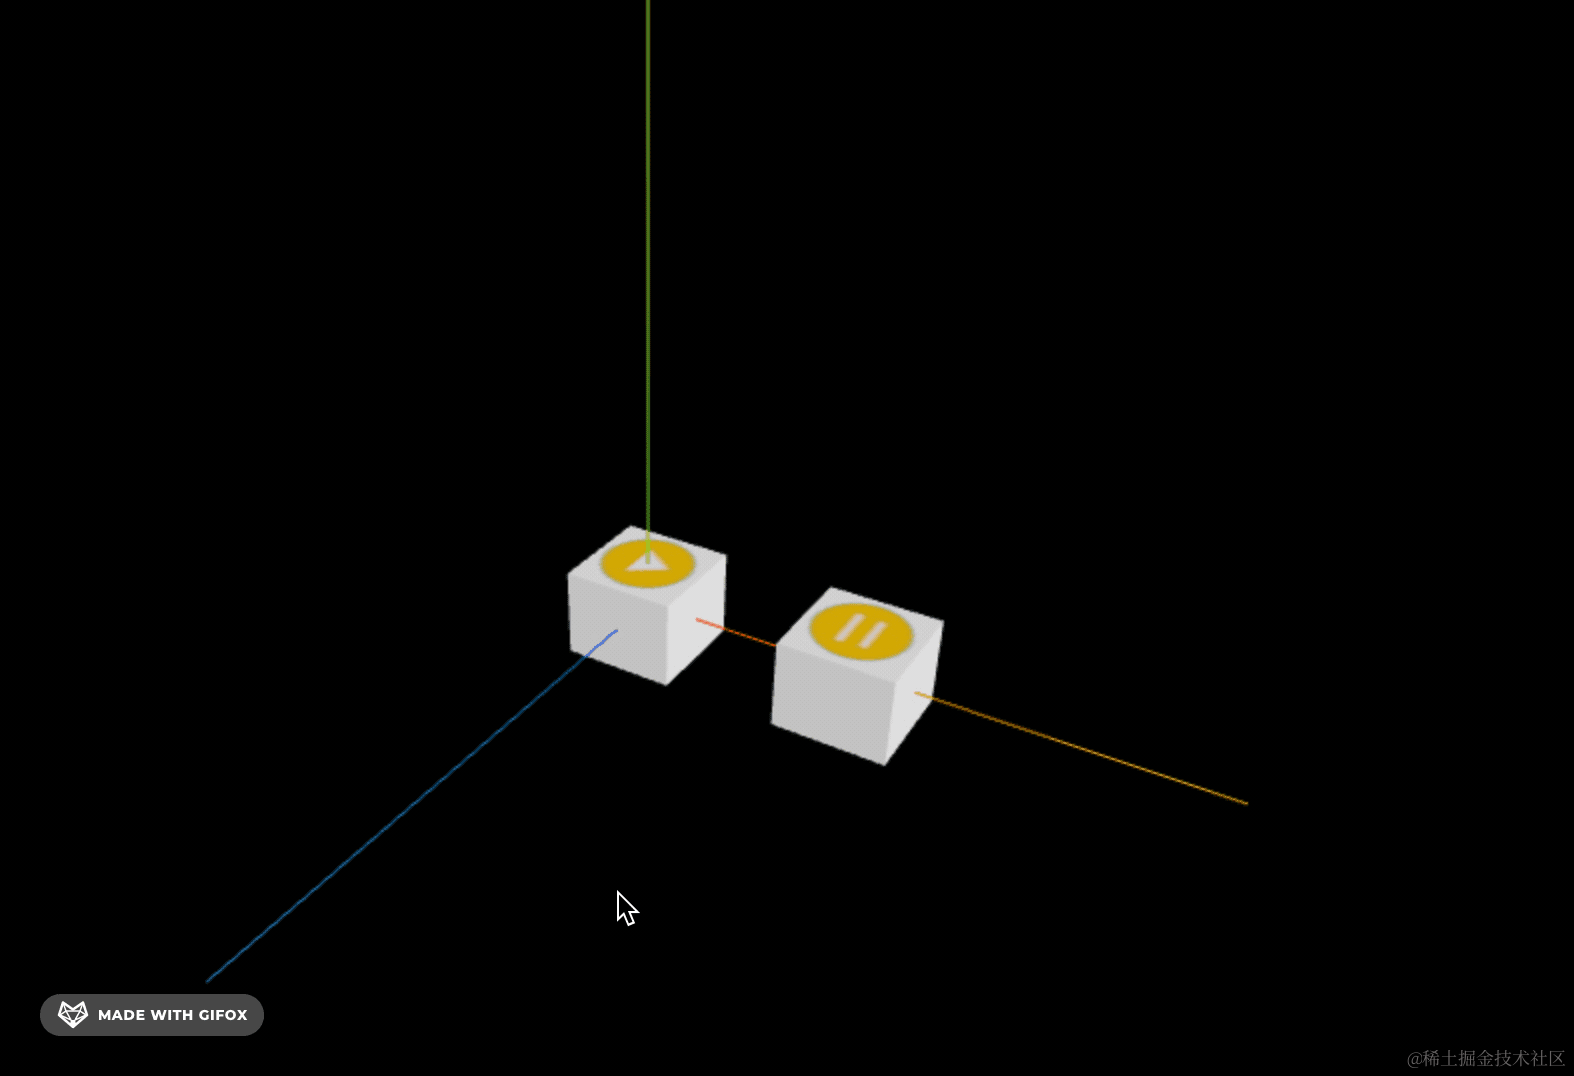
就是录音机的那种感觉。
然后让音乐也跟着播放和暂停:
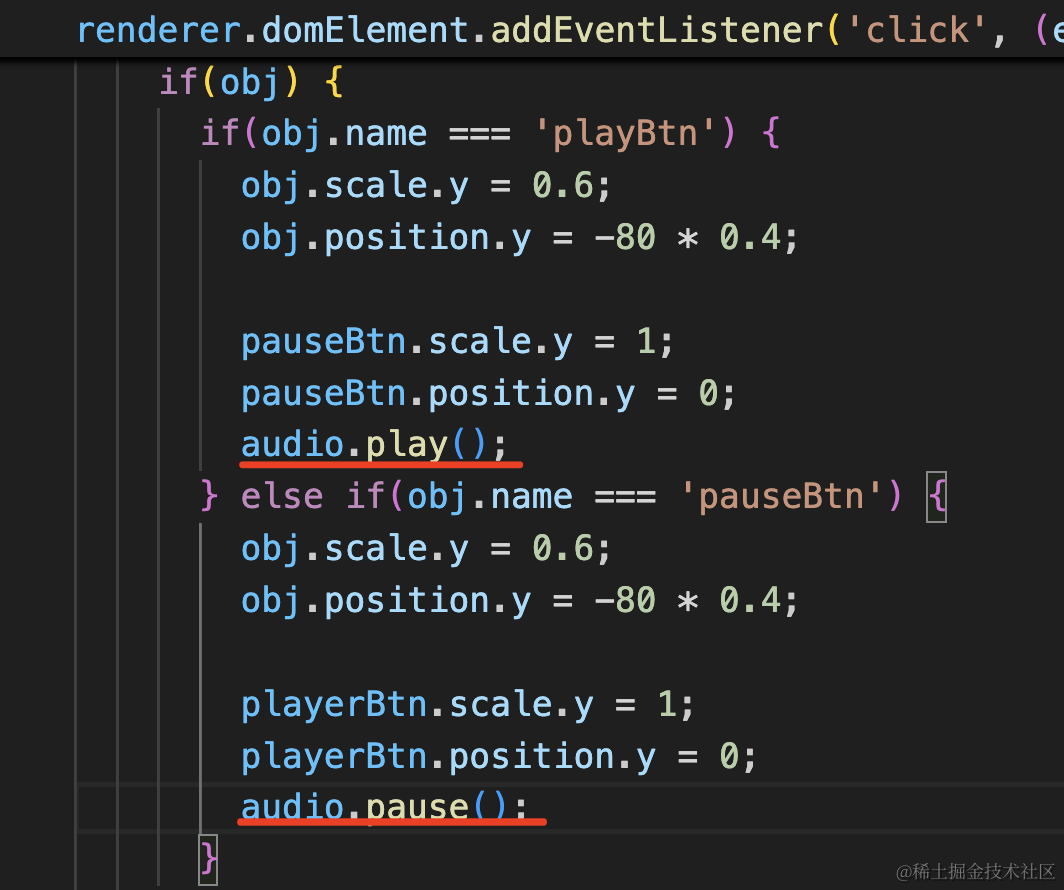
player.play();player.pause();试下效果:
音乐的暂停和播放就做好了。
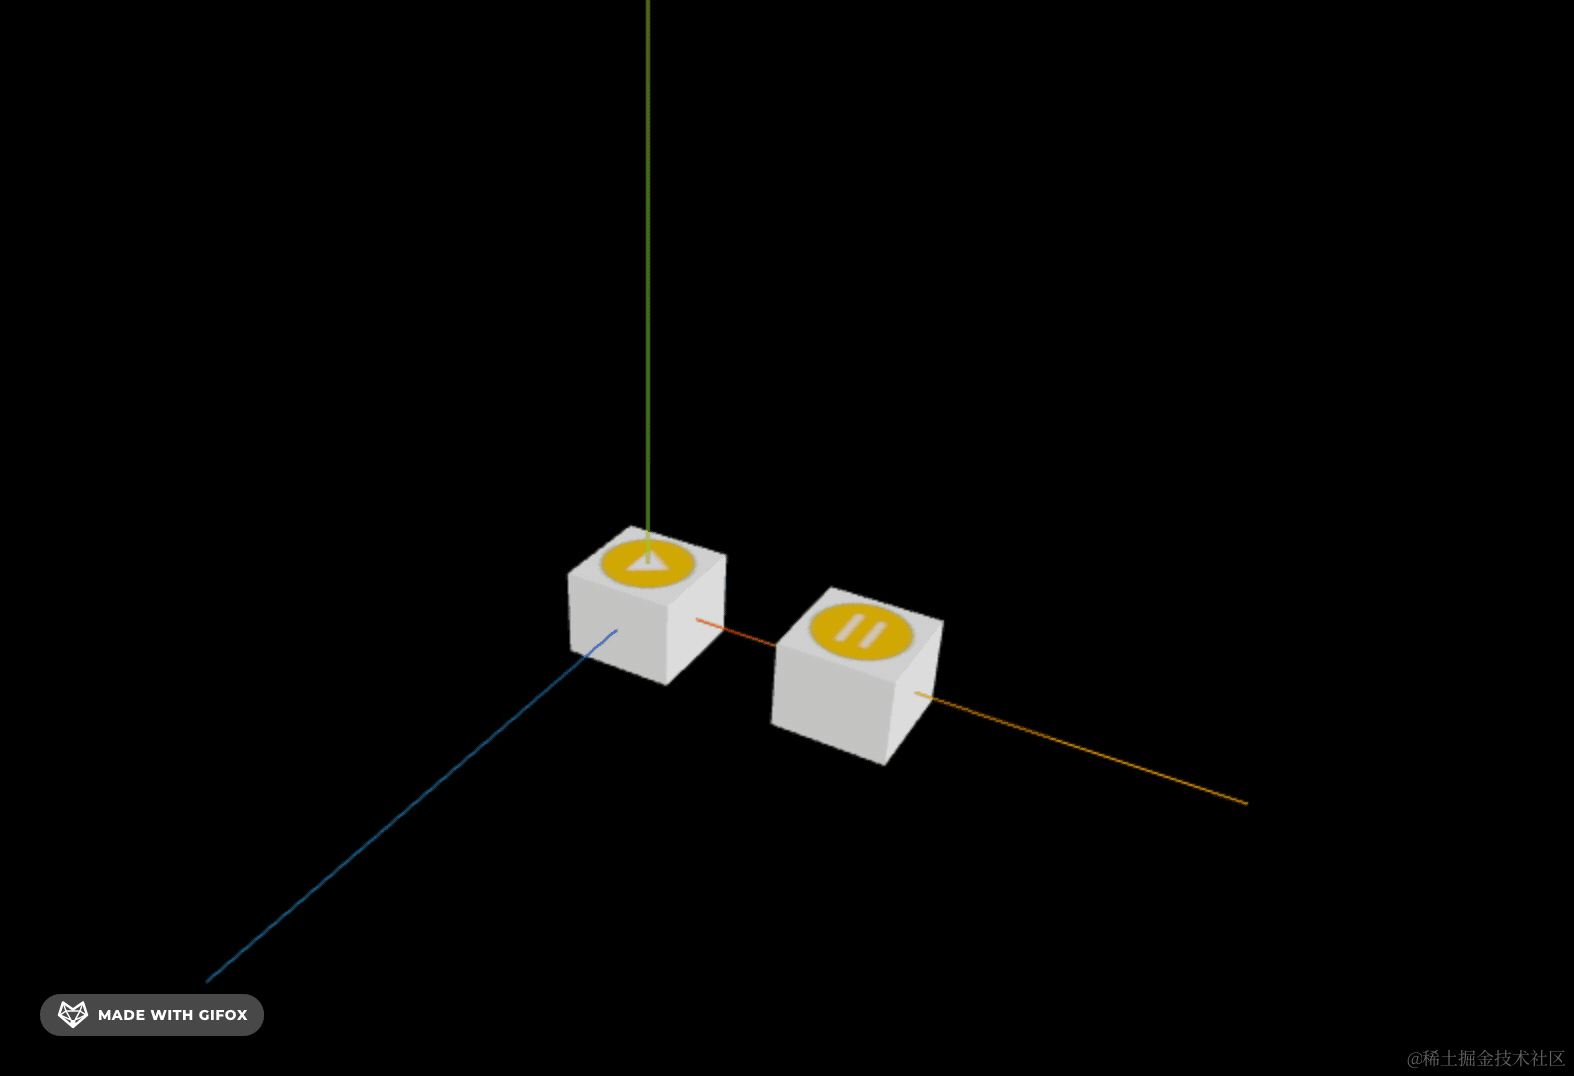
这时候我发现按钮位置不太对:
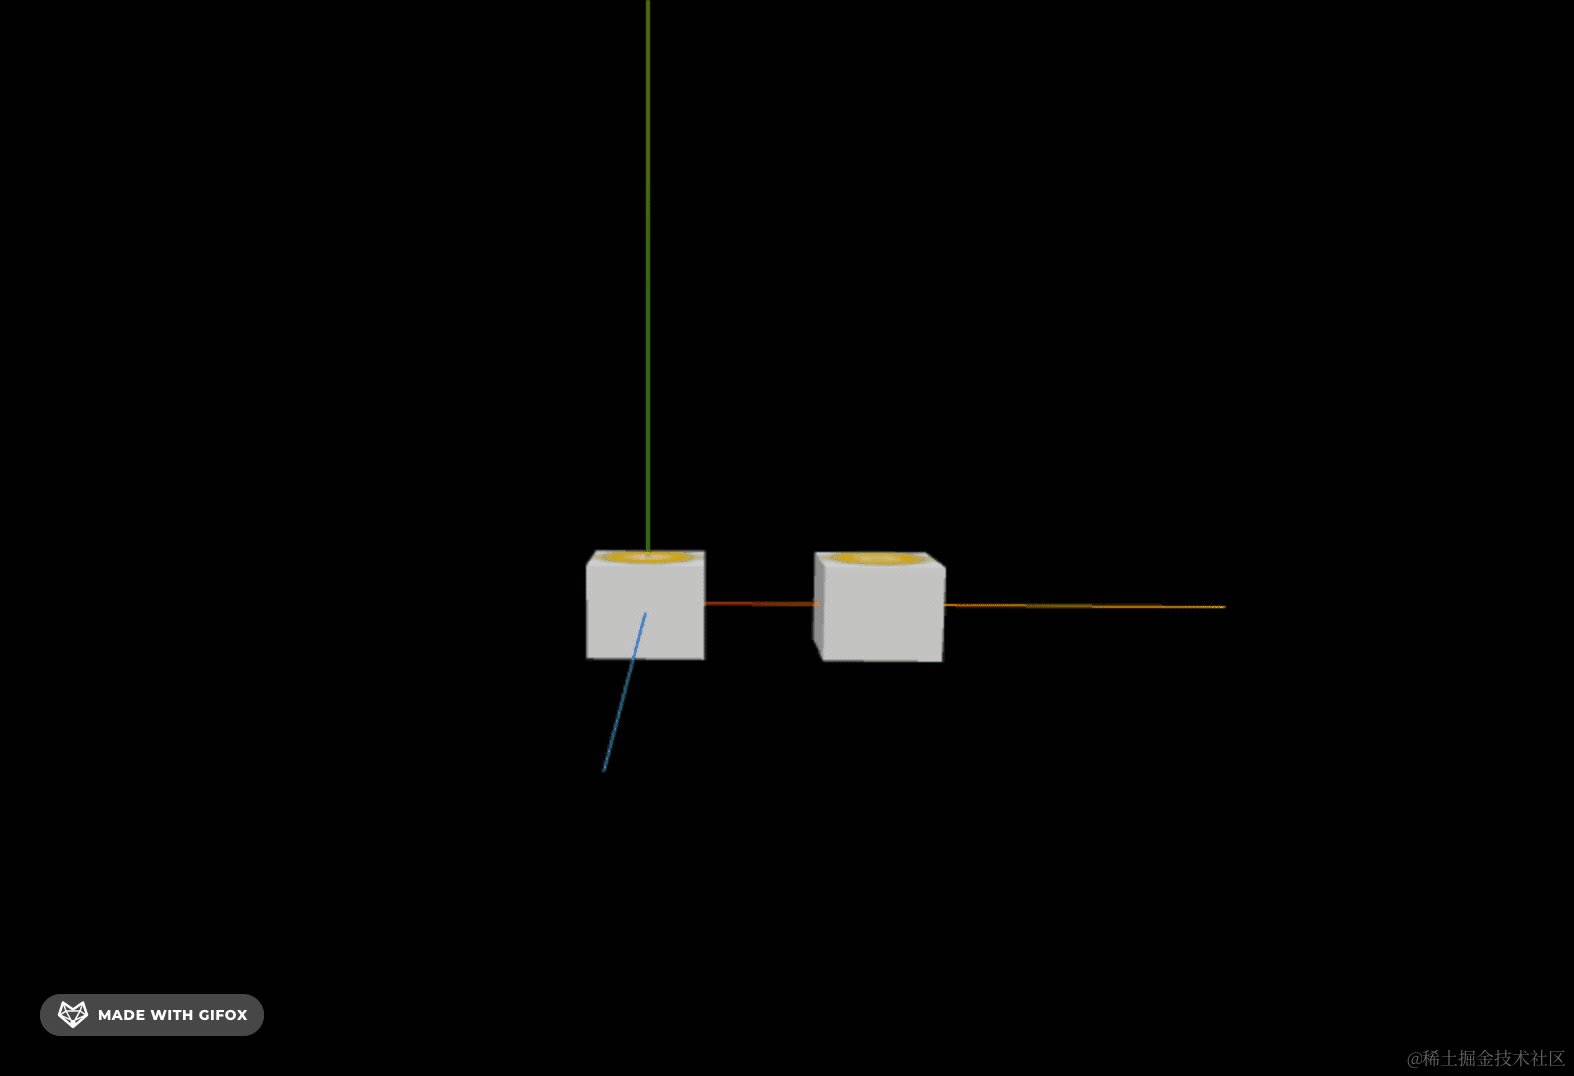
按下高度为 0.6 的话,整体少了 0.4。
但之前中心点在按钮中间,中心点只需要下移一半就好了:
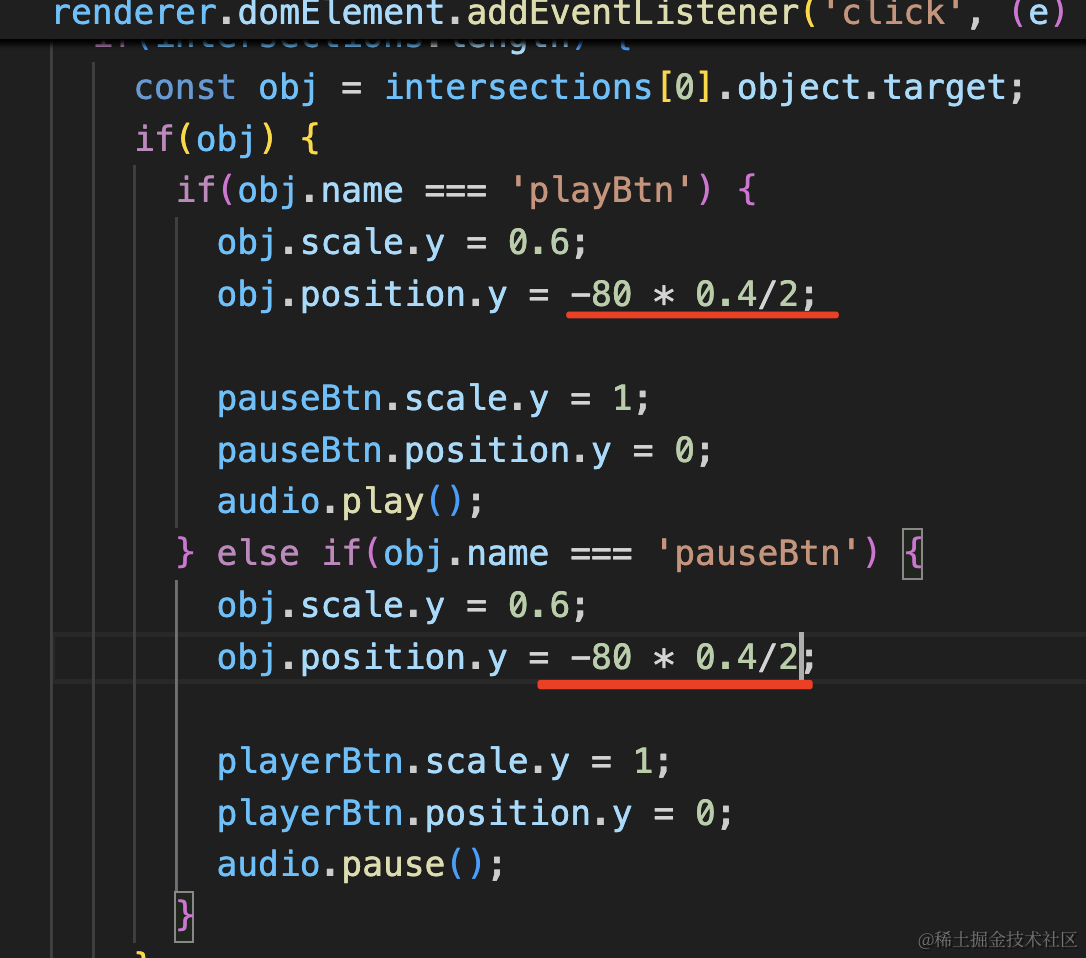

这样位置就对了。
案例代码上传了小册仓库。
总结
这节我们开始做音乐播放器的实战。
我们用 BoxGeometry 画了 2 个按钮,上面的 PlaneGeometry 用 canvas 画了播放、暂停的纹理。
用 RayCaster 处理了点击事件,点击的时候修改对应按钮的 scale 和 position.y 做按下的效果,并且让另一个按钮弹起。
之后加上 Audio 加载了音乐,点击按钮的时候让音乐播放暂停。
下一节我们继续来加上环形柱状音乐频谱的可视化。